
Formatting loss in Excel files disrupts data readability and undermines reporting accuracy. When cell colors, number formats, fonts, or layouts revert after saving and reopening, the root cause often lies in how the file is saved, the file type, or underlying file corruption. Addressing this problem requires checking file formats, compatibility, and Excel settings to ensure that formatting persists as intended.
Save the File in the Correct Excel Format
Step 1: Open the file in Excel. If you downloaded or imported the file from another application or received it as a .csv or .txt file, Excel may treat it as plain text. In these formats, formatting like colors, fonts, and borders cannot be saved because text-based files only store raw data, not visual formatting.
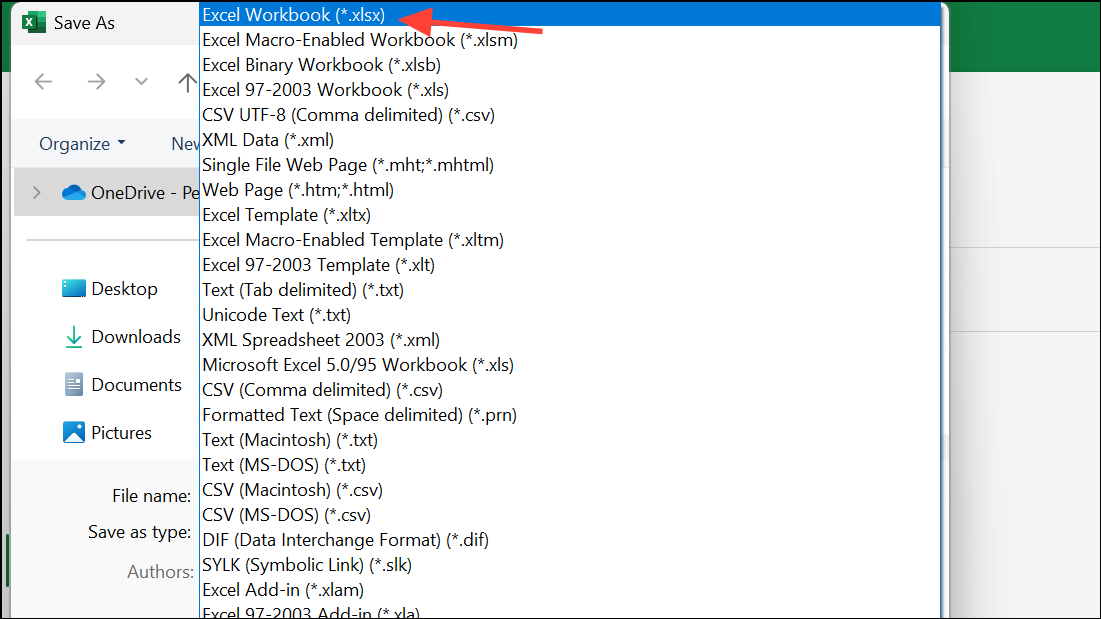
Step 2: Click File > Save As. In the dialog box, select Excel Workbook (*.xlsx) from the "Save as type" dropdown menu. If you see .xls as the default, consider switching to .xlsx for better compatibility and to support all modern formatting features.
Step 3: Choose a new file name if prompted and click Save. This ensures that Excel stores formatting details alongside your data. After saving, reopen the file to verify that your formatting changes persist.
Convert Data Properly When Working with CSV or TXT Files
CSV and TXT files only store raw data, not formatting. When you open such files in Excel, any formatting you apply will be lost once you save and reopen the file in its original format. To make formatting changes stick, you must convert the data to an Excel workbook.
Step 1: Open your CSV or TXT file in Excel. Apply your desired formatting (such as changing date formats, colors, or fonts).
Step 2: Use File > Save As and select Excel Workbook (*.xlsx) as the file type. This step is critical—if you save as CSV or TXT, formatting will be discarded.
Step 3: If you need to share the data as a CSV again, consider using Excel formulas (such as =TEXT(A1,"yyyy-mm-dd") for date conversion) to ensure the exported values match your requirements. Copy and paste the results as values before saving as CSV.
Check for Compatibility Mode and Older Excel Formats
Files saved in older Excel formats (.xls) or opened in Compatibility Mode may not support all formatting features. This can result in lost or altered formatting when saving or reopening the file.
Step 1: Look for the word "Compatibility Mode" in the title bar. If present, the file is in an older format.
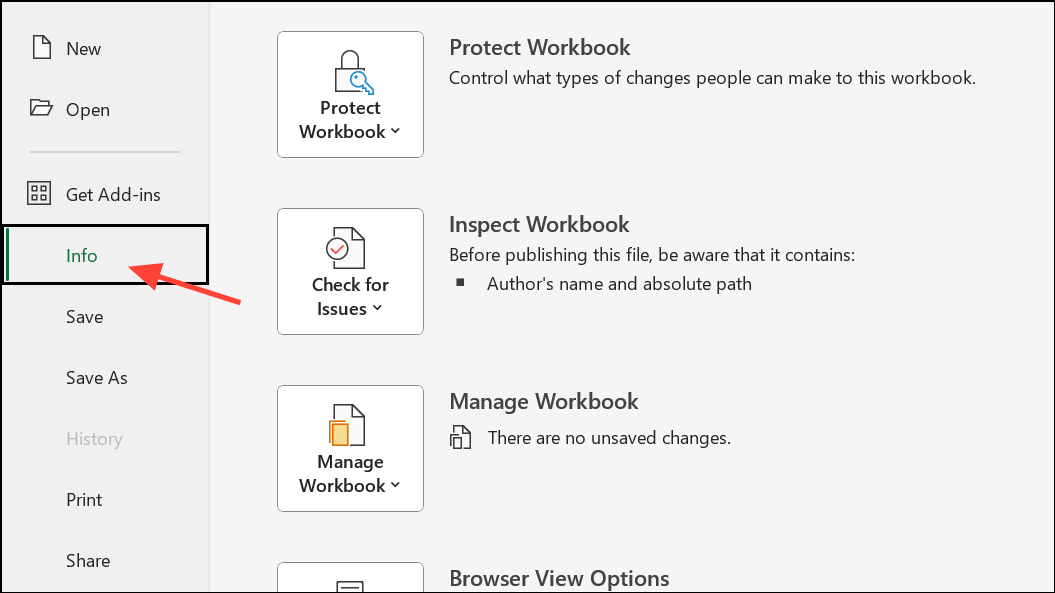
Step 2: Click File > Info > Convert (in recent versions of Excel) to upgrade the file to the current format. This action unlocks full formatting capabilities.
Step 3: Save the file and reopen it to confirm that formatting is preserved.
Repair Corrupted Excel Files
File corruption can prevent Excel from saving formatting or even opening files correctly. Symptoms include missing formatting, unreadable content, or error messages when saving.
Step 1: In Excel, go to File > Open. Select the problematic file.
Step 2: Click the arrow next to the Open button, then choose Open and Repair. This built-in tool attempts to fix corruption and recover lost formatting.

Step 3: If Excel cannot repair the file, consider using a dedicated file repair utility. Tools like Wondershare Repairit can recover formatting and data from severely damaged Excel files, supporting both .xlsx and .xls formats.
Adjust Excel Settings and Templates
Incorrect Excel options or custom templates can override or block formatting changes. For example, non-standard default fonts, cell styles, or templates may cause formatting to reset unexpectedly.
Step 1: Open Excel and select File > Options. Review settings under the "General" and "Advanced" tabs. Ensure default font and style settings are appropriate for your needs.
Step 2: If you use custom templates, try starting a new workbook using Excel’s default template (Normal.xltx). Delete or rename any custom templates in your templates folder to rule out template-related issues.
Step 3: Save a test file, apply formatting, and verify that changes are saved after closing and reopening.
Clear Conflicting or Hidden Formatting
Overlapping or hidden formatting rules, such as conditional formatting or merged cells with conflicting styles, can prevent Excel from saving your intended appearance.
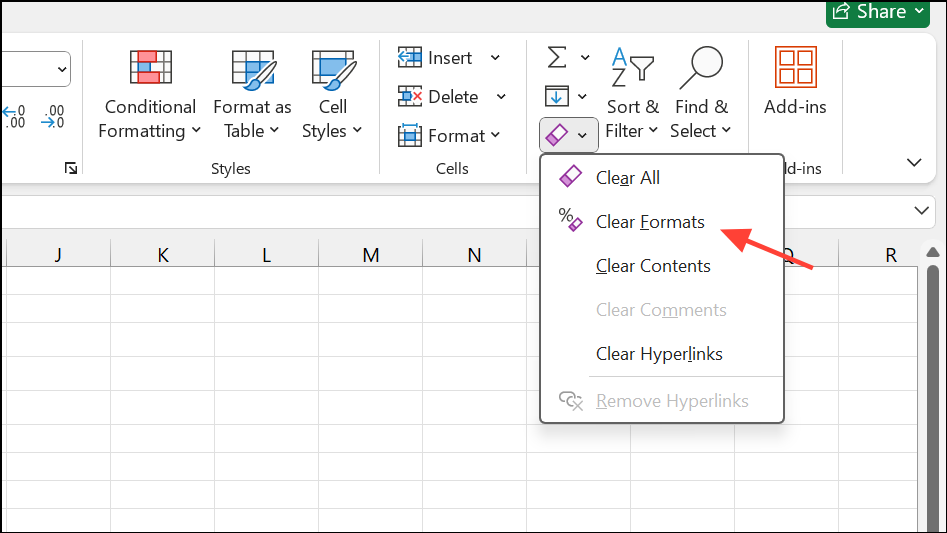
Step 1: Select the affected range. On the Home tab, choose Clear > Clear Formats to remove all existing formatting.
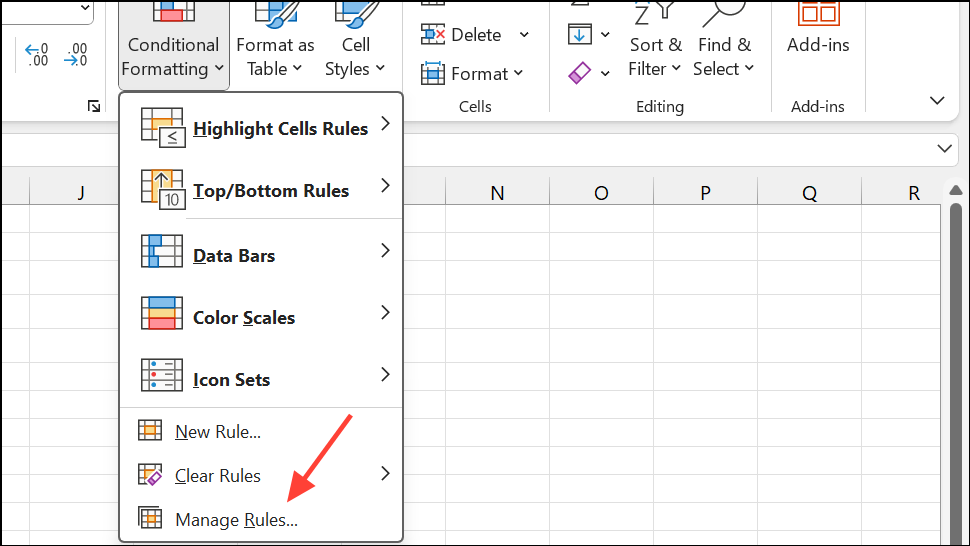
Step 2: Reapply your desired formatting. If you use conditional formatting, check rules for conflicts by selecting Home > Conditional Formatting > Manage Rules and adjusting or deleting as needed.
Step 3: Save and reopen the file to confirm that formatting is now retained.
Additional Tips for Persistent Formatting Issues
- Run Excel in Safe Mode by holding
Ctrlwhile launching the program or by typingexcel /safein the Run dialog. This disables add-ins that might interfere with formatting. - Update Excel to the latest version through Microsoft 365 updates to benefit from bug fixes and compatibility improvements.
- If the issue occurs only with shared files, check if collaborators are overwriting formatting or if shared workbook features are enabled, as these can restrict formatting options.
Switching to the correct file format and checking for compatibility issues resolves most Excel formatting problems. If issues persist, repairing the file or adjusting Excel settings can restore full formatting functionality.