
Experiencing random freezes accompanied by a loud buzzing noise on your Windows 11 PC can be both alarming and disruptive. These issues often occur unpredictably, whether you’re gaming, browsing, or even when the system is idle. Fortunately, there are several solutions you can try to resolve these problems and restore your computer’s stability.
1. Reinstall or Update Your Graphics Drivers
Outdated or corrupted graphics drivers are a common cause of system freezes and audio glitches. Updating or reinstalling your graphics drivers can often resolve these issues.
If you have an NVIDIA or AMD graphics card, use their dedicated software to update your drivers.
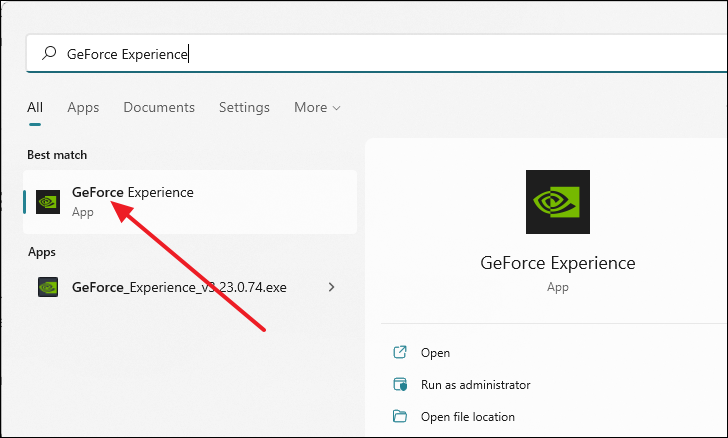
Here’s how to do it using NVIDIA GeForce Experience:
- Open GeForce Experience by searching for it in the Start menu.
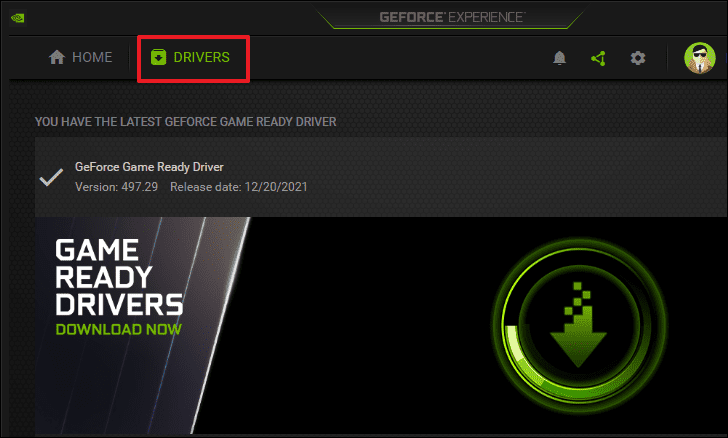
- Click on the DRIVERS tab at the top-left corner.
- Select CHECK FOR UPDATES on the right side.
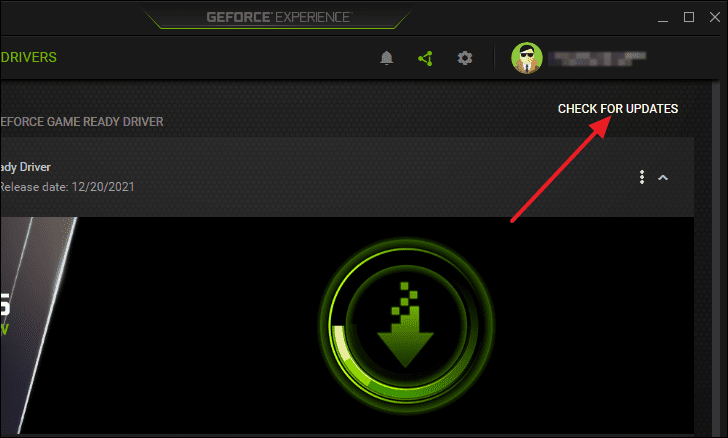
- If an update is available, follow the prompts to download and install it. If your drivers are up to date, you’ll see a confirmation message.
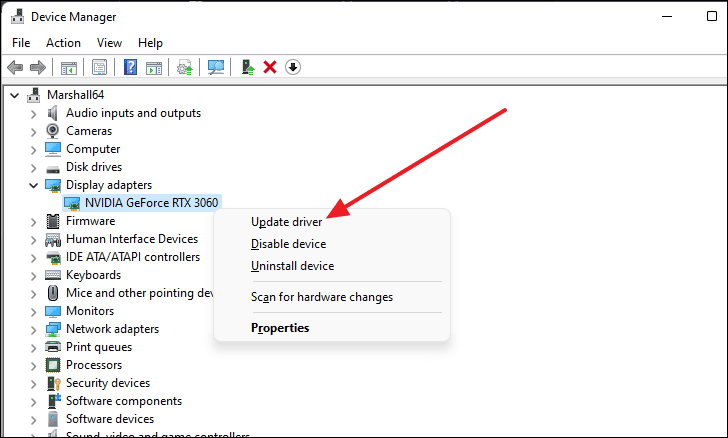
If you prefer, you can update or reinstall your graphics drivers via the Device Manager:
- Open Device Manager by right-clicking the
Startbutton and selecting it from the menu.

- Expand the Display adapters section.
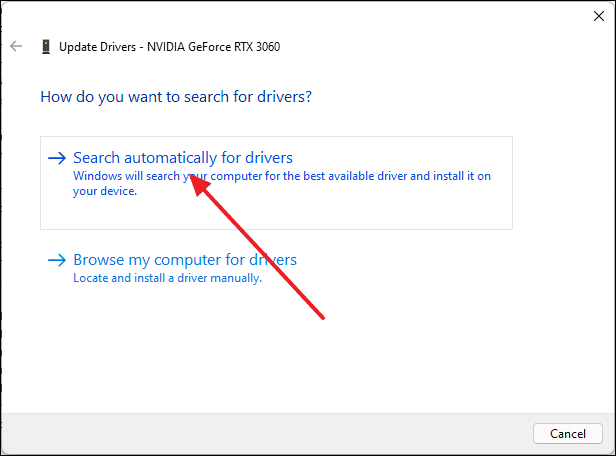
- Right-click your graphics card and choose Update driver.
- Select Search automatically for drivers. Windows will search for and install any available updates.
If no updates are found, you can uninstall the driver by right-clicking your graphics card and selecting Uninstall device.
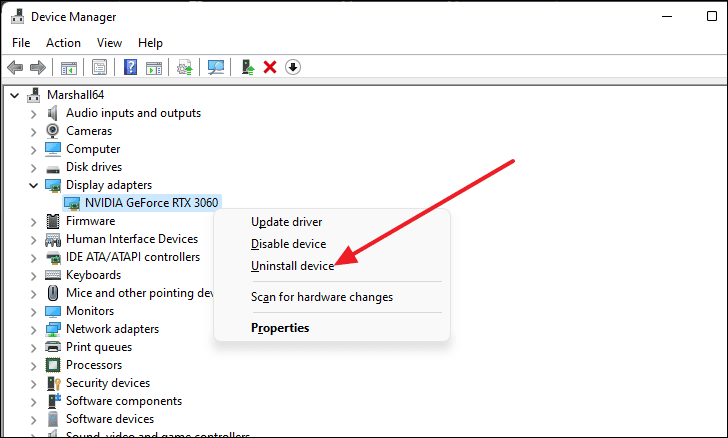
Restart your computer, and Windows will automatically reinstall the graphics driver.
2. Update Your Audio Drivers
Faulty or outdated audio drivers can cause buzzing noises and contribute to system freezes. Updating them might resolve the issue.
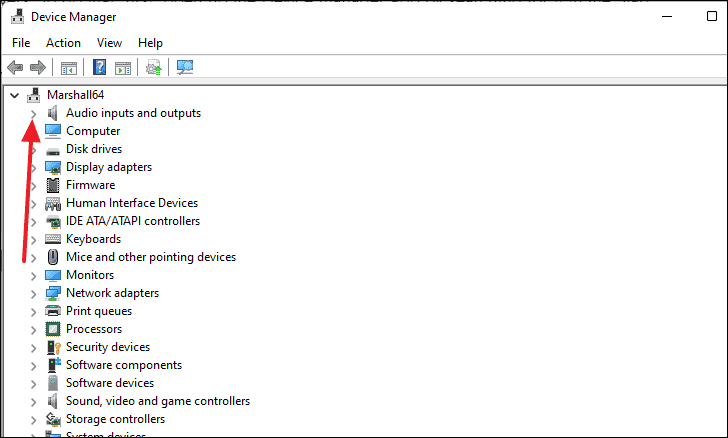
- Open Device Manager by searching for it in the Start menu.
- Expand the Audio inputs and outputs section.
- Right-click your audio device and select Update driver.
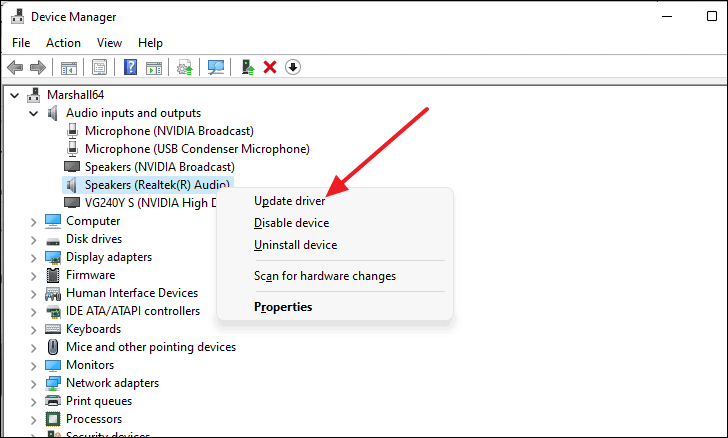
- Choose Search automatically for drivers. Windows will look for and install any available updates.
- After updating, restart your computer to apply the changes.
3. Check for CPU Overheating
Overheating can cause your CPU to throttle or crash, leading to system freezes and buzzing noises. Monitoring your CPU temperature can help identify if overheating is the culprit.
Use a third-party application like Core Temp or HWMonitor to check your CPU temperatures. If they consistently exceed 85°C, consider the following steps:
- Ensure all fans are functioning properly and clean any dust from them.
- Improve airflow by repositioning your computer or opening up blocked vents.
- Apply new thermal paste between the CPU and its cooler.
- Consider upgrading your CPU cooling solution.
4. Clean Your RAM Modules
Faulty or improperly seated RAM can lead to system instability. Cleaning and reseating your RAM modules might resolve the freezing and buzzing issues.
- Shut down your computer and disconnect all cables.
- Open your computer case to access the motherboard.
- Carefully remove the RAM modules by releasing the clips on either side.
- Use compressed air to clean the RAM slots and modules.
- Reinsert the RAM modules firmly until the clips snap back into place.
- Close the case, reconnect the cables, and power on your computer.
If the problem persists, test each RAM module individually to identify any faulty hardware.
5. Perform an SFC Scan
Corrupted system files can cause various issues, including freezes and audio glitches. Running a System File Checker (SFC) scan can repair these files.
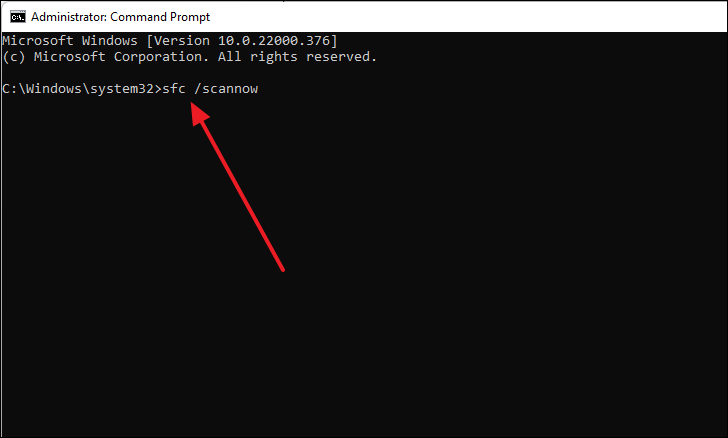
- Open Command Prompt as an administrator by searching for cmd in the Start menu, right-clicking it, and selecting Run as administrator.
- Type
sfc /scannowand pressEnterto begin the scan.
sfc /scannow
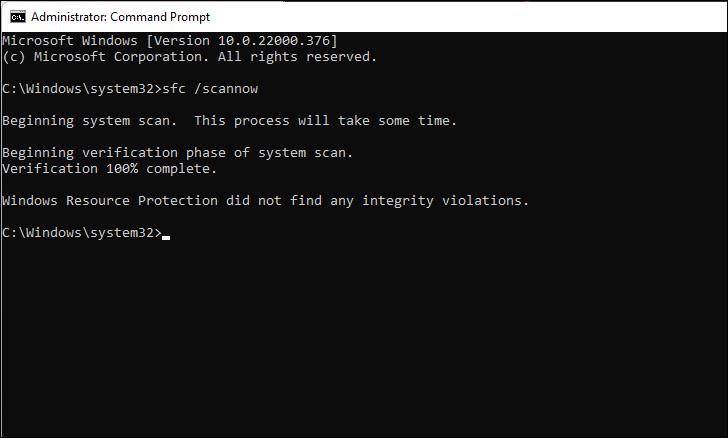
- Wait for the scan to complete. It may take several minutes.
- Review the results displayed in Command Prompt. If any issues were found and fixed, restart your computer.
6. Boot Windows in Safe Mode
Booting into Safe Mode can help you determine if a third-party application or driver is causing the problem. In Safe Mode, Windows runs with a minimal set of drivers and services.
- Press
Windows+Rto open the Run dialog, typemsconfig, and pressEnter.

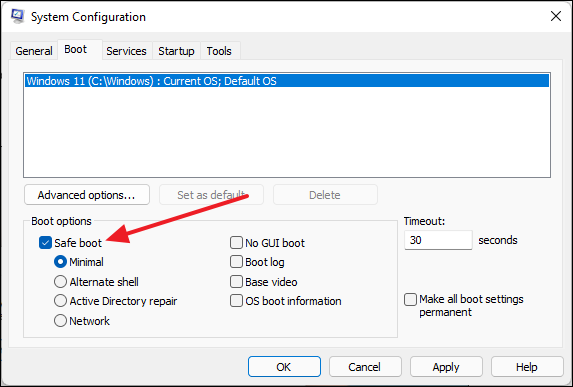
- In the System Configuration window, go to the Boot tab.
- Check the box for Safe boot and select Minimal.
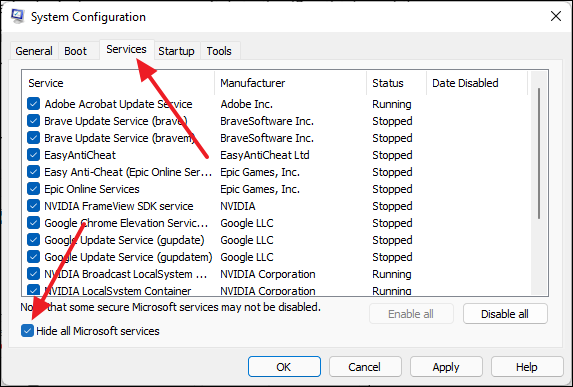
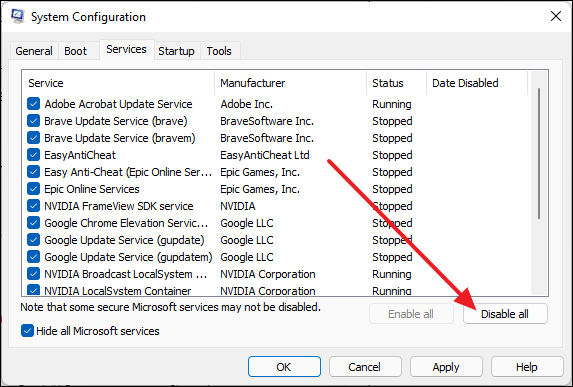
- Switch to the Services tab.
- Check Hide all Microsoft services.
- Click Disable all, then click OK and restart your computer.
Use your computer in Safe Mode to see if the issue persists. If it doesn’t, a third-party application or driver may be the cause. Consider uninstalling recent software or drivers.
7. Restart Your Computer
Sometimes, temporary glitches can cause your system to freeze and emit buzzing noises. Restarting your computer can reset any minor issues.
If your system is responsive:
- Click the Start button.
- Select the Power icon and choose Restart.
If your system is unresponsive:
Press and hold the physical Reset button on your computer case. If there isn’t one, press and hold the Power button for several seconds to force a shutdown. Wait a moment, then press the Power button again to restart.
By trying these solutions, you can often identify and fix the causes of freezing and buzzing issues on your Windows 11 PC. If the problems persist, consider seeking professional help to diagnose potential hardware faults.


