
Experiencing no sound on your Windows 11 computer can be quite frustrating, especially when you’re trying to enjoy your favorite media or participate in important online meetings. Fortunately, there are several methods you can try to resolve this issue without external assistance.
1. Ensure the Audio Isn’t Muted
If you’re not hearing any sound, the first thing to check is whether your system audio is muted or set to a very low volume.
- Open the
Settingsmenu by pressingWindows+Ion your keyboard. - In the Settings window, select Sound from the right pane.
- Look at the Volume section. If the volume slider displays 0, it means the audio is muted. Adjust the slider to increase the volume to your preferred level.
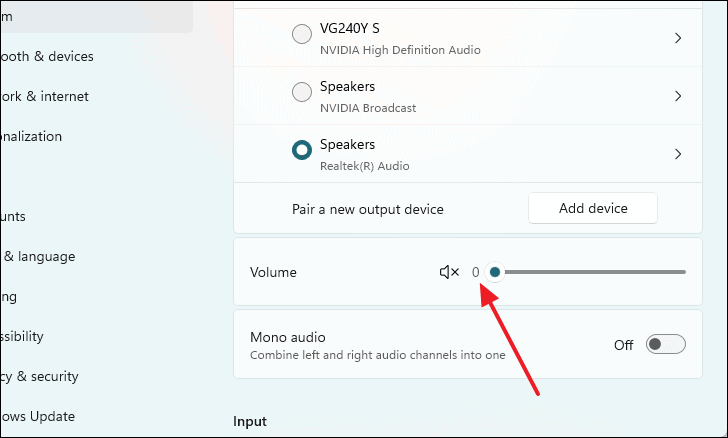
Once you’ve adjusted the volume, play any audio or video file to check if the sound is working properly.
2. Verify the Correct Audio Output Device is Selected
Windows might be sending audio to the wrong output device, especially if you have multiple audio devices connected.
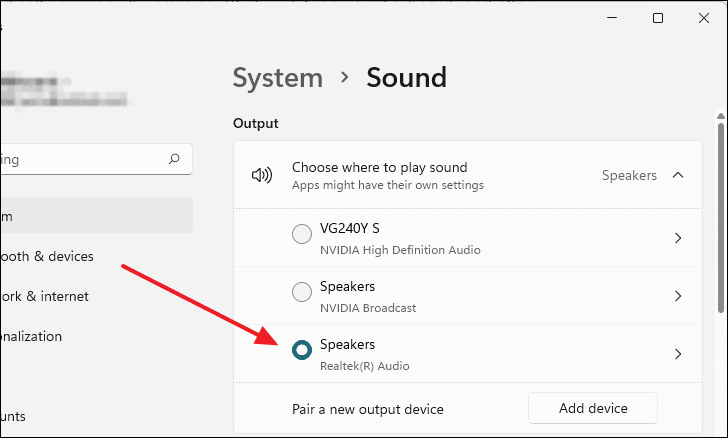
- Open the
Settingsmenu by pressingWindows+I. - Select Sound from the right pane.
- Under the Output section, you’ll see a list of available audio devices. Ensure that the correct output device (like your speakers or headphones) is selected. The default is often the Realtek audio driver for many systems.
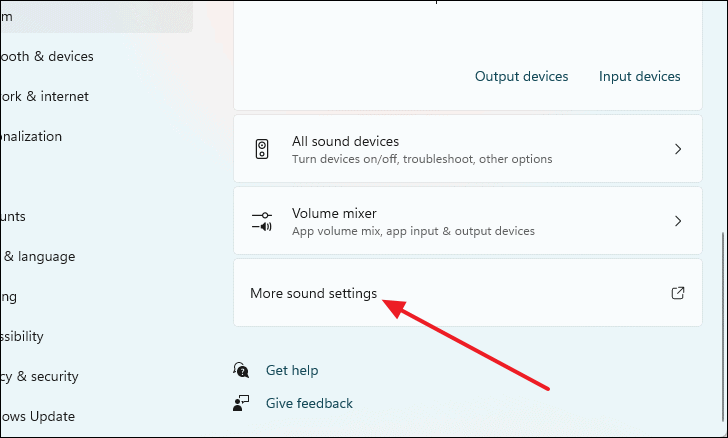
- Scroll down and click on More sound settings at the bottom of the Sound settings.
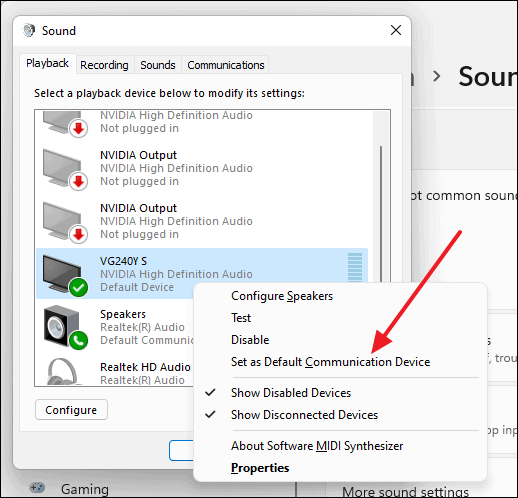
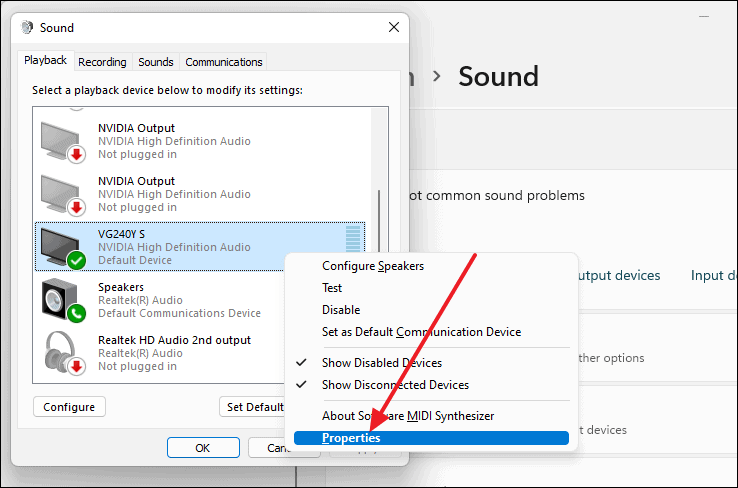
- In the Sound window that appears, go to the Playback tab.
- Right-click on your active audio device and select Set as Default Device and Set as Default Communication Device.
3. Run the Windows Audio Troubleshooter
Windows 11 includes a built-in troubleshooter that can detect and fix common audio problems automatically.
- Press
Windows+Ito openSettings. - Select Troubleshoot from the right pane.
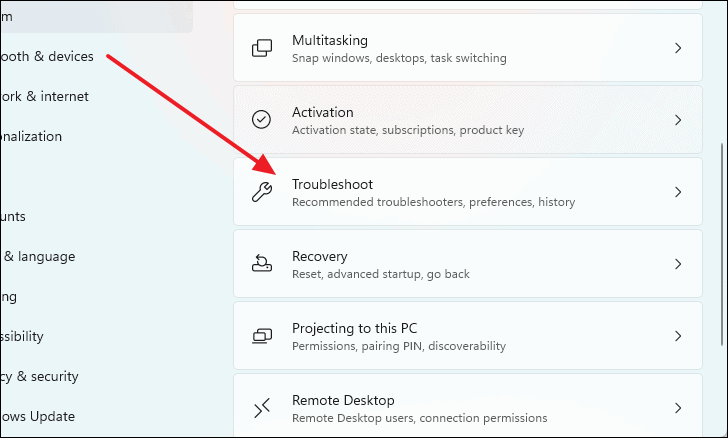
- Click on Other troubleshooters.

- Under the Most frequent section, find Playing Audio and click on Run.
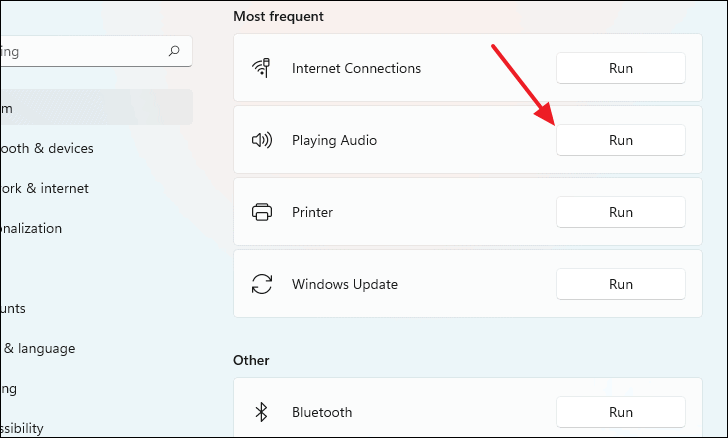
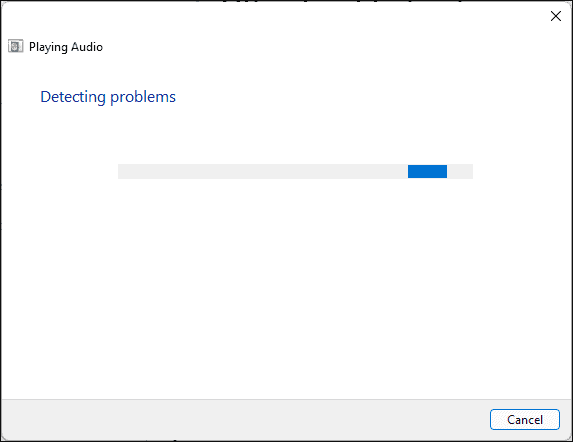
- The troubleshooter will attempt to detect any audio issues automatically.
- Follow the on-screen prompts. You might be asked to select the audio device you want to troubleshoot and whether you want to open audio enhancements.
- If prompted to play test sounds, listen carefully to see if you can hear them.
- If the troubleshooter finds any issues, it will attempt to fix them or provide further instructions.
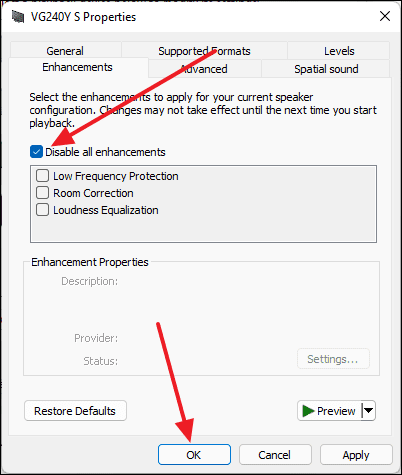
4. Disable Audio Enhancements
Audio enhancements are intended to improve sound quality but can sometimes cause issues.
- Open the
Settingsmenu by pressingWindows+I. - Go to Sound from the right pane.
- Click on More sound settings at the bottom.

- In the Sound window, select the Playback tab.
- Right-click on your active audio device and choose Properties.
- Navigate to the Enhancements tab.
- Check the box labeled Disable all enhancements and click OK to save the changes.
Try playing audio again to see if the issue has been resolved.
5. Check Physical Connections
Ensure that all audio cables and devices are properly connected and functioning.
- Verify that your speakers or headphones are securely plugged into the correct audio jack on your computer.
- If using a 3.5mm connector, make sure it’s inserted into the output jack, typically marked with a headphone icon.
- If using a USB audio device, try unplugging and reconnecting it. You can also try a different USB port.
6. Uninstall and Reinstall Audio Drivers
Corrupted or outdated audio drivers can cause sound issues. Reinstalling them might help.
- Open the
Device Managerby searching for it in the Start menu. - Expand the Audio inputs and outputs section.
- Right-click on your audio device and select Uninstall device.

- Confirm the uninstallation by clicking Uninstall when prompted.
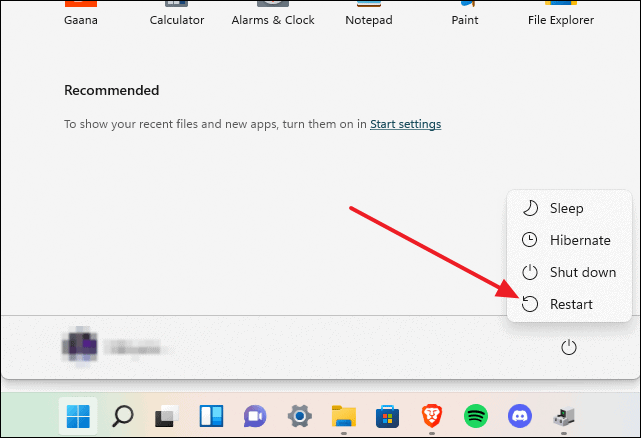
- Restart your computer. Windows will automatically reinstall the audio driver upon reboot.
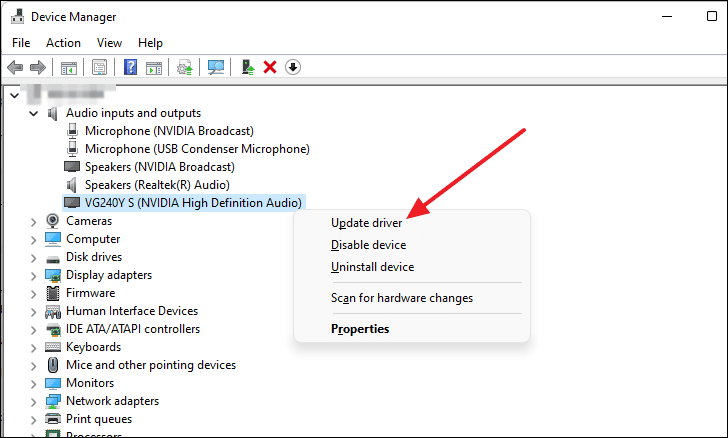
7. Manually Update Audio Drivers
If reinstalling doesn’t help, you might need to update your audio drivers manually.
- Open the
Device Manager. - Expand the Audio inputs and outputs section.
- Right-click on your audio device and select Update driver.
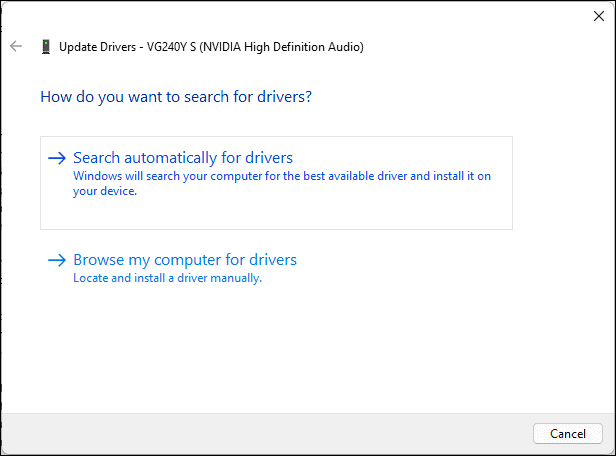
- Choose Search automatically for drivers. Windows will look for and install any available updates.
If no updates are found, you can also check for driver updates via Windows Update:
- Open
Settingsby pressingWindows+I. - Select Windows Update from the left pane.
- Click on Check for updates to see if any updates are available.

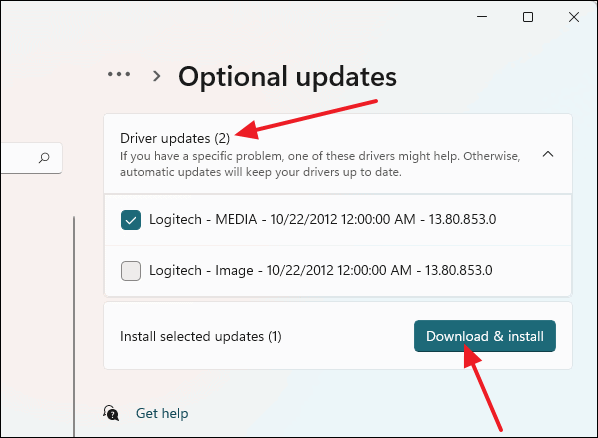
You can also look for optional driver updates:
- In the Windows Update settings, click on Advanced options.
- Scroll down and select Optional updates under the Additional options section.
- Expand the Driver updates section to see if any audio driver updates are available.
- Check the box next to any available audio driver and click Download & install.
By following these methods, you should be able to fix the no sound issue on your Windows 11 computer and enjoy your audio content once again.


