Encountering the absence of the Wi-Fi option on your Windows 11 PC can be both puzzling and frustrating, especially when you rely on wireless connectivity for your daily tasks. Thankfully, there are several solutions you can try to bring back the missing Wi-Fi option. Below are detailed steps to help you resolve this issue.
1. Enable the Wi-Fi Adapter
Sometimes, the Wi-Fi adapter on your computer might be disabled, causing the Wi-Fi option to disappear. Enabling it can quickly fix the problem.
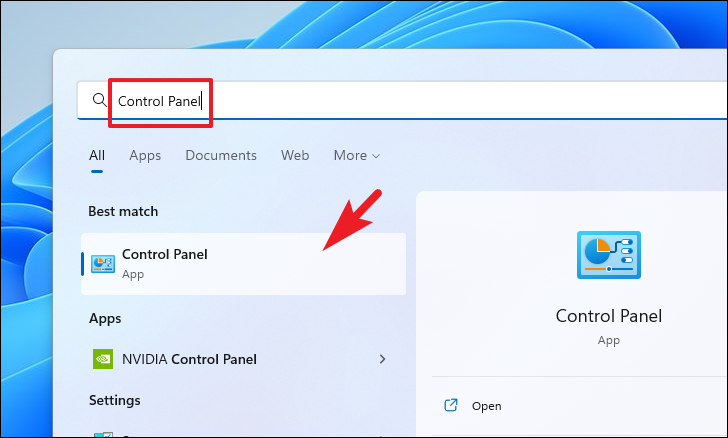
Step 1: Click on the Start Menu and type Control Panel in the search bar. Then, select the 'Control Panel' app from the results.
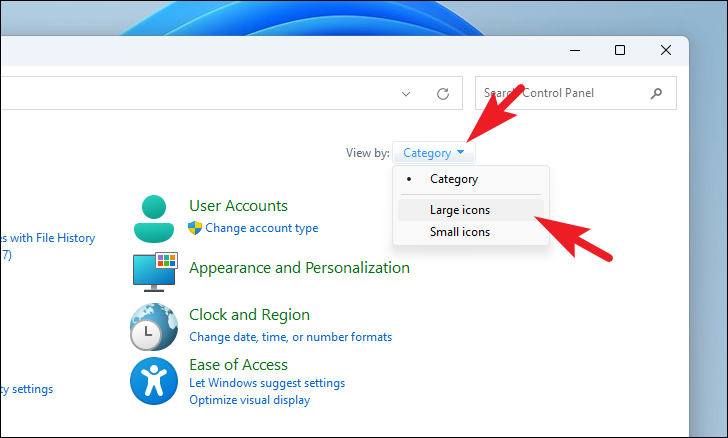
Step 2: In the Control Panel window, set the 'View by' option to 'Large icons' using the drop-down menu at the top right corner.
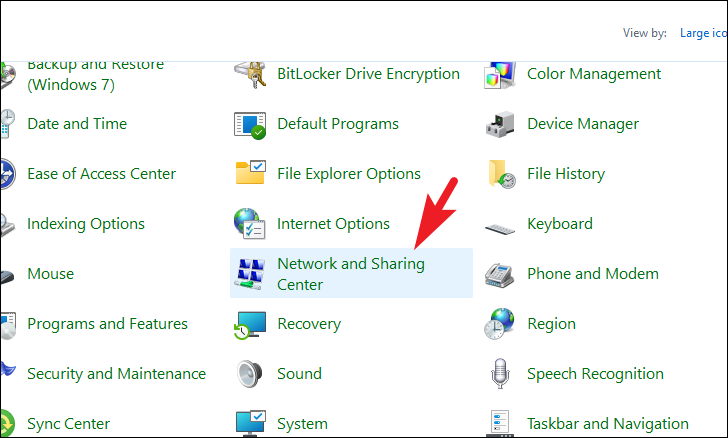
Step 3: Locate and click on 'Network and Sharing Center'.
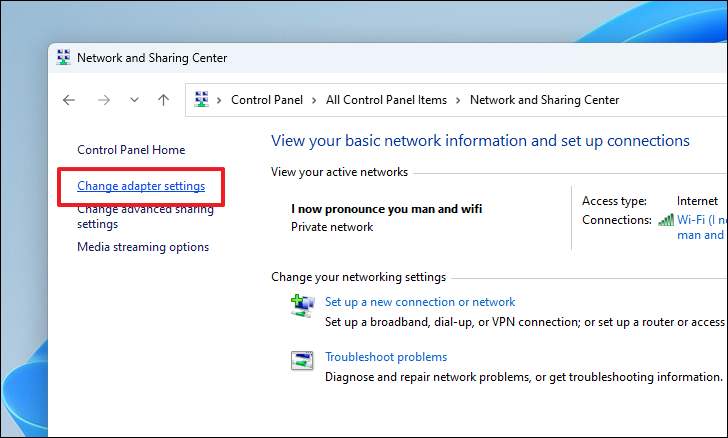
Step 4: On the left sidebar, click on 'Change adapter settings'. This will open the 'Network Connections' window.
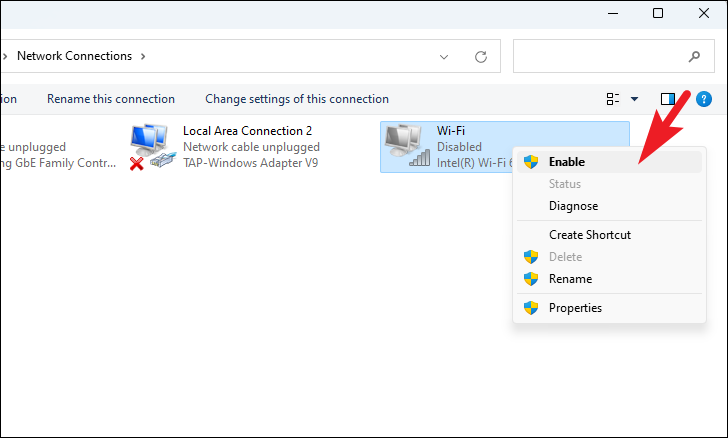
Step 5: Find the 'Wi-Fi' adapter, right-click on it, and select 'Enable' from the context menu.
2. Update the Wi-Fi Driver
An outdated or corrupted driver can cause the Wi-Fi option to disappear. Updating the driver can resolve this issue.
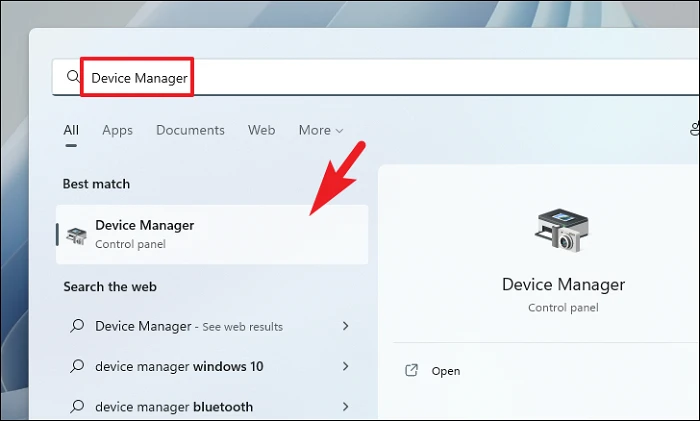
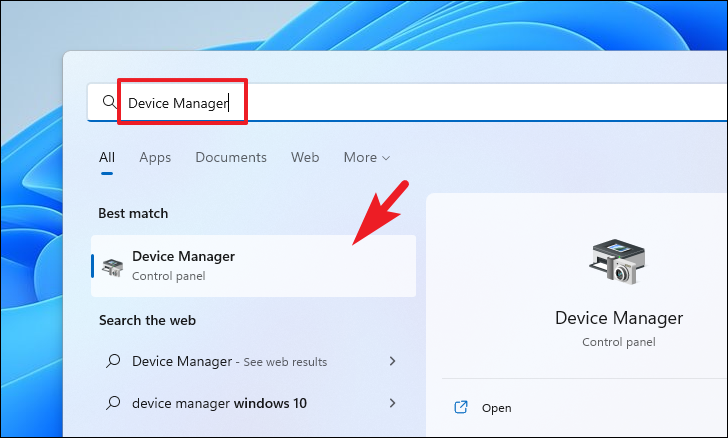
Step 1: Open the Start Menu and type Device Manager. Click on the 'Device Manager' app from the search results.
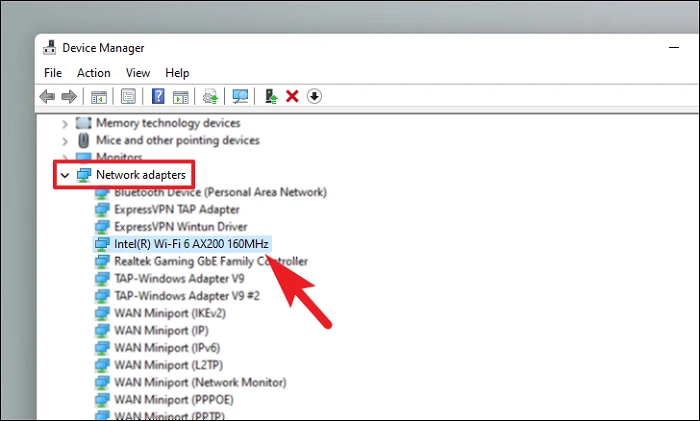
Step 2: In the Device Manager window, expand the 'Network adapters' section by clicking the arrow next to it. Then, double-click on your Wi-Fi adapter to open its properties.
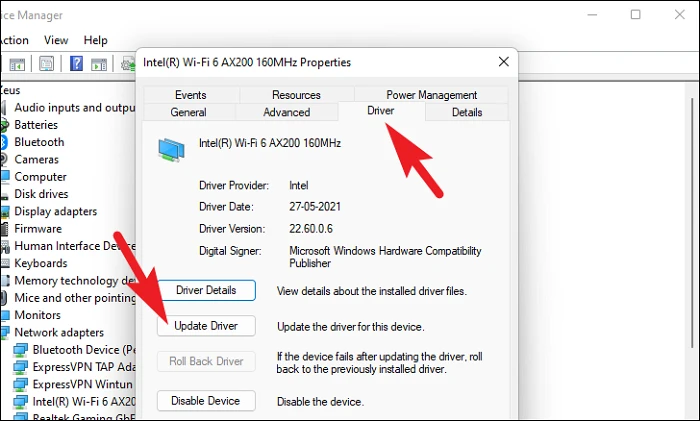
Step 3: Navigate to the 'Driver' tab and click on 'Update Driver'.
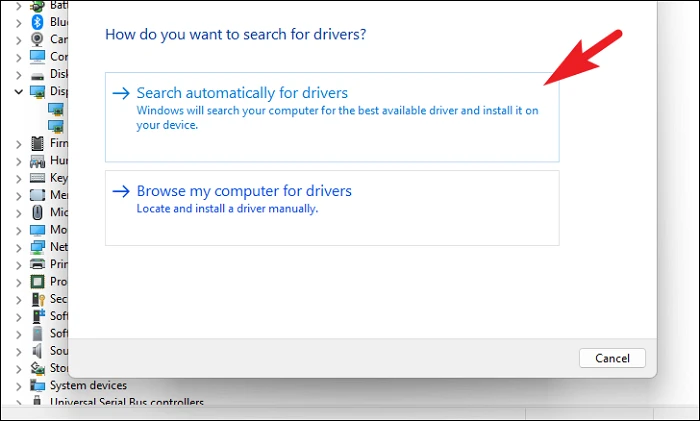
Step 4: Choose 'Search automatically for drivers' to let Windows find and install the latest driver. If you have downloaded the driver manually, select 'Browse my computer for drivers' and navigate to the driver file.
3. Ensure WLAN AutoConfig Service Is Running
The WLAN AutoConfig service manages wireless connections. If it's disabled, the Wi-Fi option may not appear.
Step 1: Press Windows + R to open the Run dialog box. Type services.msc and press Enter to open the Services window.
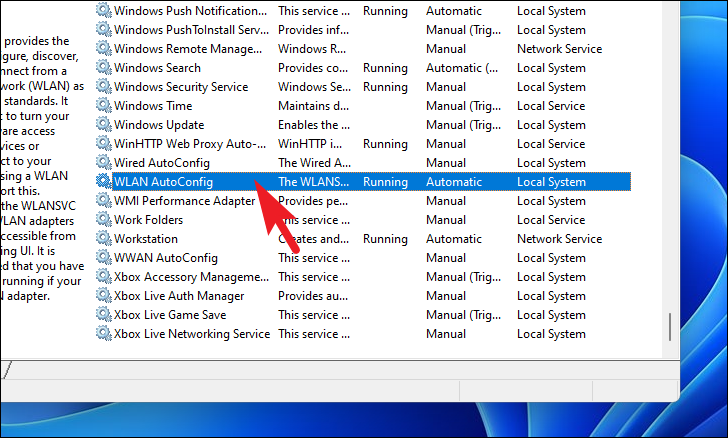
Step 2: Scroll down and double-click on 'WLAN AutoConfig' to open its properties.
Tip: You can press the 'W' key to jump to services starting with 'W'.
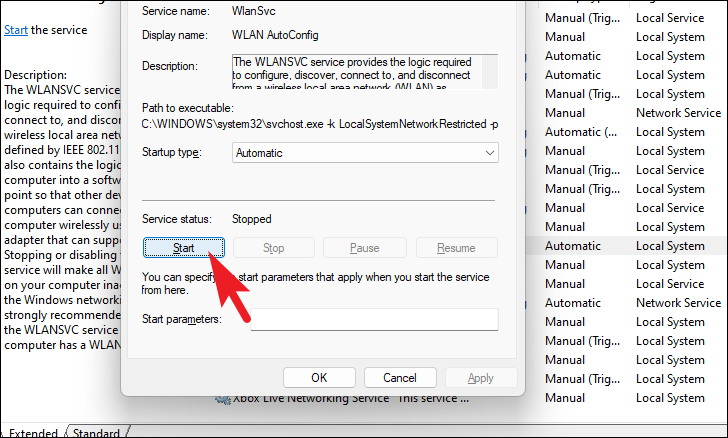
Step 3: In the 'General' tab, ensure that the 'Service status' is 'Running'. If not, click on 'Start'.
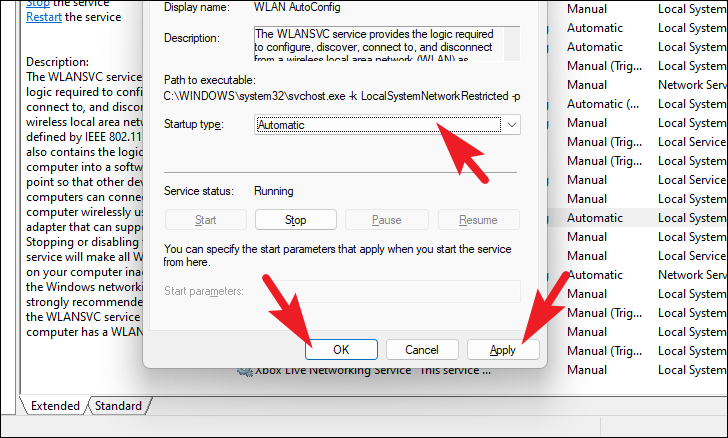
Step 4: Set the 'Startup type' to 'Automatic' so that the service starts when Windows boots up. Click 'Apply' and then 'OK'.
4. Run Network Troubleshooters
Windows has built-in troubleshooters that can automatically detect and fix network-related issues.
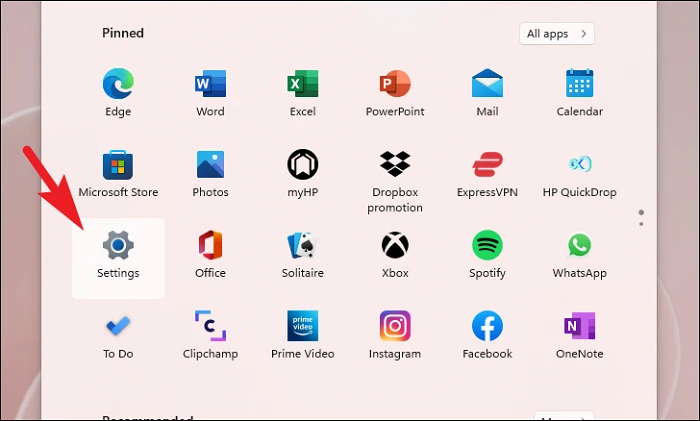
Step 1: Open the Start Menu and click on 'Settings'.
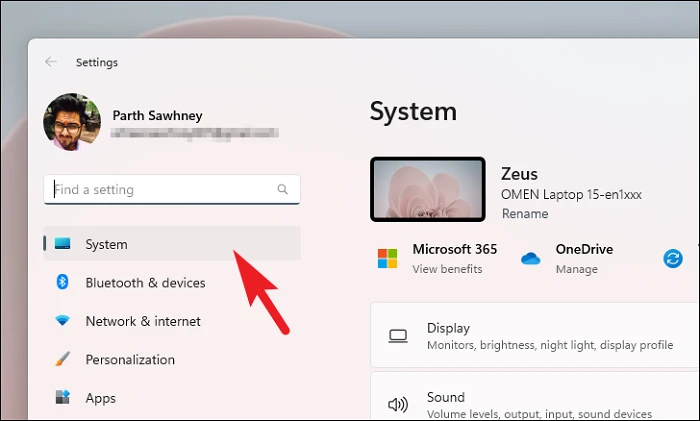
Step 2: Click on the 'System' tab on the left sidebar, then select 'Troubleshoot' on the right pane.
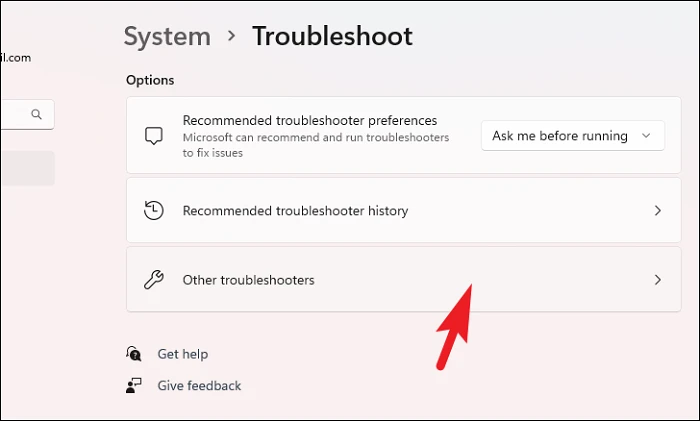
Step 3: Click on 'Other troubleshooters'.
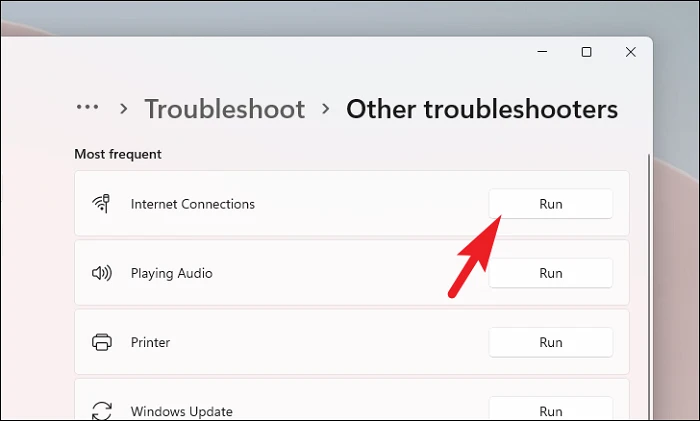
Step 4: Find 'Internet Connections' and click 'Run'. Follow the on-screen instructions to complete the troubleshooting process.
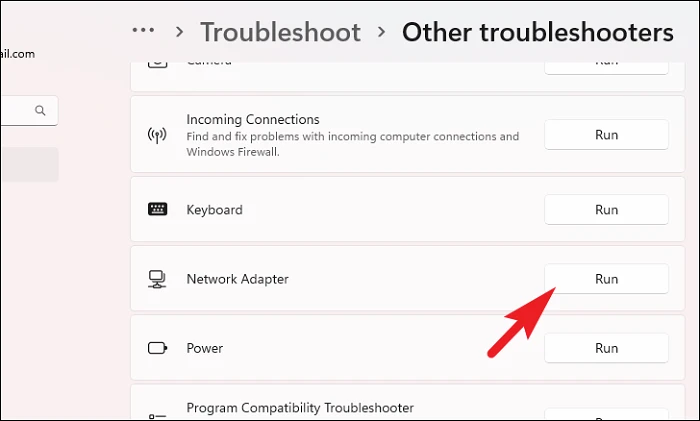
Step 5: If the issue persists, run the 'Network Adapter' troubleshooter by clicking 'Run' next to it.
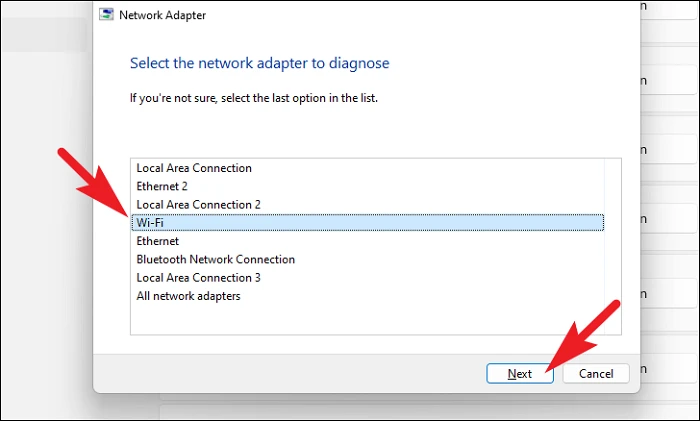
Step 6: Select 'Wi-Fi' and click 'Next' to allow the troubleshooter to detect and fix any problems with the Wi-Fi adapter.
5. Adjust Wi-Fi Adapter Power Settings
Power management settings can sometimes disable the Wi-Fi adapter to save power. Adjusting these settings may resolve the issue.
Step 1: Open the Start Menu and type Device Manager. Click on the 'Device Manager' app.
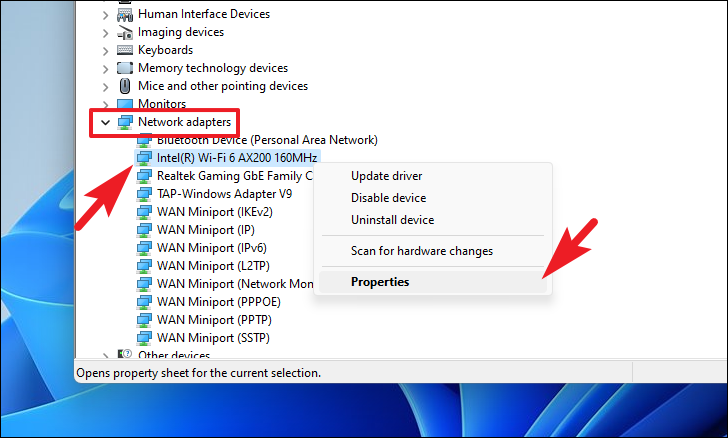
Step 2: Expand the 'Network adapters' section. Right-click on your Wi-Fi adapter and select 'Properties'.
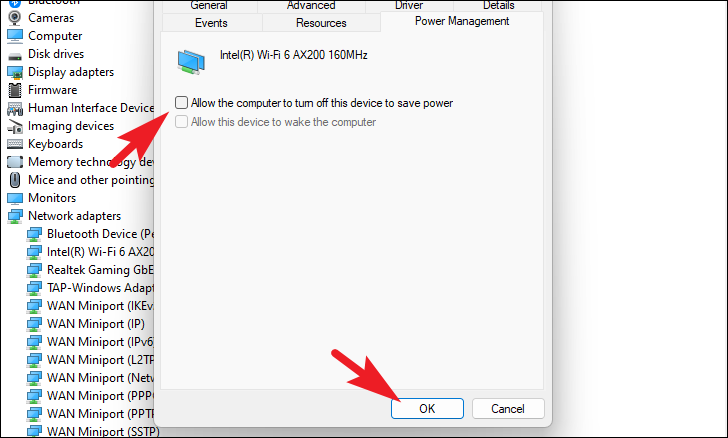
Step 3: Go to the 'Power Management' tab. Uncheck the box that says 'Allow the computer to turn off this device to save power'. Click 'OK' to save the changes.
6. Reset Network Components
Resetting network components can fix underlying issues related to network configurations.
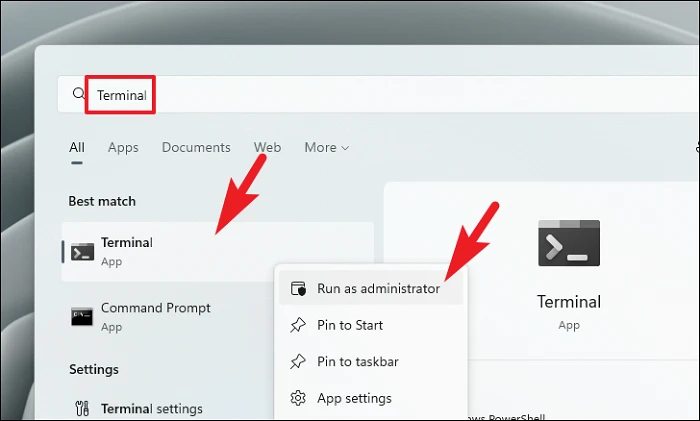
Step 1: Open the Start Menu and type Terminal. Right-click on 'Terminal' and choose 'Run as administrator'.
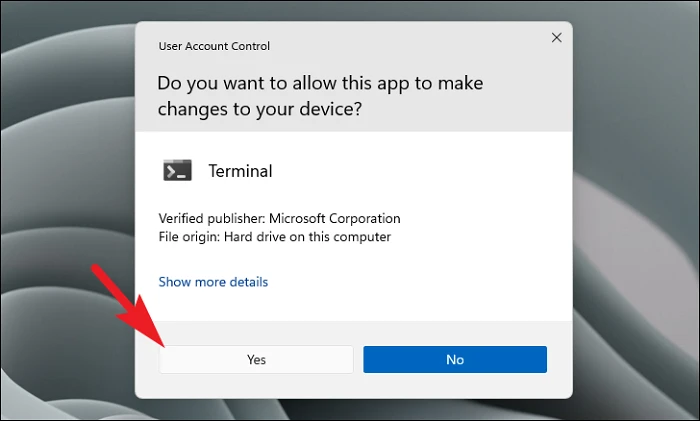
Step 2: If prompted by User Account Control (UAC), click 'Yes' to allow administrative privileges.
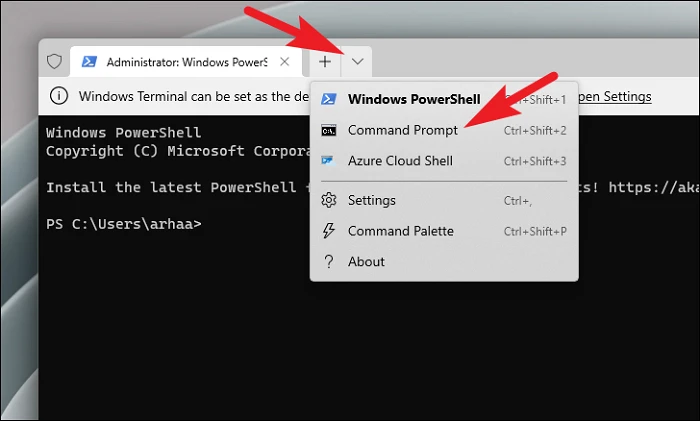
Step 3: In the Terminal, click the downward arrow and select 'Command Prompt'.
Step 4: Type or paste the following commands one by one, pressing Enter after each:
netsh int ip resetnetsh advfirewall resetnetsh winsock resetipconfig /flushdnsipconfig /releaseipconfig /renew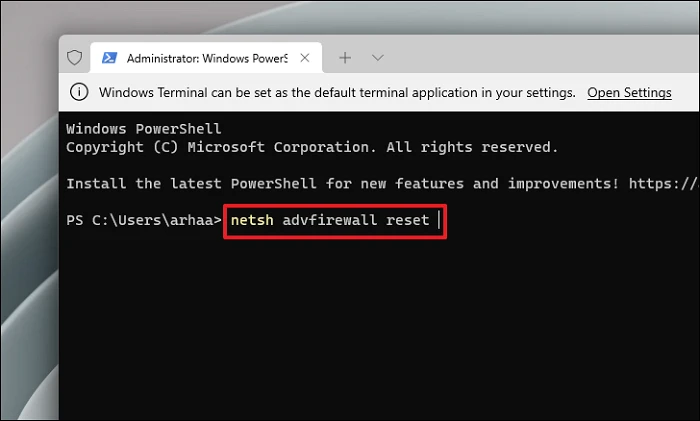
Step 5: Restart your computer and check if the Wi-Fi option has reappeared.
7. Restart Your PC
A simple restart can sometimes fix temporary glitches that cause the Wi-Fi option to disappear.
Step 1: Click on the Start Menu, select the 'Power' icon, and choose 'Restart'.

8. Install or Roll Back Windows Updates
Updating Windows can fix known issues. Conversely, if the problem started after an update, rolling back might help.
To install updates:
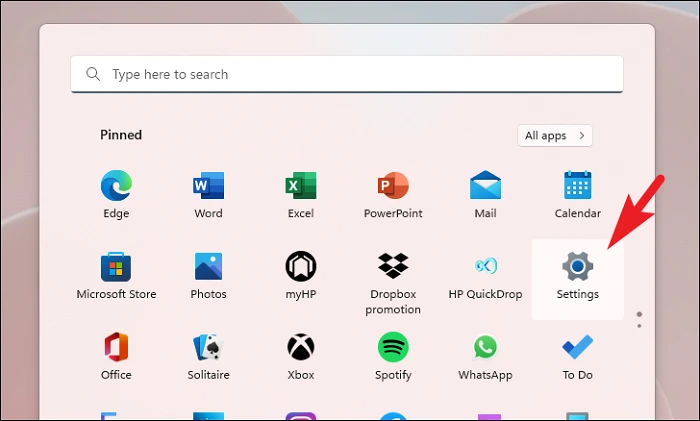
Step 1: Open 'Settings' from the Start Menu.
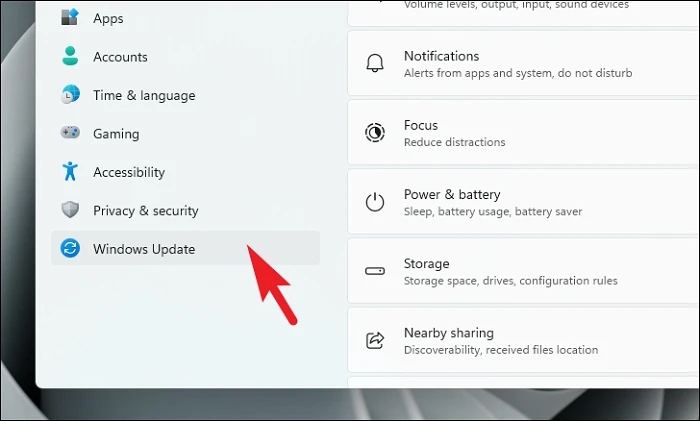
Step 2: Click on 'Windows Update' on the left sidebar.
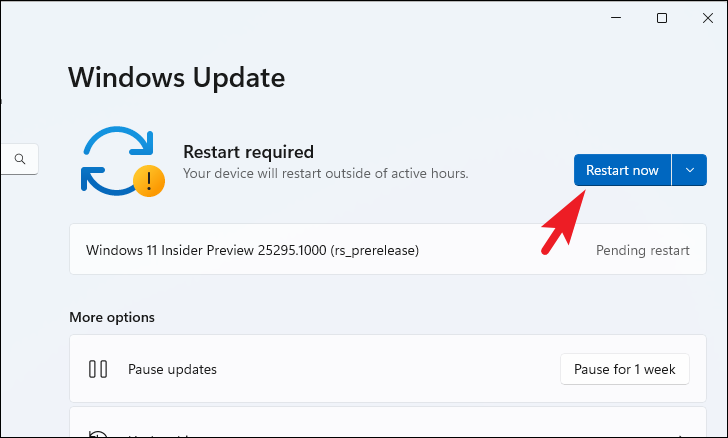
Step 3: Click 'Check for updates' and install any available updates by clicking 'Download & install' or 'Restart now'.
To roll back updates:
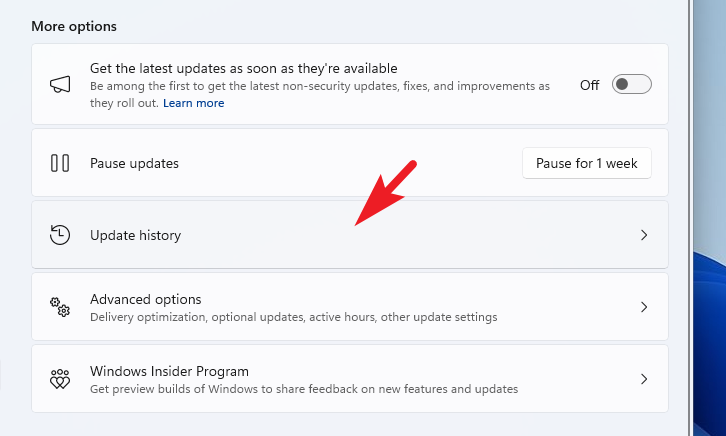
Step 1: From the 'Windows Update' settings, click on 'Update history'.
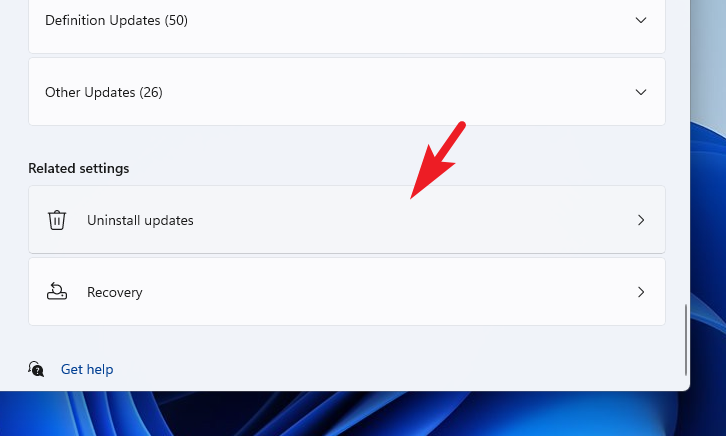
Step 2: Scroll down and click on 'Uninstall updates'.
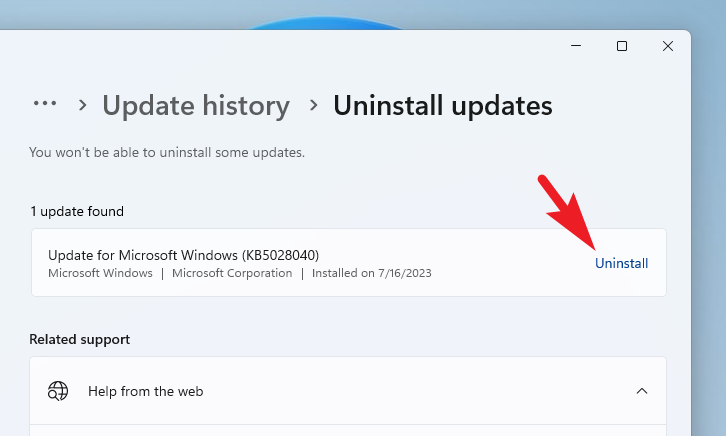
Step 3: Select the most recent update and click 'Uninstall'. Confirm the action when prompted.
Step 4: Restart your computer after the uninstallation completes.
9. Perform Network Reset
A network reset reinstalls all network adapters and resets networking components to their default settings.
Step 1: Open 'Settings' and navigate to the 'Network & internet' tab on the left sidebar.
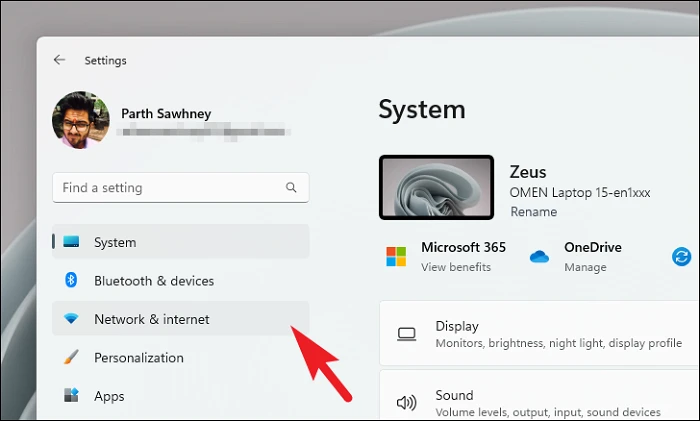
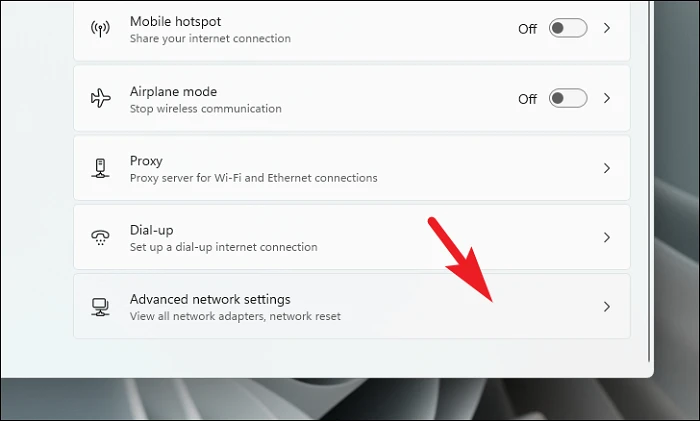
Step 2: Click on 'Advanced network settings' on the right pane.
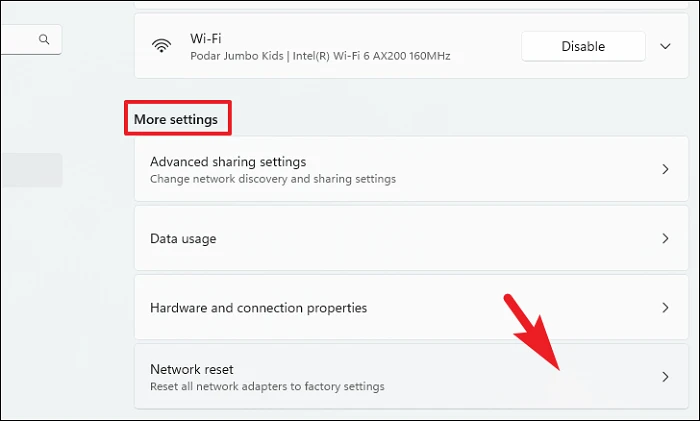
Step 3: Scroll down and select 'Network reset'.
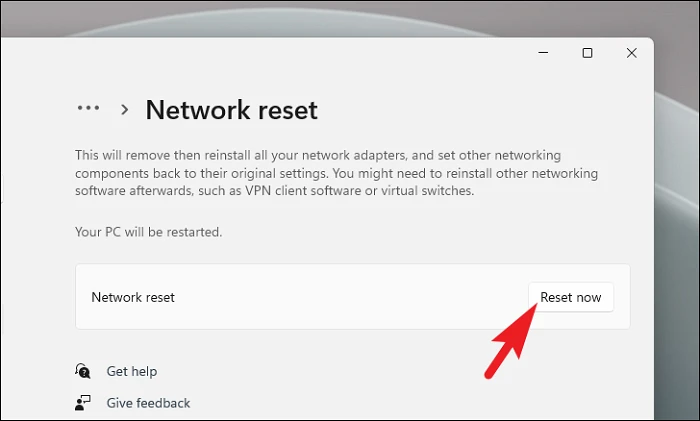
Step 4: Click on 'Reset now'. Your PC will restart to complete the process.
10. Perform a Clean Boot
A clean boot starts Windows with a minimal set of drivers and startup programs, which can help eliminate software conflicts.
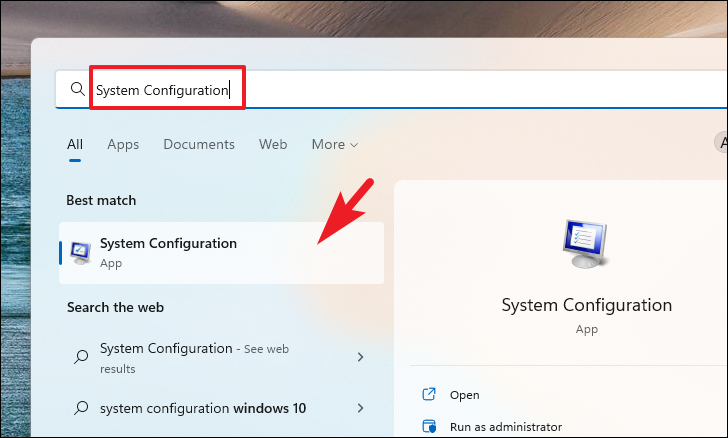
Step 1: Open the Start Menu and type System Configuration. Click on the 'System Configuration' app.
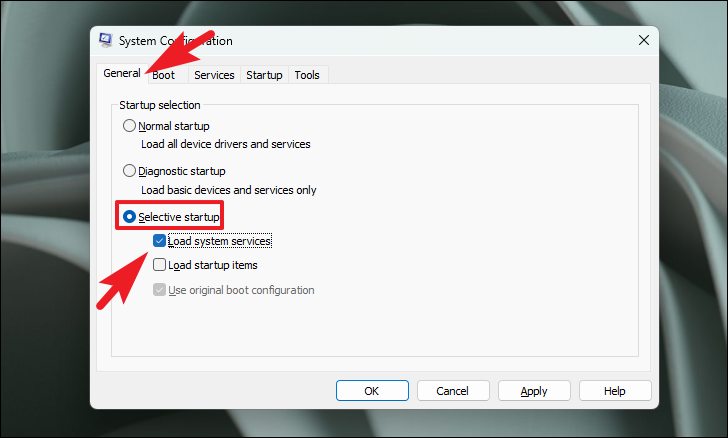
Step 2: Under the 'General' tab, select 'Selective startup' and uncheck 'Load startup items'. Ensure 'Load system services' is checked.
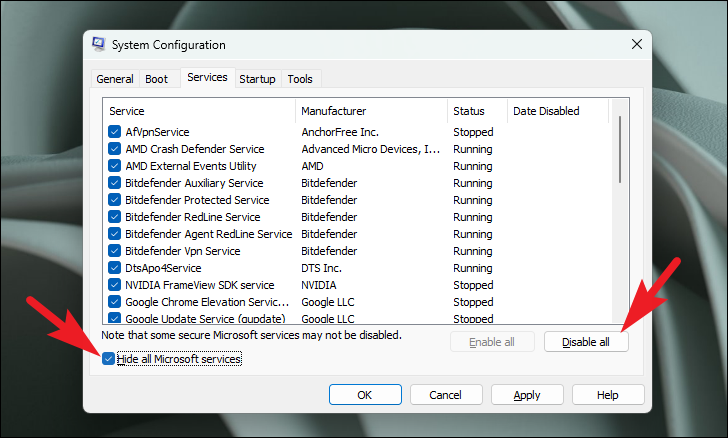
Step 3: Go to the 'Services' tab, check 'Hide all Microsoft services', and then click 'Disable all'.
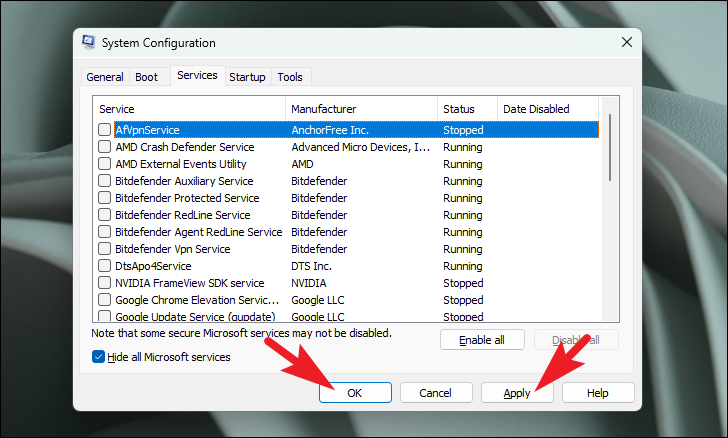
Step 4: Click 'Apply' and 'OK', then restart your computer.
Step 5: After the restart, check if the Wi-Fi option has returned.
11. Use a System Restore Point
If the problem started recently, restoring your system to an earlier point in time might fix the issue.
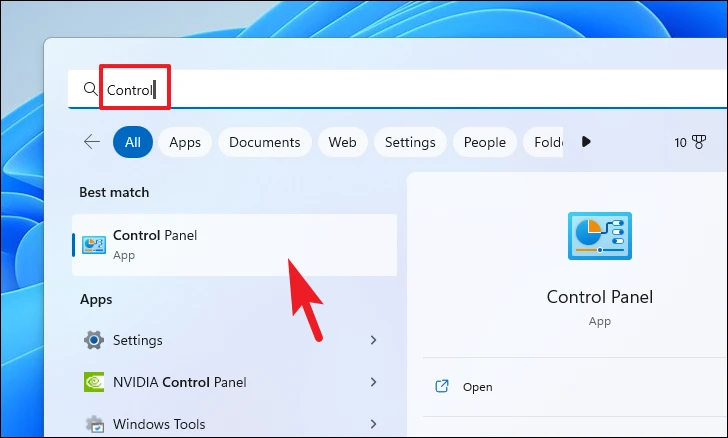
Step 1: Open the Start Menu, type Control Panel, and select it from the results.
Step 2: Click on 'Recovery' in the Control Panel.
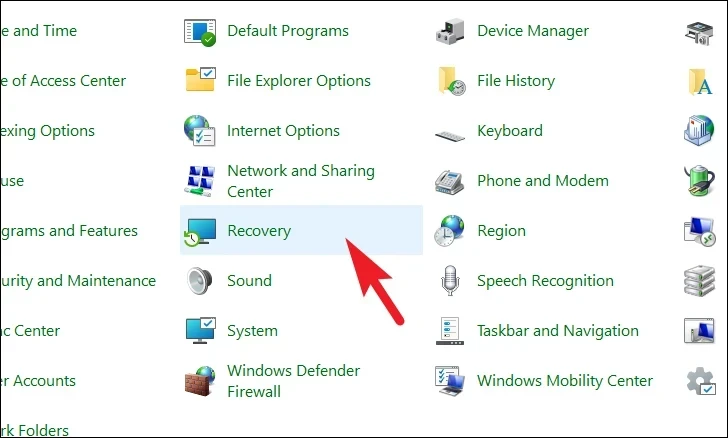
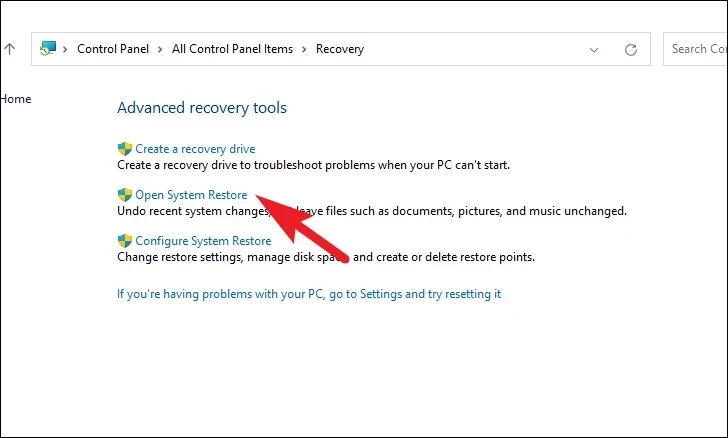
Step 3: Click on 'Open System Restore'.
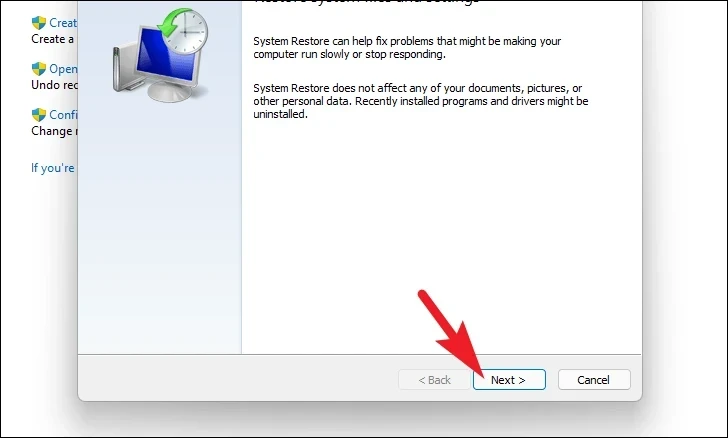
Step 4: Click 'Next' and select a restore point from the list.
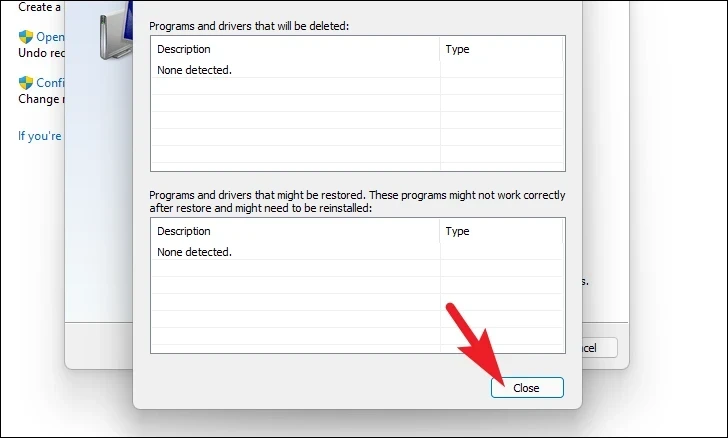
Step 5: Click 'Scan for affected programs' to see which programs will be impacted. After reviewing, click 'Close'.
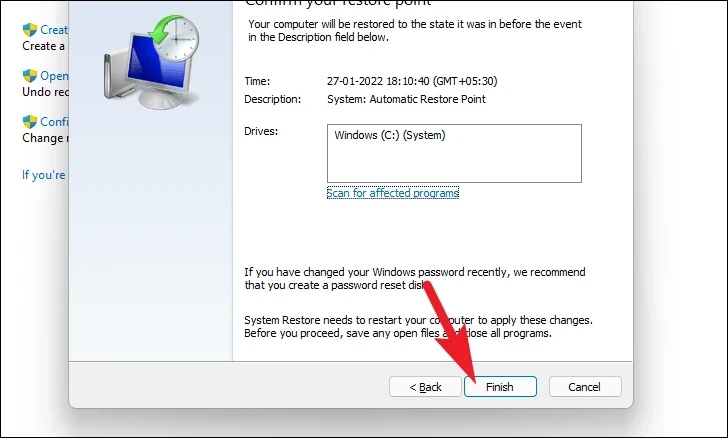
Step 6: Click 'Finish' to start the restoration process.
12. Reset Your PC
If all else fails, resetting your PC can resolve deep-rooted issues. You have the option to keep your personal files.
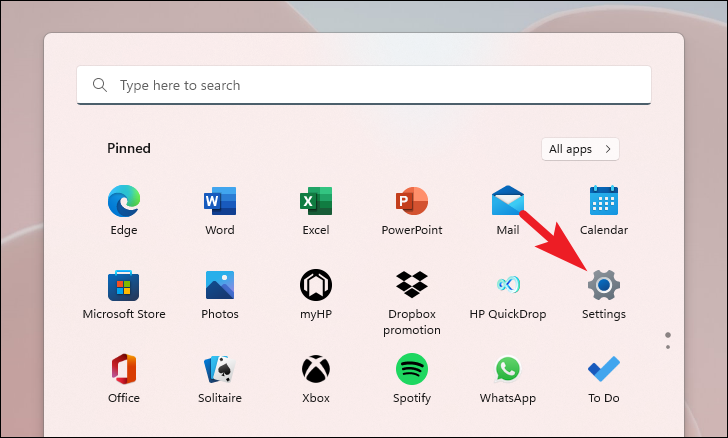
Step 1: Open 'Settings' from the Start Menu.
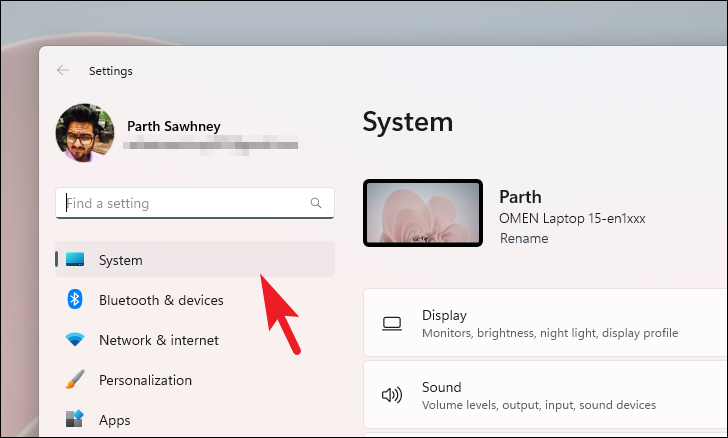
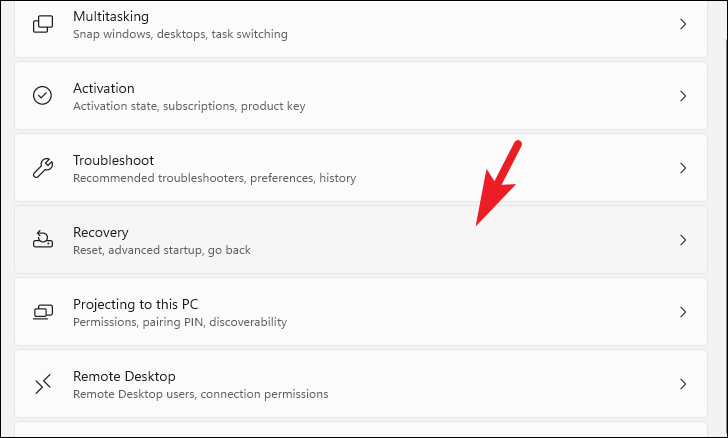
Step 2: Ensure you are on the 'System' tab, then scroll down and click on 'Recovery'.
Step 3: Under 'Recovery options', click on 'Reset PC'.
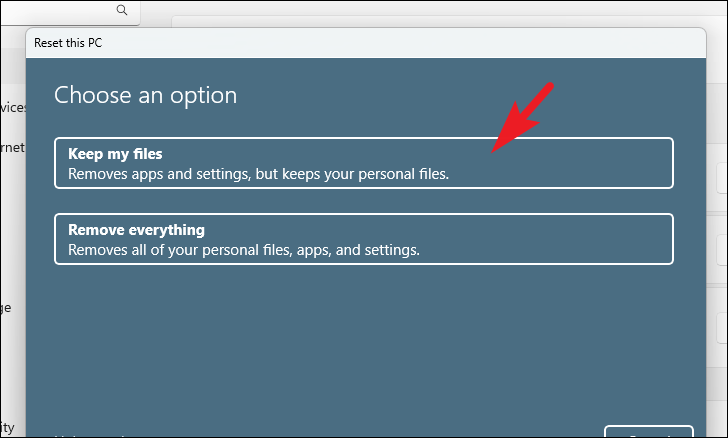
Step 4: Choose 'Keep my files' to retain personal files, or 'Remove everything' to start fresh.
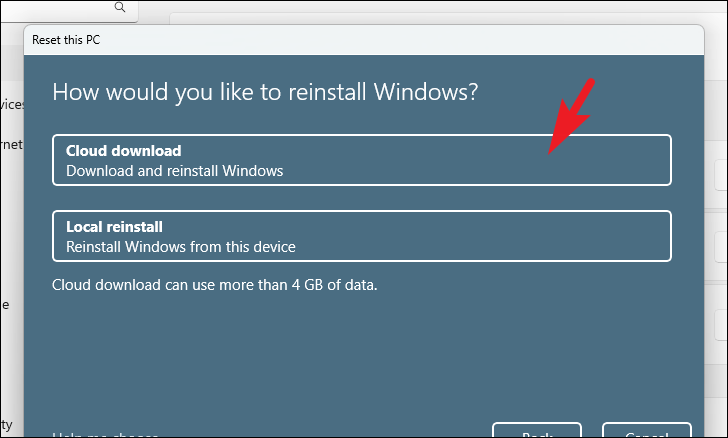
Step 5: Select 'Cloud download' to download a fresh copy of Windows or 'Local reinstall' to use the existing system files.
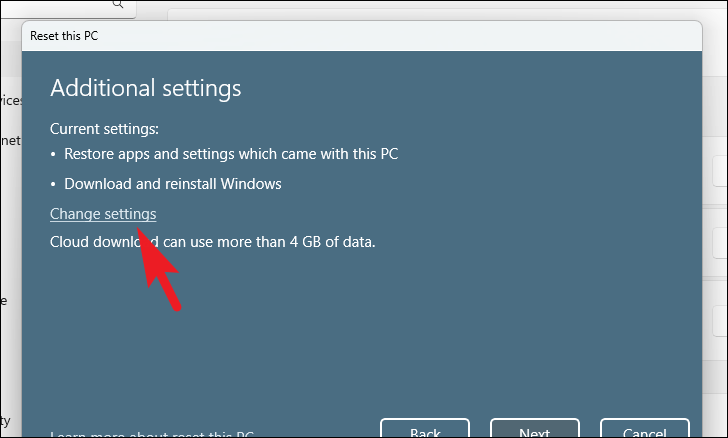
Step 6: Review the settings and click on 'Next'. If prompted about not being able to roll back, click 'Next' again.
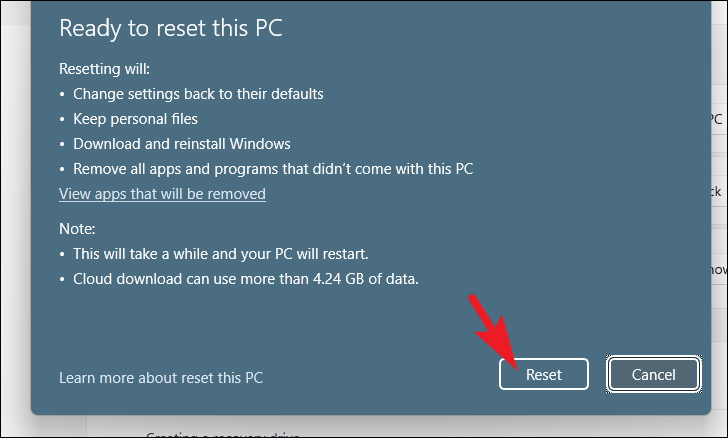
Step 7: Finally, click 'Reset' to begin the process.
Experiencing the disappearance of the Wi-Fi option can be frustrating, but these steps should help you resolve the issue and get back online.


