
Nvidia driver version 572.83 on Windows 11 and Windows 10 systems can sometimes result in a black screen immediately after installation or upon system reboot. This issue prevents users from accessing their desktops, severely limiting usability. Fortunately, there are several effective solutions to quickly restore your display functionality.
Method 1: Roll Back Nvidia Driver to a Previous Version
Step 1: Boot Windows into Safe Mode. To do this, restart your computer, interrupt the boot process three times by pressing the power button as Windows starts loading, and Windows will automatically enter recovery mode. Navigate to "Troubleshoot" > "Advanced options" > "Startup Settings" > "Restart." After the reboot, press 4 to enter Safe Mode.
Step 2: Once in Safe Mode, right-click the Start button and select "Device Manager."

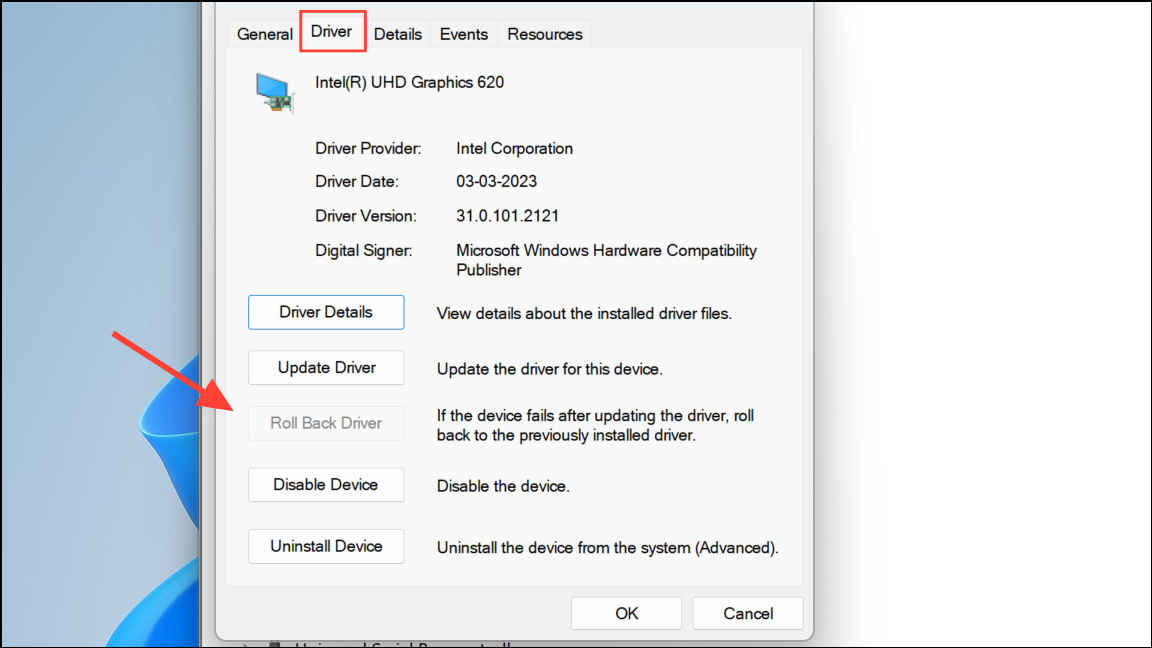
Step 3: In the Device Manager window, expand the "Display adapters" category, then right-click your Nvidia graphics card and select "Properties."
Step 4: Under the "Driver" tab, click "Roll Back Driver." Follow the prompts to complete the rollback process. This action reinstalls the previous stable driver version, resolving the black screen issue.
Step 5: Restart your computer normally to confirm that the issue is resolved. Your display should now function properly without the black screen.
Method 2: Uninstall and Reinstall Nvidia Driver Manually
If rolling back the driver is not possible or doesn't solve the problem, manually uninstalling and reinstalling an older, stable Nvidia driver can fix the black screen issue.
Step 1: Boot into Safe Mode using the instructions in Method 1, Step 1.
Step 2: Once in Safe Mode, open Device Manager (right-click Start > Device Manager). Expand "Display adapters," right-click your Nvidia device, and select "Uninstall device." Confirm the uninstallation by selecting "Delete the driver software for this device" if prompted.
Step 3: Restart your computer normally. After the reboot, Windows will load basic display drivers allowing you to navigate your desktop.
Step 4: Visit Nvidia’s official website and download a previous version of the Nvidia graphics driver compatible with your GPU and Windows version. Run the installer and follow the on-screen instructions to complete the installation.
Step 5: Restart your PC after installation. The black screen issue should be resolved, and your graphics card should function normally.
Method 3: Disable Fast Startup
In some cases, disabling Windows Fast Startup can resolve display issues related to Nvidia drivers.
Step 1: Boot into Safe Mode as described previously if you cannot access your desktop normally.
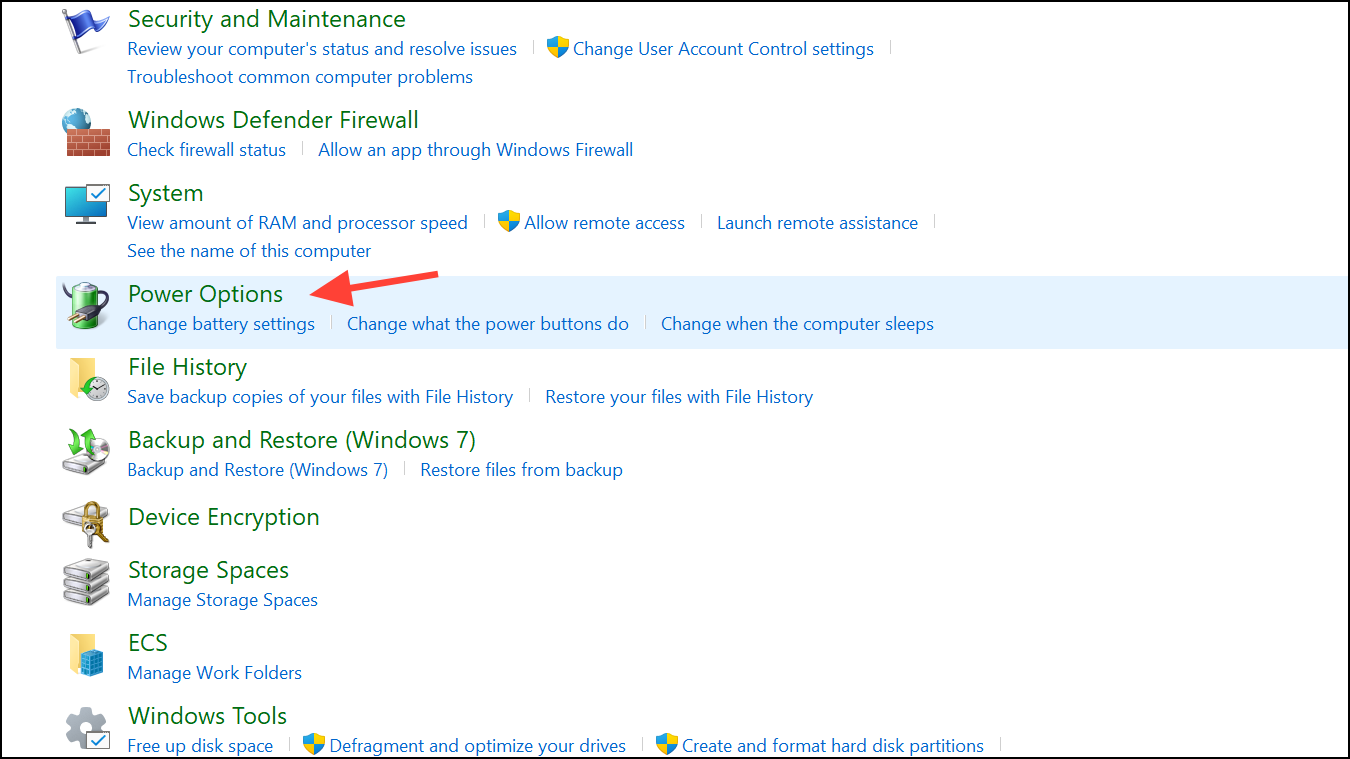
Step 2: Press Win + R, type control panel, and press Enter. In the Control Panel, go to "System and Security" > "Power Options."
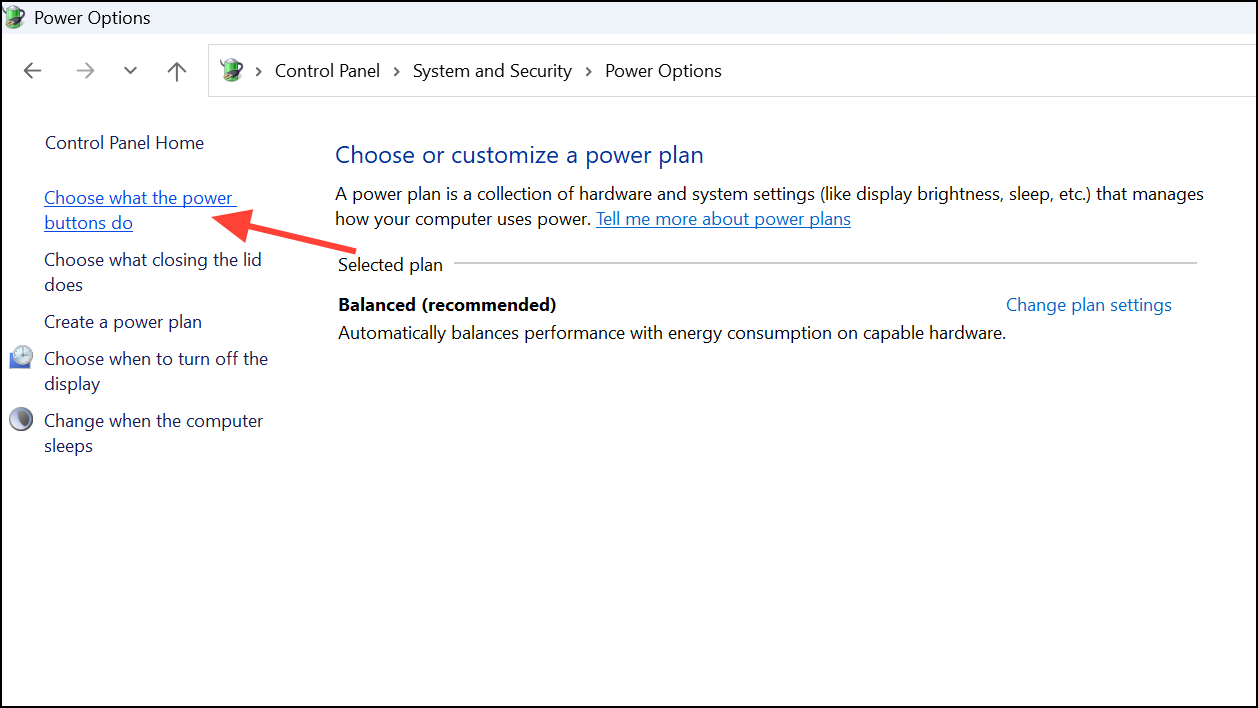
Step 3: Click on "Choose what the power buttons do," then select "Change settings that are currently unavailable."
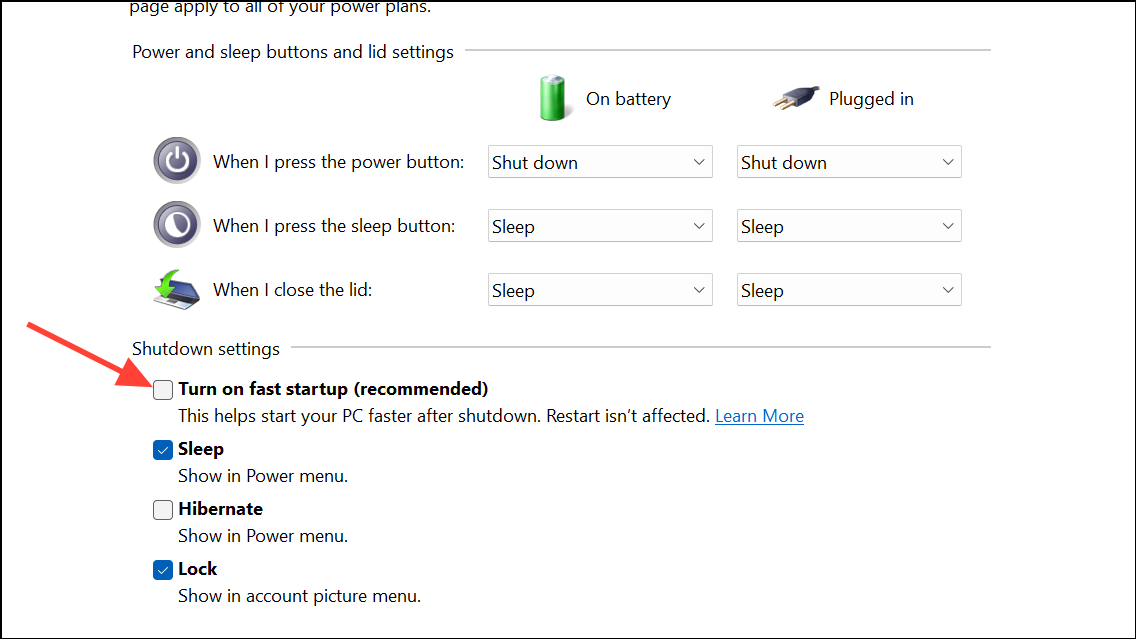
Step 4: Uncheck the option "Turn on fast startup (recommended)" and click "Save changes."
Step 5: Restart your computer normally and verify if the black screen issue has been resolved.
Method 4: Use System Restore to Revert System Changes
If none of the above methods work, using System Restore can revert your system to a point before the problematic Nvidia driver was installed.
Step 1: Boot into recovery mode by interrupting the Windows startup sequence three times (as described previously). Navigate to "Troubleshoot" > "Advanced options" > "System Restore."
Step 2: Select a restore point dated before the Nvidia driver 572.83 was installed. Follow the prompts to complete the restoration process.
Step 3: After System Restore completes, your computer will reboot. Confirm that the black screen issue is resolved.
After resolving the black screen issue, consider temporarily disabling automatic driver updates to prevent Windows from reinstalling the problematic Nvidia driver. Regularly check Nvidia’s official website for updated drivers that specifically address this issue.