
Word and Excel files stored in OneDrive or SharePoint sometimes display "Saved to this PC" in the title bar when opened, even though they exist in your cloud folders. This behavior prevents AutoSave from working and can disrupt real-time collaboration, version history, and seamless syncing between devices. The root cause often lies in how the files are opened, local versus cloud sync folder usage, or misconfigured Office or OneDrive settings. Addressing this restores cloud connectivity and fixes save location confusion.
Open Files Directly from OneDrive or SharePoint Online
Step 1: Navigate to your OneDrive or SharePoint site using a web browser. Access the folder or document library where your file is stored.
Step 2: Click the file to open it in Word or Excel Online. If you prefer working in the desktop app, use the "Open in App" option provided in the web interface. This ensures the file opens as a cloud-connected document, with AutoSave enabled by default.
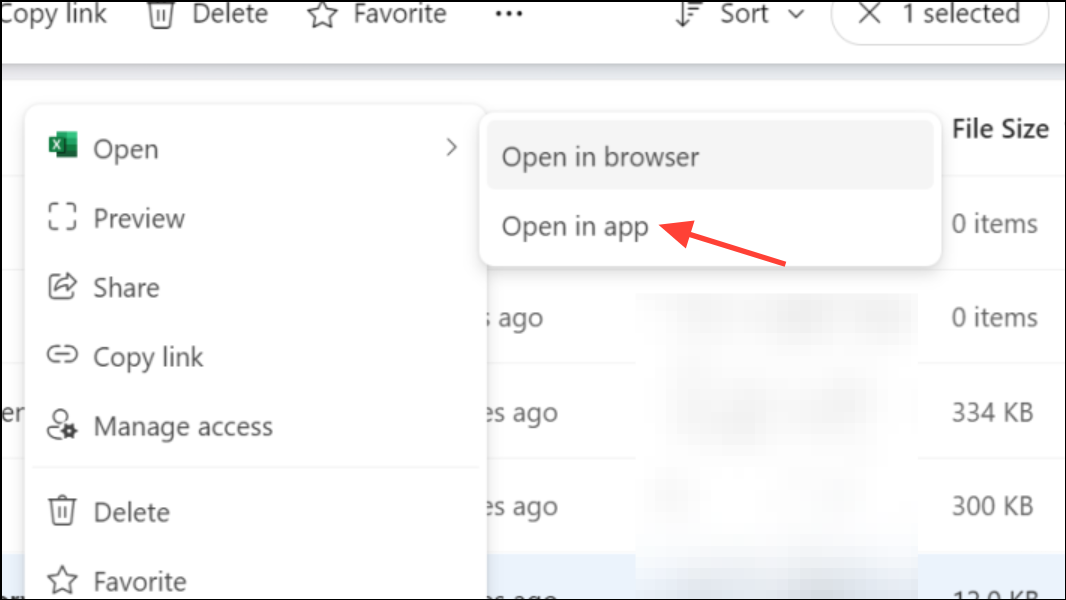
Opening files this way guarantees that Office recognizes the cloud location, so changes sync automatically and you avoid duplicate copies or "Saved to this PC" prompts.
Check and Adjust Office Save Settings
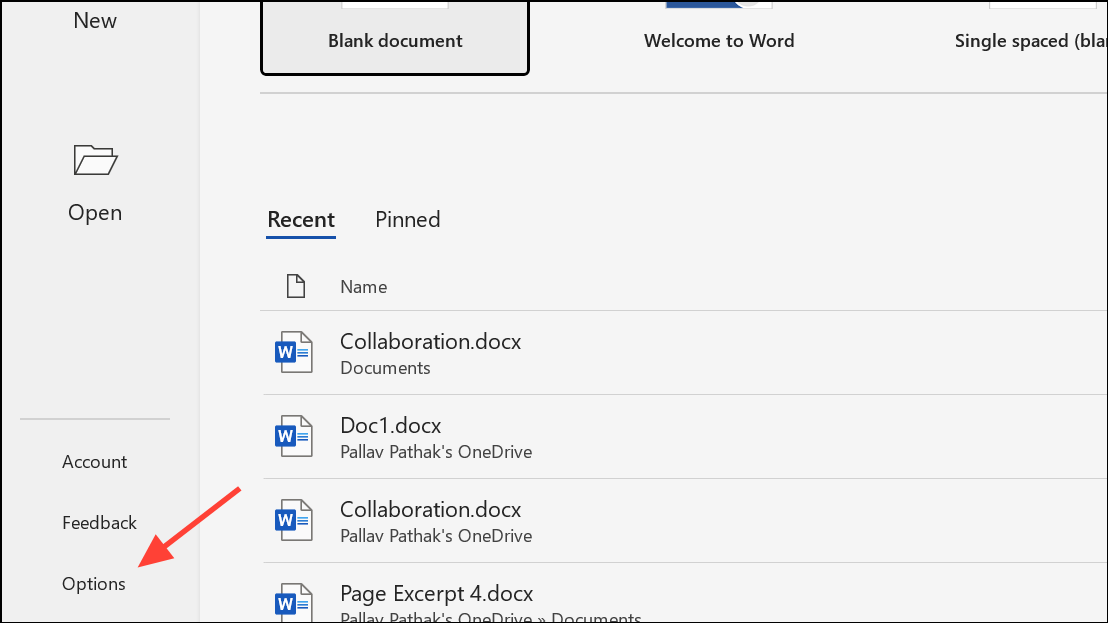
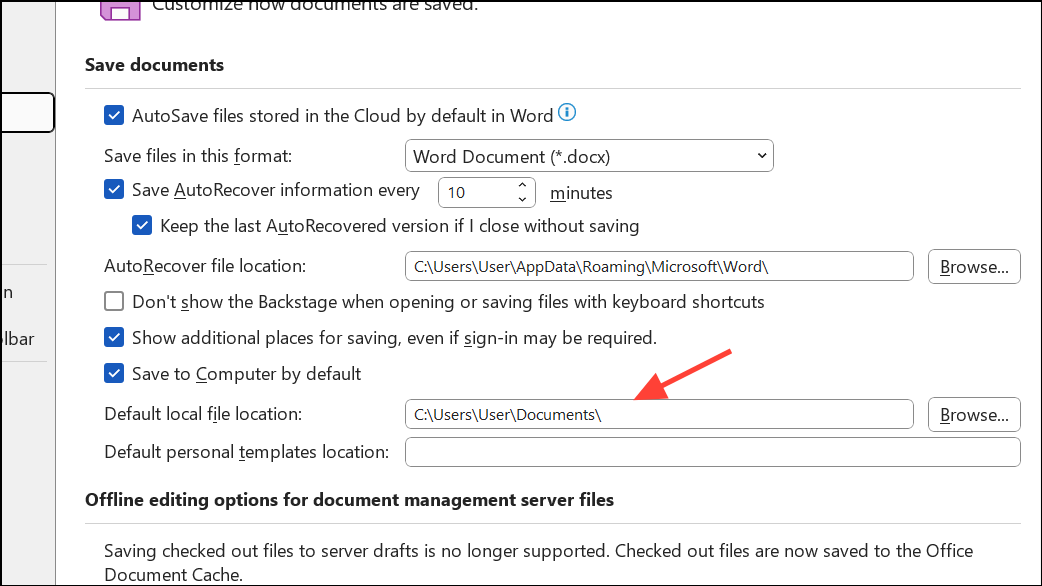
Step 1: Open Word or Excel. Go to File > Options (or More > Options if you don't see it immediately).
Step 2: Select the Save tab. Ensure the following settings:
- Check "AutoSave files stored in the Cloud by default in Word".
- Uncheck "Save to Computer by default" if you want cloud as the default save location, or check it if you want to prioritize local saves.
- Set your preferred "Default local file location" to a folder on your PC if you want to save locally by default.
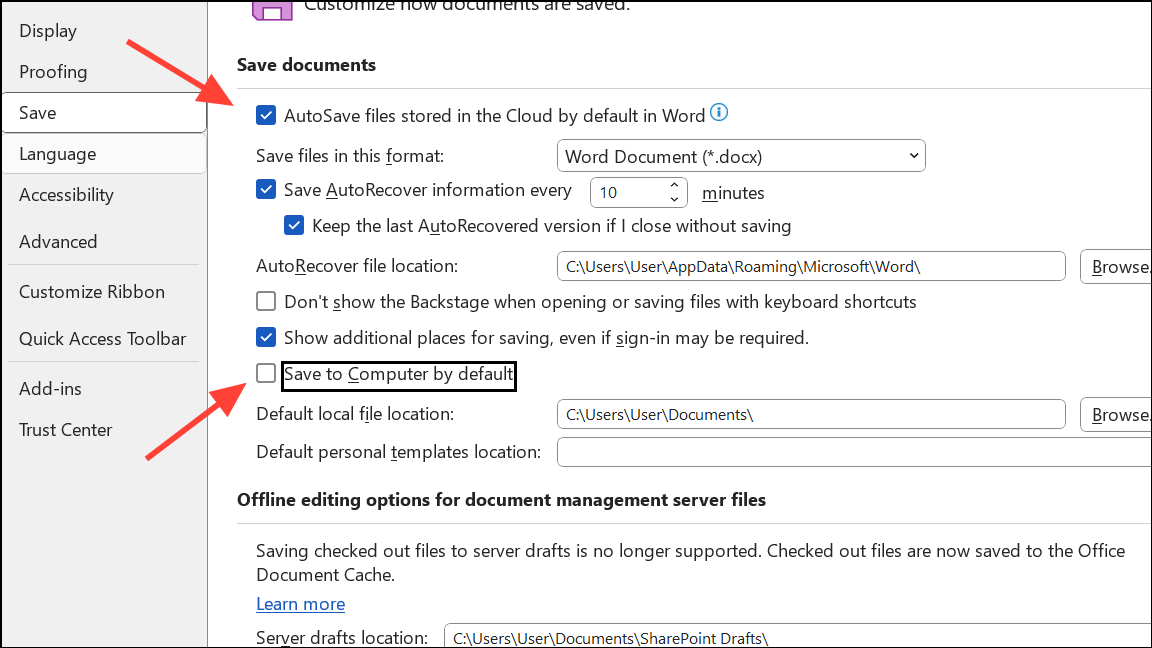
Step 3: Click OK to apply changes. Restart Word or Excel to ensure the new settings take effect.
These settings direct Office to recognize and properly handle cloud files, preventing confusion between local and cloud saves.
Verify File Path and Sync Status
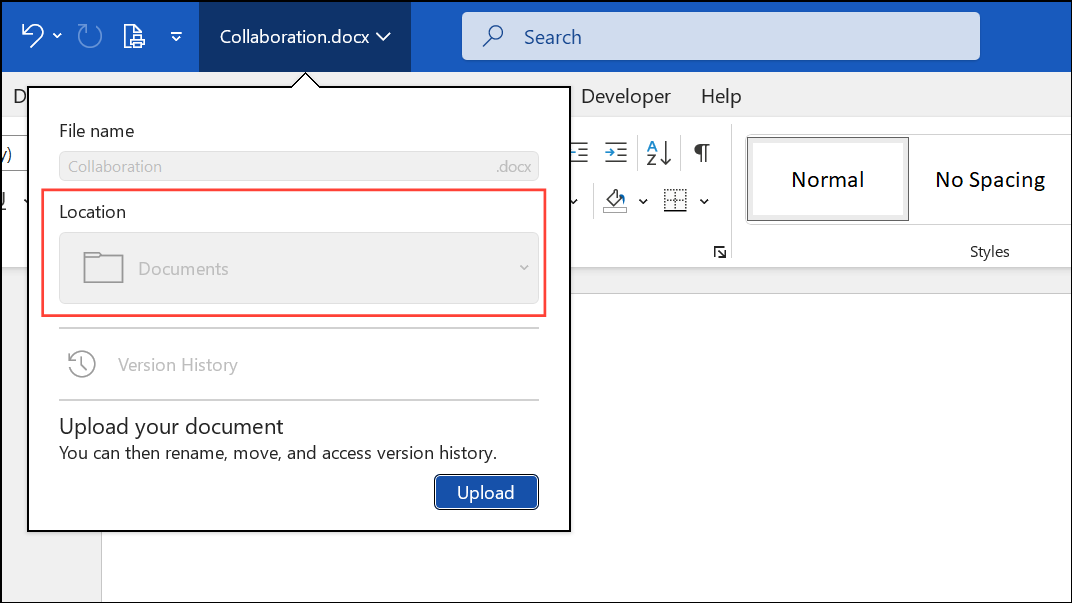
Step 1: When you open a file, check the title bar in Word or Excel. If it displays a local path like C:\Users\YourName\Documents, you're working with a local copy. If it shows a cloud path or your organization's name, it's cloud-connected.
Step 2: Right-click the OneDrive cloud icon in your system tray (near the clock). Select Settings > Account > Choose folders and ensure all relevant folders are checked for sync.
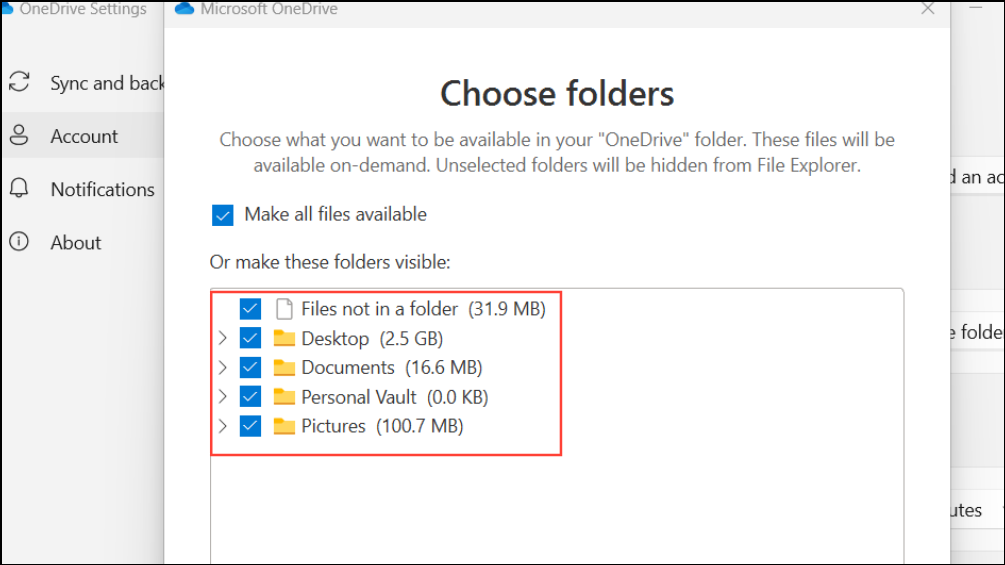
Step 3: Manually trigger a sync by clicking the OneDrive icon and selecting "Sync now." Confirm that the files in your OneDrive or SharePoint folders show a green checkmark (synced) or cloud icon (online-only) in File Explorer.
Proper sync ensures that Office apps can access the latest file versions and maintain cloud connectivity.
Change Default Save Location in Office
Step 1: Open Word or Excel and go to File > Options > Save.

Step 2: Under "Default local file location," enter or paste the path to your preferred folder. If the "Browse" button is missing, copy the folder address from Windows Explorer and paste it directly.
Step 3: Check or uncheck "Save to Computer by default" based on your preference. This overrides OneDrive as the default save target for new documents.
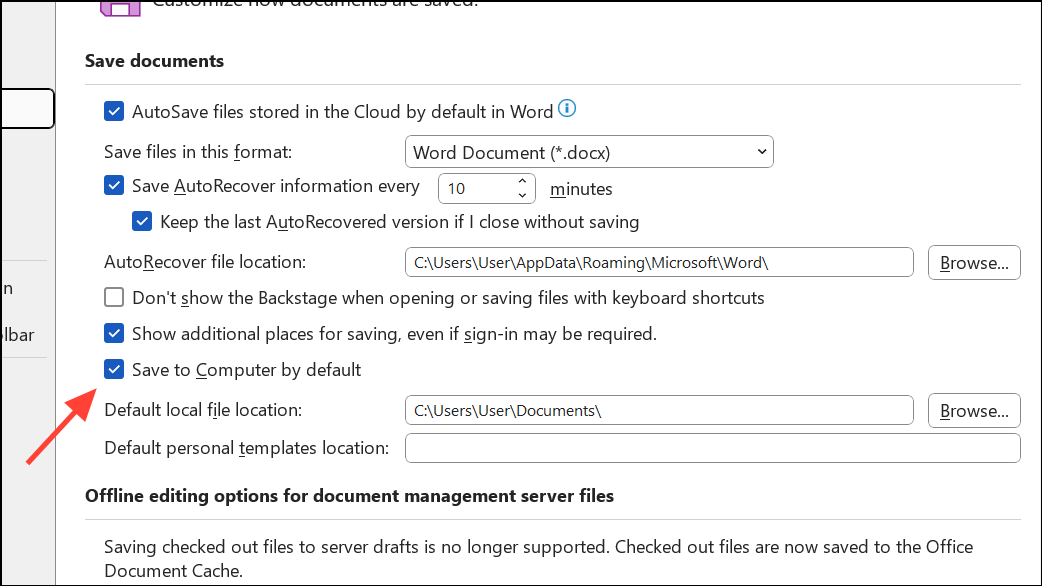
Step 4: Click OK and restart the Office app to confirm the change.
This step is especially useful if you want to avoid OneDrive entirely or need to save files to a specific local or network folder.
Reset or Repair Office and OneDrive Integration
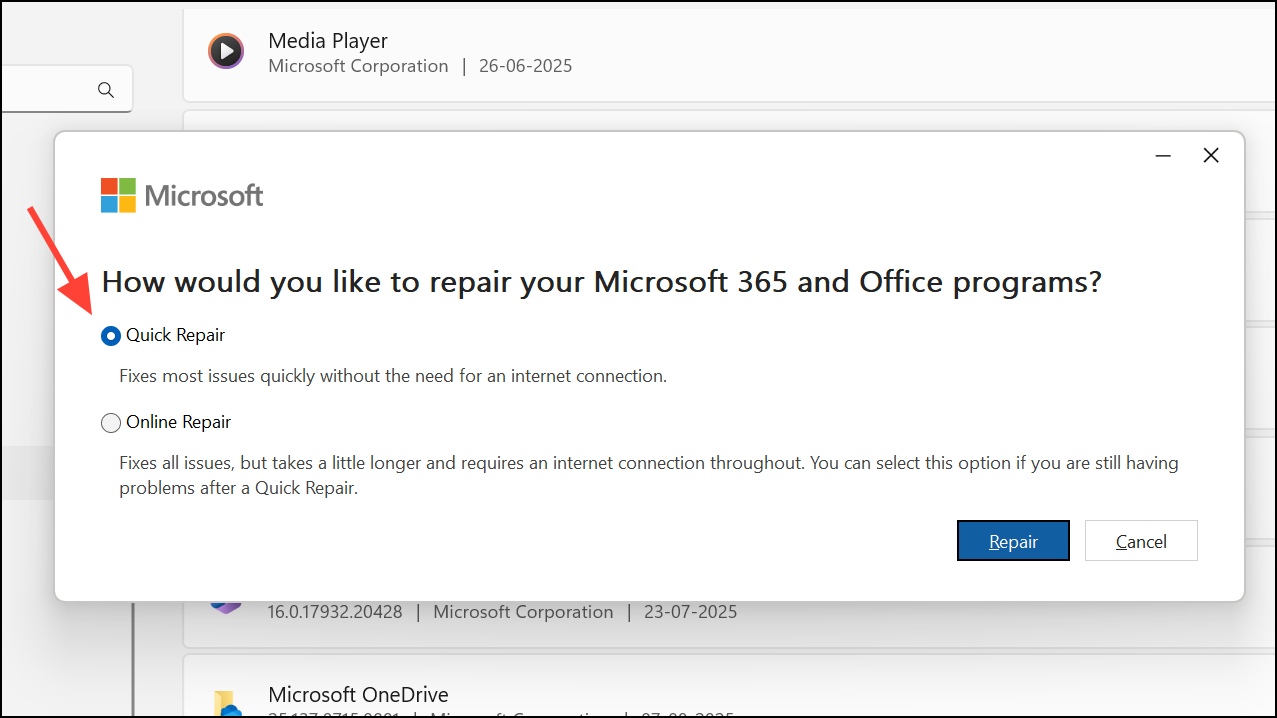
Step 1: Close all Office applications. Open Windows Settings, go to Apps > Installed Apps, and find "Microsoft 365" or "Office."
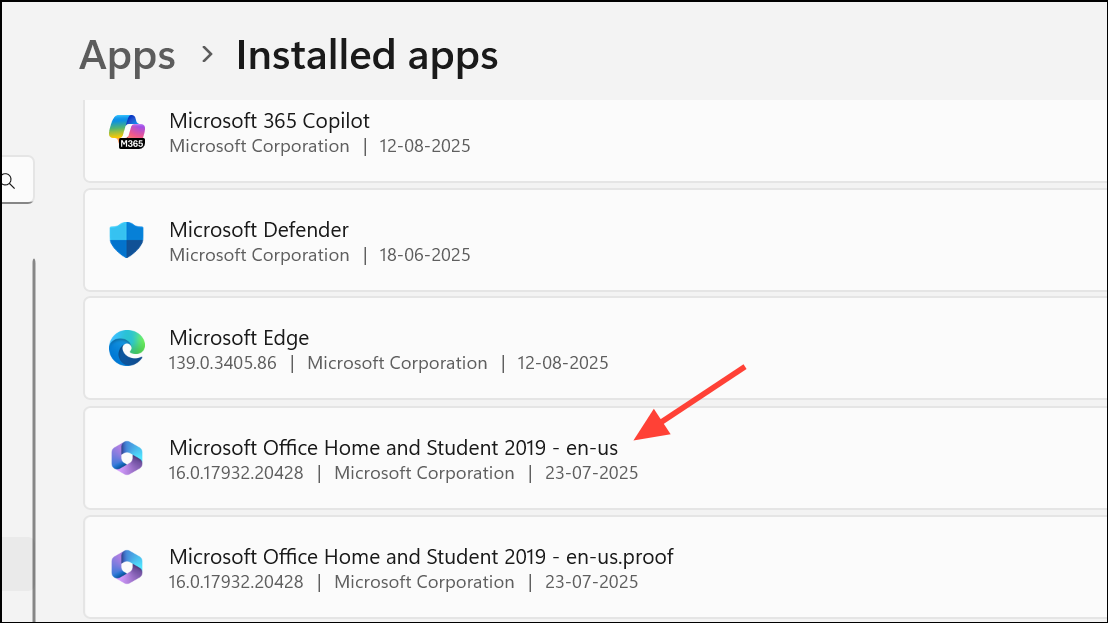
Step 2: Click "Modify" and choose "Quick Repair." If issues persist, repeat and select "Online Repair" (requires internet access).
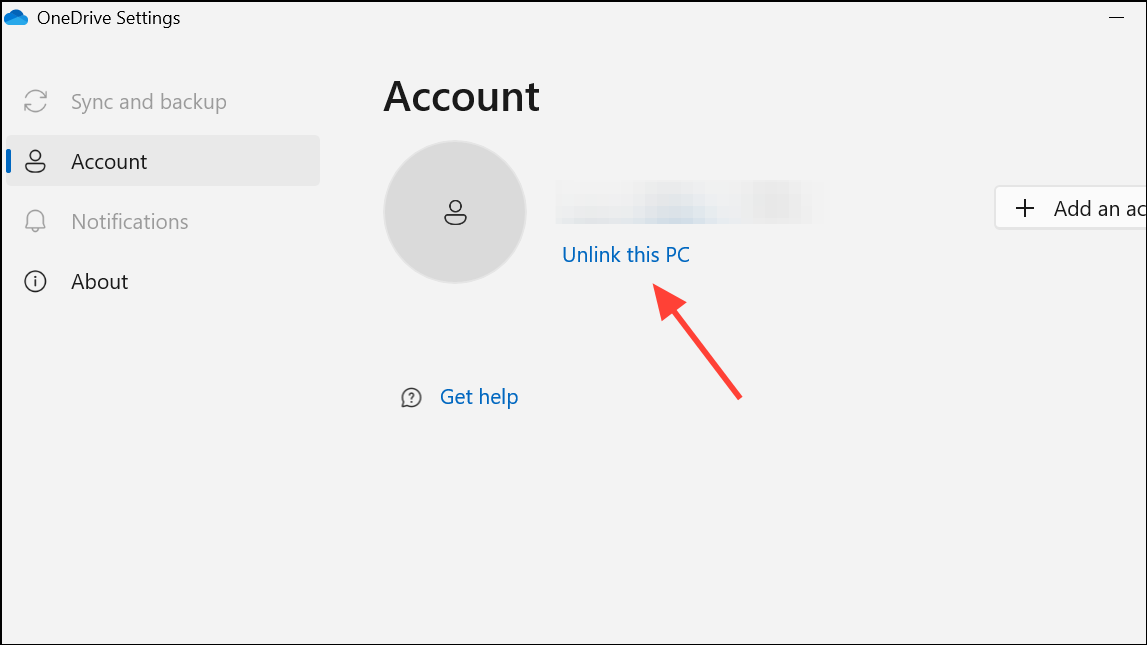
Step 3: If OneDrive sync remains problematic, right-click the OneDrive icon in the system tray, select Settings > Account > Unlink this PC. Follow prompts to re-link your account and reconfigure sync folders as needed.
Repairing Office and OneDrive can resolve hidden glitches that interfere with save locations or cloud connectivity.
Advanced: Disable OneDrive Integration via Group Policy or Registry (Windows Pro/Enterprise)
For system administrators or advanced users needing to disable OneDrive integration across a device:
Step 1: Press Windows + R, type gpedit.msc, and press Enter. Navigate to Computer Configuration > Administrative Templates > OneDrive.
Step 2: Double-click "Prevent the usage of OneDrive for file storage," set to "Enabled," and apply changes. Restart your computer.
Step 3: For Windows Home, use Registry Editor (regedit) to set DisableOneDriveFileSync to 1 at HKEY_CURRENT_USER\Software\Microsoft\Office\16.0\Common\General.
This approach blocks OneDrive as a save option and is useful in managed environments or when OneDrive is not wanted at all.
Tips for Troubleshooting Persistent Issues
- Use
F12in any Office app to open the classic Save As dialog, which lets you pick any folder, bypassing OneDrive defaults. - If Office apps still prompt for OneDrive after settings changes, sign out of your Microsoft account in
File > Accountand restart the app. - To prevent OneDrive from backing up Desktop, Documents, or Pictures, right-click the OneDrive icon, go to "Settings" > "Sync and backup" > "Manage backup," and turn off unwanted folders.
- If you use SharePoint, consider using "Add shortcut to OneDrive" instead of sync, as this method integrates better with Office apps and avoids local-only saving.
Resolving the "Saved to this PC" issue in OneDrive and SharePoint streamlines file management and restores full cloud features, including AutoSave and collaboration. Adjusting Office and OneDrive settings usually fixes the problem, but advanced methods are available if standard fixes don't work.
Once you confirm your files open with cloud connectivity and AutoSave enabled, you'll spend less time troubleshooting and more time working productively.