The PAGE_FAULT_IN_NONPAGED_AREA error is a common Blue Screen of Death (BSOD) issue on Windows 10 and 11 systems. It typically indicates a problem with memory management, often related to faulty drivers, memory modules, corrupted system files, or disk errors. If your PC frequently crashes and displays this error message, try the following solutions to resolve the problem.
Update Device Drivers
Outdated, incompatible, or corrupted drivers are often the main cause of the PAGE_FAULT_IN_NONPAGED_AREA error. Updating your drivers can fix this issue effectively.
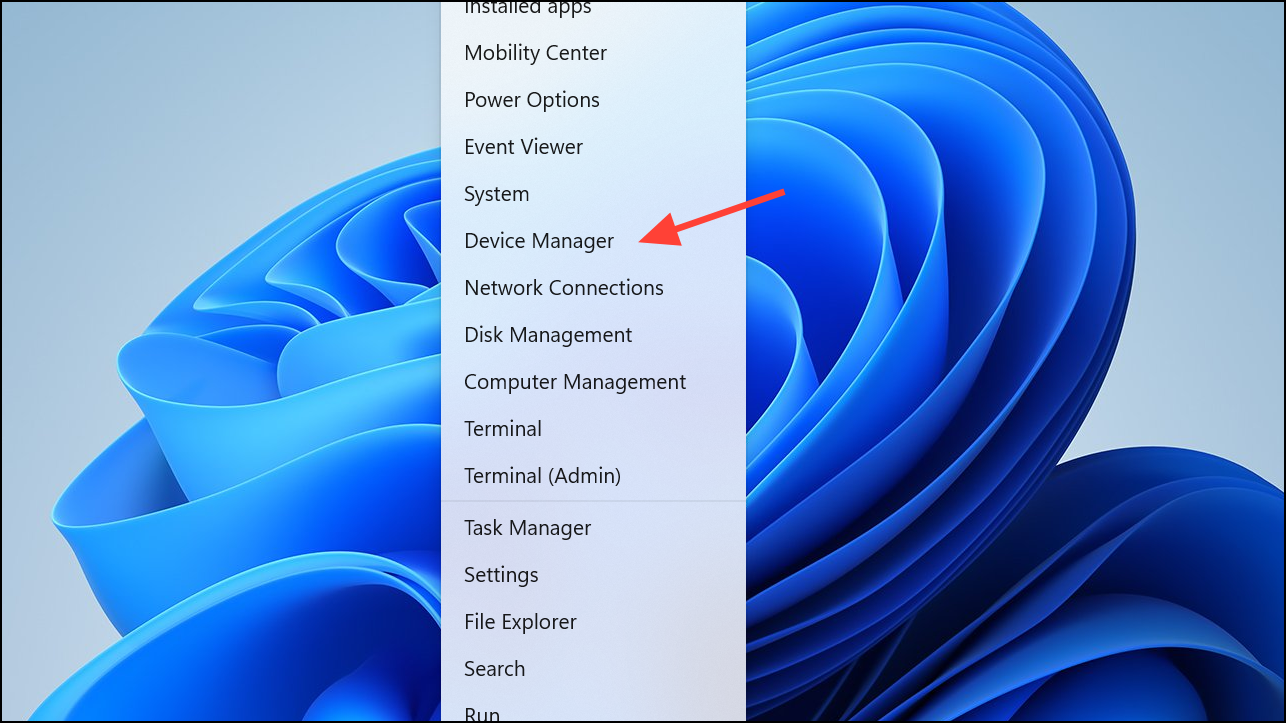
Step 1: Right-click the Start button and select "Device Manager" from the Quick Links menu.
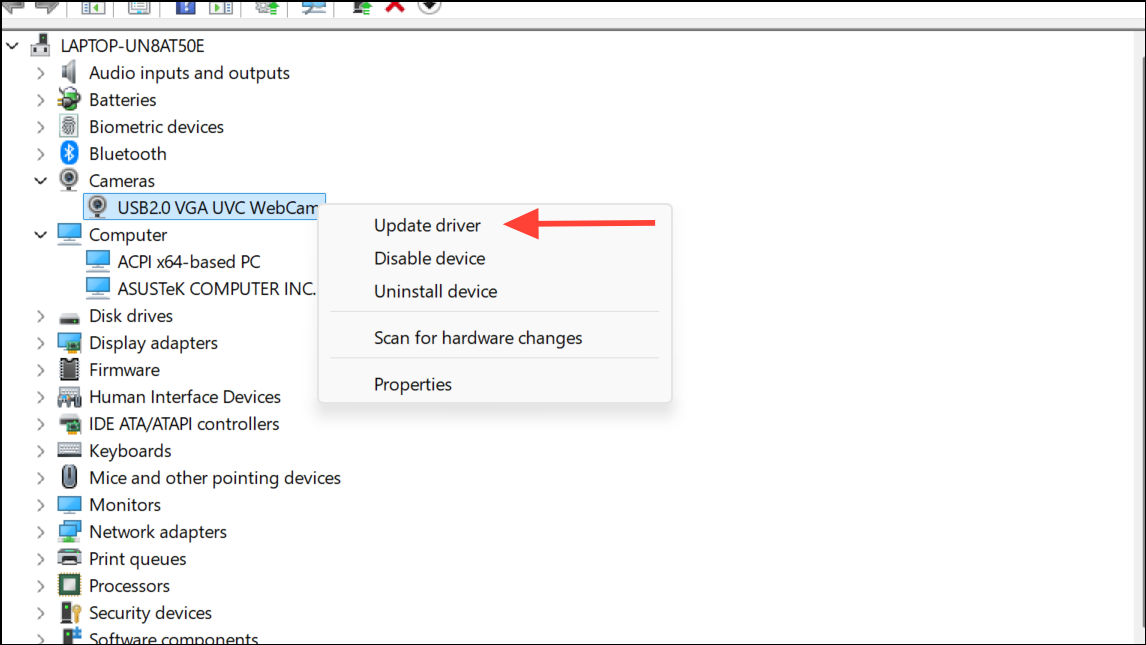
Step 2: Within Device Manager, look for devices marked with a yellow exclamation mark, indicating problematic drivers. Right-click each problematic driver and select "Update driver."
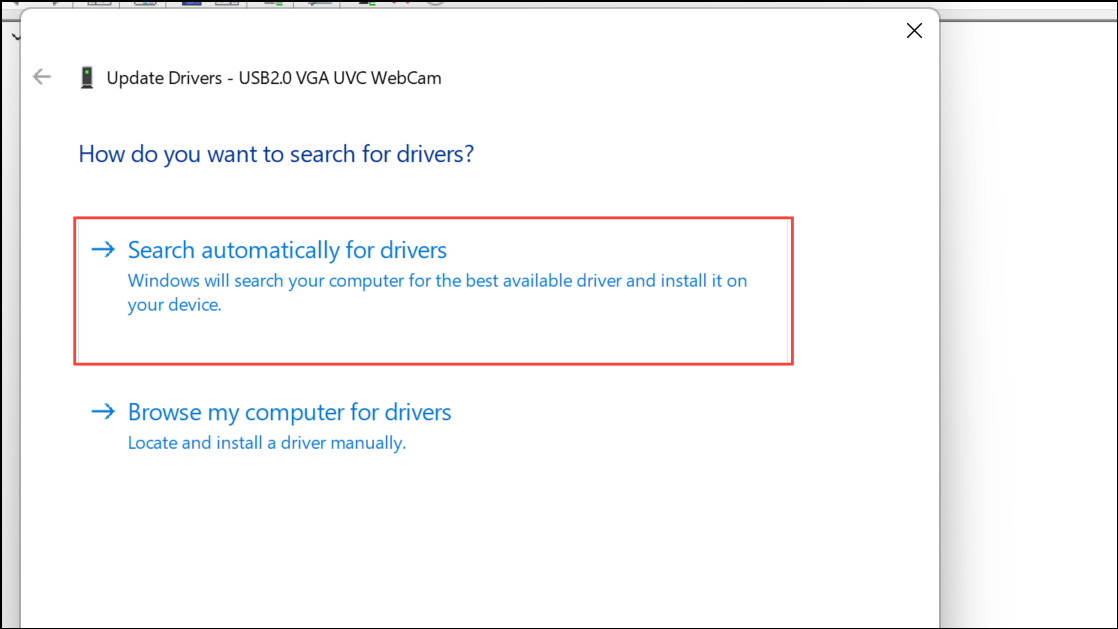
Step 3: Choose "Search automatically for drivers." Windows will search online and install the latest compatible drivers.
Step 4: After completing these steps, restart your computer and check if the issue persists.
Check for Faulty RAM
Faulty RAM modules can cause the PAGE_FAULT_IN_NONPAGED_AREA error. Windows includes a built-in tool called Windows Memory Diagnostic to test for memory issues.
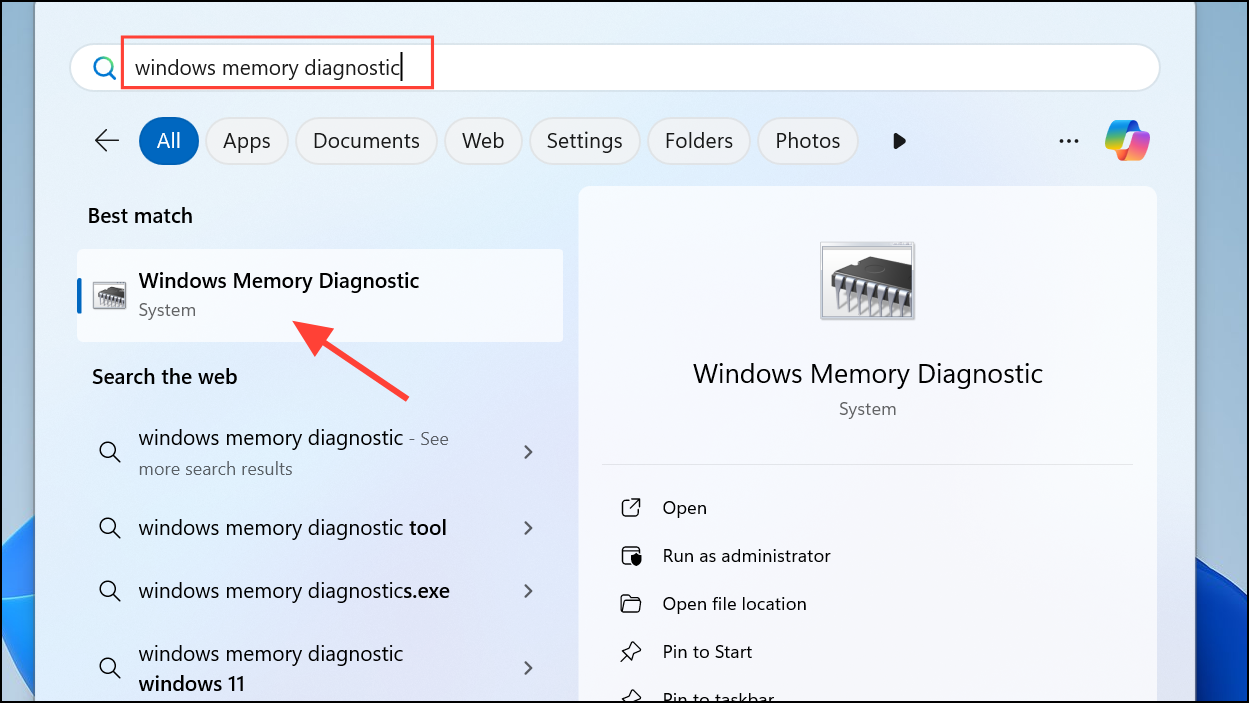
Step 1: Press Windows + S, type "Windows Memory Diagnostic," and open the tool.
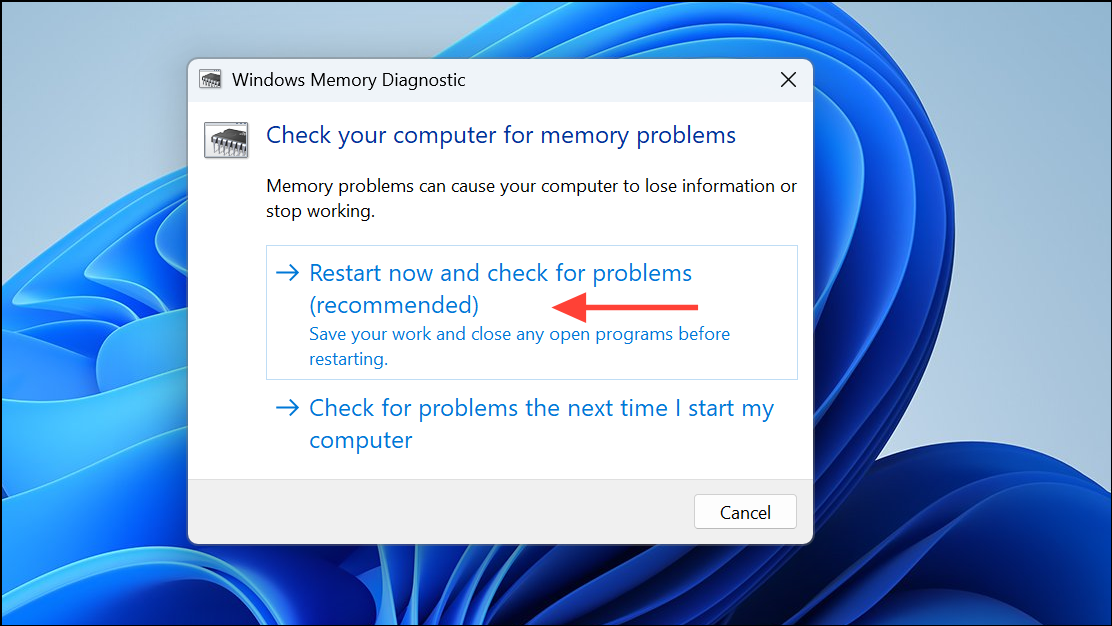
Step 2: Select "Restart now and check for problems." Windows will reboot and run a thorough memory test.
If the diagnostic tool detects issues, consider replacing your RAM module. Ensure you purchase compatible RAM for your PC or laptop model.
Disable Automatic Paging File Management
Windows automatically manages virtual memory (paging file), but sometimes this can lead to memory-related errors. Manually adjusting the paging file settings can resolve the PAGE_FAULT_IN_NONPAGED_AREA issue.
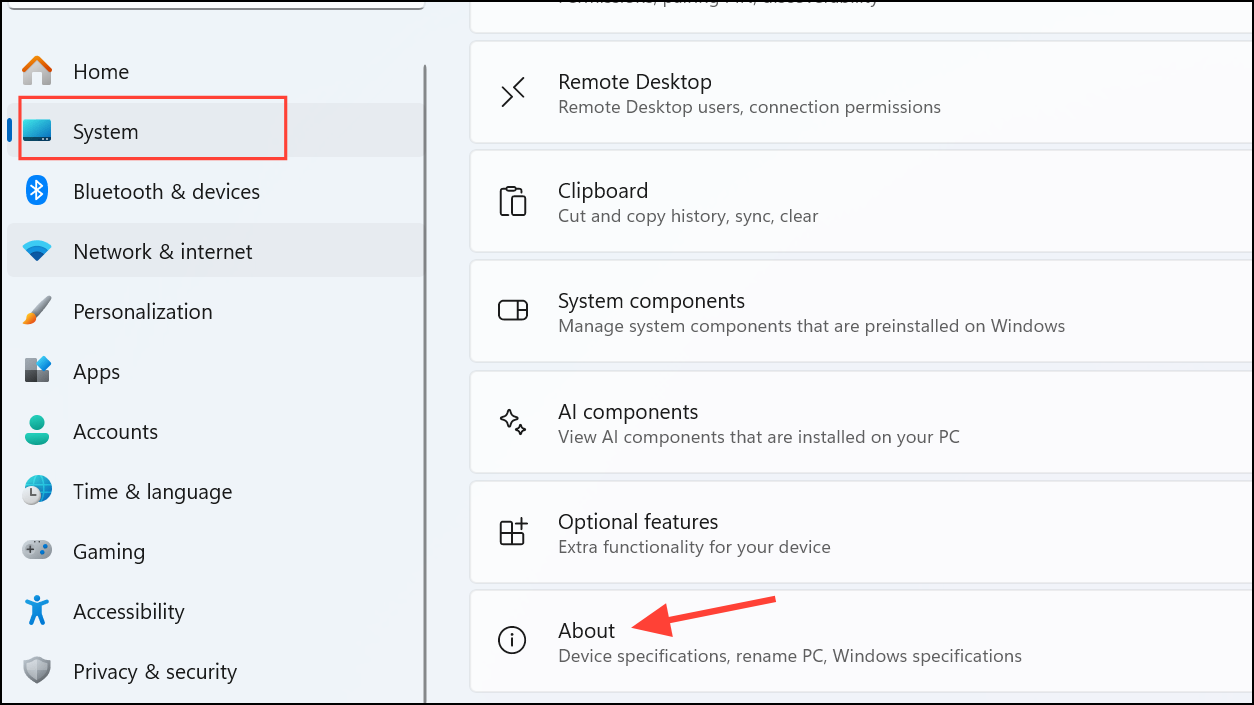
Step 1: Press Windows + I to open Settings, navigate to "System," and click "About."
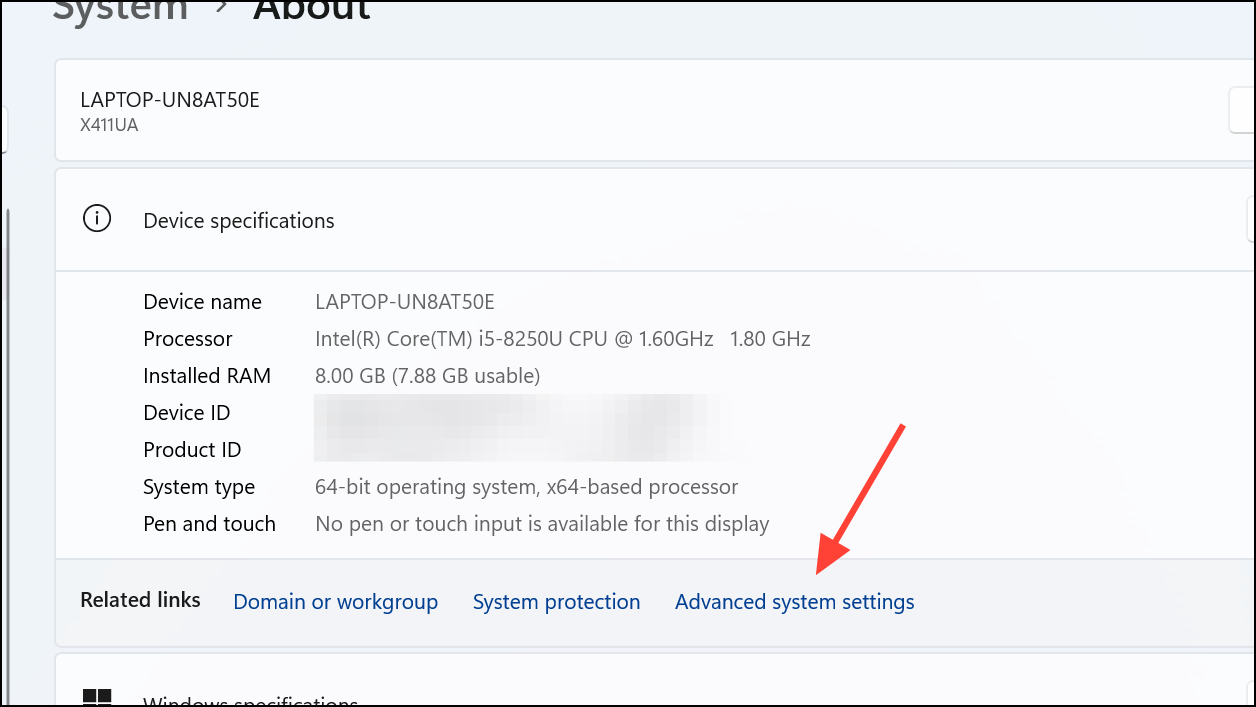
Step 2: Click "Advanced system settings" under the Related links section.
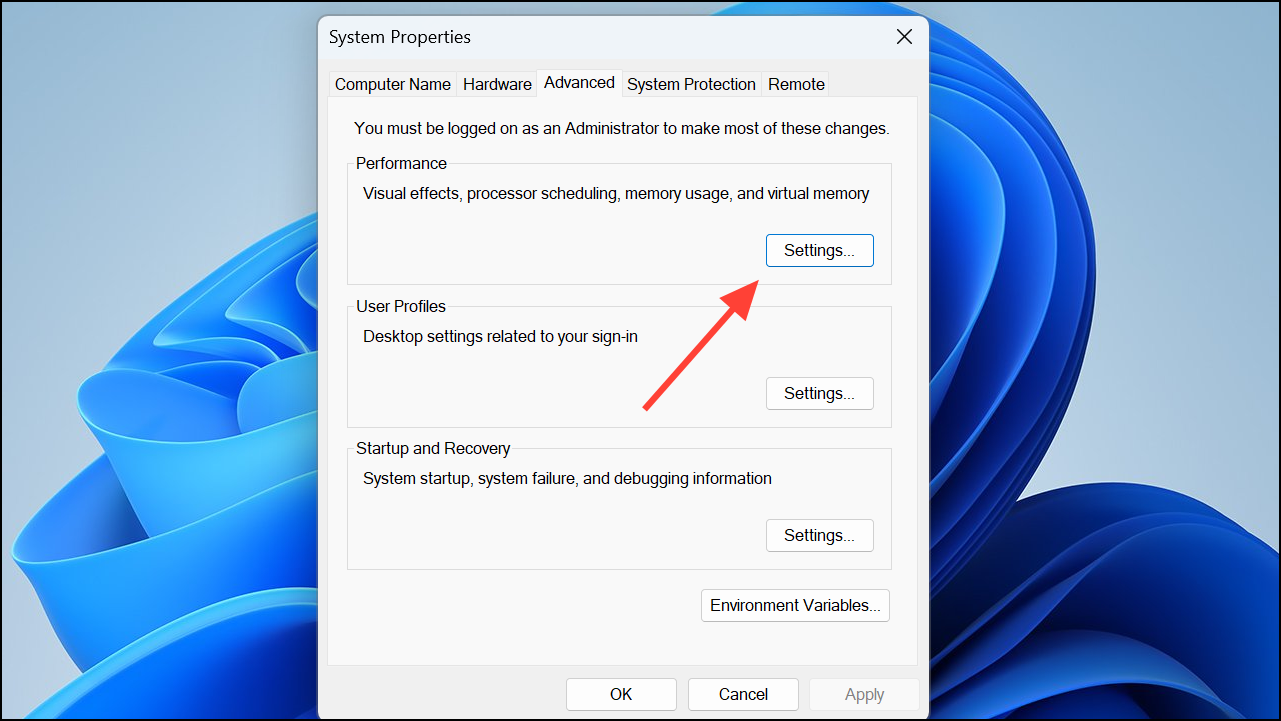
Step 3: In the System Properties window, click the "Settings" button under the Performance section.
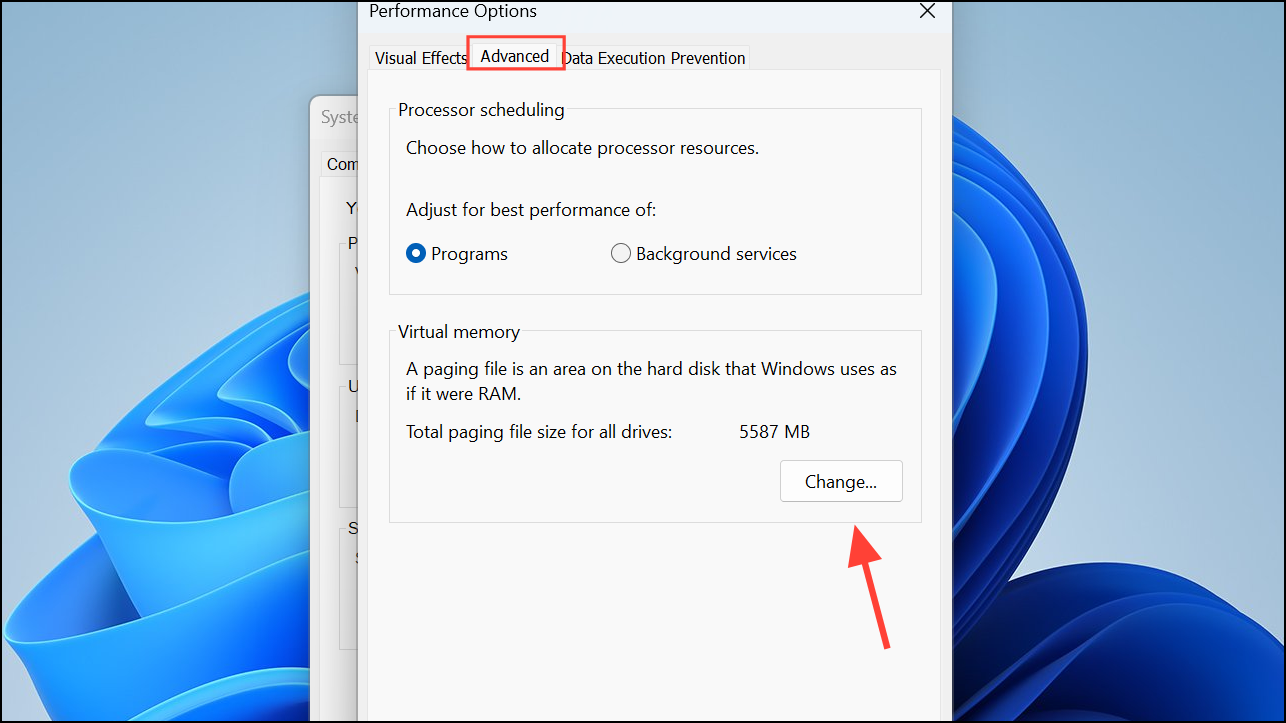
Step 4: Switch to the "Advanced" tab and click "Change" under the Virtual memory section.
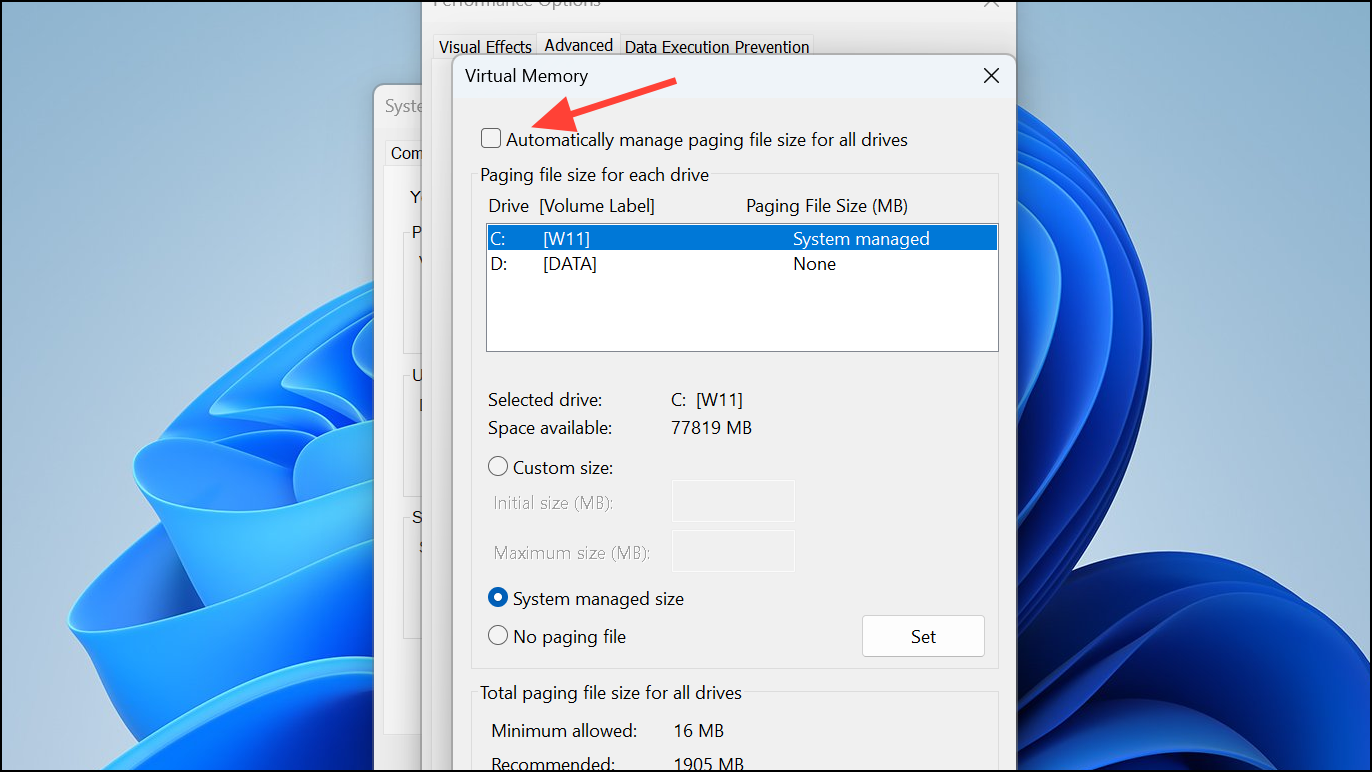
Step 5: Uncheck the "Automatically manage paging file size for all drives" option and click "OK."
Step 6: Restart your PC to apply the changes and verify if the error is resolved.
Check For Disk Errors and Bad Sectors
Disk errors and bad sectors on your hard drive or SSD can trigger the PAGE_FAULT_IN_NONPAGED_AREA error. Windows includes a built-in tool called Check Disk to identify and fix these issues.
Step 1: Press Windows + S, type "Command Prompt," and open it as administrator.

Step 2: Type the following command and press Enter:
chkdsk C: /f /x /r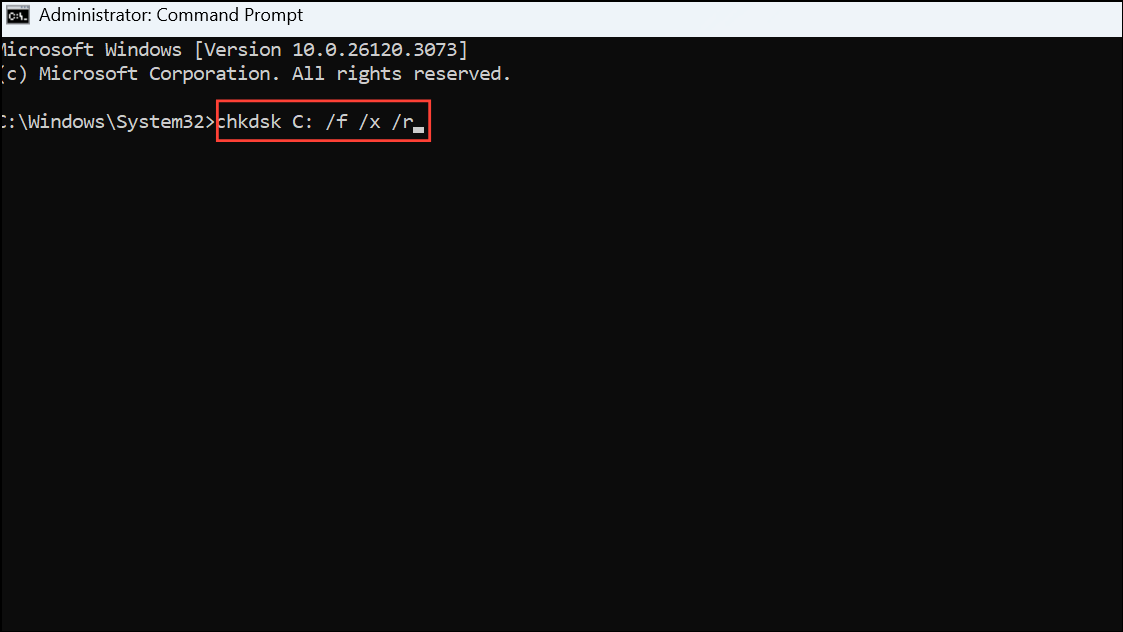
Allow the tool to complete its operation. This command checks your drive for errors, repairs logical issues, and marks bad sectors.
Run an SFC Scan to Fix Corrupted Files
Corrupted system files can also cause the PAGE_FAULT_IN_NONPAGED_AREA error. The System File Checker (SFC) tool scans and repairs these files.
Step 1: Open Command Prompt as administrator (as described earlier).

Step 2: Type the following command and press Enter:
sfc /scannow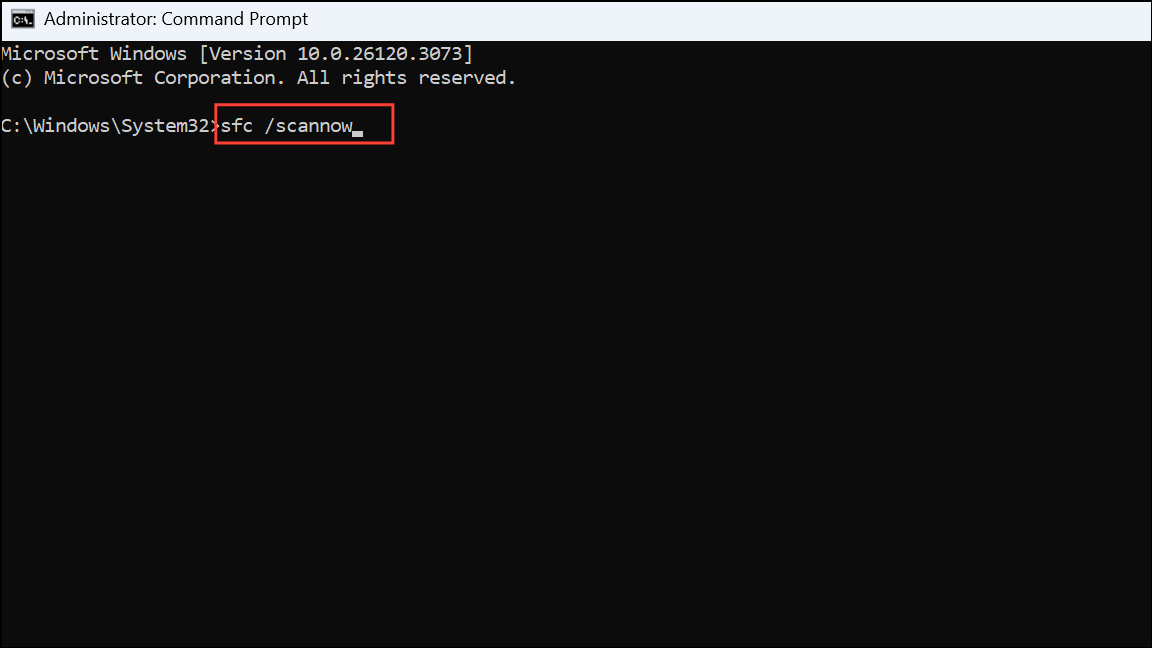
Step 3: SFC will scan your system for corrupted or missing files and automatically repair them. After completion, restart your PC.
Keep Only One Antivirus Software Active
Running multiple antivirus programs simultaneously can cause conflicts and result in memory errors. Ensure only one reliable antivirus software is active on your system.
Step 1: Press Windows + I to open Settings, navigate to "Privacy & Security," and click "Windows Security."
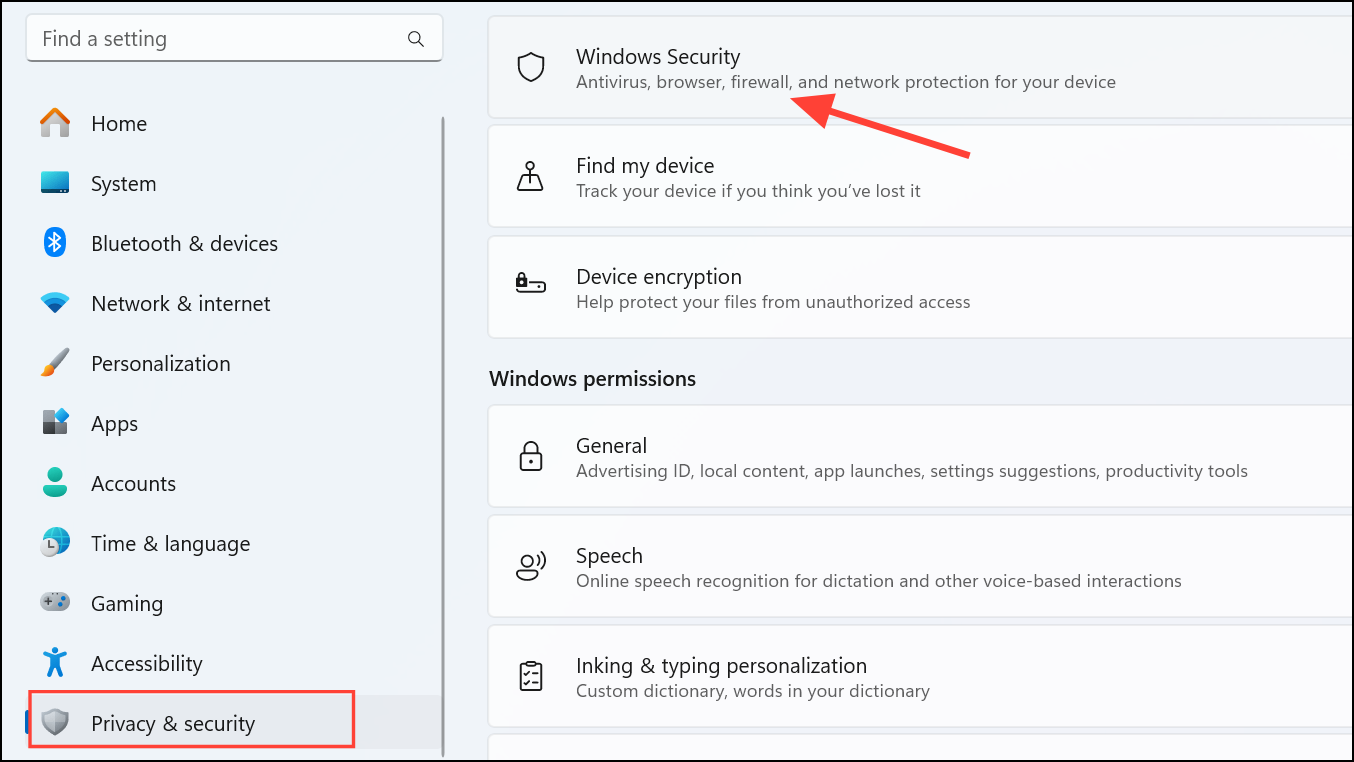
Step 2: Click "Open Windows Security," then select "Virus & threat protection."
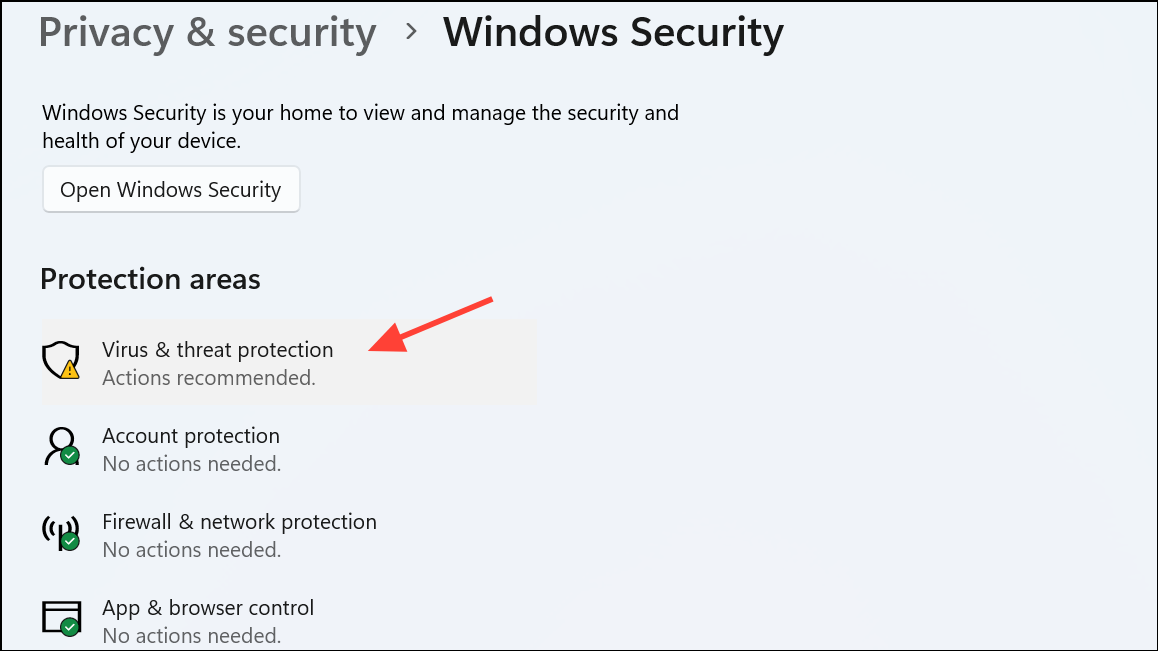
Step 3: Click "Manage settings" and toggle off "Real-time protection" if you have another antivirus program installed and running.
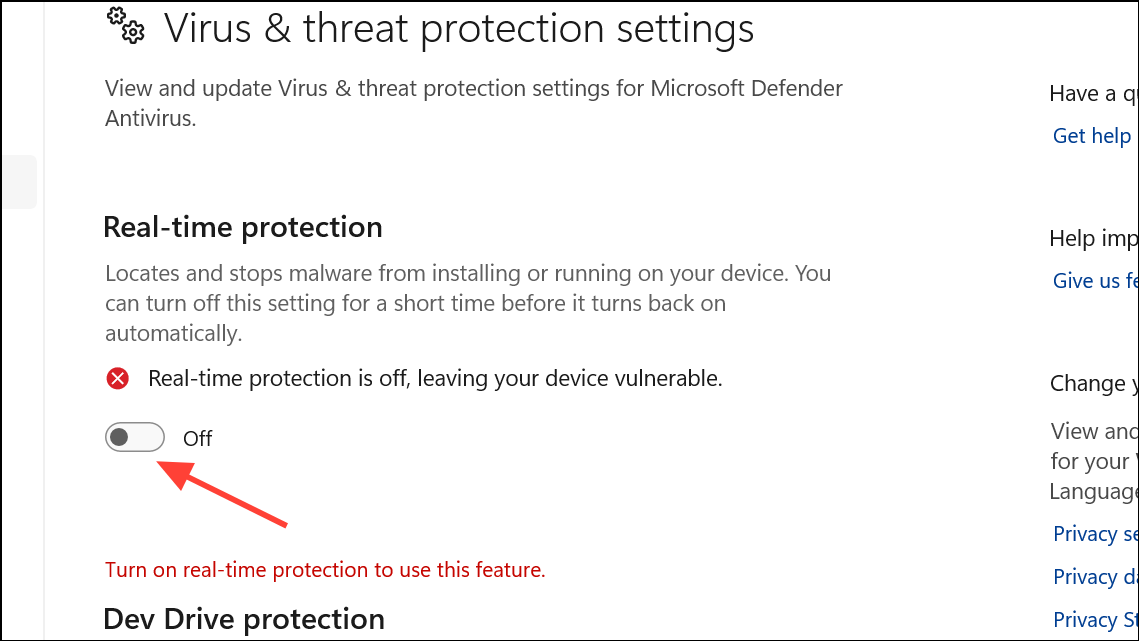
Make sure you have only one antivirus actively protecting your system to avoid conflicts.
By following these solutions, you can effectively troubleshoot and resolve the PAGE_FAULT_IN_NONPAGED_AREA error on your Windows PC. If the issue persists after these steps, consider performing a clean installation of Windows as a last resort.

