The PNP_Detected_Fatal_Error is a Blue Screen of Death (BSOD) issue that occurs when Windows encounters problems related to Plug and Play (PNP) devices. Typically, corrupted drivers, faulty hardware, or problematic Windows updates trigger this error, preventing your system from booting correctly.
To resolve this issue, follow these troubleshooting methods, starting with the most effective solutions.
Method 1: Run System Restore
Step 1: First, trigger the Advanced Startup Options by turning your computer on and off three times in a row. Turn on your computer, wait for the Windows logo, then immediately switch it off by holding the power button. Repeat this process three times until you enter the recovery environment.
Step 2: Once in the recovery environment, select "Troubleshoot" > "Advanced Options" > "System Restore."
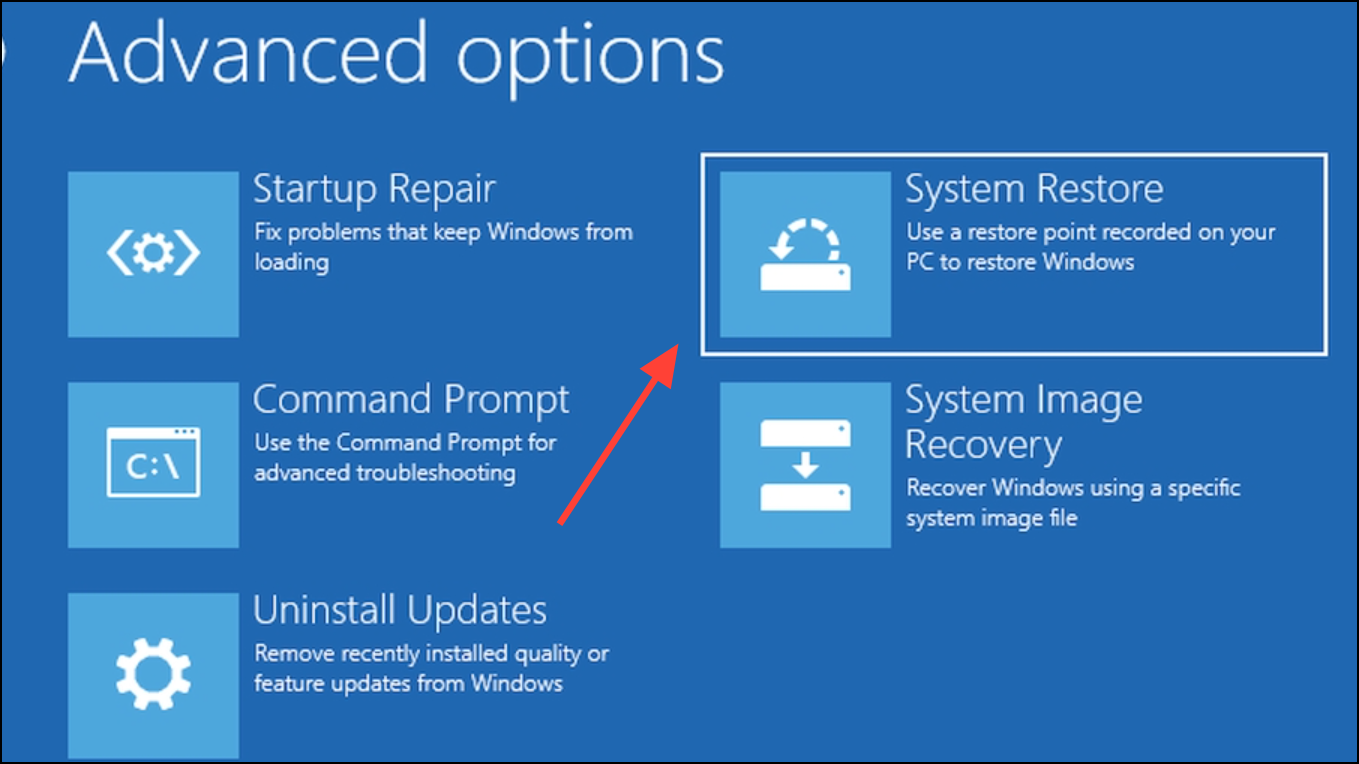
Step 3: After your computer restarts, click "Next" to proceed and select a restore point from the list. Choose a date before the error started occurring, then click "Next" again.
Step 4: Confirm your selection by clicking "Finish." Your system will restore to the selected point and reboot automatically.
Method 2: Boot Windows in Safe Mode and Remove Recent Updates
Step 1: Enter the Advanced Startup Options as described in Method 1, then select "Troubleshoot" > "Advanced Options" > "Startup Settings" and click "Restart."
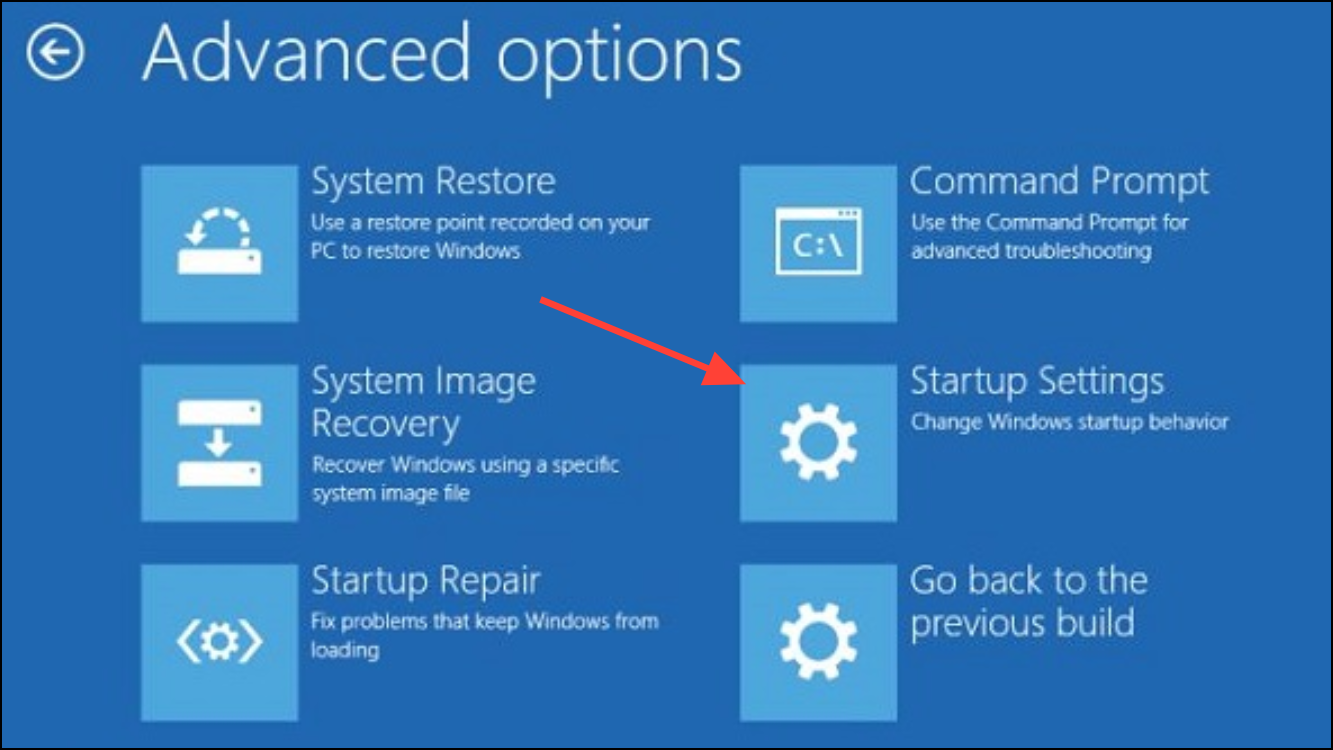
Step 2: After reboot, press F5 to enter Safe Mode.
Step 3: In Safe Mode, open Control Panel by typing it in the search bar. Navigate to "Programs" > "Programs and Features."
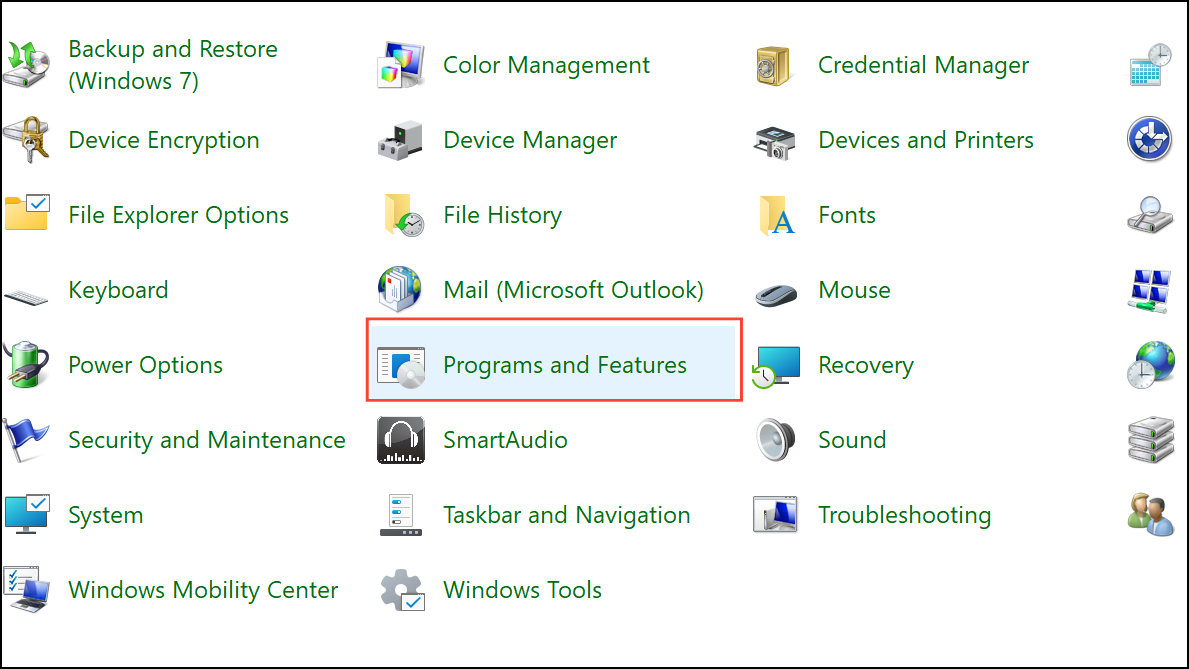
Step 4: Then click "View Installed Updates" on the next page.
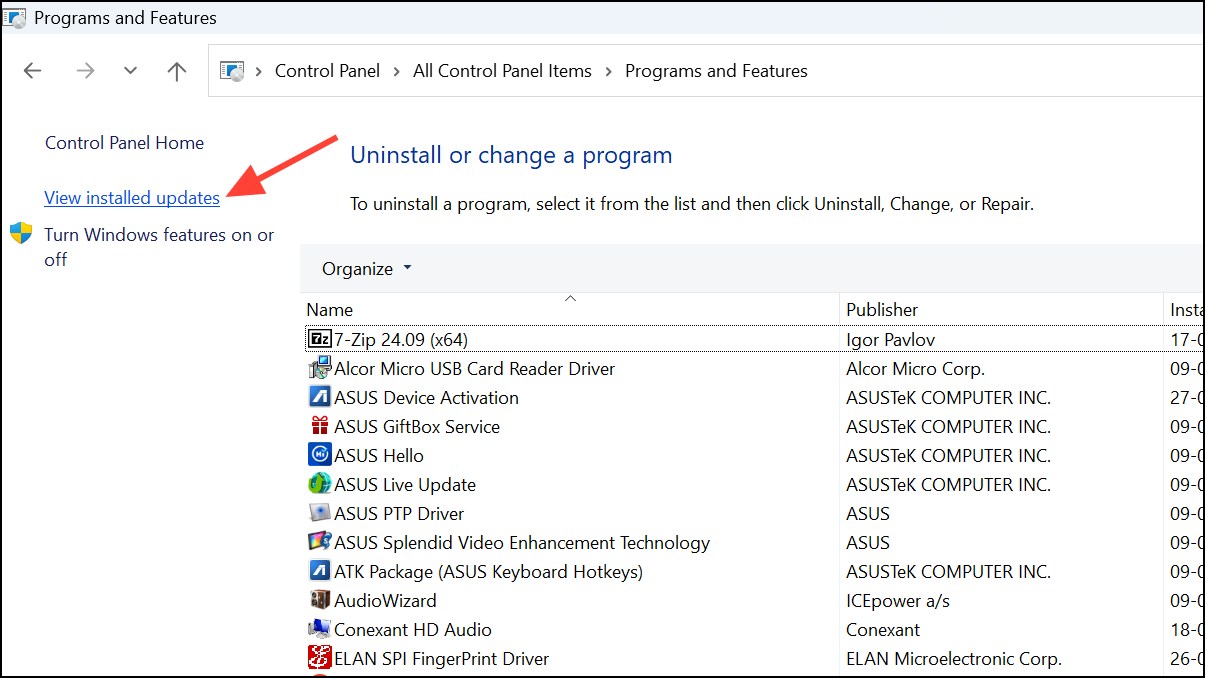
Step 5: Uninstall the most recent Windows updates by selecting them and clicking "Uninstall." Restart your computer afterward to check if the issue is resolved.
Method 3: Perform a Clean Boot
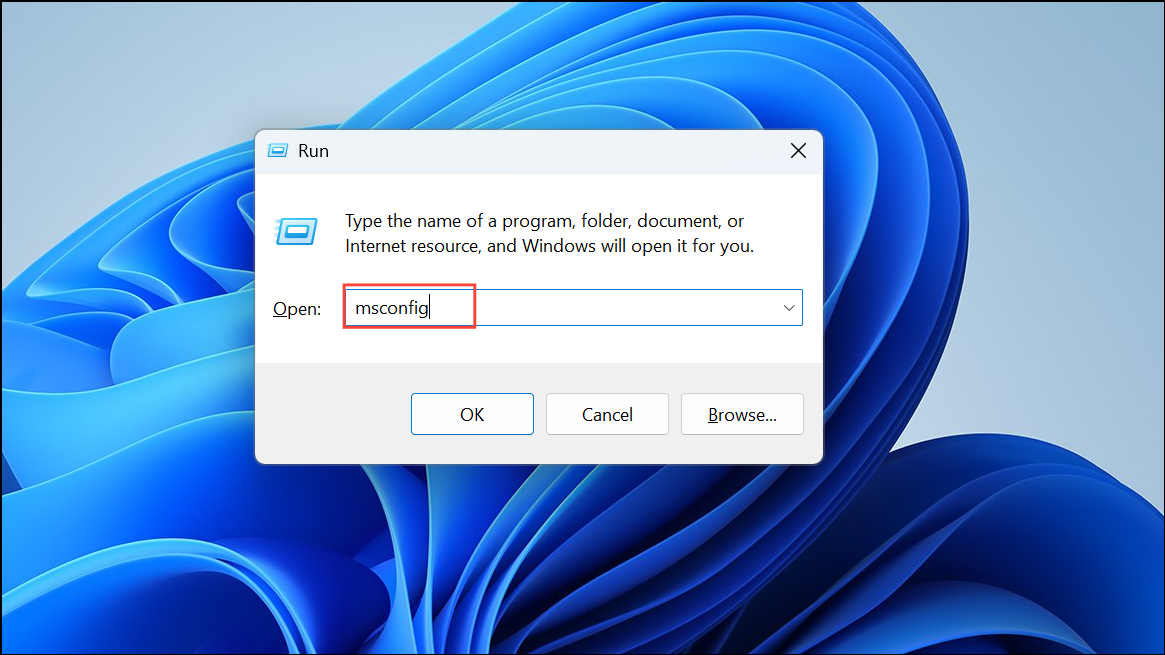
Step 1: Press Windows Key + R, type msconfig, and press Enter to open System Configuration.
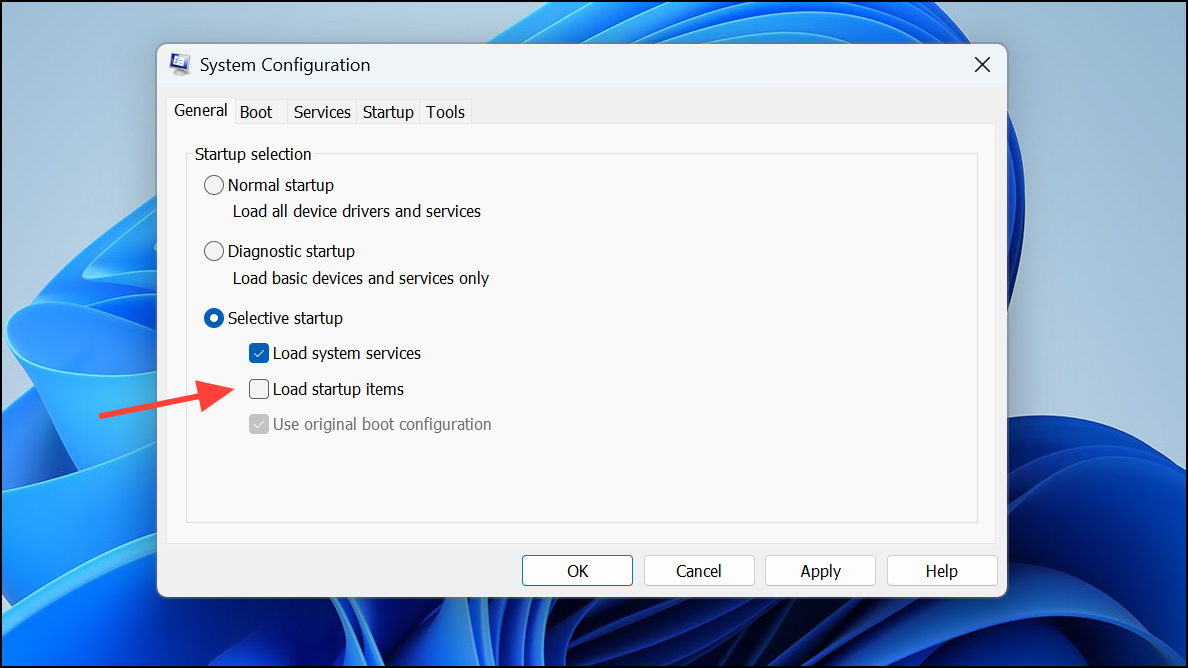
Step 2: Under the "General" tab, select "Selective Startup" and uncheck "Load startup items."
Step 3: Go to the "Services" tab, check "Hide all Microsoft services," then click "Disable all."
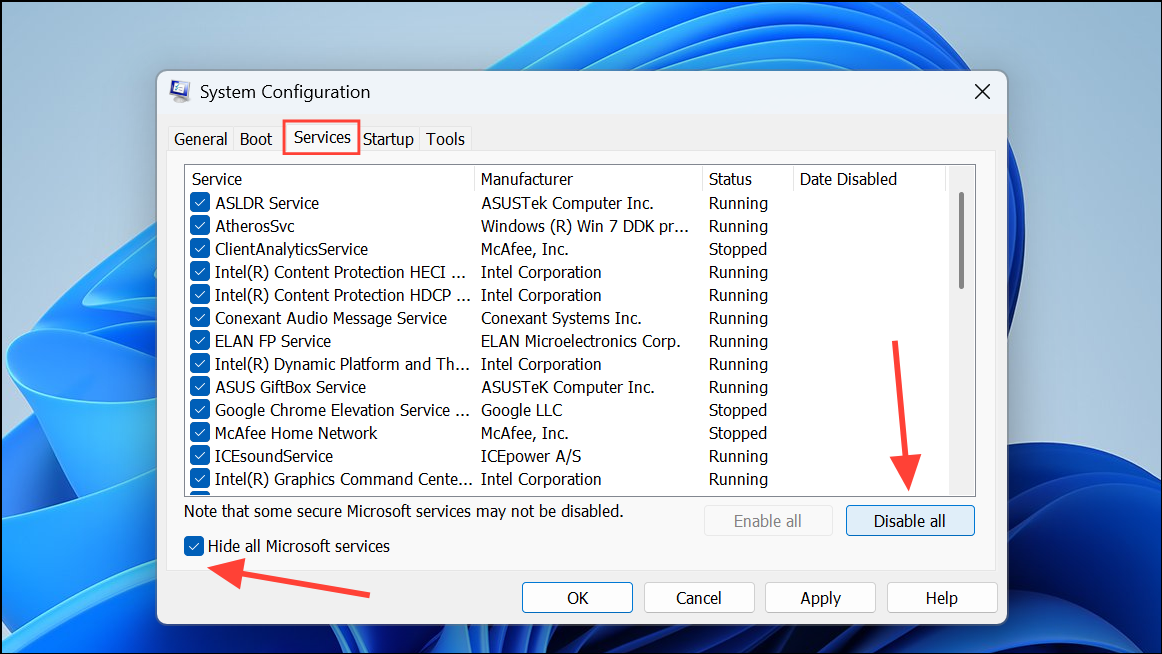
Step 4: Click "Apply" and "OK," then restart your computer. This helps identify if third-party software is causing the problem.
Method 4: Run Startup Repair
Step 1: Access Advanced Startup Options as described above and select "Troubleshoot" > "Advanced Options" > "Startup Repair."
Step 2: Wait for Windows to diagnose and fix startup issues automatically. Once complete, restart your system to verify if the error is resolved.
Method 5: Run CHKDSK Utility
Step 1: In Advanced Options, select "Troubleshoot" > "Advanced Options" > "Command Prompt."
Step 2: Type the command below and press Enter:
chkdsk C: /F /X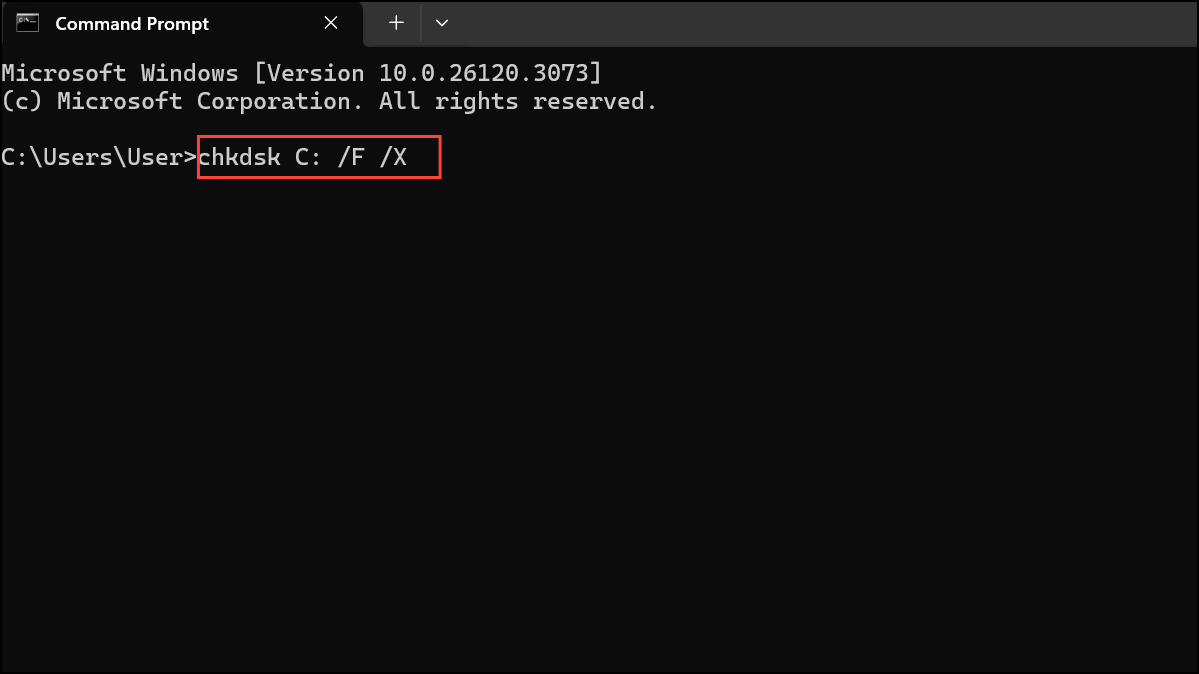
Step 3: Allow the scan to complete, then restart your system to see if the issue persists.
Method 6: Run SFC and DISM Commands
Step 1: Open Command Prompt from Advanced Options as described above.
Step 2: Execute the following commands sequentially, pressing Enter after each:
DISM /Online /Cleanup-Image /RestoreHealth
sfc /scannow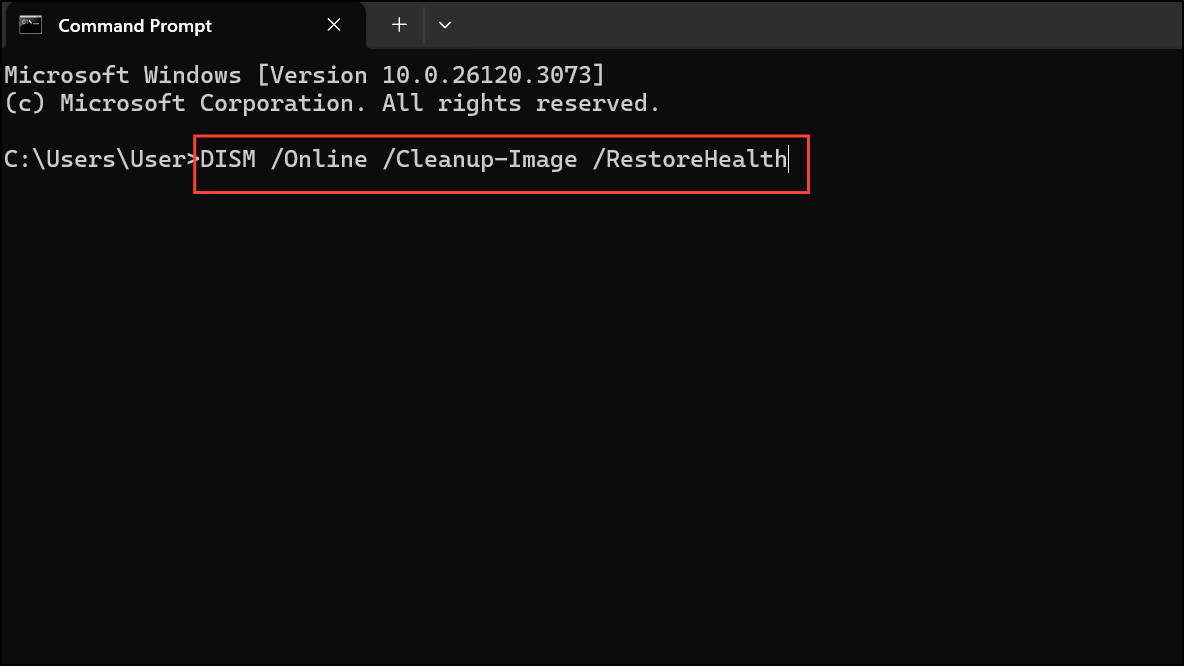
Step 3: Wait for the scans to finish, then reboot your computer.
Method 7: Reinstall Graphics Drivers
Step 1: Boot into Safe Mode as described in Method 2. Download and run Display Driver Uninstaller (DDU) from its official website.
Step 2: Launch DDU, select your GPU vendor and click "Clean and Restart."
Step 3: After rebooting, visit your GPU manufacturer's website (NVIDIA, AMD, or Intel), download the latest driver for your GPU, and install it.
Step 4: Restart your computer and verify if the issue is resolved.
If the above methods fail, consider checking your hardware components, such as RAM or storage drives, as faulty hardware can cause persistent BSOD errors. Regularly updating your drivers and keeping Windows updated can prevent similar issues in the future.

