
Public Wi-Fi networks often require users to sign in through a browser-based login page, known as a captive portal. On Windows 11, this process can break down: the system connects to the network, but the expected splash screen never loads, leaving you unable to browse. This issue typically results from DNS configuration, browser settings, or network adapter problems. Below you’ll find step-by-step solutions to restore access and reliably trigger the login page.
Turn Off Third-Party DNS Servers
Custom DNS settings, such as Google DNS (8.8.8.8) or Cloudflare (1.1.1.1), can prevent public Wi-Fi networks from redirecting you to their login page. Many captive portals rely on their own DNS to intercept your first web request. Switching back to automatic DNS assignment allows the portal to function as intended.
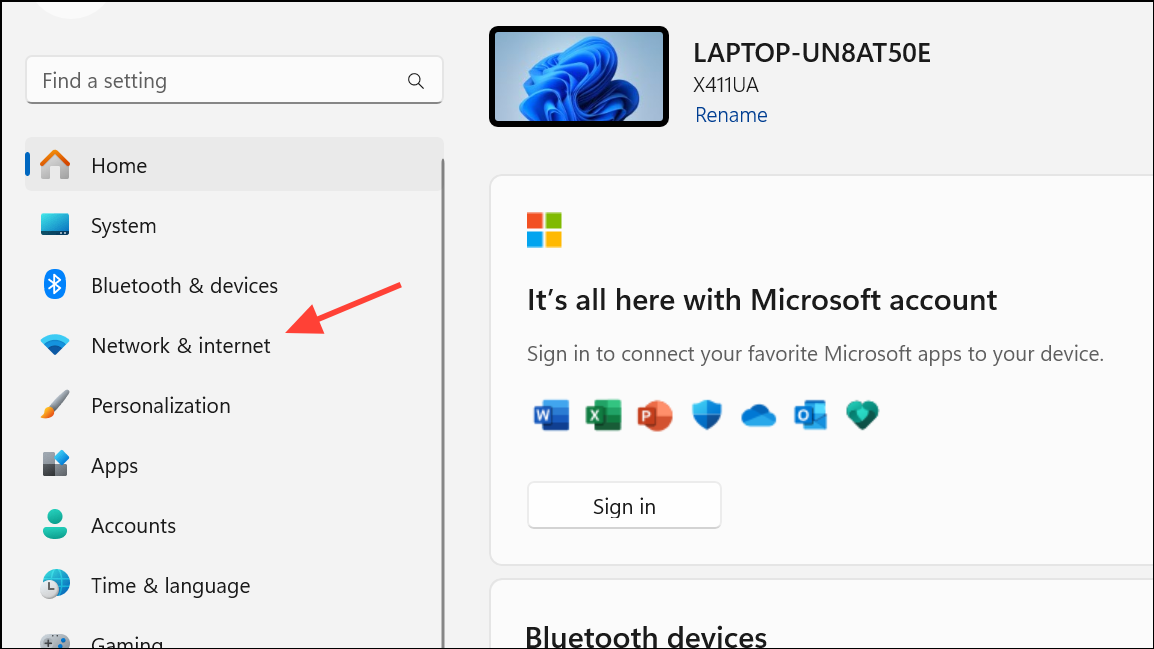
Step 1: Open Settings and select Network & Internet from the sidebar.
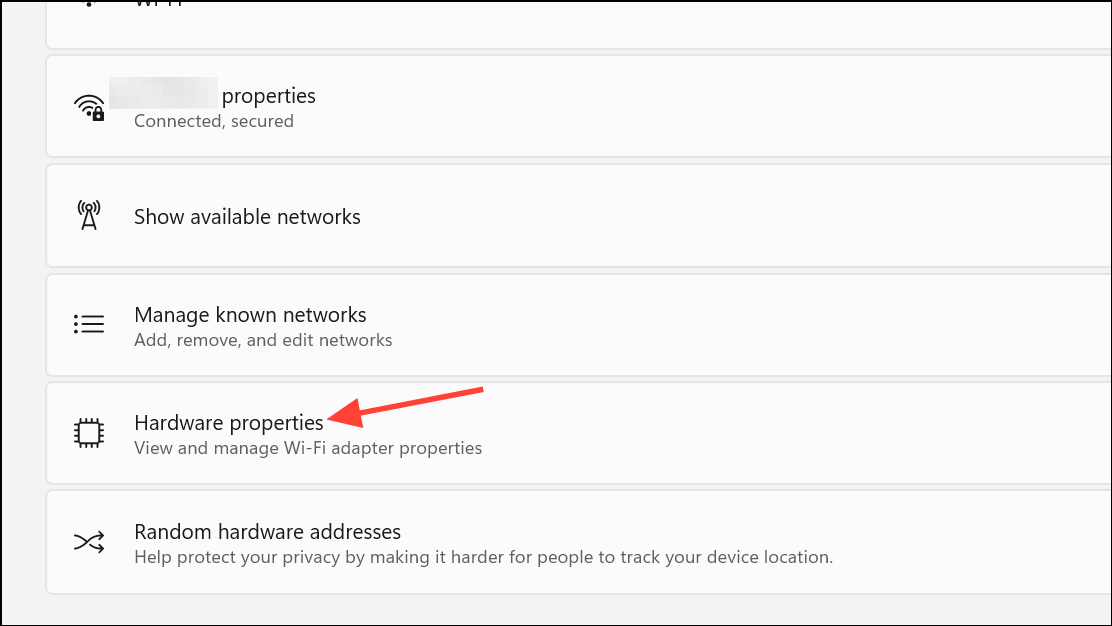
Step 2: Click Wi-Fi, then select Hardware properties.
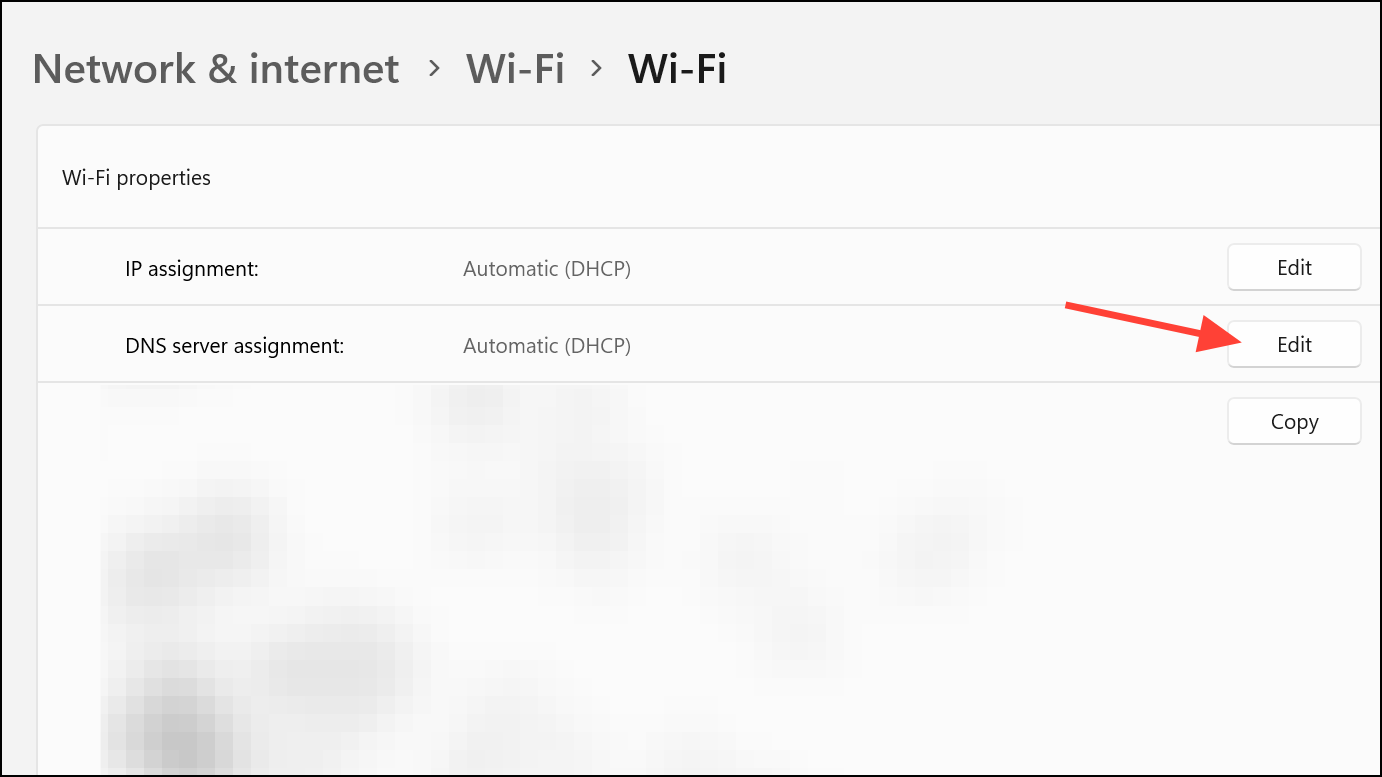
Step 3: Next to DNS server assignment, click Edit.
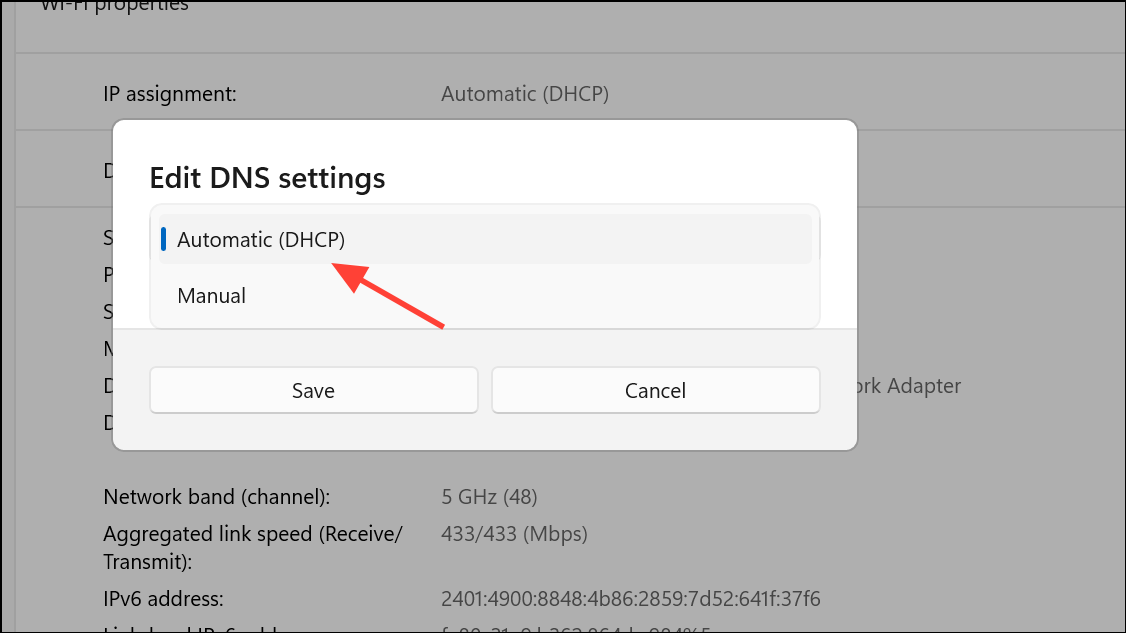
Step 4: Change the setting from Manual to Automatic (DHCP) and click Save.
Step 5: Disconnect from the Wi-Fi network and reconnect. The login page should now appear automatically.
Flush DNS Cache
Windows stores DNS records locally to speed up browsing. If the network’s DNS or IP has changed, your computer may use outdated information and fail to load the login portal. Flushing the DNS cache clears these records and forces Windows to request fresh data.
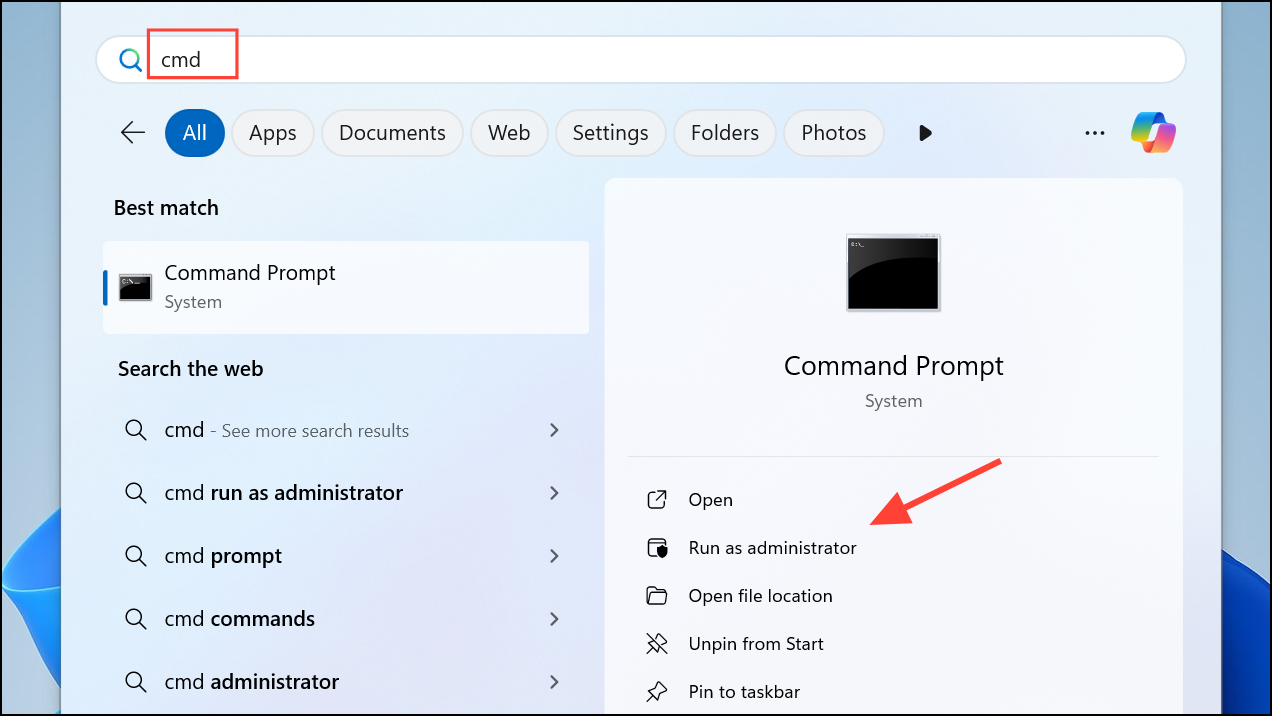
Step 1: Press Win + S, type cmd, right-click Command Prompt, and choose Run as administrator.
Step 2: Enter the following command and press Enter:
ipconfig /flushdns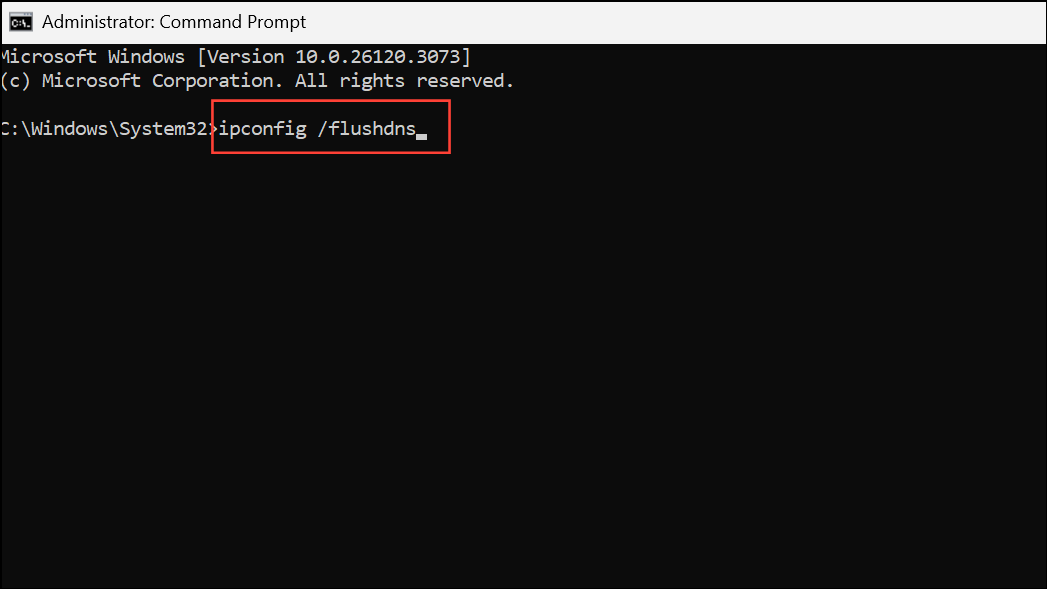
Step 3: Close Command Prompt, disconnect from Wi-Fi, reconnect, and try loading a non-HTTPS website such as example.com in your browser to trigger the login page.
Manually Open the Router’s Login Page
If automatic redirection fails, you can attempt to access the captive portal directly by entering the router’s IP address in your browser. Common addresses include:
http://192.168.1.1http://192.168.0.1http://10.0.0.1http://localhost
Step 1: Connect to the public Wi-Fi network.
Step 2: Open your browser and enter one of the above IP addresses in the address bar. If the login page appears, proceed to sign in.
Step 3: If these addresses do not work, find the router’s gateway address by opening Command Prompt and entering:
ipconfig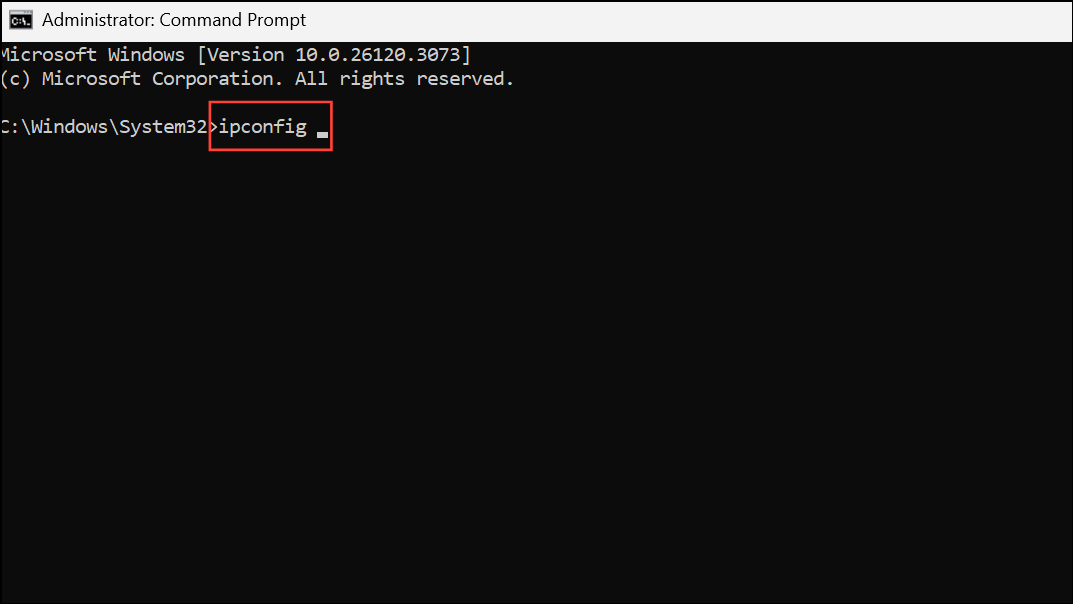
Look for Default Gateway under your Wi-Fi adapter, then enter that IP address in your browser.
Disable Pop-Up Blocking in Your Browser
Some captive portals open as pop-up windows. If your browser blocks pop-ups, the login screen might never appear. Temporarily allow pop-ups to ensure the page loads correctly.
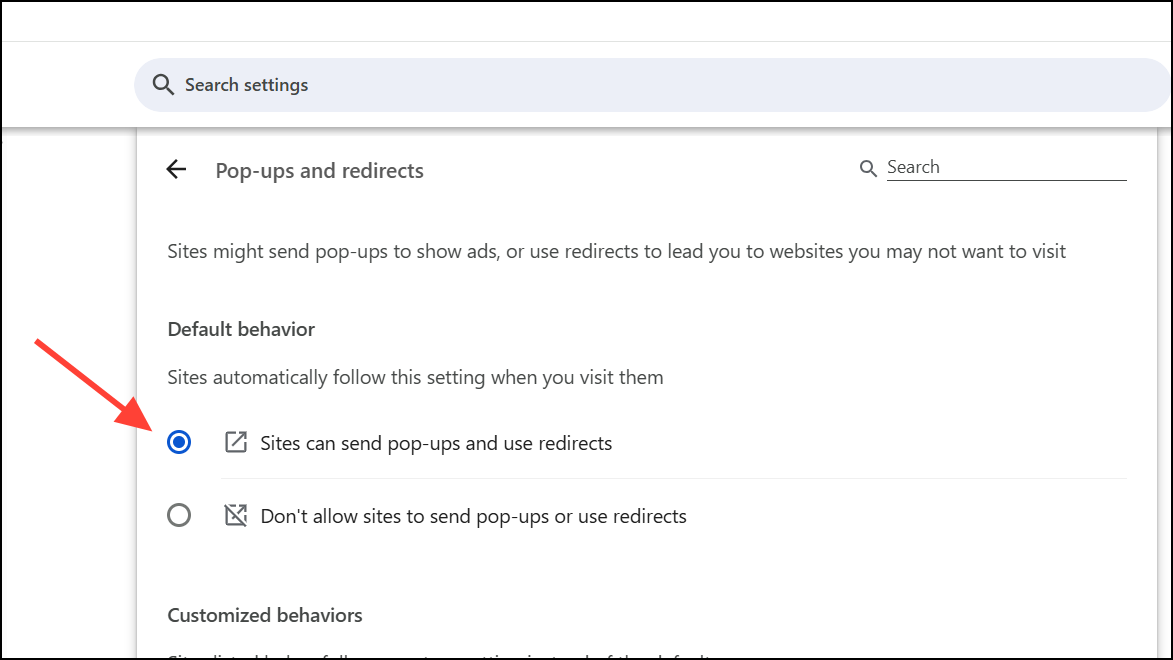
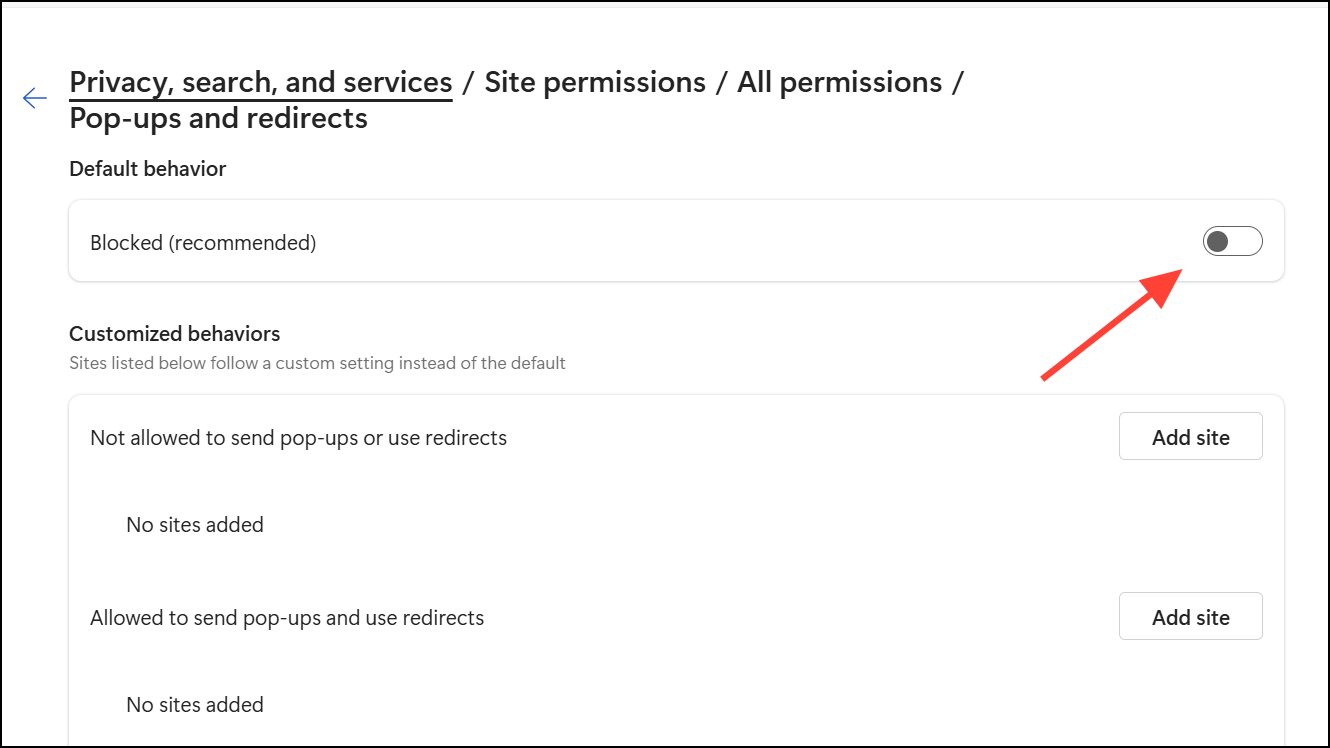
Step 1: For Chrome, go to Settings > Privacy and Security > Site Settings > Pop-ups and redirects, and set to Sites can send pop-ups and use redirects.
Step 2: For Edge, navigate to Settings > Cookies and site permissions > Pop-ups and redirects and toggle Block to Off.
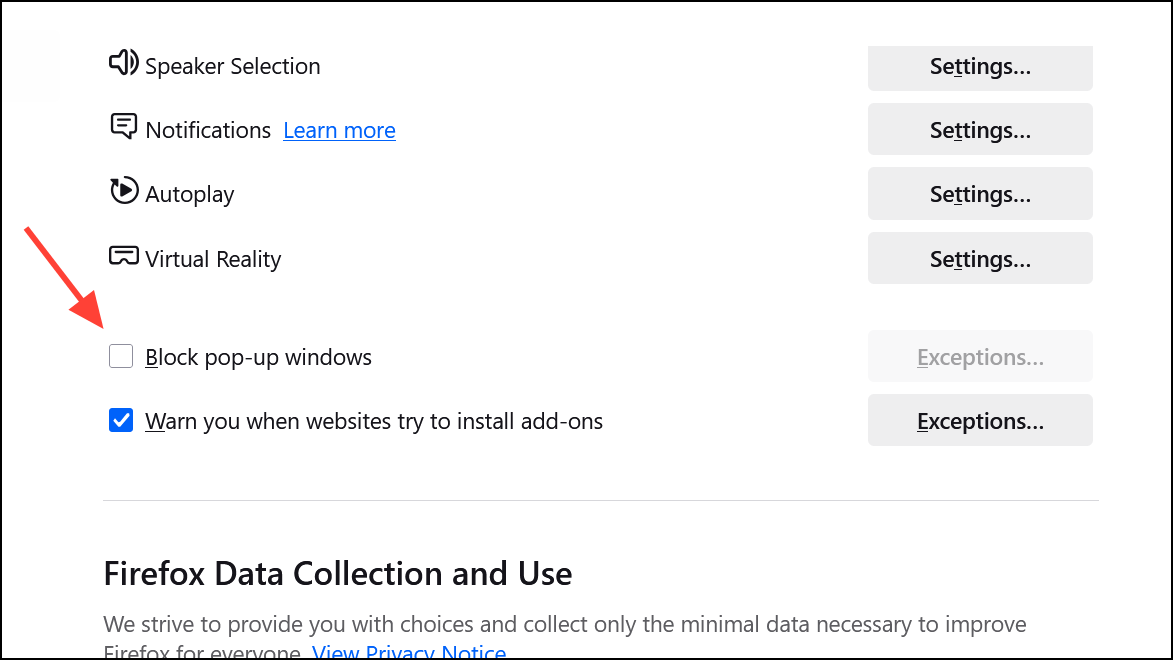
Step 3: For Firefox, open Settings > Privacy & Security and uncheck Block pop-up windows.
After making these changes, reload your browser and try reconnecting to the network.
Disable VPN or Proxy Connections
VPNs and proxies can interfere with captive portal detection and redirection, blocking the login page entirely. Temporarily disabling these services allows your system to communicate with the network’s authentication page.
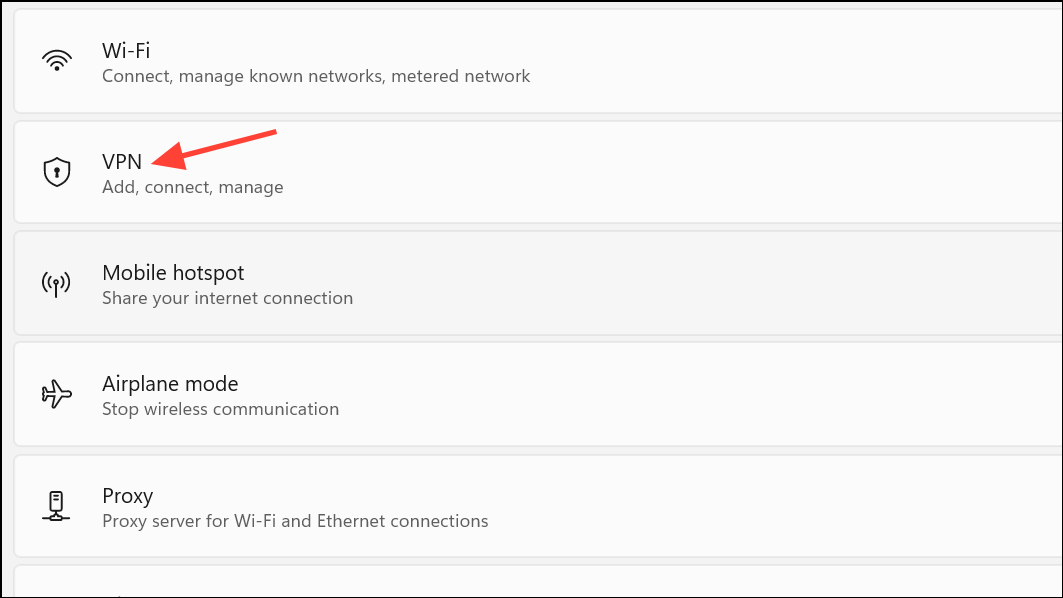
Step 1: Open Settings > Network & Internet > VPN and disconnect any active VPN connections.
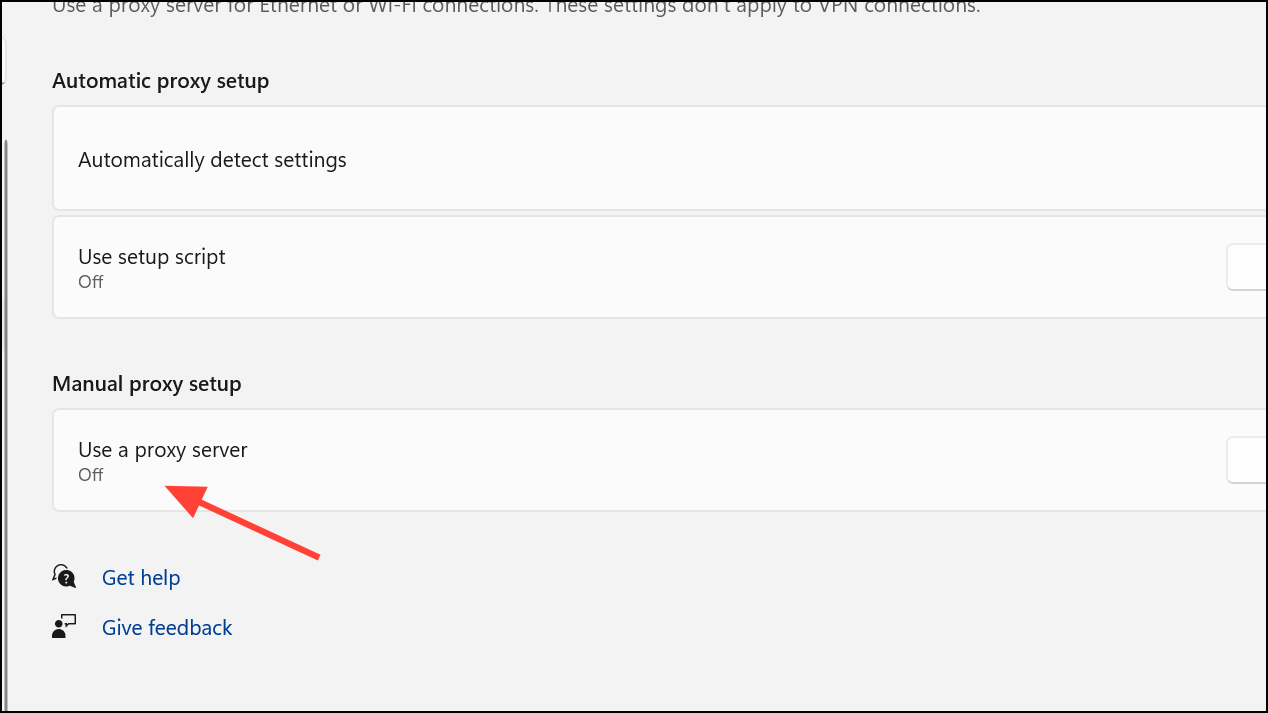
Step 2: Go to Settings > Network & Internet > Proxy and turn off Use a proxy server.
Once you’ve logged in to the Wi-Fi, you can re-enable your VPN or proxy for secure browsing.
Reset Network Settings and Release/Renew IP
Network misconfigurations or expired DHCP leases may block access to captive portals. Resetting adapters and renewing your IP address can resolve these issues.
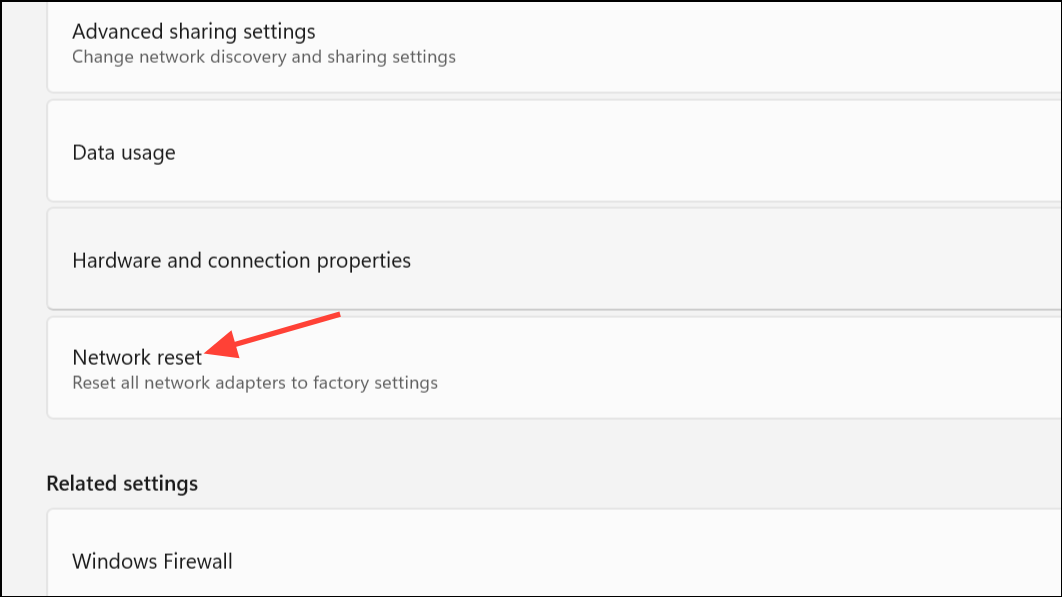
Step 1: Open Settings > Network & Internet > Advanced network settings and select Network reset. Confirm and restart your PC.
Step 2: After restart, open Command Prompt as administrator and run these commands one at a time:
netsh winsock reset
netsh int ip reset
ipconfig /release
ipconfig /renew
ipconfig /flushdns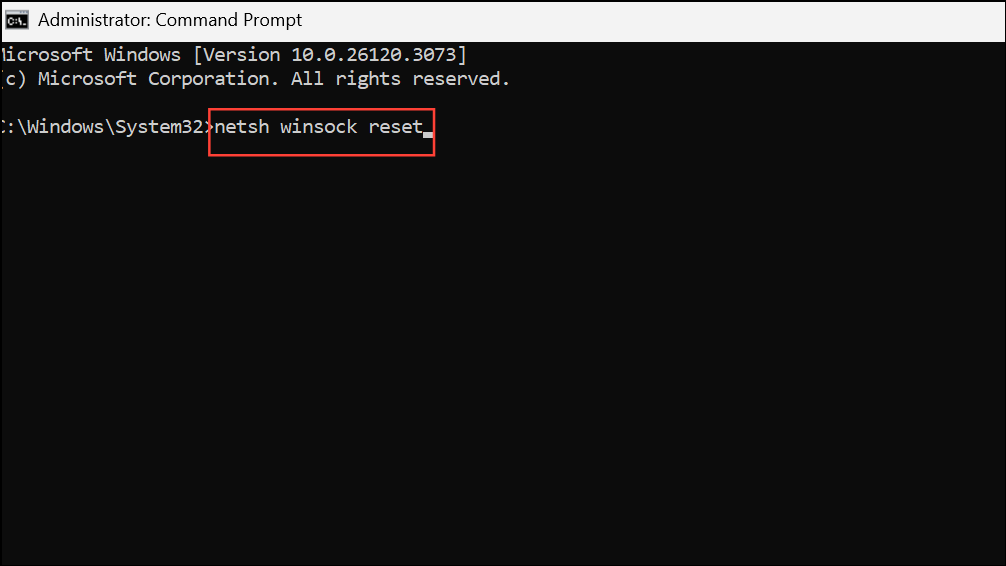
Step 3: Reconnect to the public Wi-Fi and check for the login page.
Try a Different Browser or Incognito Mode
Sometimes, browser cache or extensions prevent captive portals from loading. Switching browsers or using an incognito/private window can bypass these issues.
Step 1: Open a private or incognito window in your browser (Ctrl + Shift + N in Chrome/Edge, Ctrl + Shift + P in Firefox).
Step 2: Navigate to a non-secure (HTTP) website such as example.com to trigger the captive portal.
Step 3: If that fails, try using a different browser entirely and repeat the process.
Temporarily Disable Firewall or Security Software
Windows Defender Firewall or third-party security tools can sometimes block network redirection. Disabling these temporarily can help determine if they are the cause.
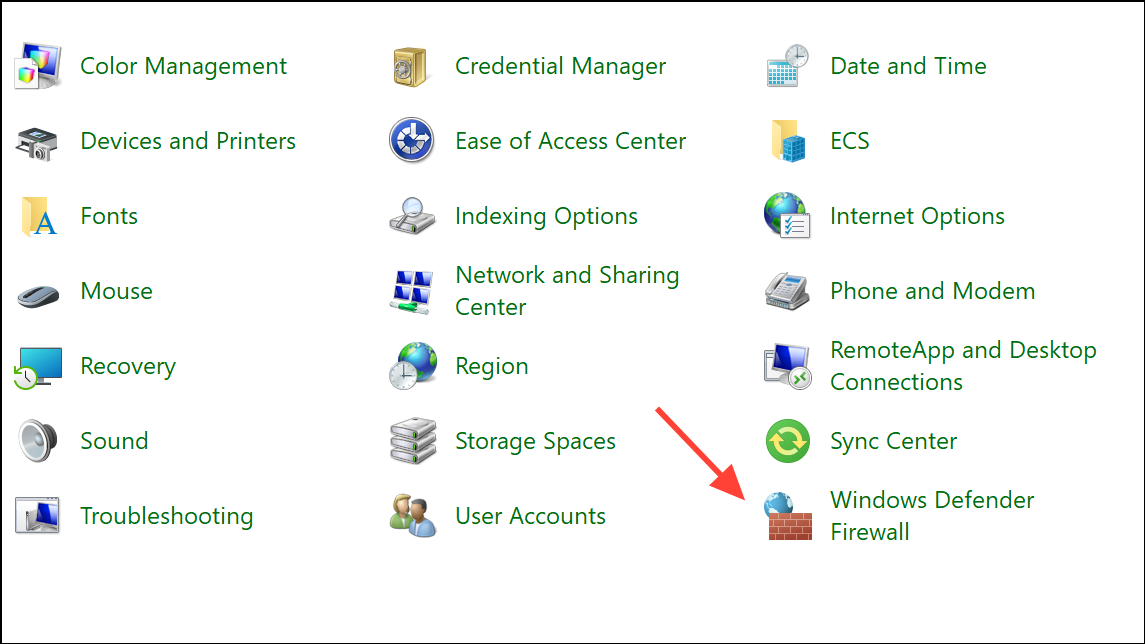
Step 1: Open Control Panel > System and Security > Windows Defender Firewall.
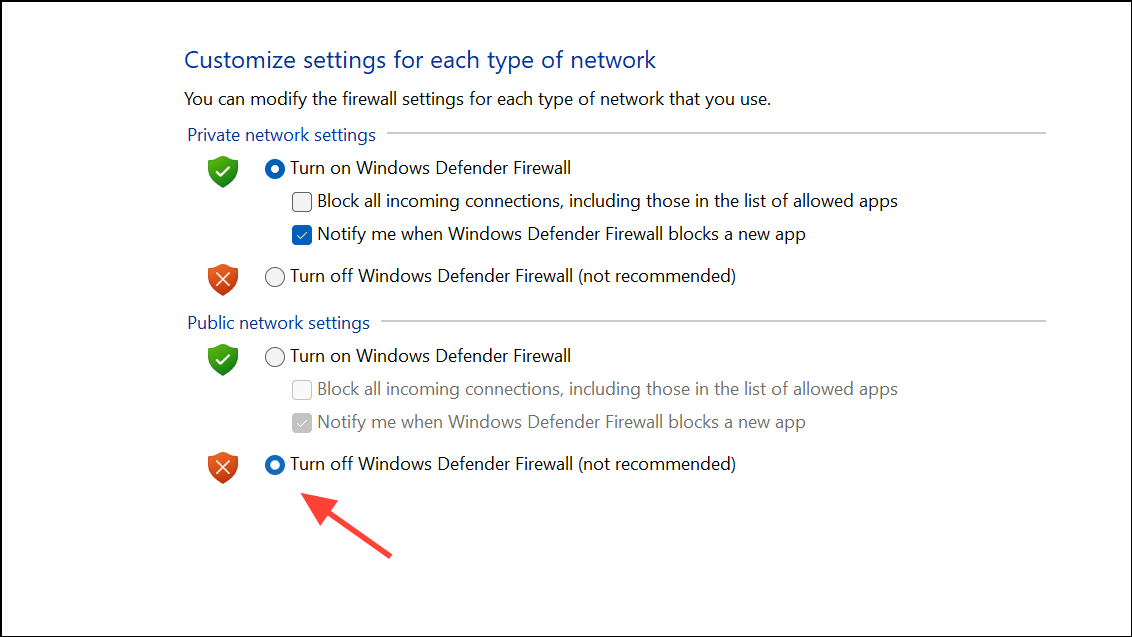
Step 2: Click Turn Windows Defender Firewall on or off and select Turn off for public networks. Remember to turn it back on after testing.
Step 3: If using third-party antivirus or firewall, disable it through its application interface, reconnect to Wi-Fi, and check for the login page.
Update or Reinstall Network Adapter Drivers
Outdated or corrupt network drivers may prevent connections to certain networks. Updating or reinstalling drivers can restore connectivity.
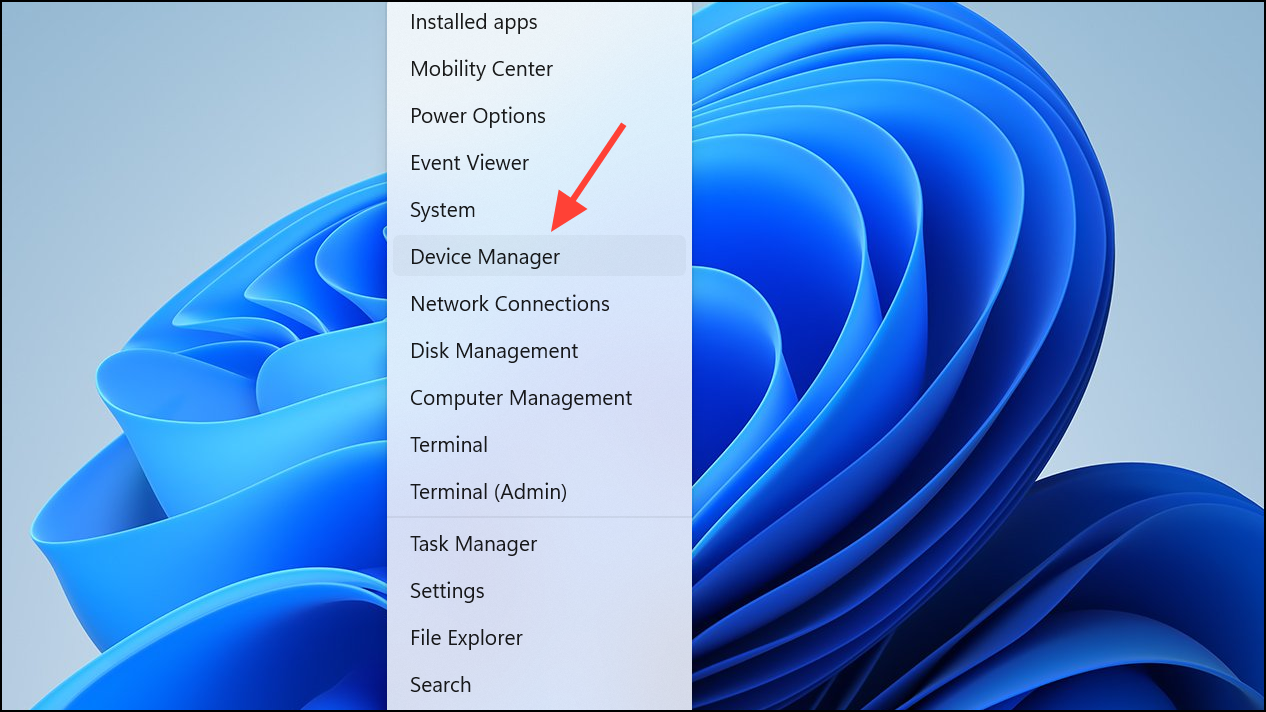
Step 1: Open Device Manager by pressing Win + X and selecting Device Manager.
Step 2: Expand Network adapters, right-click your Wi-Fi adapter, and select Update driver. Choose Search automatically for drivers.
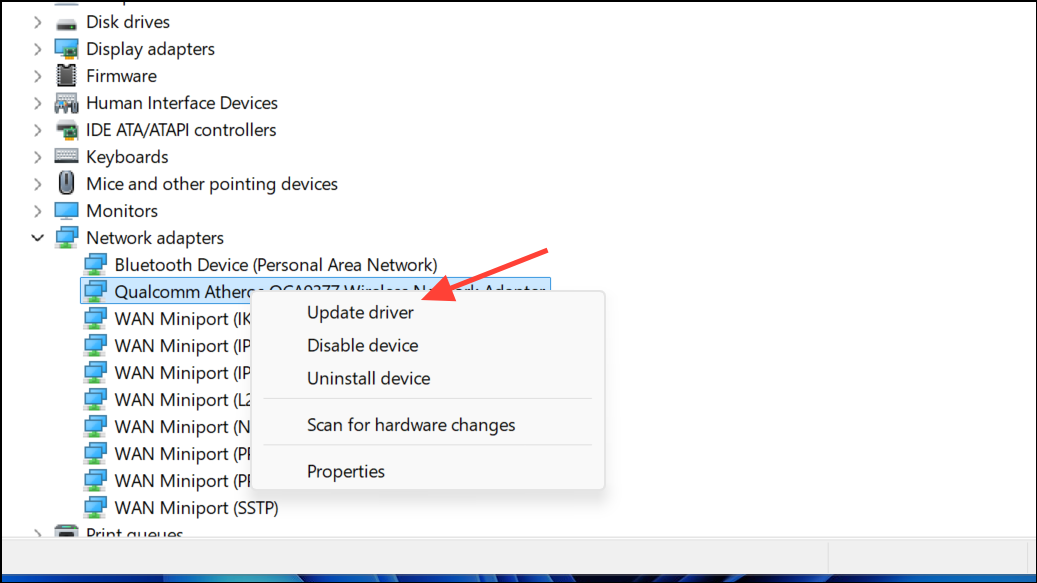
Step 3: If issues persist, right-click the adapter and choose Uninstall device. Restart your PC; Windows will reinstall the driver automatically.
Once you regain access to public Wi-Fi, always use a VPN to protect your data on open networks. If the login page still fails to load after trying these fixes, check with others nearby—sometimes the issue is with the network itself and not your device.