
Encountering the “User Profile Service failed the sign-in” error when trying to log into your Windows 11 account can be quite frustrating. This issue prevents access to your desktop and personal files. Fortunately, there are several methods to resolve this error and regain access to your account.
Causes of ‘User Profile Service failed the sign-in’ error in Windows 11
This error can occur due to various reasons:
- Corrupted user profile files.
- Incorrect values or corrupt entries in the Windows Registry.
- Improper or incomplete Windows Updates.
- Changes in default profile permissions or incorrect NTFS permissions.
- Resizing of partitions.
- Antivirus software blocking profile folders during authentication.
- Improper shutdowns or restarts.
Change user profile values using Windows Registry Editor
Modifying certain registry values can fix the sign-in error by correcting issues with your user profile’s configuration. Follow these steps carefully to edit the registry:
- Restart your computer. On the sign-in screen, click the power icon at the bottom right, hold down the
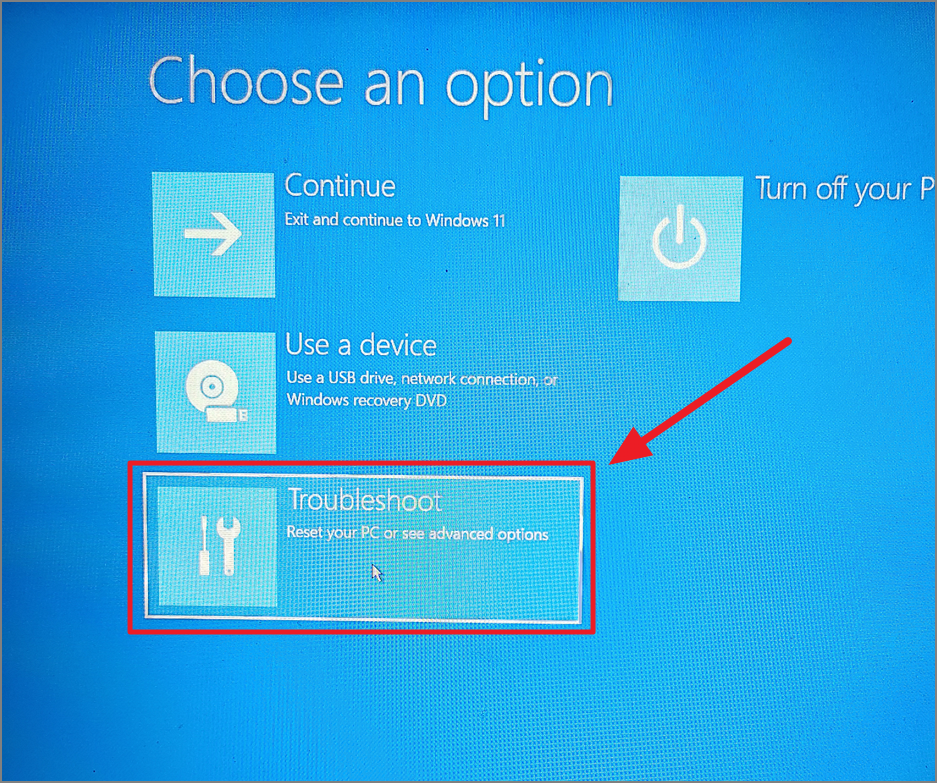
Shiftkey, and select Restart. - After restarting, you’ll see the Choose an option screen. Click on Troubleshoot.
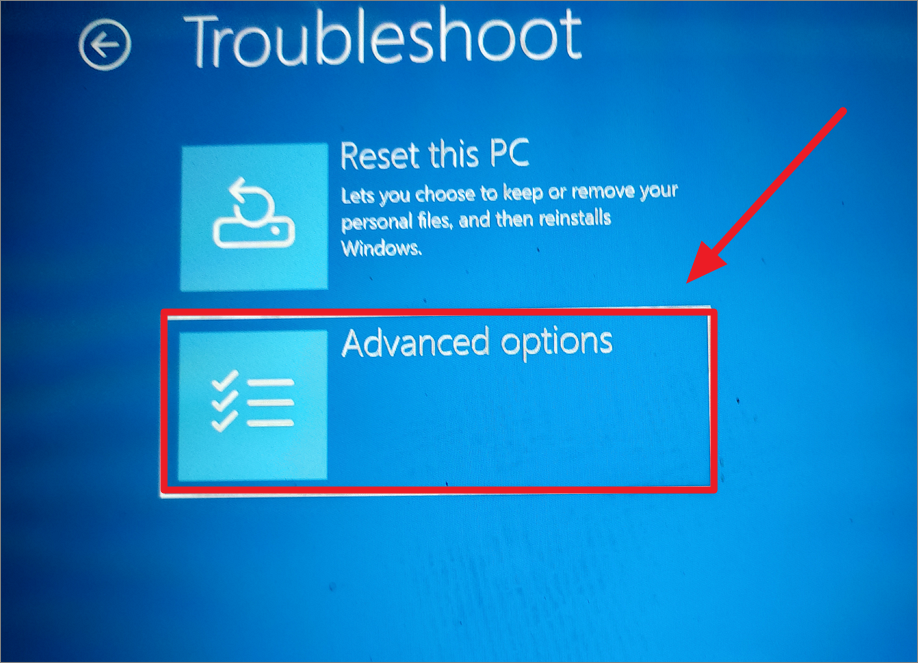
- Select Advanced options.
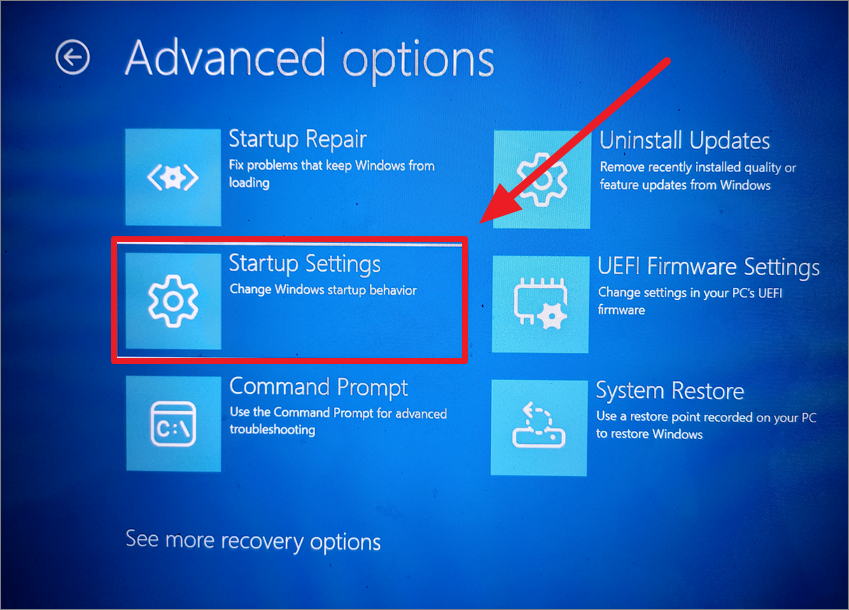
- Click on Startup Settings and then select Restart.
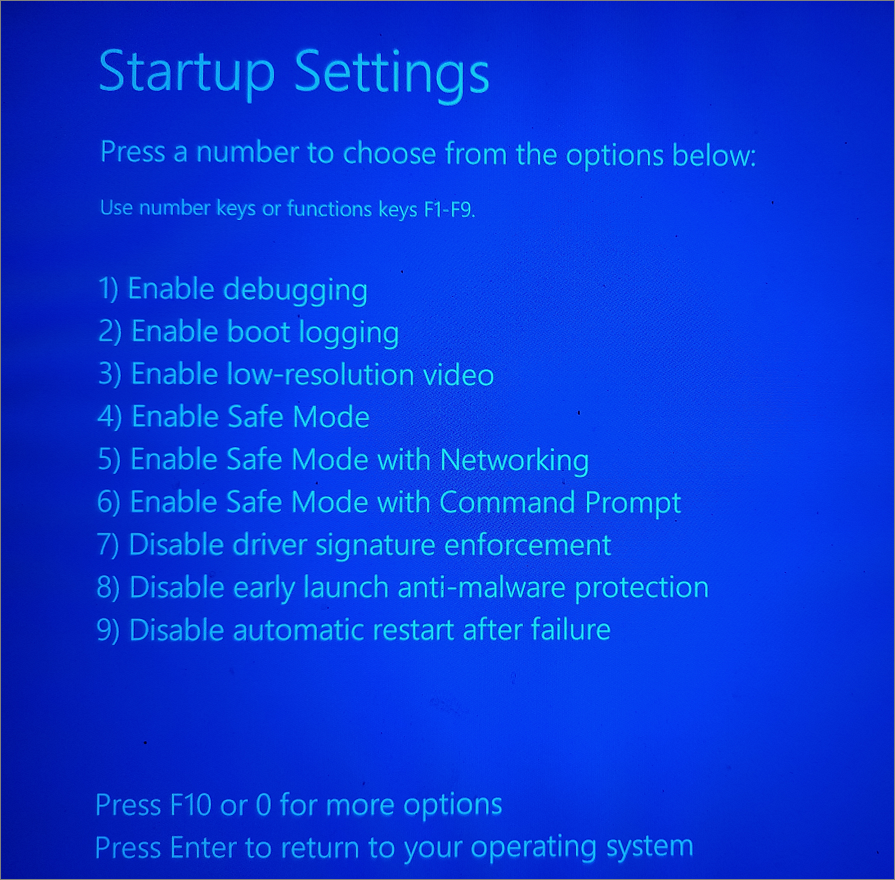
- Your system will restart and show the list of the numbered Startup settings. Now, press
4orF4to enter Safe mode.
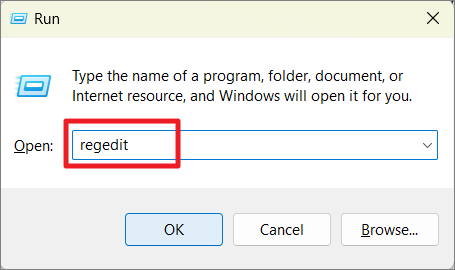
- Once in Safe Mode, press
Win+Rto open the Run dialog box. Typeregeditand pressEnterto open the Registry Editor.
- Under the ProfileList key, you’ll find several folders starting with
S-1-5. Click on each and check theProfileImagePathentry to identify the one associated with your problematic user account.
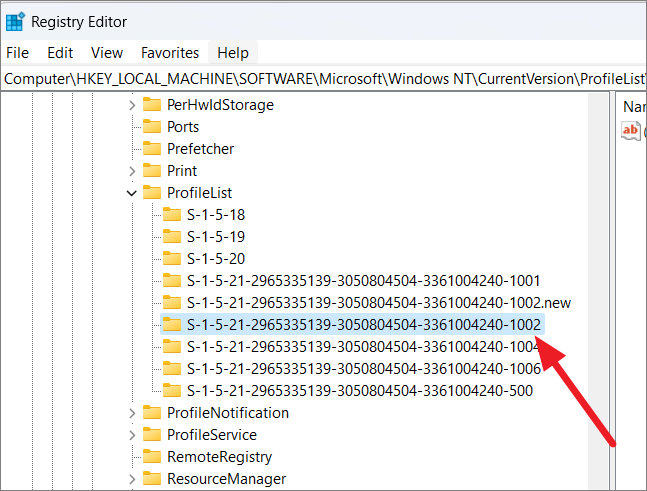
Navigate to the following path:
HKEY_LOCAL_MACHINE\SOFTWARE\Microsoft\Windows NT\CurrentVersion\ProfileList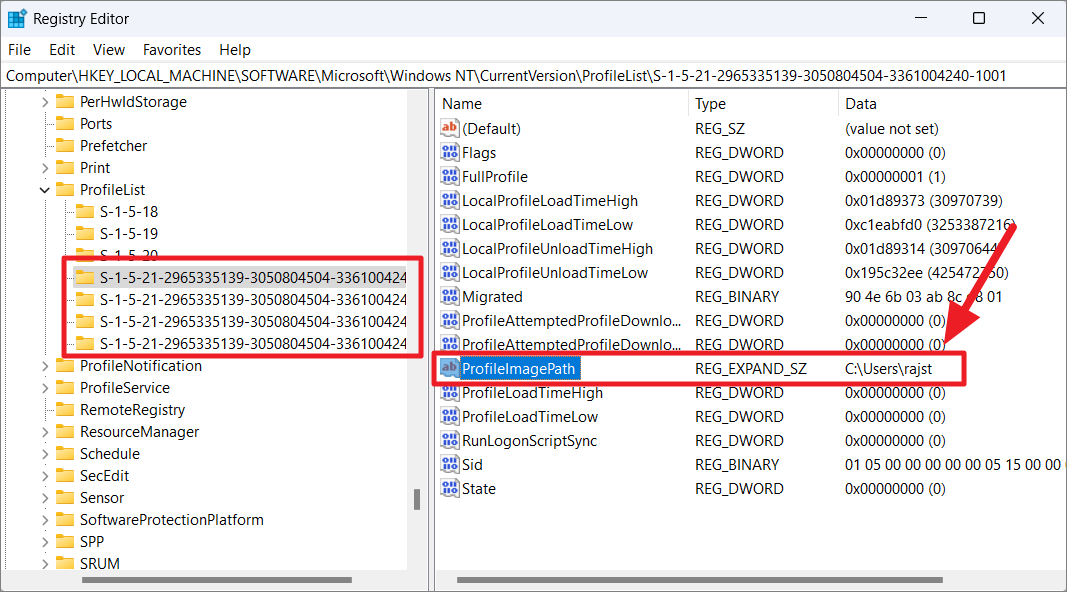
In our example, the user profile (rajst) with the SID key – ‘S-1-5-21-2965335139-3050804504-3361004240-1002’ is the one that’s causing the ‘user profile service failed the sign-in’ error.
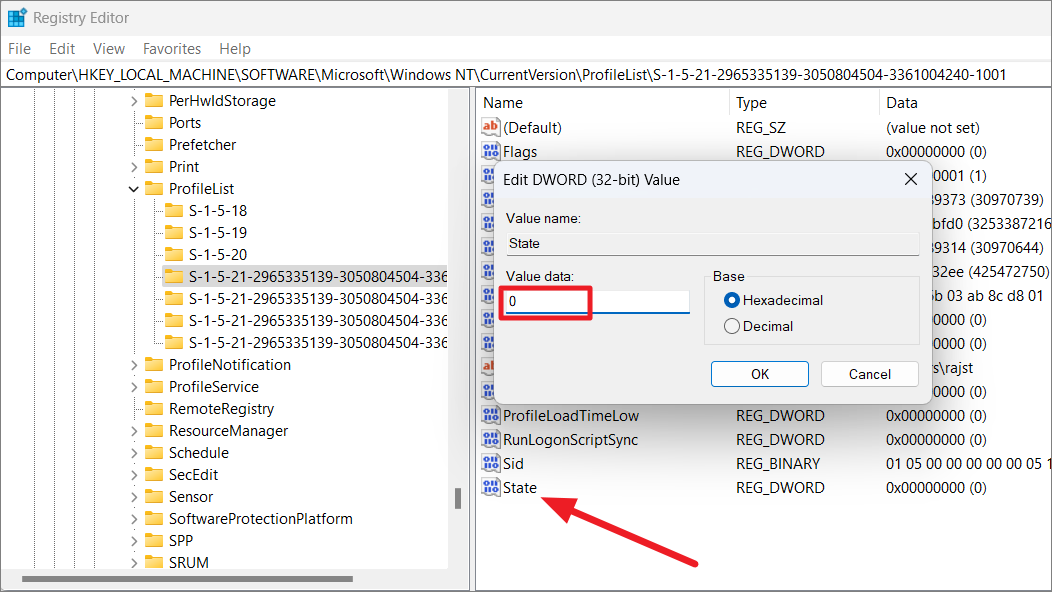
- Once you’ve located the correct profile, double-click on the
Stateentry in the right pane and change its value to0. Click OK.
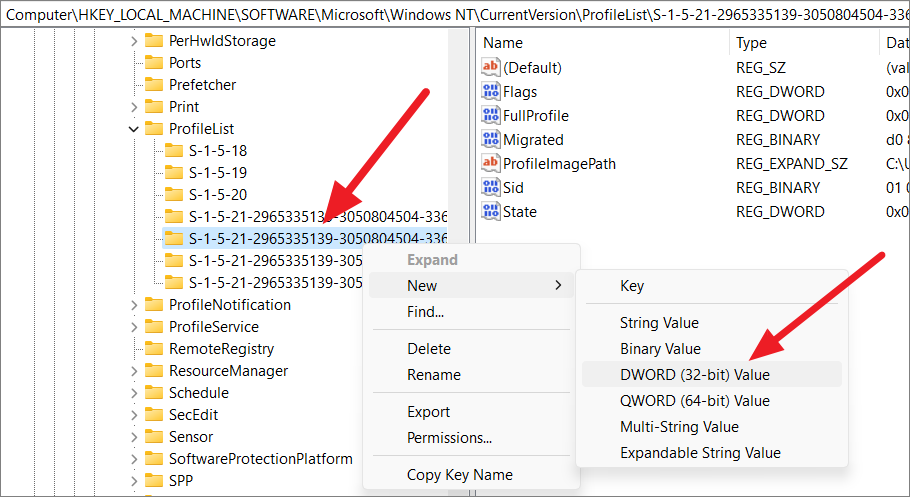
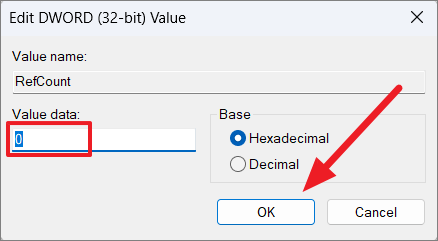
- Next, double-click on
RefCountand set its value to0. IfRefCountdoesn’t exist, right-click in the right pane, select New > DWORD (32-bit) Value, name itRefCount, and set the value to0.
- If there are two identical profile keys, one with a
.bakextension and one without, rename the one without.bakby adding.newat the end. Then, remove.bakfrom the other key.
- Now, rename the key with
.newby adding.bakat the end. - Ensure that the key corresponding to your user profile now has no extension. Modify its
StateandRefCountvalues to0as described earlier. - Close the Registry Editor and restart your computer.
- Try signing into your account to see if the issue has been resolved.
Replace NTUSER.DAT file
The NTUSER.DAT file contains user profile configurations. If it’s corrupted, replacing it may fix the sign-in error.
Method 1: Replace the NTUSER.DAT file from the Guest profile or another working profile
- Log into an administrator account.
- Open File Explorer and navigate to
C:\Users. If the Default folder isn’t visible, click on View > Show > Hidden items to display hidden folders.

- Rename the
NTUSER.DATfile in theDefaultfolder toNTUSER.DAT_bakor move it to another location as a backup. - Copy the
NTUSER.DATfile from theGuestprofile or another functioning user profile. - Paste the copied file into the
Defaultfolder. - Restart your computer and attempt to sign into the affected account.
Method 2: Replace the NTUSER.DAT file from another computer
- On another Windows 11 computer with the same build and version, navigate to
C:\Users. - Copy the entire
Defaultfolder onto a USB drive or external storage device. - On your affected computer, rename the existing
Defaultfolder toDefault.old. - Paste the
Defaultfolder from the other computer into theC:\Usersdirectory. - Restart your computer and check if the sign-in issue is resolved.
Method 3: Recreate the NTUSER.DAT file
- Boot your computer into Safe Mode.
- Navigate to
C:\Usersand rename theDefaultfolder toDefault.old. - Create a new folder named
Defaultin theC:\Usersdirectory. - Create the following empty folders inside the new
Defaultfolder:AppData\LocalAppData\RoamingDesktopDocumentsDownloadsFavoritesLinksPicturesSaved GamesVideos
- Open Command Prompt as administrator.
- Restart your computer and create a new user account to see if the issue persists.
Run the following command to copy the NTUSER.DAT file from your corrupted profile to the new Default folder:
xcopy C:\Users\<Username>\NTUSER.DAT C:\Users\DefaultReplace <Username> with your actual username.
Restart or shut down Windows 11
Sometimes, a simple restart or shutdown can resolve temporary glitches causing the sign-in error.
- On the sign-in screen, click the power icon at the bottom right.
- Select Restart or Shut down.
- After your computer restarts, try signing in again.
Check for Windows updates
Ensuring your system is up to date can fix known bugs and issues.
- Press
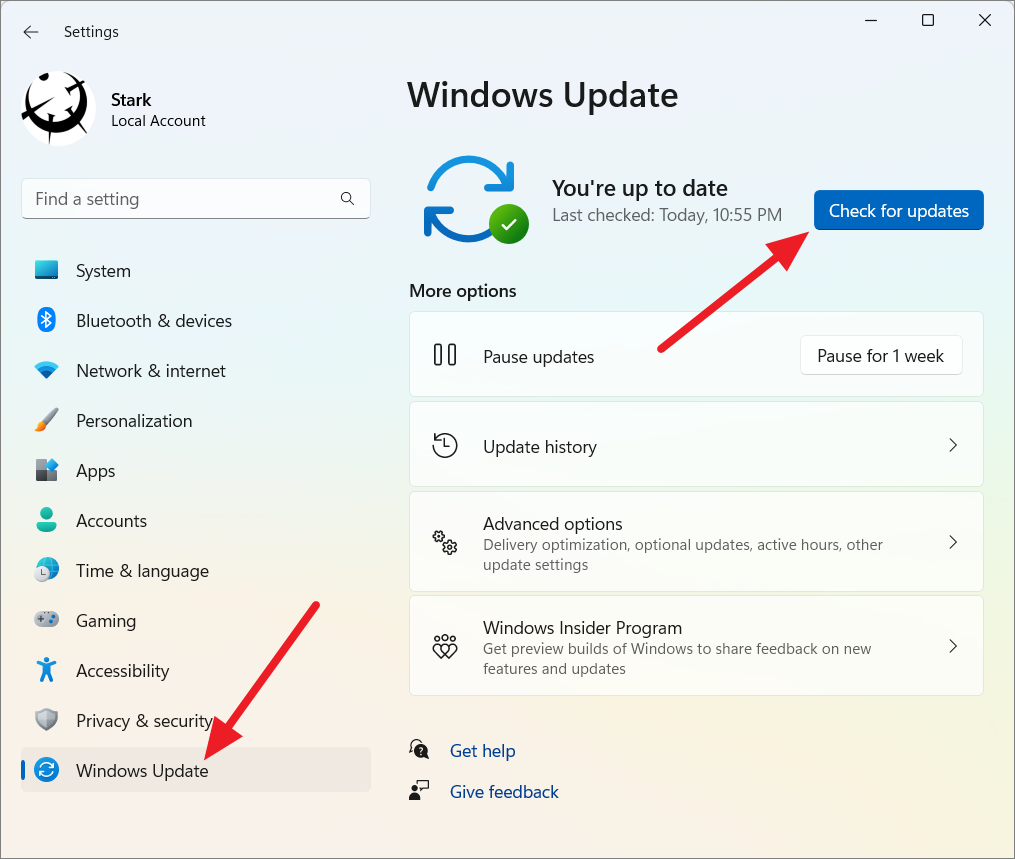
Win+Ito open Settings. - Click on Windows Update in the left pane.
- Click Check for updates.
- If updates are available, click Install.
- Once updates are installed, restart your computer.
Repair user profiles using DISM and SFC scans
Corrupted system files can lead to sign-in errors. Running DISM and SFC scans can repair these files.
- Open Command Prompt as administrator.
- Type
sfc /scannowand pressEnter. Wait for the scan to complete. - After the scans complete, restart your computer and try signing in.
Next, run the following commands one by one:
DISM.exe /Online /Cleanup-image /scanhealth
DISM.exe /Online /Cleanup-image /CheckHealth
DISM.exe /Online /Cleanup-image /RestoreHealth
Boot into Safe Mode and check Profile Service status
The User Profile Service manages user profiles and might not start automatically. Ensure it’s running correctly.
- Boot your computer into Safe Mode.
- Press
Win+R, typeservices.msc, and pressEnter. - In the Services window, find User Profile Service and double-click it.
- Set the Startup type to Automatic and click Start if the service isn’t running.
- Click Apply and then OK.
- Restart your computer and attempt to sign in.
Delete the user account and recreate it in Windows 11
If your user profile is corrupted beyond repair, deleting and recreating it may resolve the issue. Note that this will delete all data associated with the account.
- Log into an administrator account.
- Press
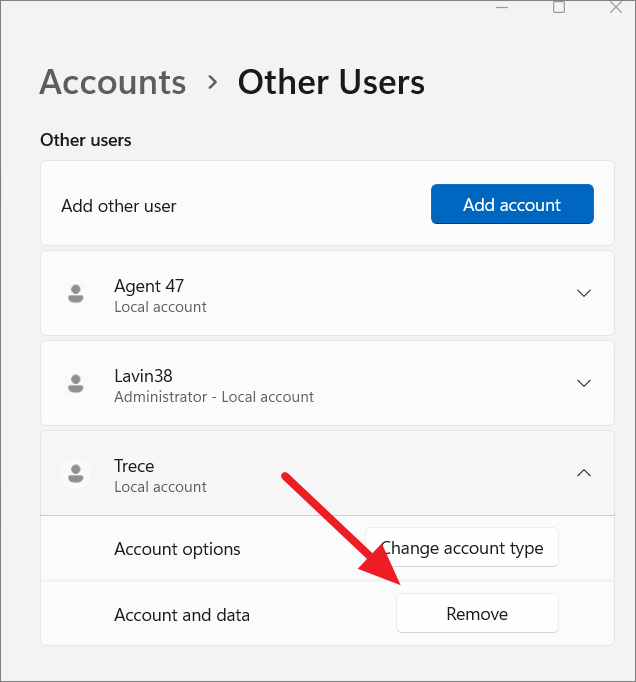
Win+Ito open Settings. - Go to Accounts > Other users.
- Select the problematic account and click Remove.
- Click Delete account and data to confirm.
- To create a new account, click Add account.
- Choose I don’t have this person’s sign-in information.
- Select Add a user without a Microsoft account.
- Enter a username and password, then click Next.
- Restart your computer and sign in with the new account.
Use Startup Repair to fix the User Profile Service error
Startup Repair can fix issues that prevent Windows from starting correctly, including user profile problems.
- Boot into Windows Recovery Environment (WinRE) by forcefully shutting down your computer three times during the boot process.
- On the Automatic Repair screen, select Advanced options.
- Click on Troubleshoot > Advanced options > Startup Repair.
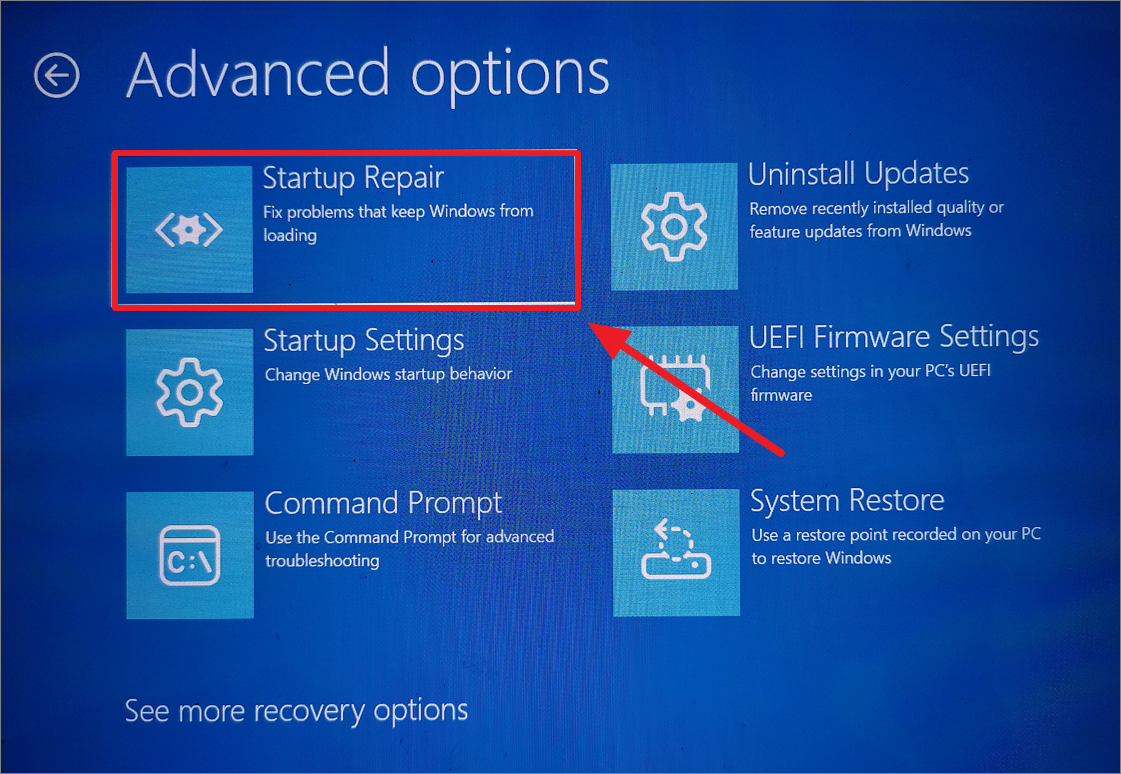
- Select your operating system and enter your credentials if prompted.
- Wait for the repair to complete and restart your computer.
Perform System Restore
System Restore can revert your system to a previous state before the issue occurred.
- Press
Win+R, typerstrui.exe, and pressEnter. - In the System Restore window, click Next.
- Select a restore point from before the error appeared and click Next.
- Click Finish to start the restoration process.
- After your computer restarts, attempt to sign in.
Create a new admin user account
1. Accessing Windows Recovery Environment
- Start or restart your computer.
- As soon as you see the Windows logo or manufacturer’s logo, press and hold the power button for about 10 seconds to force a shutdown.
- Repeat steps 1 and 2 two more times. On the third startup, Windows should automatically enter the Recovery Environment.
- If the above method doesn’t work, try this alternative:
- At the Windows login screen, click the Power icon in the bottom right corner.
- Hold down the Shift key on your keyboard and click “Restart” while still holding Shift.
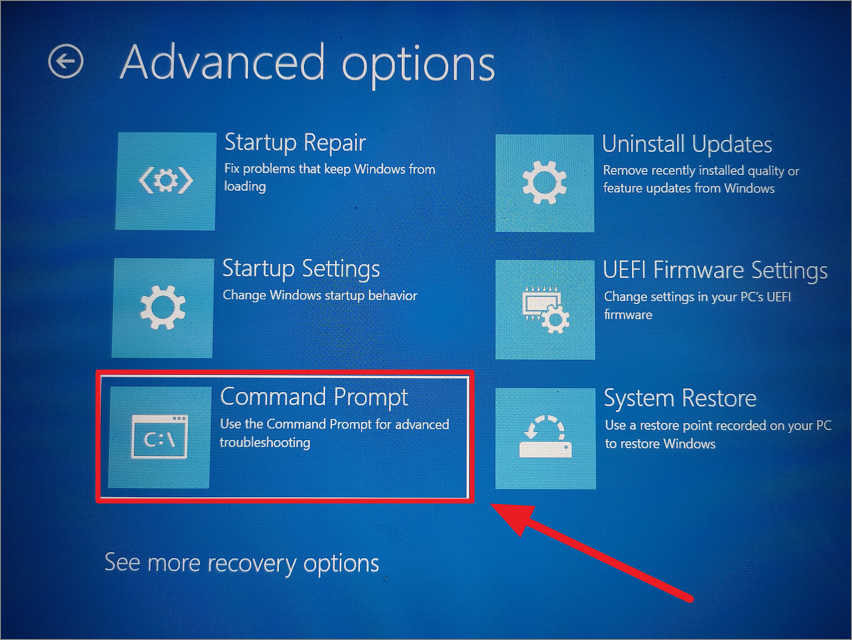
- Once in the Recovery Environment, you’ll see a blue screen with options. Select “Troubleshoot”.
- On the next screen, choose “Advanced options”.
- Finally, select “Command Prompt” from the list of advanced options.
2. Identifying the Windows Drive
- In the Command Prompt window, type
diskpartand press Enter.

- Type
list volumeand press Enter.
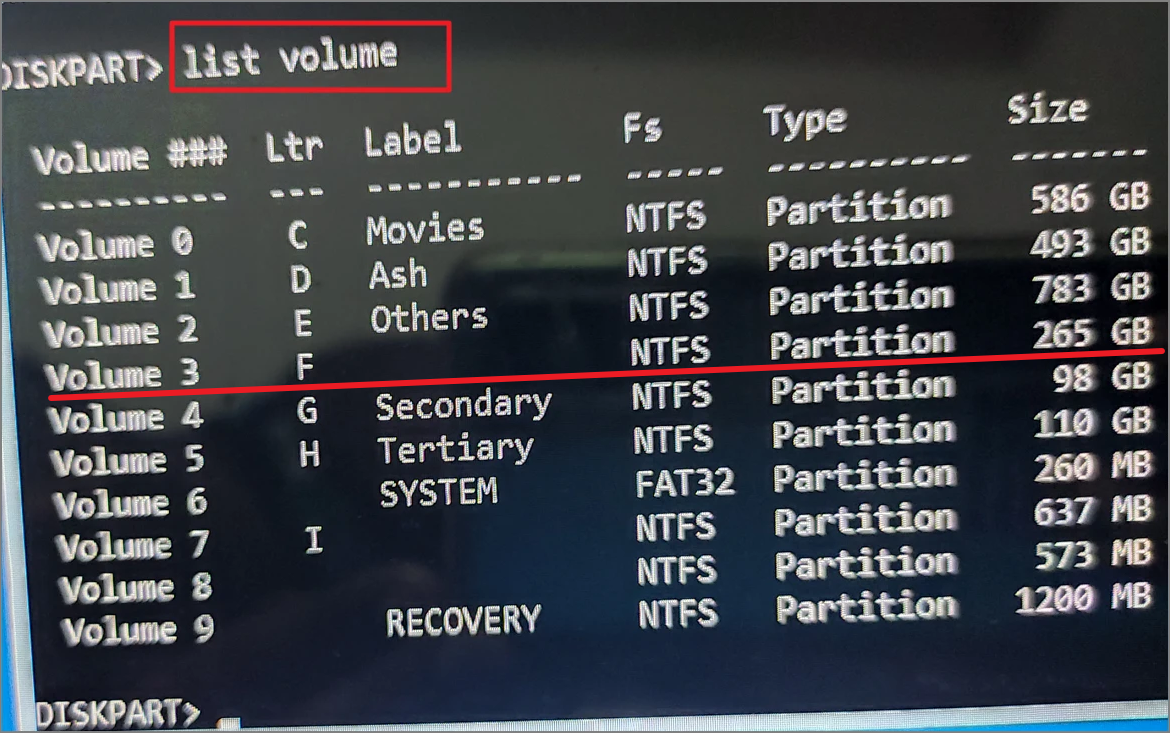
- You’ll see a list of all volumes on your computer. Look for the one labeled as “Windows” or the largest volume. Note its drive letter (it might not be C:).
- Type
exitand press Enter to leave diskpart.
3. Replacing Utilman with Command Prompt
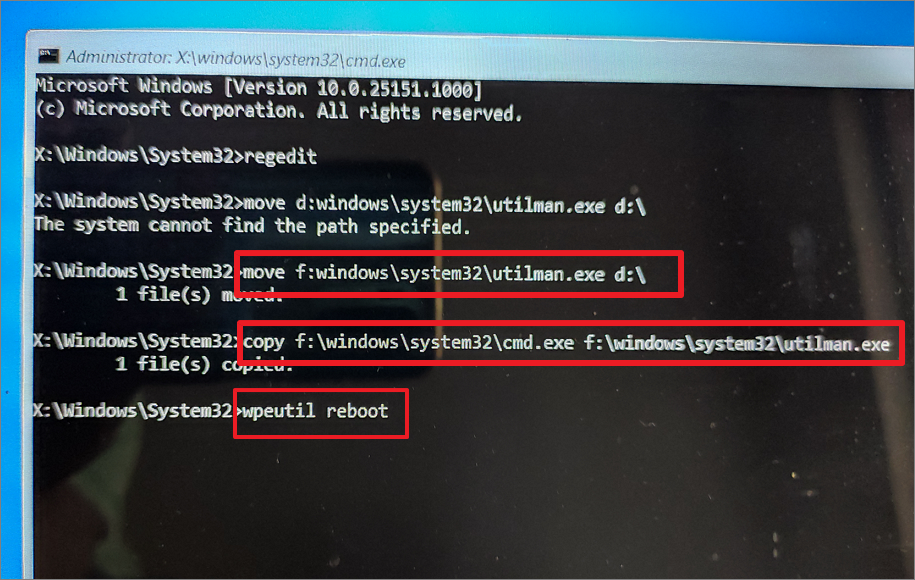
- In the Command Prompt, type the following commands, replacing X with your Windows drive letter:
move X:\Windows\System32\Utilman.exe X:\
copy X:\Windows\System32\cmd.exe X:\Windows\System32\Utilman.exe
- Press Enter after each command. You should see confirmation messages.
- Type
wpeutil rebootand press Enter to restart your computer.
4. Enabling the Built-in Administrator Account
- At the Windows login screen, click the Ease of Access (Accessibility) icon in the bottom-right corner.
- This will open a Command Prompt window instead of accessibility options.
- In this Command Prompt, type:
net user Administrator /active:yes
- Press Enter. You should see a message confirming the command was successful.
- Close the Command Prompt and click the Power icon to restart your computer.
5. Logging in as Administrator and Creating a New Admin Account
- At the login screen, you should now see an “Administrator” account. Click on it.
- If prompted for a password, leave it blank and press Enter (unless you know you’ve set a password for this account before).
- Once logged in, right-click on the Start button and select “Windows Terminal (Admin)”.
- In the terminal, type the following commands, replacing NewAdminName and YourPassword with your desired username and password:
net user /add NewAdminName YourPassword
net localgroup administrators NewAdminName /add
- Press Enter after each command. You should see confirmation messages.
6. Securing Your System
- Log out of the Administrator account and log in with your new admin account.
- Open Windows Terminal as an administrator again.
- Disable the built-in Administrator account by typing:
net user Administrator /active:no
- Restore the original Utilman.exe file:
move X:\Utilman.exe X:\Windows\System32\Utilman.exe
- Change passwords for all user accounts using the Control Panel or Settings app.
- Consider running a full system scan with your antivirus software.
7. Final Steps
- Restart your computer to ensure all changes take effect.
- Log in with your new admin account and verify that everything is working correctly.
- If you have a Microsoft account, consider linking your new local admin account to it for additional security features.
Remember, these steps bypass normal Windows security measures. After regaining access, it’s crucial to review and strengthen your system’s security settings. Consider enabling two-factor authentication, using a password manager, and keeping your system and software up-to-date to prevent future lockouts.
Reset Windows 11
If none of the above methods work, resetting Windows 11 can resolve persistent issues by reinstalling the operating system.
- Press
Win+Ito open Settings. - Go to System > Recovery.
- Under Recovery options, click Reset PC.
- Choose to Keep my files or Remove everything.
- Select Cloud download or Local reinstall.
- Follow the on-screen instructions to complete the reset.
By following these methods, you should be able to fix the “User Profile Service failed the sign-in” error and regain access to your Windows 11 account.


