Getting a black screen on your Windows 11 computer while the mouse cursor remains visible can be both frustrating and concerning. This problem can arise during startup, after signing in, or even in the middle of using your PC. Fortunately, there are several solutions available to help you resolve this issue.
Update graphics driver
Outdated or corrupted graphics drivers can often cause display issues, including the black screen problem. Updating your graphics driver may fix compatibility issues and restore your display.
To update your graphics driver:
- Press
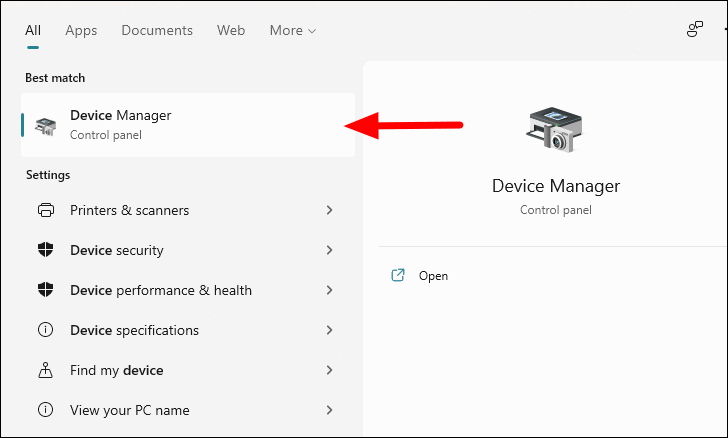
WINDOWS+Xto open the Quick Access Menu, then select Device Manager.
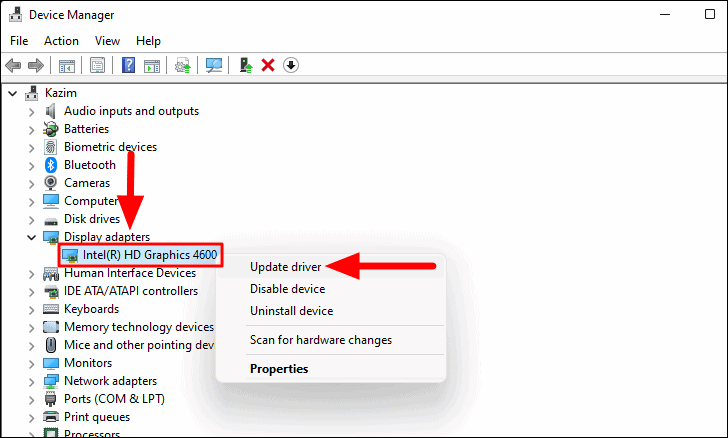
- In Device Manager, double-click on Display adapters to expand it.
- Right-click on your graphics adapter (e.g., Intel, NVIDIA, AMD) and select Update driver.
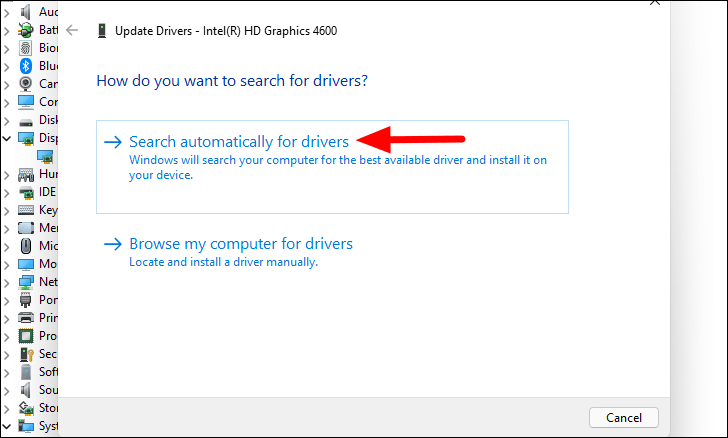
- Choose Search automatically for drivers. Windows will search for and install the latest driver if available.
If Windows doesn't find a new driver, you can manually download the latest driver from the manufacturer's website:
After downloading, run the installer and follow the on-screen instructions. Restart your computer to apply the changes.
Restart the graphics driver
A quick way to resolve display issues is to restart the graphics driver. This can refresh the display and fix minor glitches.
To restart the graphics driver:
- Press WINDOWS + CTRL + SHIFT + B simultaneously.
- You might hear a beep and see the screen flicker, which indicates that the graphics driver has been restarted.
Update Windows 11
Microsoft regularly releases updates that fix known issues. Updating Windows 11 can resolve bugs that may be causing the black screen problem.
To check for updates:
- Press
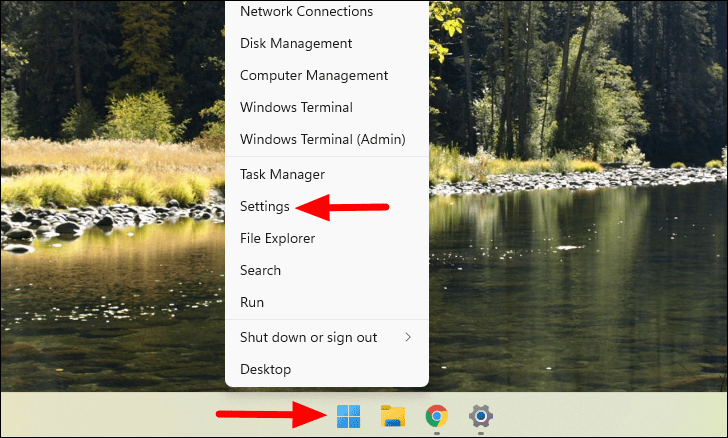
WINDOWS+Ito open Settings.
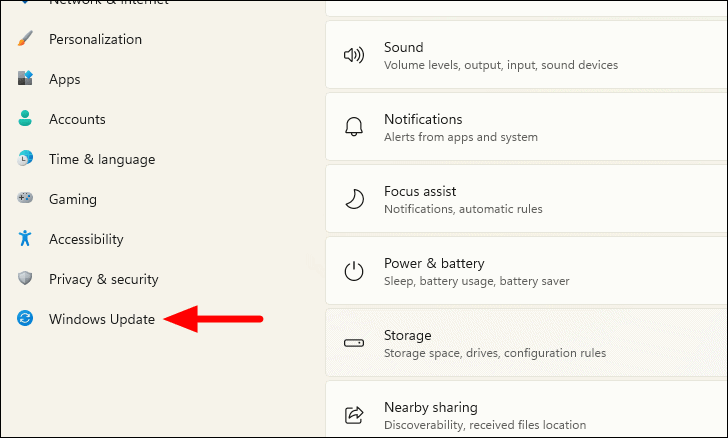
- In Settings, click on Windows Update in the left pane.
- Click on Check for updates. If updates are available, Windows will download and install them.
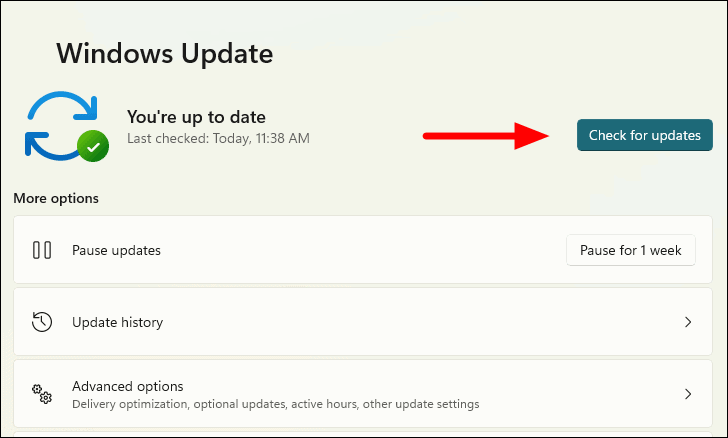
After the updates are installed, restart your computer to see if the issue has been resolved.
Change projection settings
Incorrect projection settings can cause your display to go black. Adjusting these settings may restore your screen.
To change projection settings:
- Press WINDOWS + P to open the projection menu.
- Even if you can't see the menu, use the arrow keys to select a different projection mode (e.g., Duplicate, Extend, Second screen only).
- Press ENTER to confirm your selection. Wait a few seconds to see if the display returns.
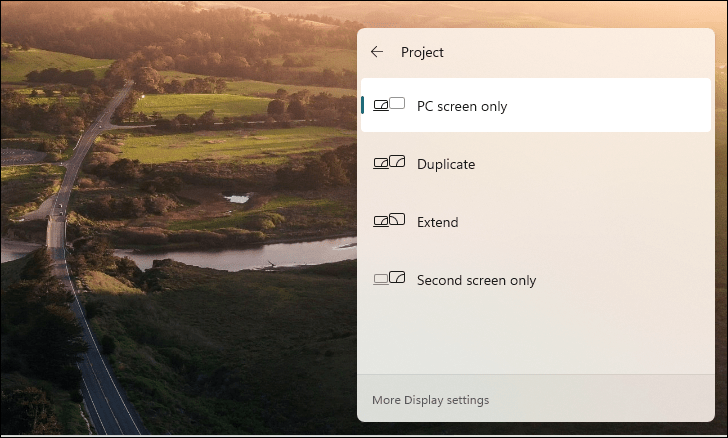
You may need to repeat these steps to find the correct setting.
Check connections and monitor
For desktop users or those with external monitors, a loose or faulty connection can lead to a black screen.
Steps to check:
- Ensure all cables between your computer and monitor are securely connected.
- Inspect cables for any visible damage and replace them if necessary.
- If available, try using a different monitor to see if the issue persists.
- If using multiple monitors, disconnect the others and use only one. You can also swap primary and secondary monitors.
Uninstall malfunctioning applications
Some applications might conflict with system processes, leading to display issues.
To uninstall problematic applications:
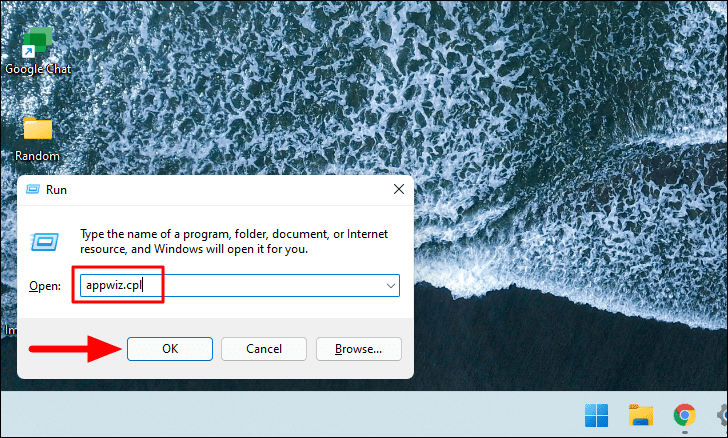
- Press WINDOWS + R to open the Run dialog.
- Type
appwiz.cpland press ENTER to open Programs and Features.
- Identify recently installed applications, especially those installed before the issue began.
- Select the application and click on Uninstall at the top.
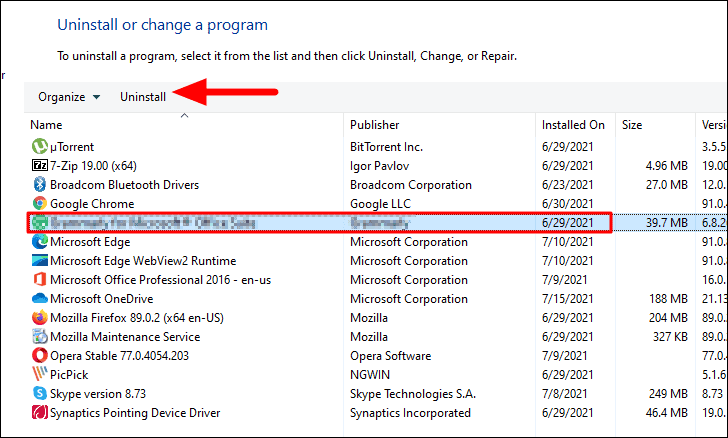
Follow any prompts to complete the uninstallation. Restart your computer and check if the issue is resolved.
Clean system components and inspect hardware
Overheating and hardware issues can cause display problems, including a black screen.
Recommendations:
- Clean dust from the CPU fan and other components to ensure proper cooling.
- Inspect the graphics card and RAM for any signs of damage or loose connections.
- Ensure that the power supply is functioning correctly.
- If you're unsure, consider consulting a professional technician for assistance.
By trying these methods, you should be able to fix the black screen with mouse cursor issue on your Windows 11 PC and get back to your normal activities.

