
Experiencing issues with the Windows key not functioning on your Windows 11 PC can be quite frustrating, especially if you rely on it for shortcuts and navigation. Fortunately, there are several methods to troubleshoot and fix this problem. In this guide, we’ll walk you through the most effective solutions to get your Windows key working again.
Method 1: Update Keyboard Drivers
Outdated or corrupted keyboard drivers can often cause the Windows key to stop working. Updating the drivers can resolve this issue swiftly.
Device Manager. To do this, go to the Start Menu and type Device Manager, then click on the Device Manager app from the search results.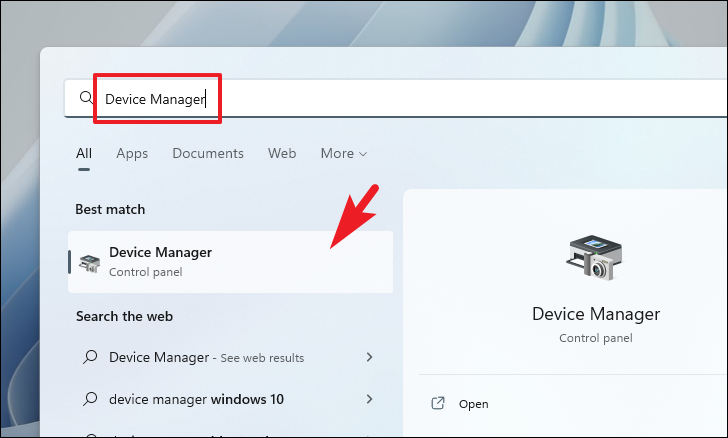
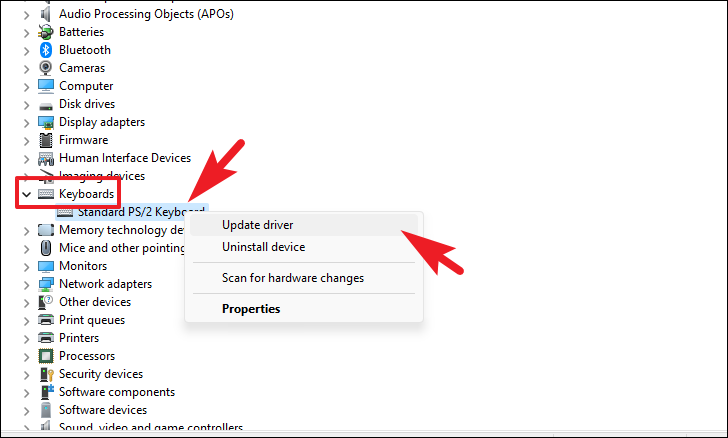
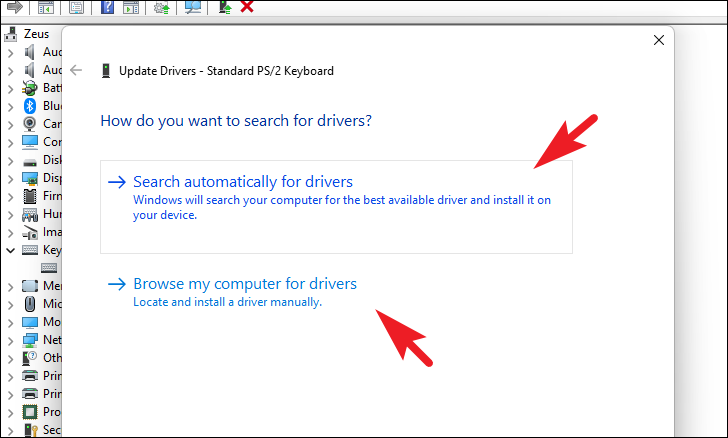
Once the driver is updated, restart your computer and check if the Windows key is functioning properly.
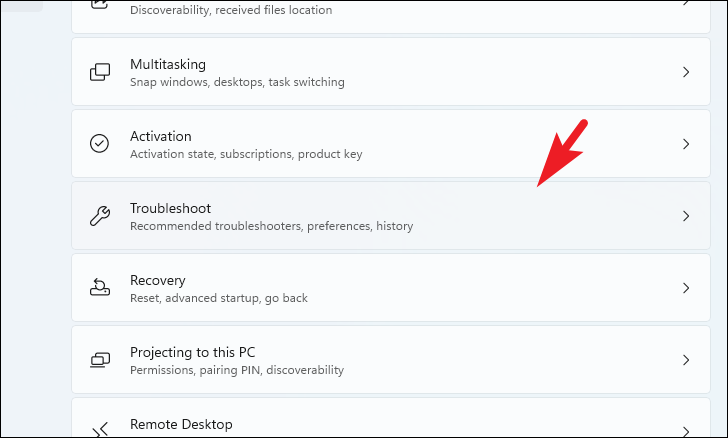
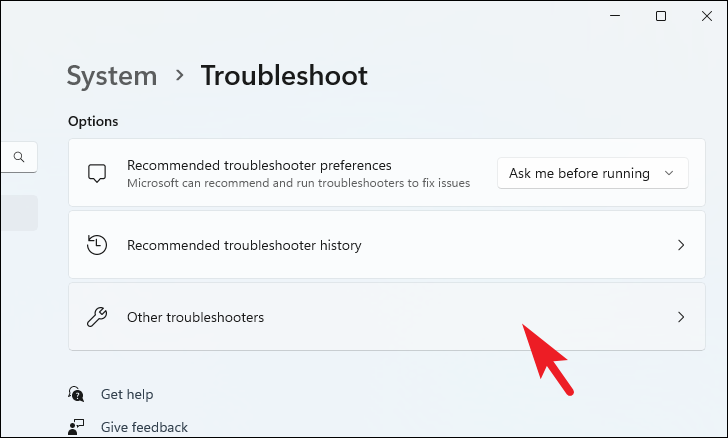
Method 2: Run the Keyboard Troubleshooter
Windows 11 includes built-in troubleshooters that can automatically detect and fix common issues, including problems with the keyboard.
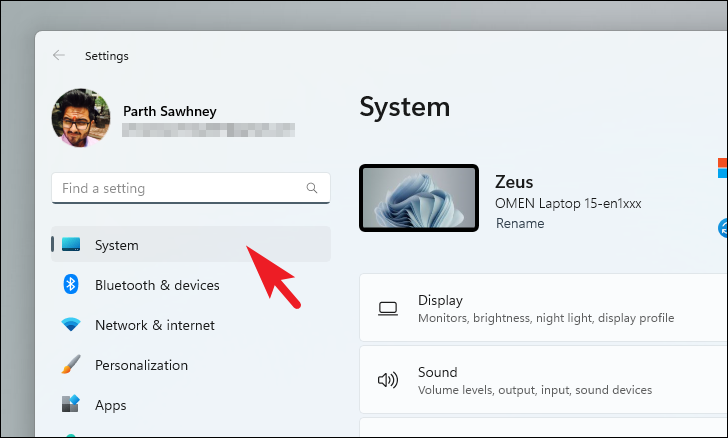
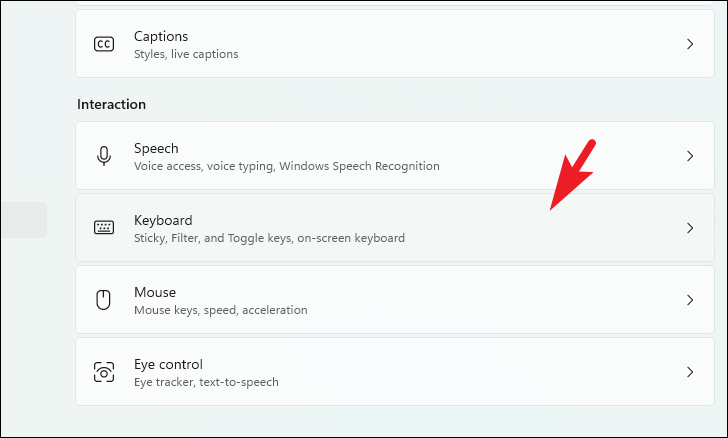
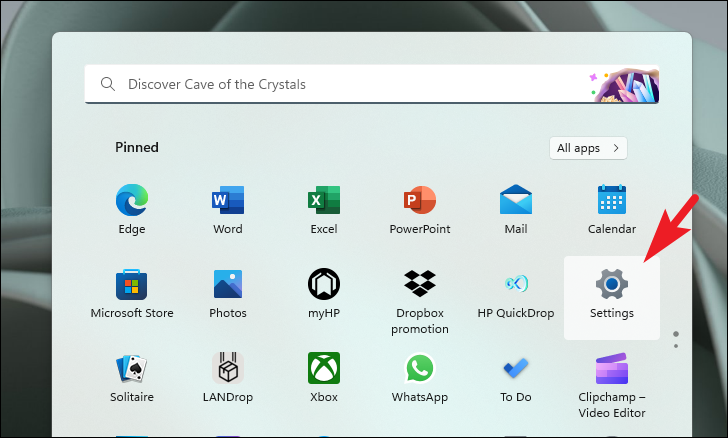
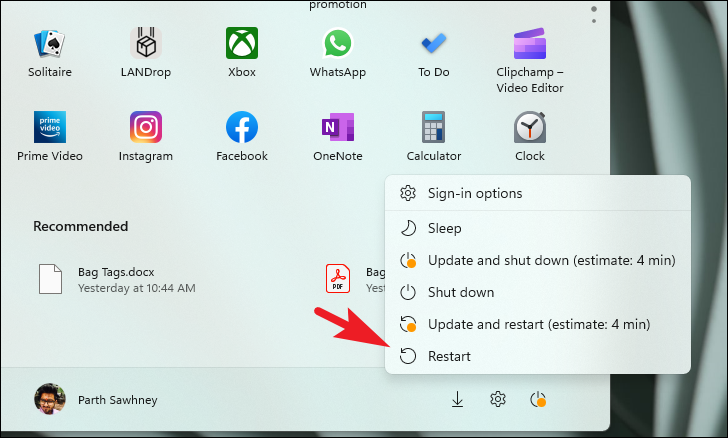
Settings app by clicking on the Start Menu and selecting the Settings icon, or by pressing Windows + I on your keyboard.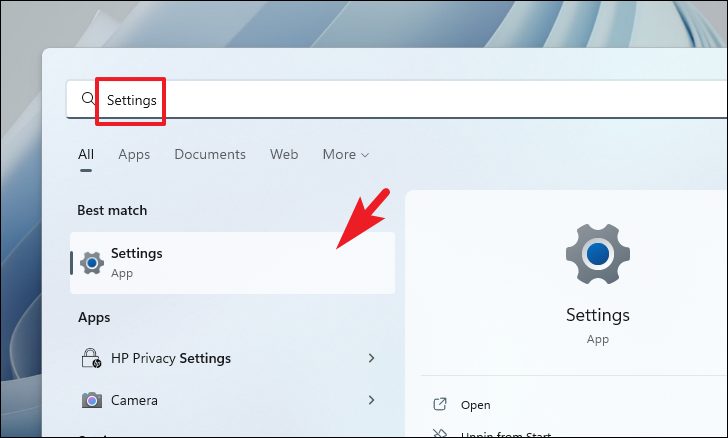
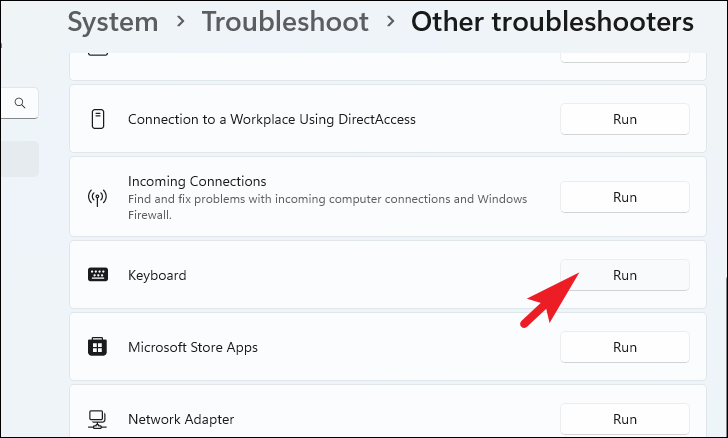
Follow the on-screen instructions to complete the troubleshooting process. After it’s finished, test your Windows key to see if the issue is resolved.
Method 3: Check for Physical Lock Key
Some keyboards, especially gaming ones, have a physical lock key that disables the Windows key to prevent accidental presses during gameplay.
Refer to your keyboard’s user manual if you’re unsure about the lock key’s location or operation.
Method 4: Turn Off Filter Keys
The Filter Keys feature can cause the keyboard to ignore brief or repeated keystrokes, potentially affecting the Windows key functionality.


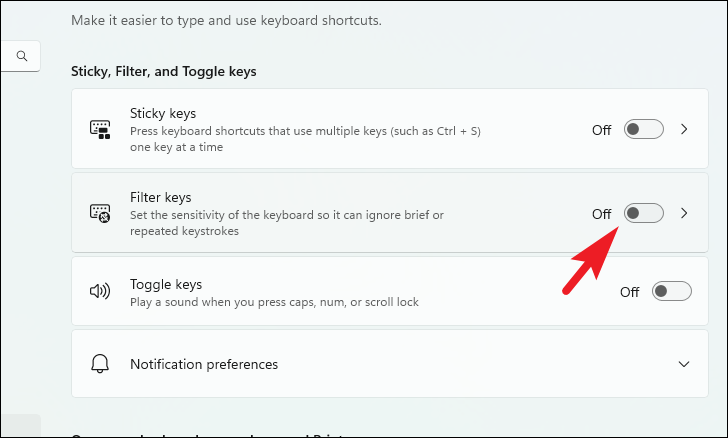
After disabling Filter Keys, test the Windows key to see if it is working.
Method 5: Turn Off Game Mode
Windows 11’s Game Mode can sometimes interfere with certain keys to enhance gaming performance. Disabling it might restore the Windows key functionality.

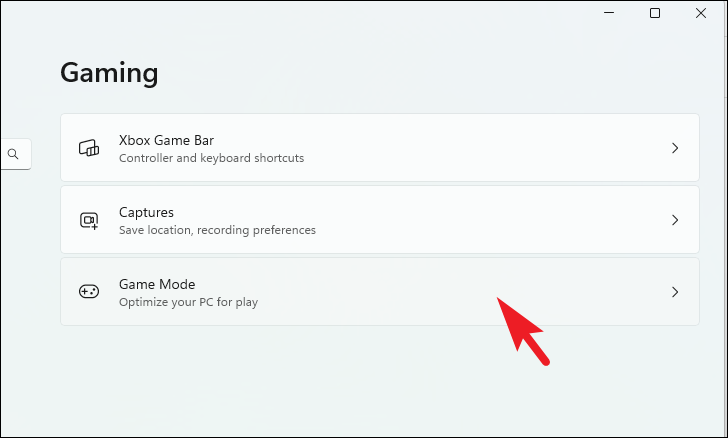
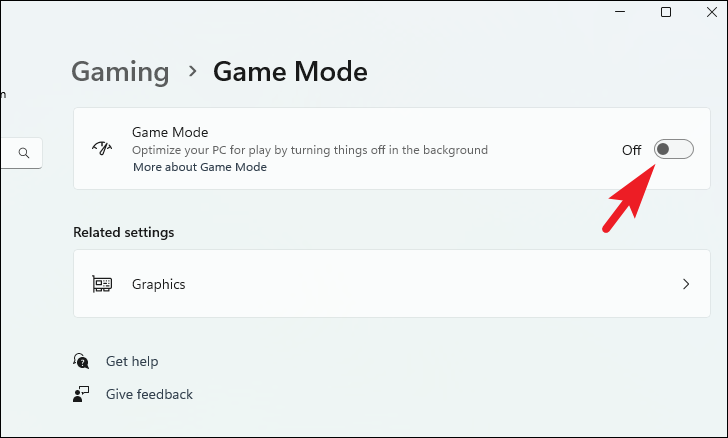
Once disabled, check if your Windows key is responsive.
Method 6: Perform Basic Keyboard Checks
Sometimes, physical issues with the keyboard can cause keys to stop working.
If the Windows key works with another keyboard, you might need to repair or replace your current keyboard.
Method 7: Force Keyboard Rescan
If the issue persists, forcing Windows to rescan the keyboard layout may help.
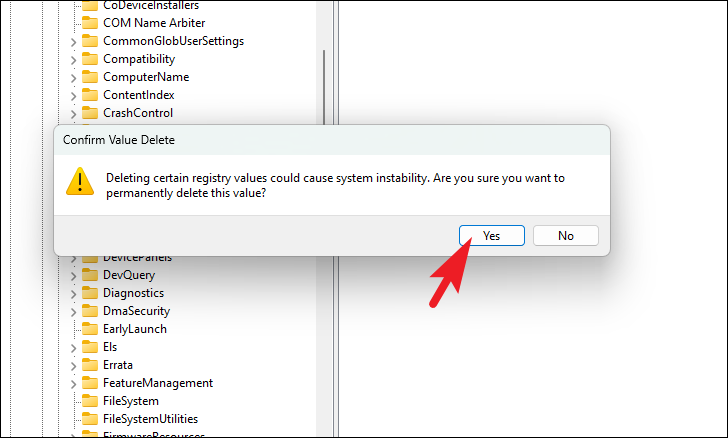
Option 1: Using Registry Editor
Registry Editor. Go to the Start Menu, type Registry Editor, and click on it from the search results.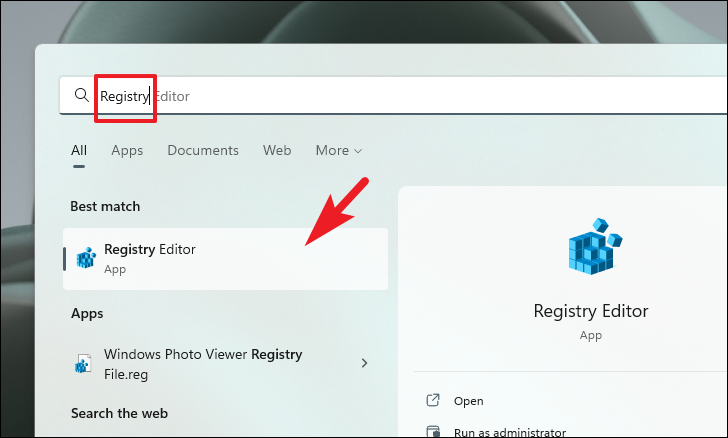
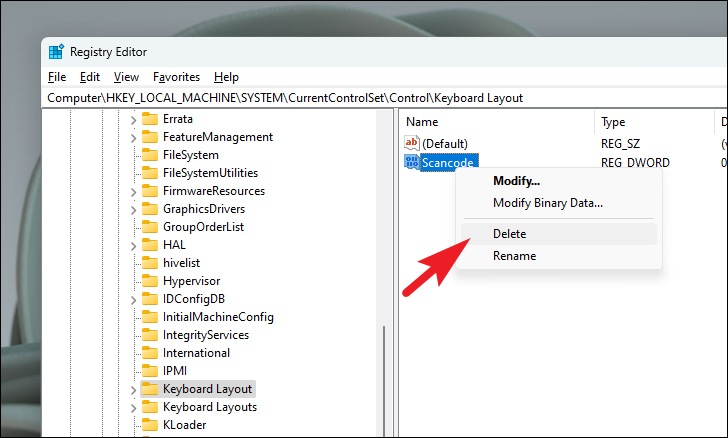
Computer\HKEY_LOCAL_MACHINE\SYSTEM\CurrentControlSet\Control\Keyboard Layout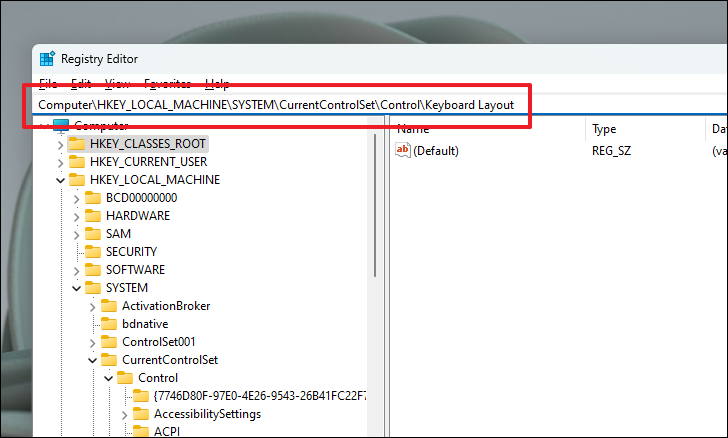
Option 2: Using Windows PowerShell
If you prefer not to edit the registry manually, you can use PowerShell.
Windows Terminal as an administrator. Go to the Start Menu, type Terminal, right-click on Windows Terminal, and select Run as administrator.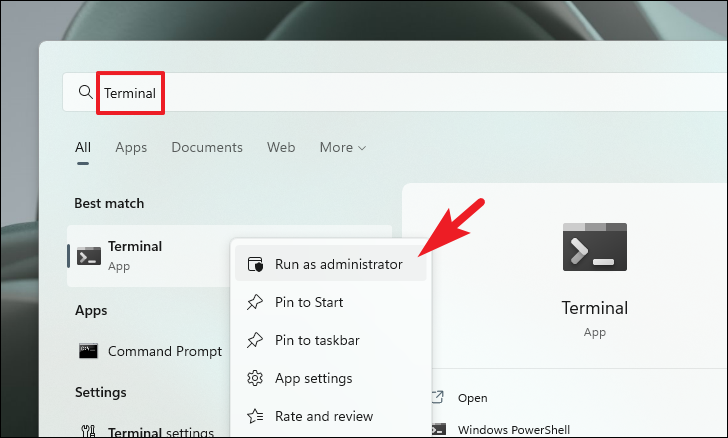
Get-AppXPackage -AllUsers | Foreach {Add-AppxPackage -DisableDevelopmentMode -Register "$($_.InstallLocation)\AppXManifest.xml"}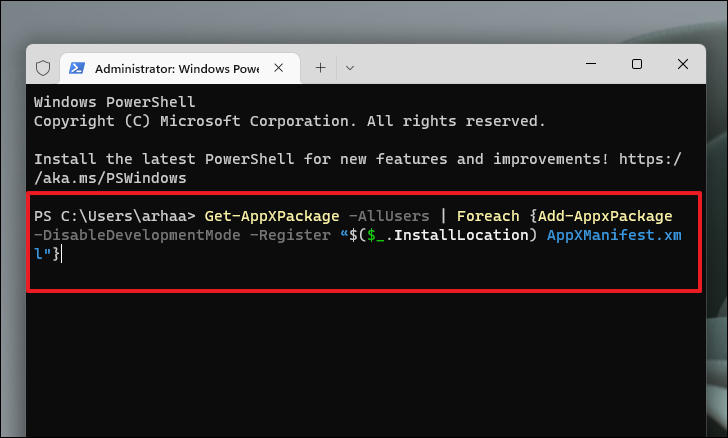
By following these methods, you should be able to resolve the issue with the Windows key not working on your Windows 11 PC.


