iMessage has always been an exclusive service to users owning Apple products. Though there are many instant messaging services to rival the iMessage, none of them has come close to de-throne it from the most exclusive.
Fortunately, you don’t need to subscribe to the whole Apple ecosystem charade just to experience the iMessage or be in constant touch with your friend who uses an iPhone. ‘AirMessage’ is one great piece of software that will allow you to experience the iMessage on any internet-enabled device.
That being said, the one and only caveat of AirMessage is that it requires a MacBook to work and it needs to be turned on and connected to the internet in order for you to send and receive iMessages as it works as a private server.
If you have been going through FOMO on iMessages, or you wish to surprise your iPhone-owning friend with an out-of-the-blue iMessage, AirMessage will suit you well. So, without further ado, let’s get started.
Setup AirMessage Server on your MacBook
Before you can use your Android device to send and receive iMessage, you will need to install an AirMessage server on your MacBook that can facilitate the functionality.
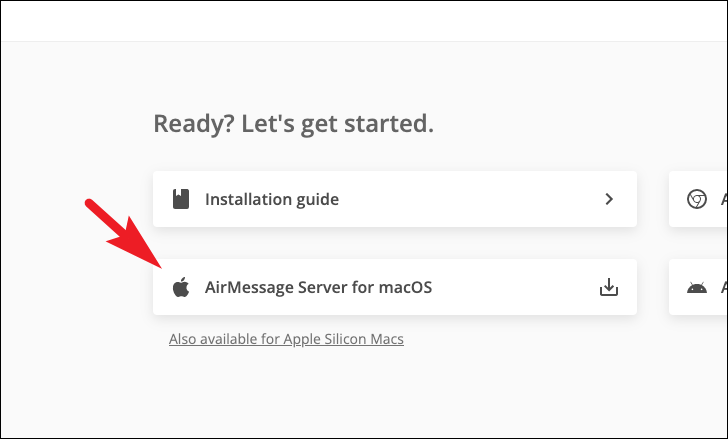
To do so, head to airmessage.org using your preferred browser. Then, scroll down to the end of the page and click on the ‘AirMessage Server for macOS’ tile to download the AirMessage server for Intel MacBooks.
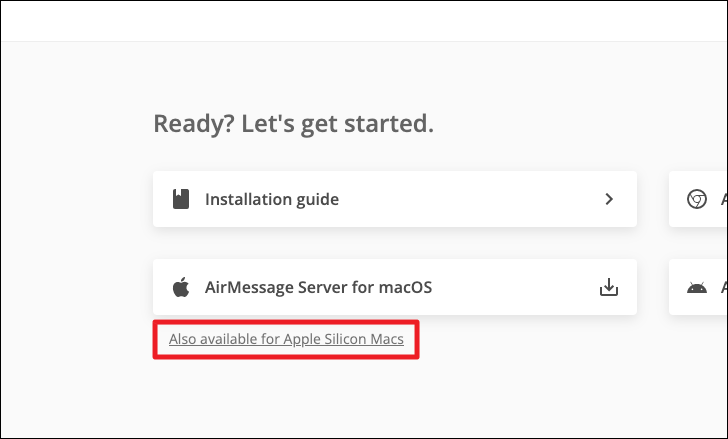
In case you have an M1 MacBook, click on the ‘Also available for silicone Macs’ option and your download should begin immediately.
Once downloaded, double-click on the .zip file to extract the app.
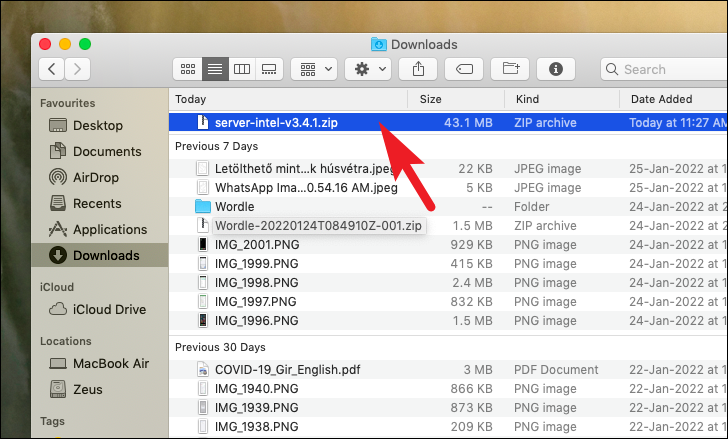
After extracting, copy the .app file you downloaded and paste it to the ‘Applications’ folder on your MacBook by using the Command+C and then Command+V keyboard shortcuts respectively.
In order to continue, you will have to provide the ‘AirMessage’ full disk access in order to relay iMessage to your device.
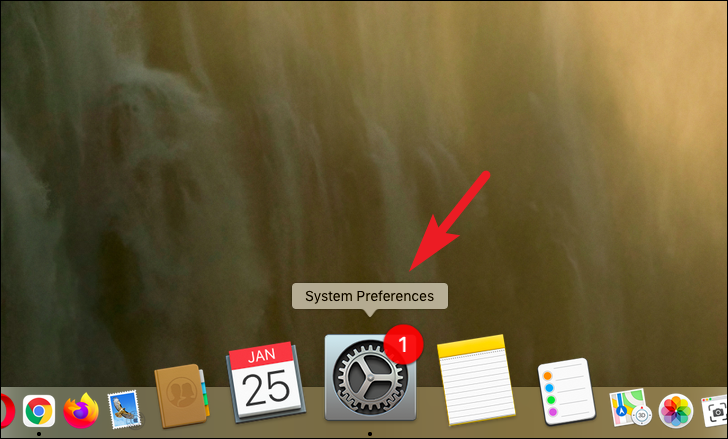
To do so, head to the ‘System Preferences’ app either from the dock or from the launchpad of your device.
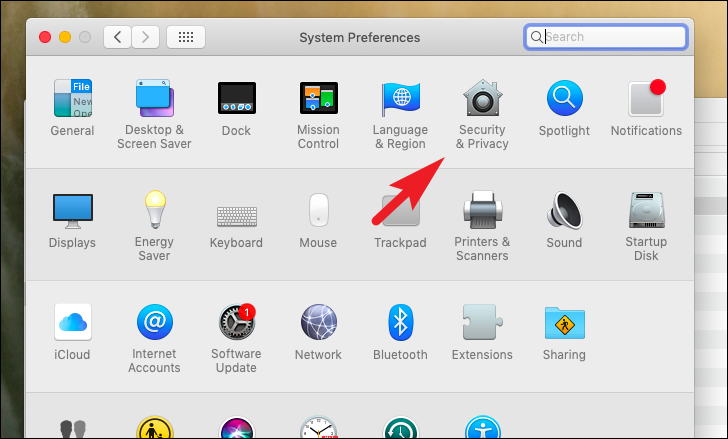
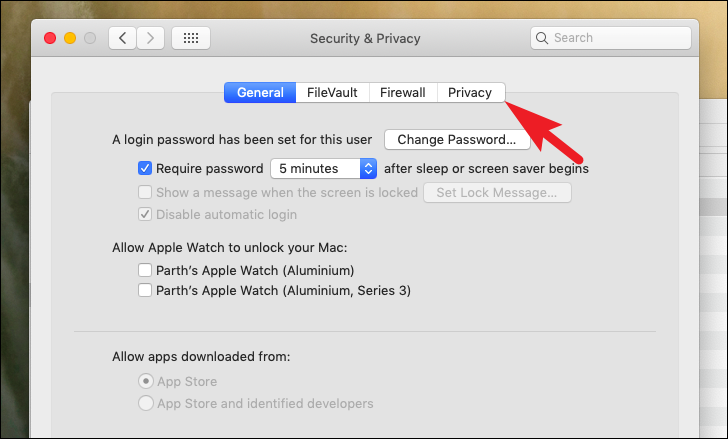
Next, click on the ‘Security & Privacy’ tile present on the System Preferences window.
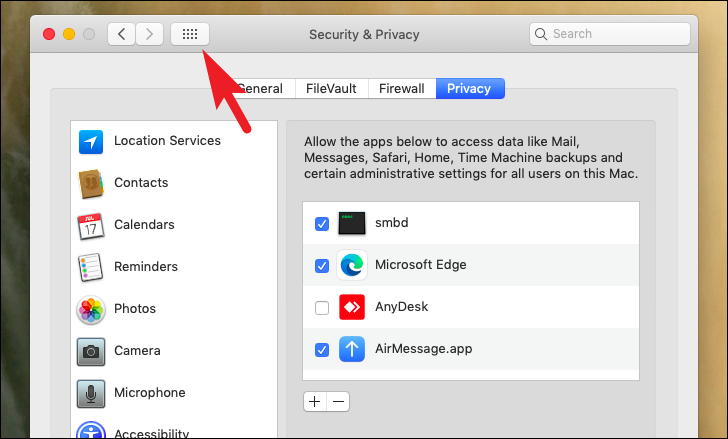
Now, click on the ‘Privacy’ tab to continue.
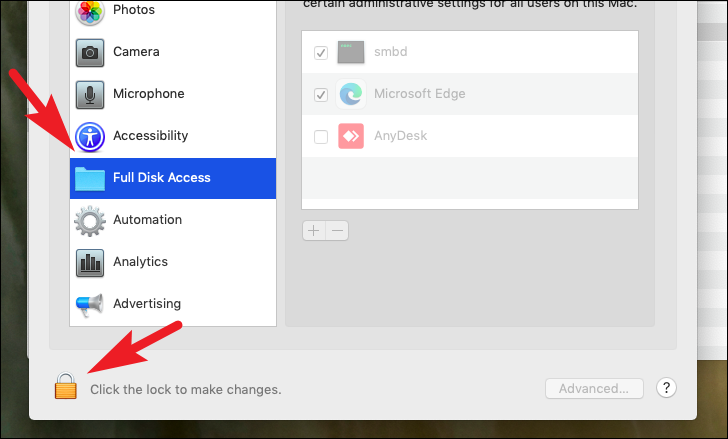
Then, from the left sidebar, scroll down to locate and click on the ‘Full Disk Access’ option. Next, click on the ‘Lock’ icon present at the bottom right corner of the ‘Security & Privacy’ window and authenticate yourself using your preferred method of authentication.
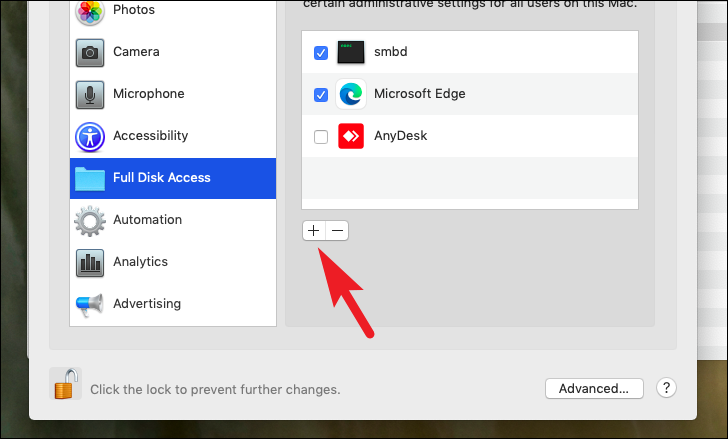
Once authenticated, click on the ‘+’ icon present on the window. This will open a separate window on your screen.
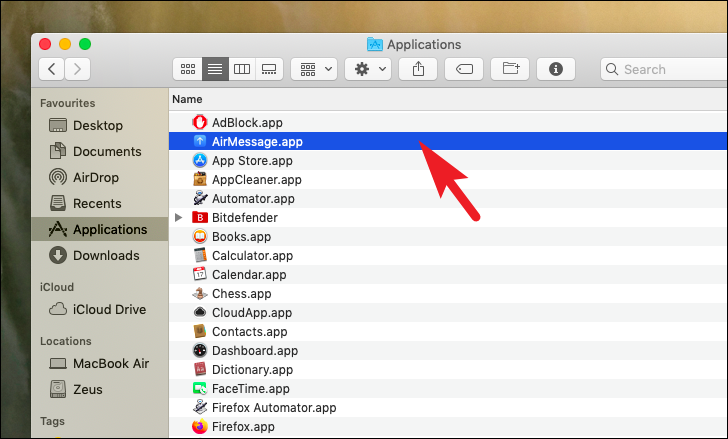
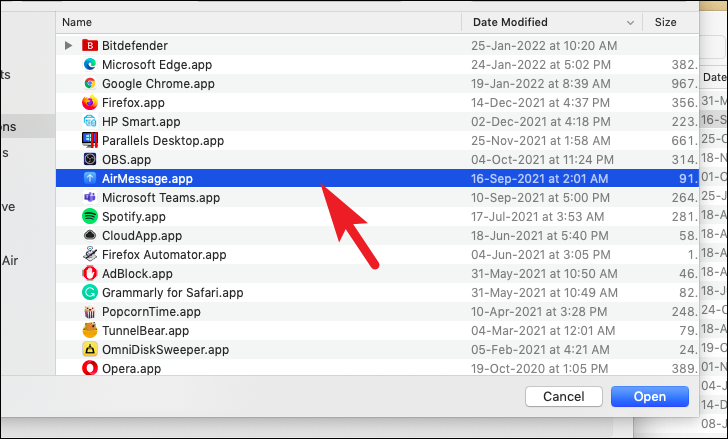
Now, locate and double-click on the ‘AirMessage’ option from the list to grant the app full disk access to your macOS device.
Since your MacBook will essentially function as a server, it needs to be always active in order to send and receive messages to your non-Apple devices. In order to achieve that, you will have to tweak the sleep settings of your macOS device.
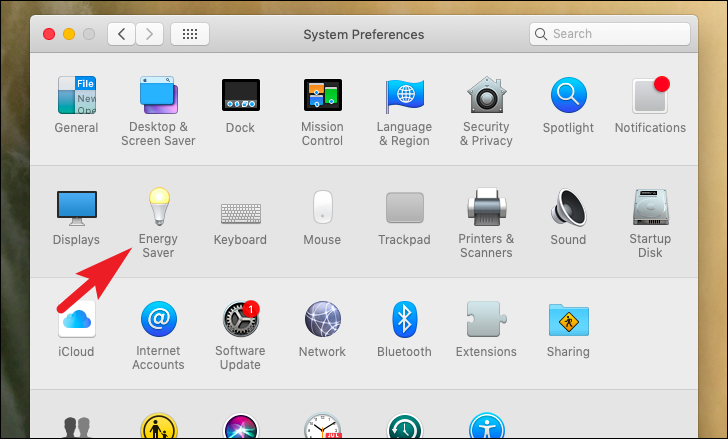
From the ‘Security & Privacy’ page of the System Preferences, click on the ‘Grid’ icon to return to the home page of System Preferences.
Now, click on the ‘Energy Saver’ icon from the grid of options to continue.
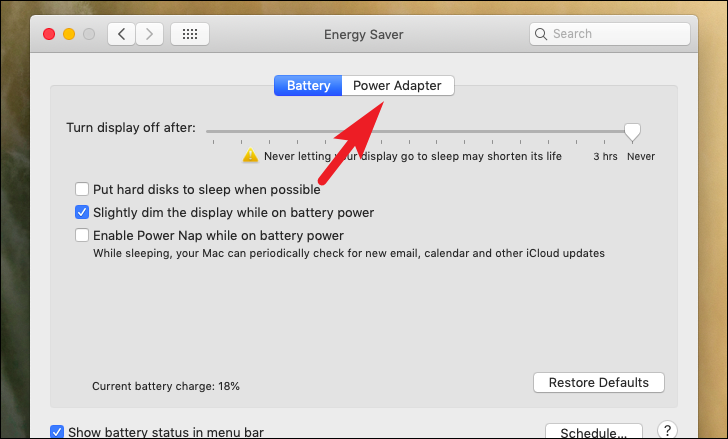
After that, click on the ‘Power Adapter’ option to continue.
Next, click on the checkbox preceding the ‘prevent computer from sleeping automatically when the display is off’ option.
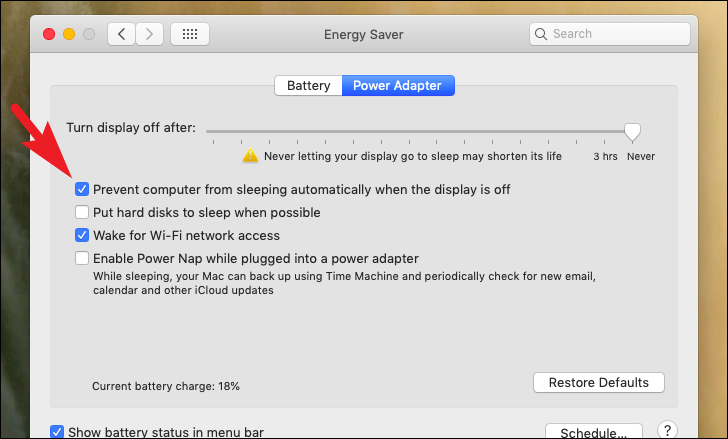
Note: If you are running the AirMessage server on a MacBook, the system will freeze all running software if the lid is shut irrespective of the ‘Energy Saver’ settings.
Now, head to the launchpad and launch the ‘AirMessage’ app.
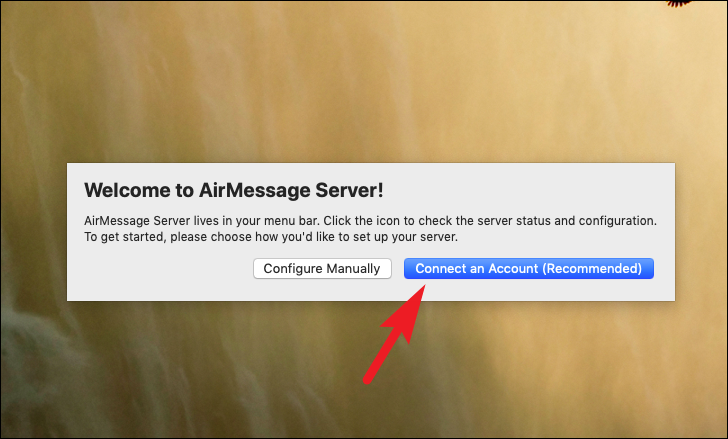
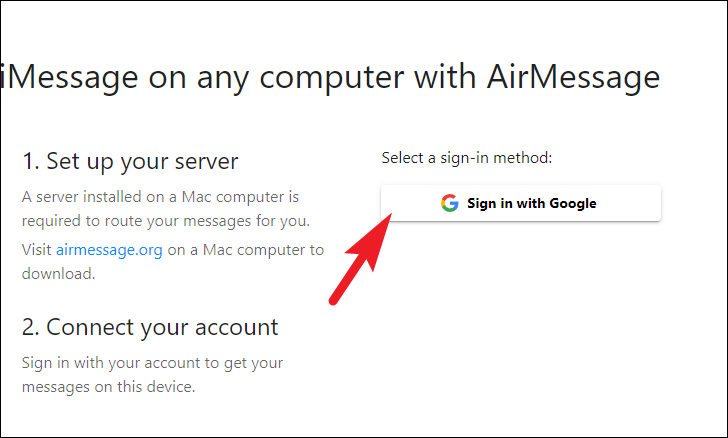
After that, from the separately opened window, click on the ‘Connect an Account’ button to proceed. This will open a separate window on your screen.
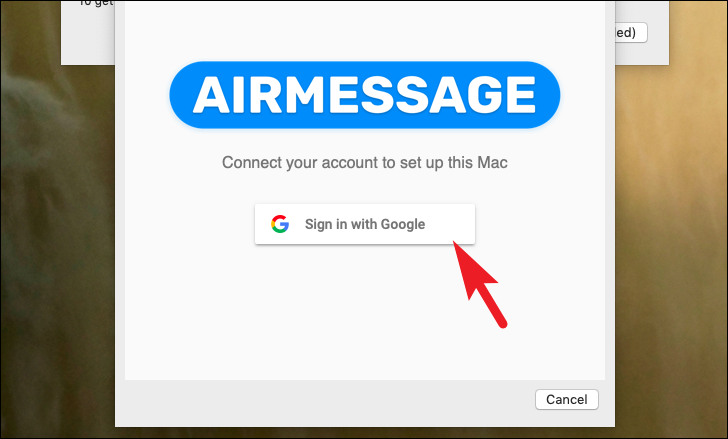
Now, click on the ‘Sign in with Google’ button to connect your Google account with AirMessage.
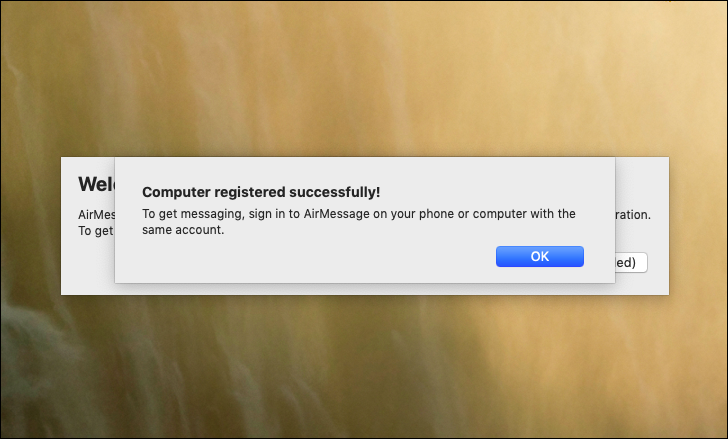
Once connected, you will receive a message stating the same on your screen.
And that’s it you have installed the server on your macOS device. It is now time to prep your Android or Windows device that you wish to use to send/receive iMessage.
Download & Install AirMessage App on your Android Device
Once you have the AirMessage server up and running, you now need to download the Android app from the PlayStore and start using the service in order to send and receive the iMessage from your Android device.
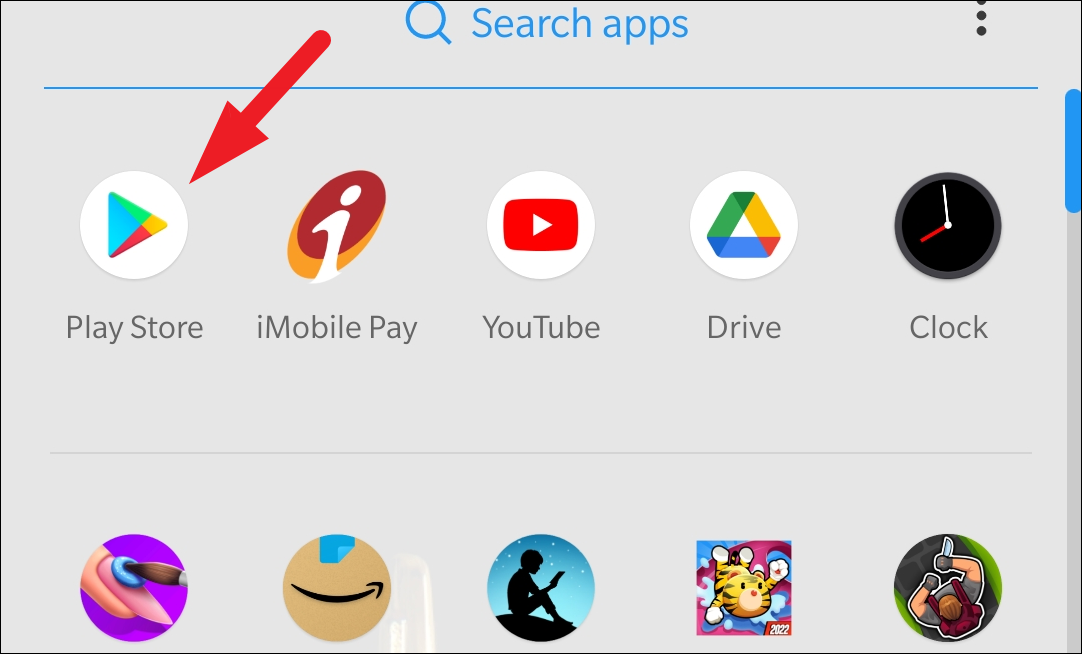
To do so, first, open the PlayStore app either from the home screen or from the app library of your Android device.
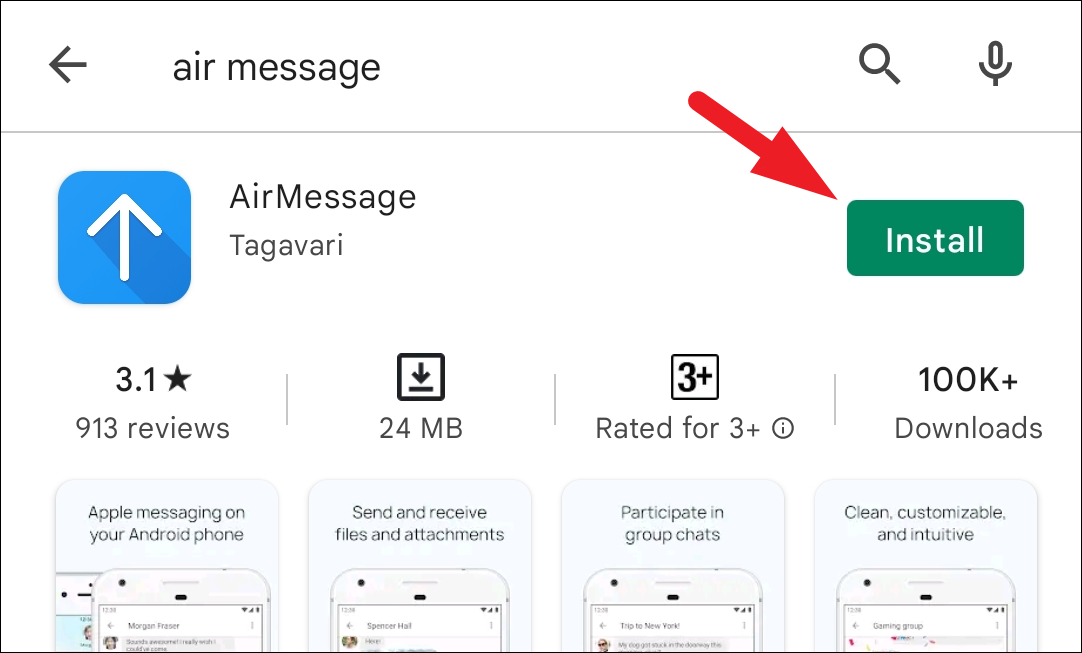
Next, tap on the ‘Seach bar’ present on the topmost section of the screen and type Air Message. Then, click on the ‘Search’ button from the bottom-right corner of the on-screen keyboard to perform the search.

Now, from the search results, click on the ‘Install’ button to download and install the AirMessage app on your Android device.
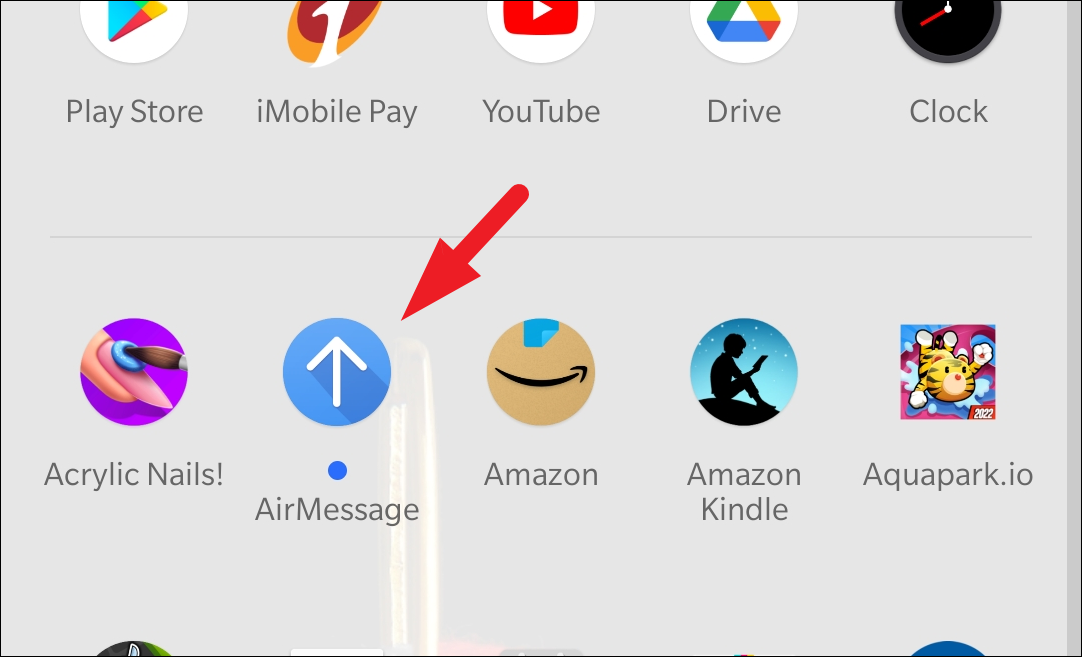
Once installed, open the app either from the home screen shortcut or from the app drawer of your Android device.
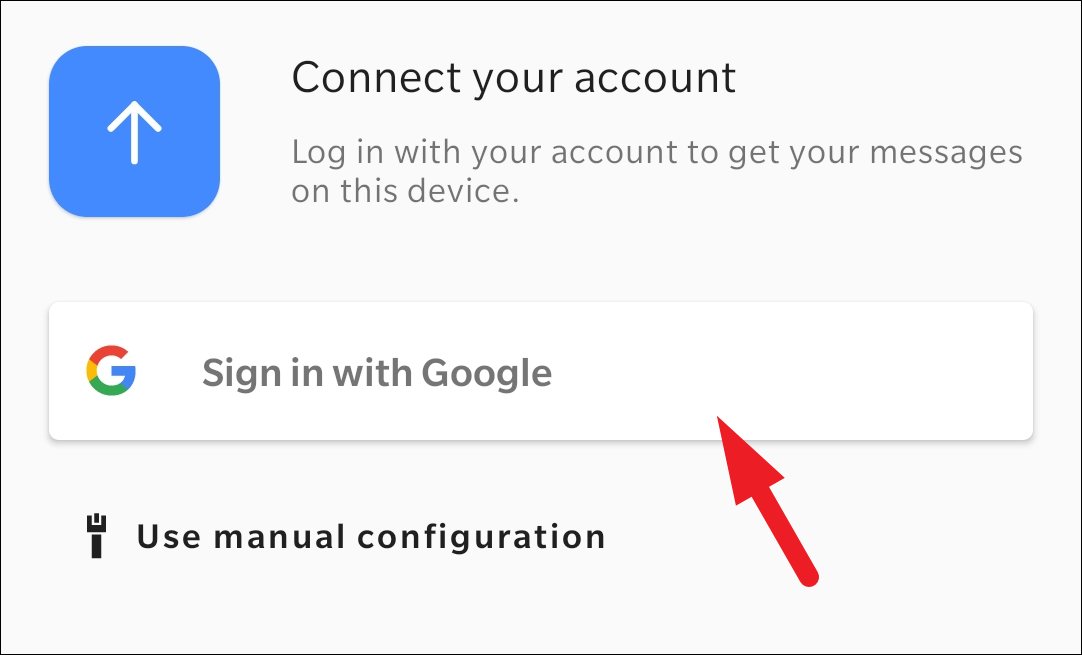
Next, tap on the ‘Sign in with Google’ option and sign in using the same Google account you signed in on the AirMessage server app on your macOS device.
You will now be able to see all your message history. You can now send or receive iMessage on your Android device as long as your macOS device is active and connected to the internet.
Use AirMessage Web App to Send/Receive iMessages on your Windows Device
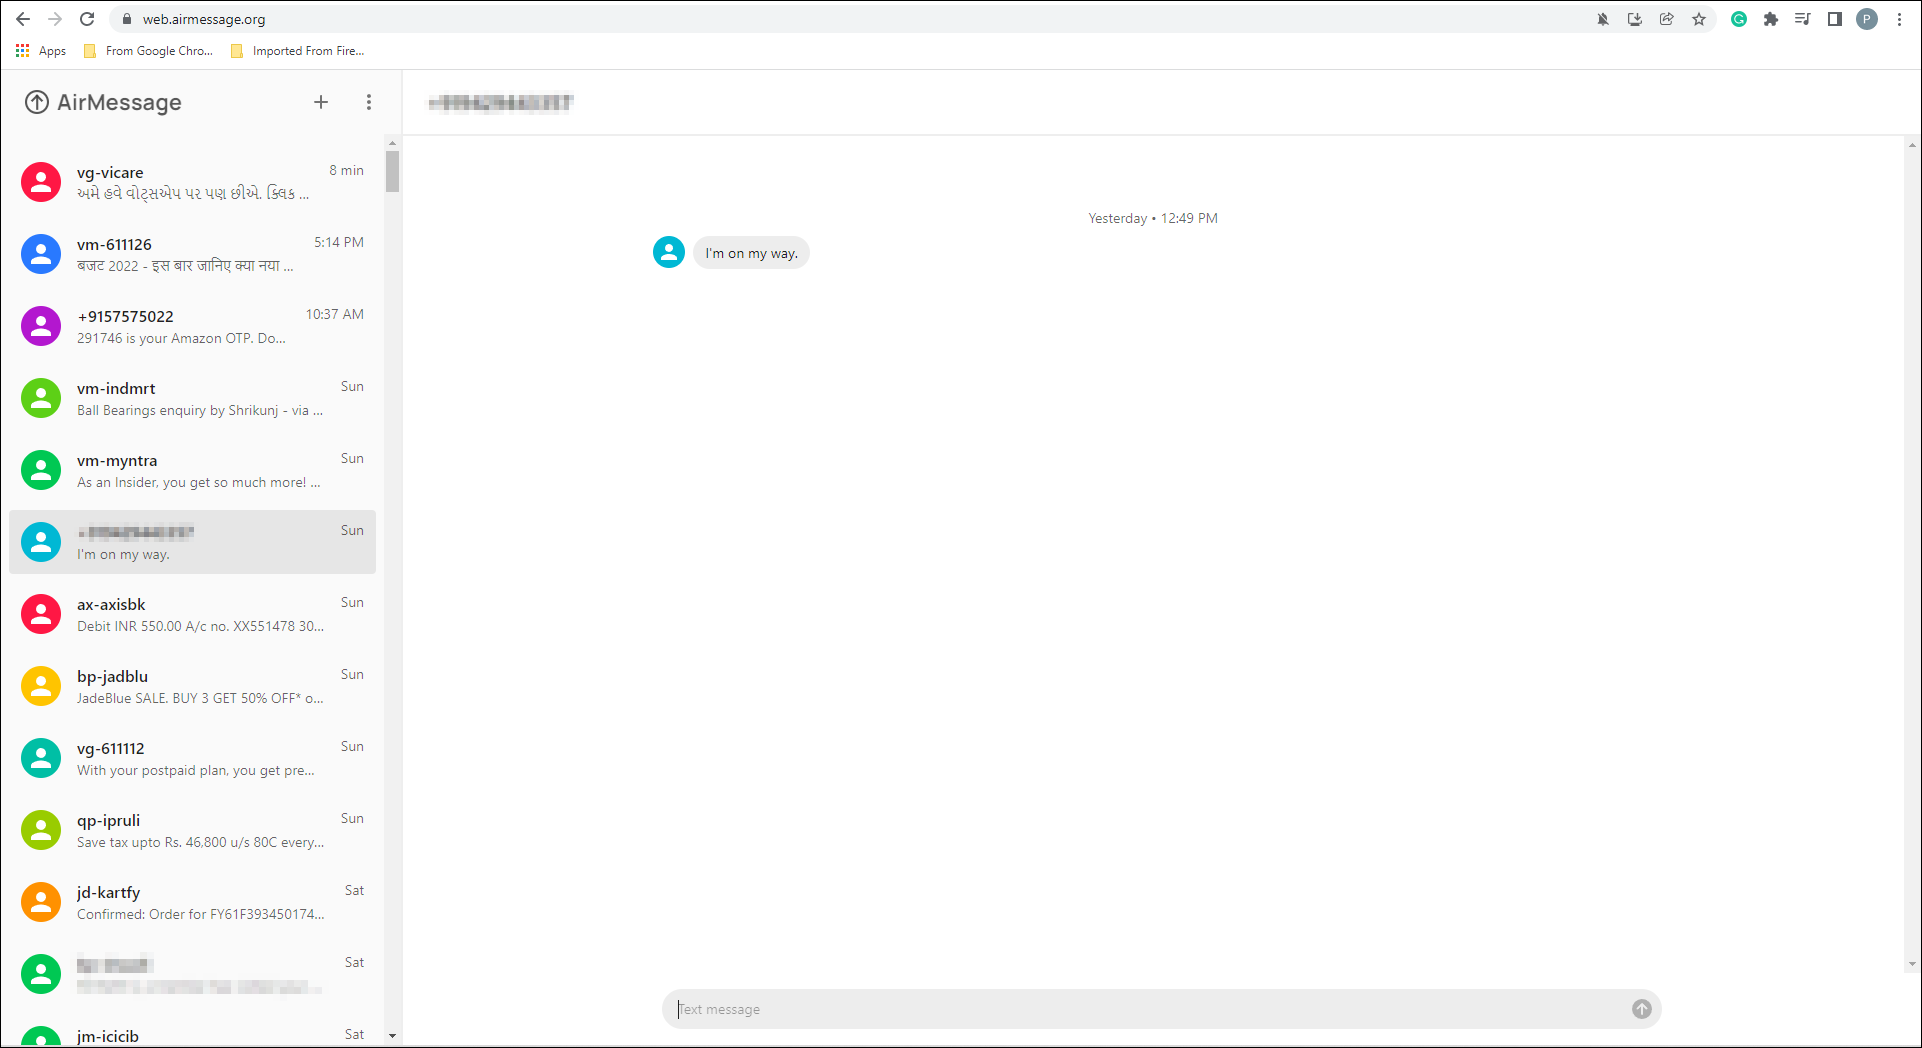
Using the AirMessage app on your Windows device is pretty straightforward and simple. Moreover, the AirMessage provides a web interface so you do not even need to download an app as well and can simply log in using any of your preferred browsers.
To do so, open any of your preferred browsers on your Windows machine. Then, head to the web.airmessage.org. Once the site is loaded, click on the ‘Sign in with Google’ button.
Now log in with the same account you used to log in on the AirMessage server app on your macOS device. Once logged in, you should be able to see all of your messages history along with the ability to send/receive iMessage on your Windows device.
There you go people, you can now use your Android and/or Windows devices to send/receive iMessages using this guide in a super convenient way.