
Quick Links on the Microsoft Edge New Tab page provide shortcuts to frequently visited sites, but for users seeking a cleaner interface or stricter focus, these tiles can be distracting. Recent updates to Edge have changed how these links are managed, leading to confusion about which settings are available and which methods truly remove Quick Links. Below, you'll find the most effective ways to hide or disable Quick Links on the Edge New Tab page, whether you're an individual user or managing multiple devices.
Disable Quick Links via New Tab Page Settings
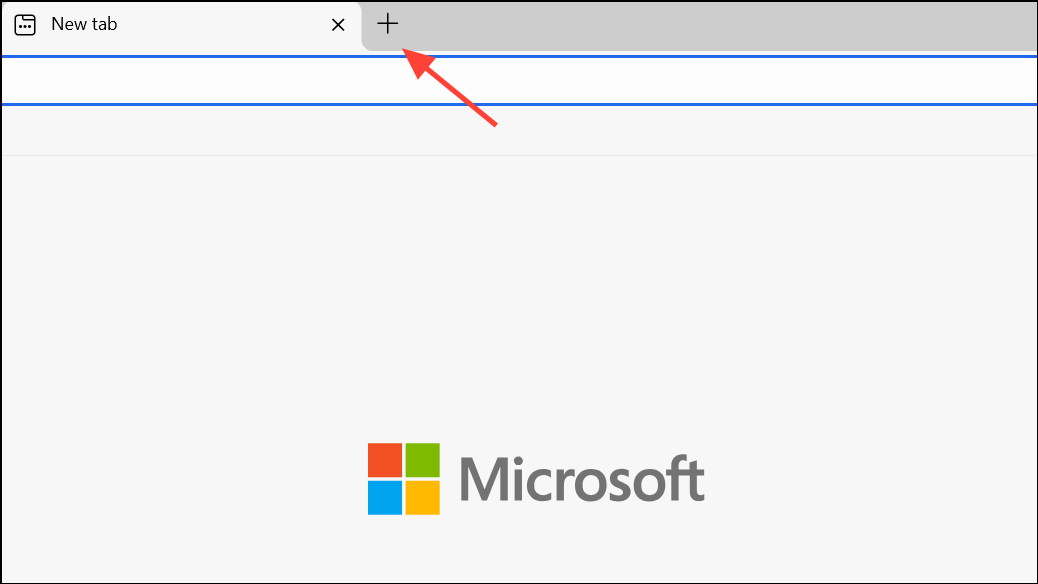
Step 1: Open Microsoft Edge and launch a new tab by pressing Ctrl + T or clicking the plus (+) icon next to your open tabs.
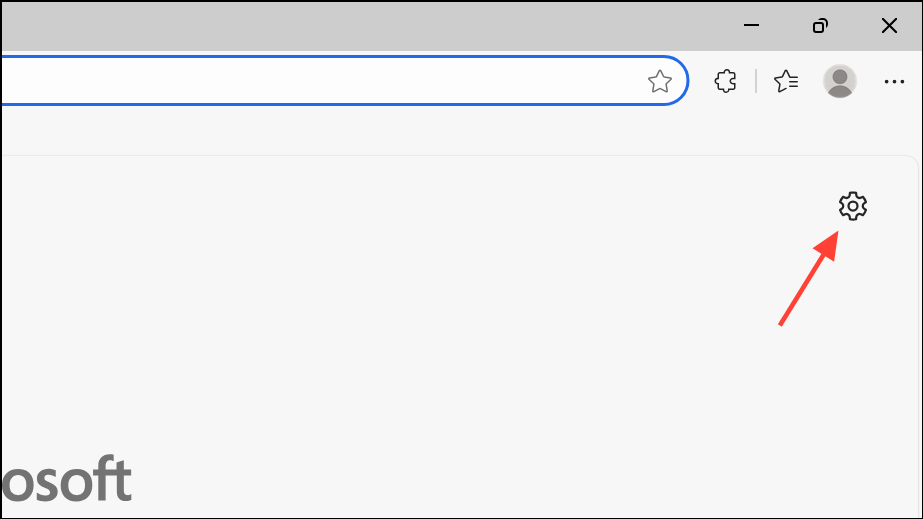
Step 2: Locate and click the gear-shaped Page settings icon in the upper-right corner of the new tab page. This opens layout and content options for the page.
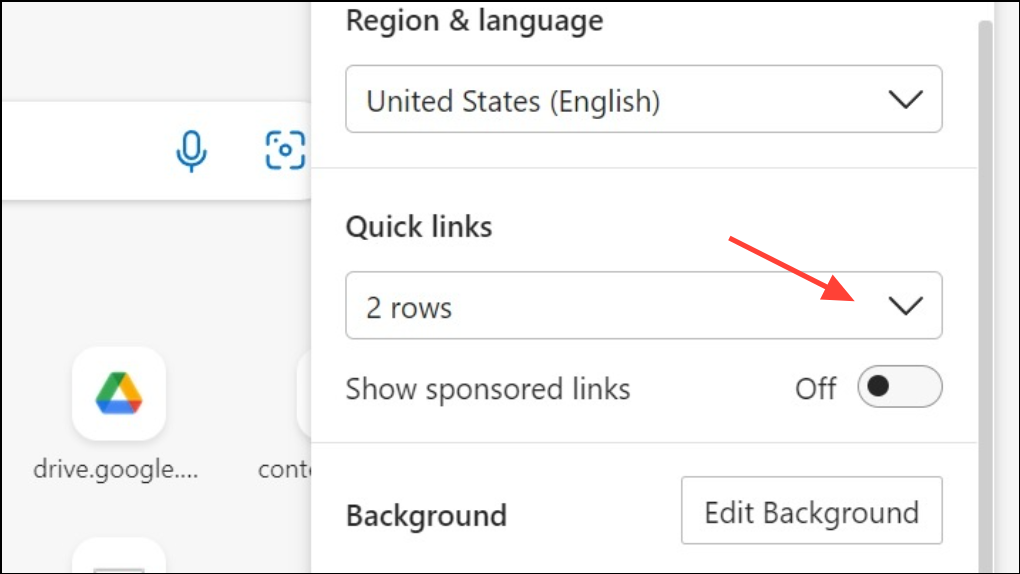
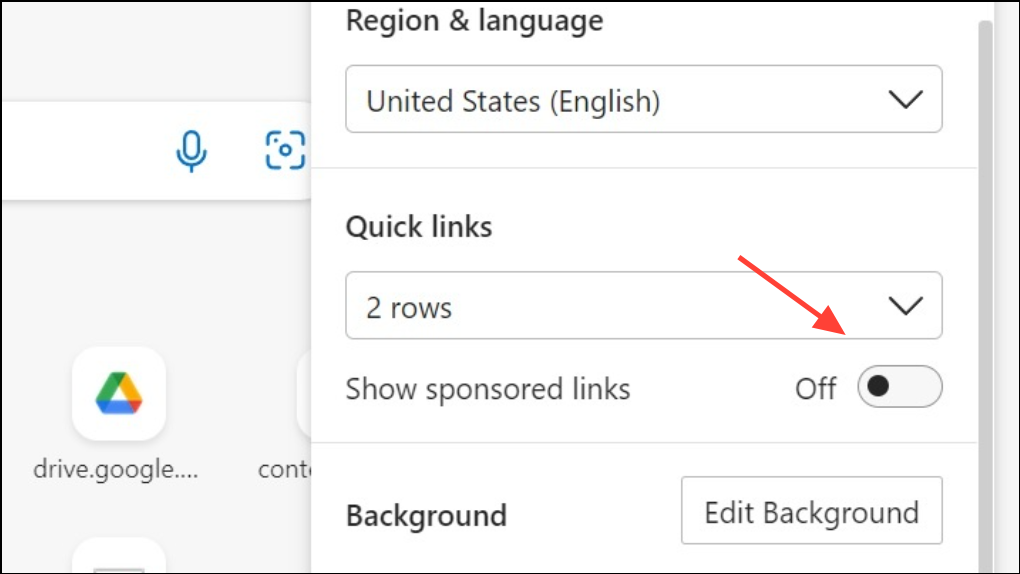
Step 3: In the settings flyout, find the Quick links drop-down menu. Click the arrow to view options.
Step 4: Select Off from the drop-down menu. This immediately hides all Quick Links from the New Tab page. If you wish to restore them later, you can select either 1 row or 2 rows from the same menu.
This method works for most users on current versions of Edge, but some updates or A/B testing may temporarily remove or relocate these settings. If you do not see the option, proceed to the next method.
Disable Quick Links via Edge Settings Menu
Step 1: Open Microsoft Edge and click the three-dot Settings and more button (Alt + F) in the upper-right corner.
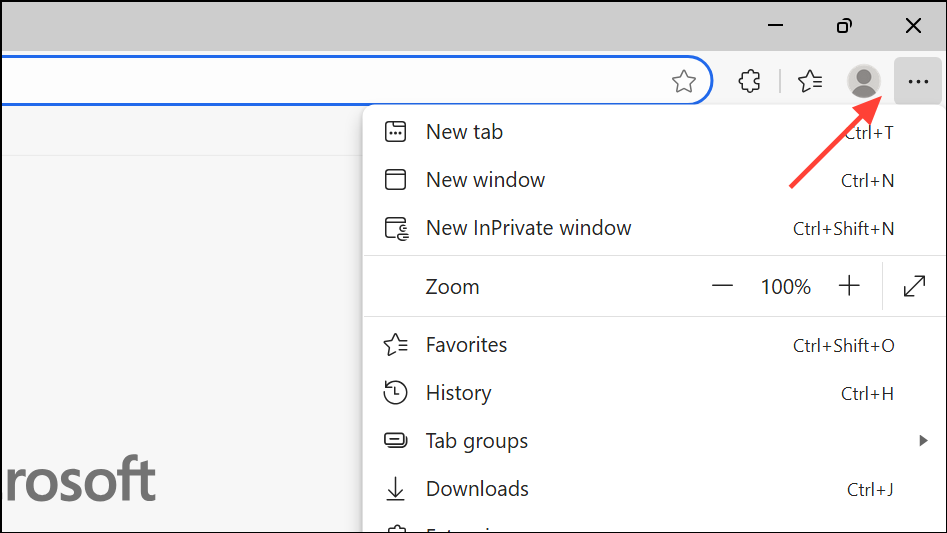
Step 2: Choose Settings from the menu.
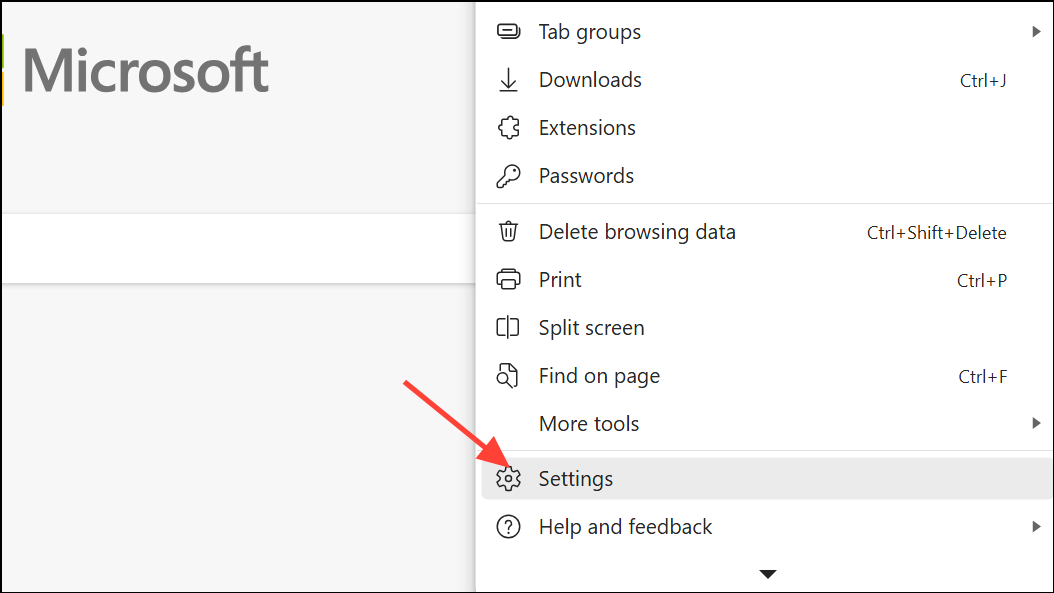
Step 3: In the left sidebar, select Start, home, and new tabs. Under the New tab page section, click the Customize button next to Customize your new tab page layout and content.
Step 4: In the customization window, find the Quick links drop-down menu and set it to Off. This hides Quick Links for your user profile.
If you do not see these options, your Edge version may have limited customization due to recent updates or organizational policies. In such cases, administrative methods are required.
Disable Quick Links for All Users Using Registry Editor
For system administrators or users who want to enforce this setting across all accounts on a device, the Windows Registry can be modified to disable Quick Links. This method requires administrative privileges and caution, as incorrect changes to the registry can cause system issues.
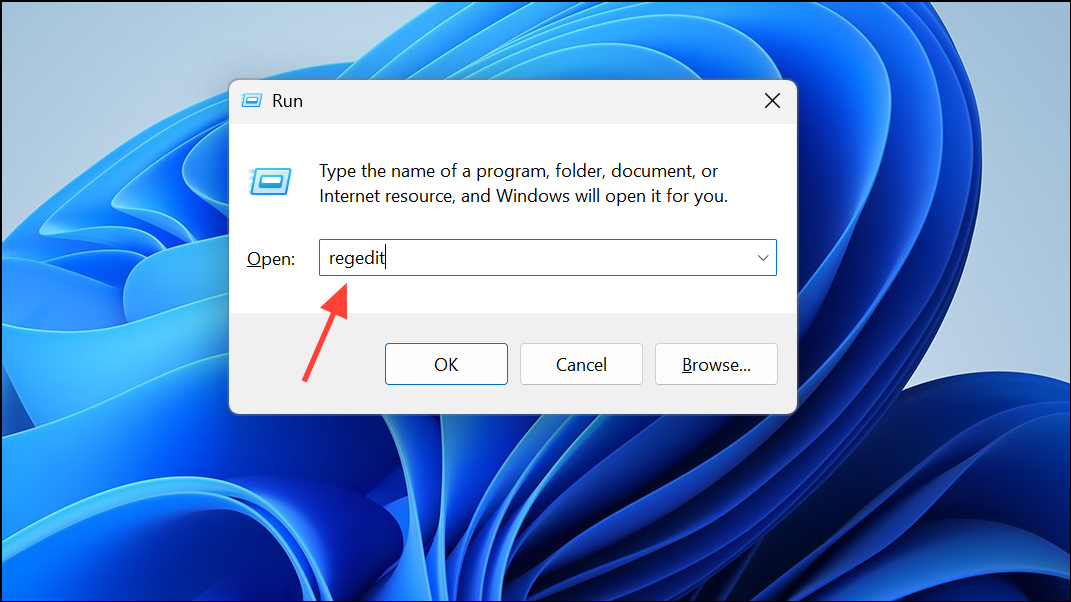
Step 1: Press Win + R to open the Run dialog, type regedit, and press Enter. Approve any User Account Control prompts.
Step 2: In Registry Editor, navigate to:
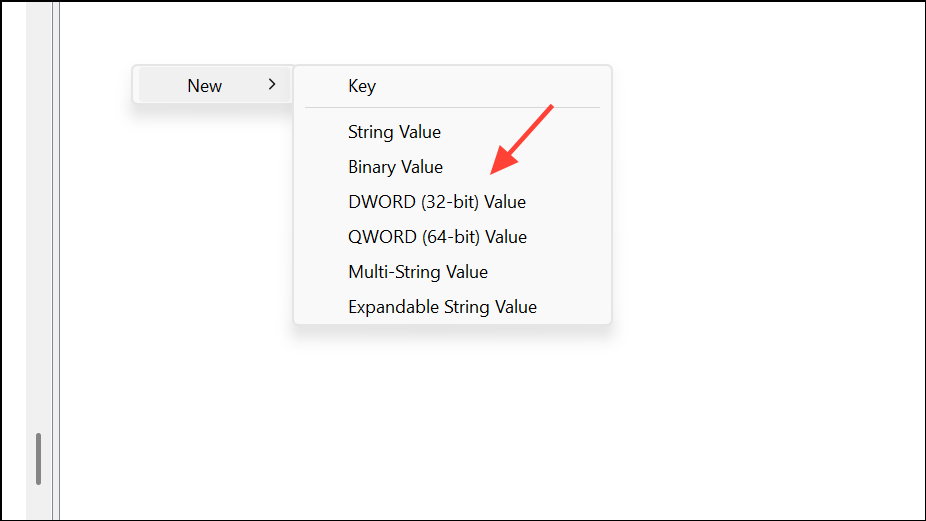
HKEY_LOCAL_MACHINE\SOFTWARE\Policies\Microsoft\EdgeStep 3: If the Edge key does not exist, right-click on Microsoft, select New > Key, and name it Edge.
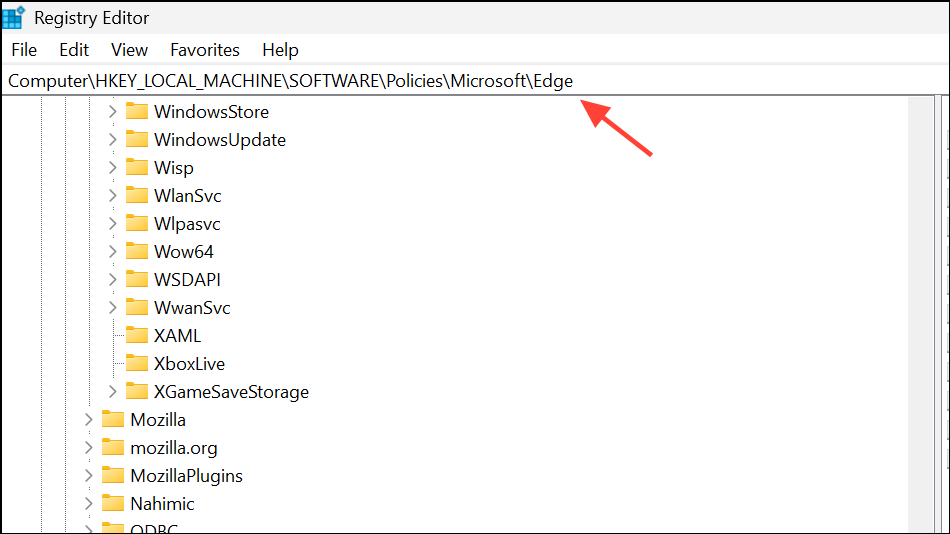
Step 4: Inside the Edge key, right-click an empty area, choose New > DWORD (32-bit) Value, and name it NewTabPageQuickLinksEnabled.
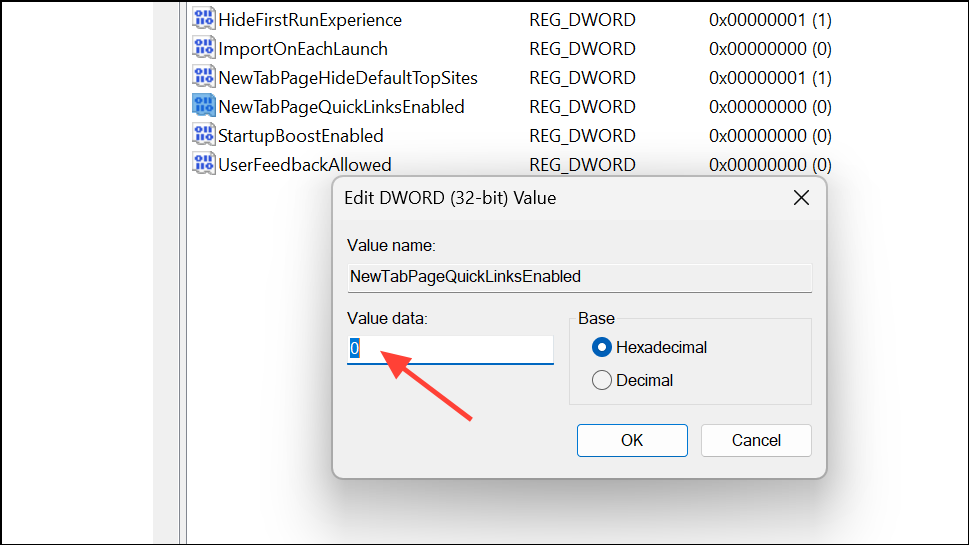
Step 5: Double-click NewTabPageQuickLinksEnabled and set its value to 0 to disable Quick Links. Click OK to save.
Step 6: Close Registry Editor and restart Microsoft Edge for the changes to take effect. The Quick Links section will now be hidden and users cannot re-enable it from their settings.
To restore Quick Links, delete the NewTabPageQuickLinksEnabled value or set it to 1.
Disable Quick Links via Group Policy (Enterprise and Education)
Organizations using Windows Pro, Enterprise, or Education editions can manage Quick Links using Group Policy. This approach is ideal for deploying settings across multiple devices.
Step 1: Download and install the latest Microsoft Edge ADMX templates from the official Microsoft site if they are not already present on your system.
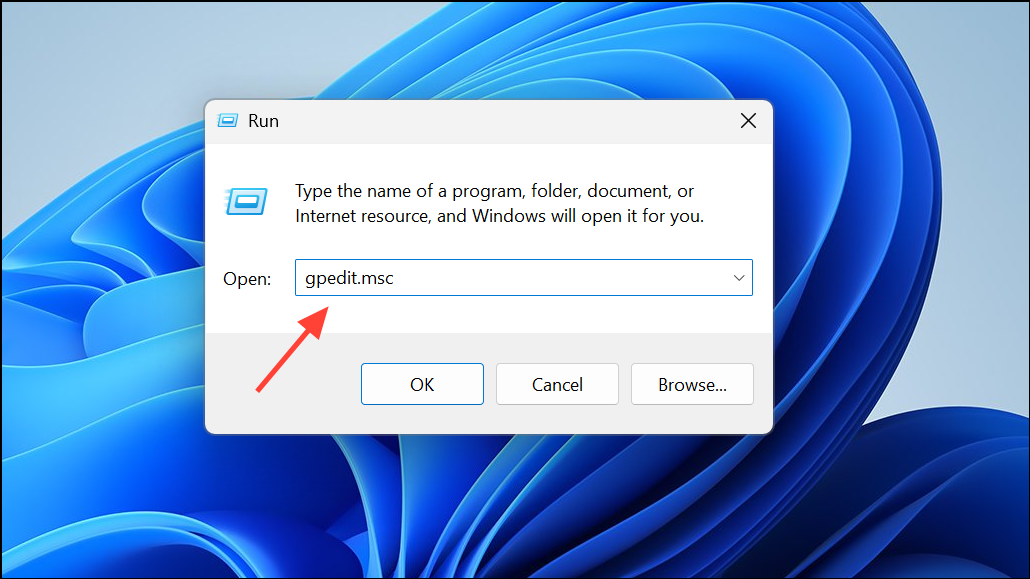
Step 2: Open the Group Policy Editor by pressing Win + R, typing gpedit.msc, and pressing Enter.
Step 3: Navigate to Computer Configuration > Administrative Templates > Microsoft Edge > Startup, home page and new tab page.
Step 4: Locate the policy named Allow quick links on the new tab page (policy name: NewTabPageQuickLinksEnabled).
Step 5: Double-click the policy, select Disabled, and click OK. This will hide Quick Links and prevent users from re-enabling them.
After applying this policy, users will no longer see Quick Links on the New Tab page, and the toggle in settings will be unavailable.
Disable Quick Links via Microsoft Intune (Cloud Management)
For organizations managing devices through Microsoft Intune, Quick Links can be disabled by configuring an Administrative Template profile.
Step 1: Sign in to the Microsoft Intune admin center and go to Devices > Configuration profiles.
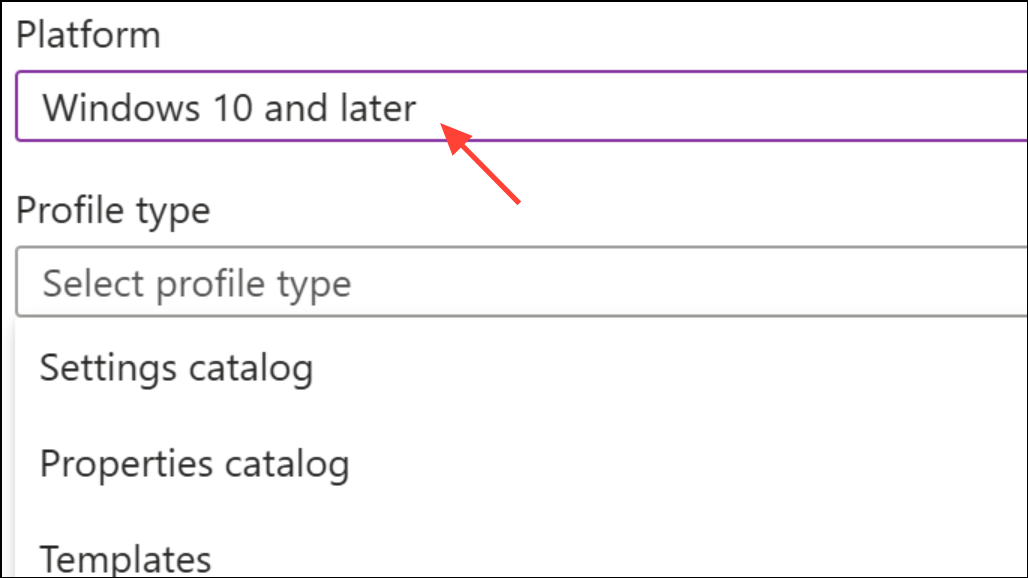
Step 2: Click Create profile, select Platform: Windows 10 and later, and choose Templates: Administrative Templates.
Step 3: In the configuration settings, search for Microsoft Edge and locate the Allow quick links on new tab page policy.
Step 4: Set this policy to Disabled and assign the profile to the desired user or device groups.
After the policy is applied, Quick Links will be hidden for all targeted users, and the option to add or show them will be unavailable.
Additional Notes and Troubleshooting
Recent Edge updates occasionally remove or relocate the Quick Links setting for some users due to staged rollouts or A/B testing. If you notice the manual setting is missing, using the Registry or Group Policy methods above remains effective. For enterprise environments, conflicting settings in Intune and the M365 Admin Center can override each other, so ensure only one configuration source manages the New Tab page experience.
Manual removal of individual Quick Links is possible by hovering over a tile and clicking the three-dot menu, but this does not prevent Edge from adding new Quick Links based on browsing activity unless the feature is fully disabled as described above.
Hiding Quick Links on the Microsoft Edge New Tab page streamlines your browsing space and minimizes distractions, whether for personal focus or organizational policy. If settings shift after Edge updates, revisiting these steps or using administrative controls ensures your preferences persist.