Allocating more RAM to your apps and games on Windows 11 can significantly boost responsiveness, decrease loading times, and reduce lag during intensive tasks. While Windows manages memory automatically, there are several effective methods to allocate additional RAM resources to your favorite applications and games. Here's how you can optimize your Windows 11 system to run your software more efficiently.
Increase RAM Allocation Using Task Manager
The quickest way to allocate more RAM to a specific app or game is by adjusting its priority through the Windows Task Manager. This method temporarily prioritizes the selected application, allowing it to access more memory resources.
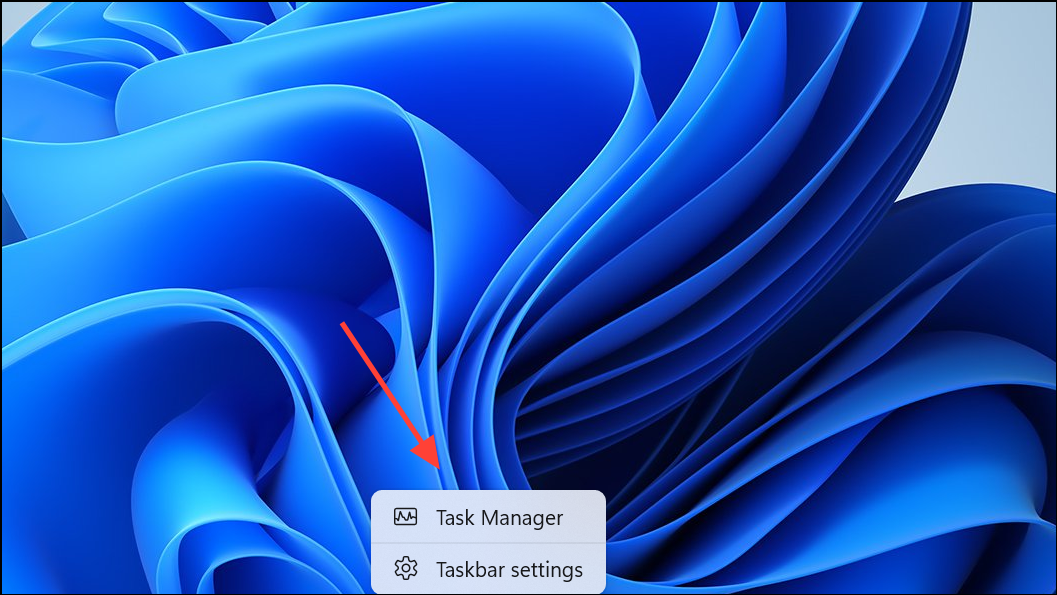
Step 1: Open Task Manager by pressing Ctrl + Shift + Esc or right-clicking the taskbar and selecting "Task Manager."
Step 2: Navigate to the "Details" tab, find your app or game process in the list, right-click it, hover over "Set priority," and select either "High" or "Above Normal." Avoid choosing "Realtime," as this can cause system instability.
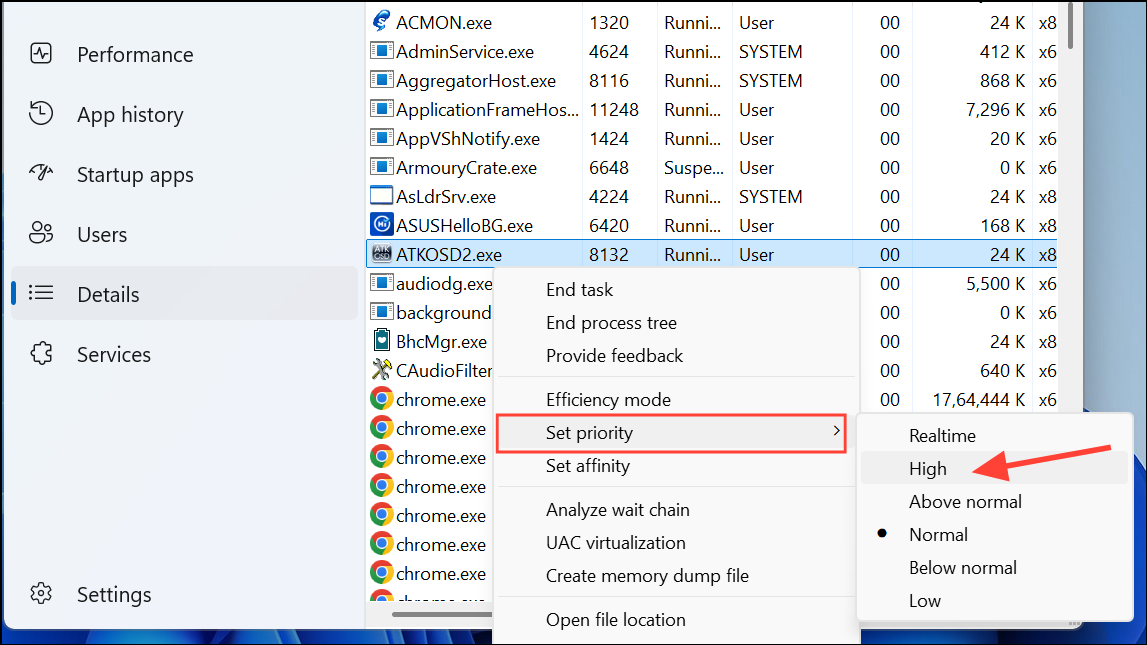
Step 3: Confirm the priority change when prompted. Remember, this adjustment is temporary and resets once the application or your PC restarts.
Adjust Windows to Prioritize Programs
Windows 11 includes a built-in option that prioritizes foreground applications over background processes, which can improve memory allocation for active apps.
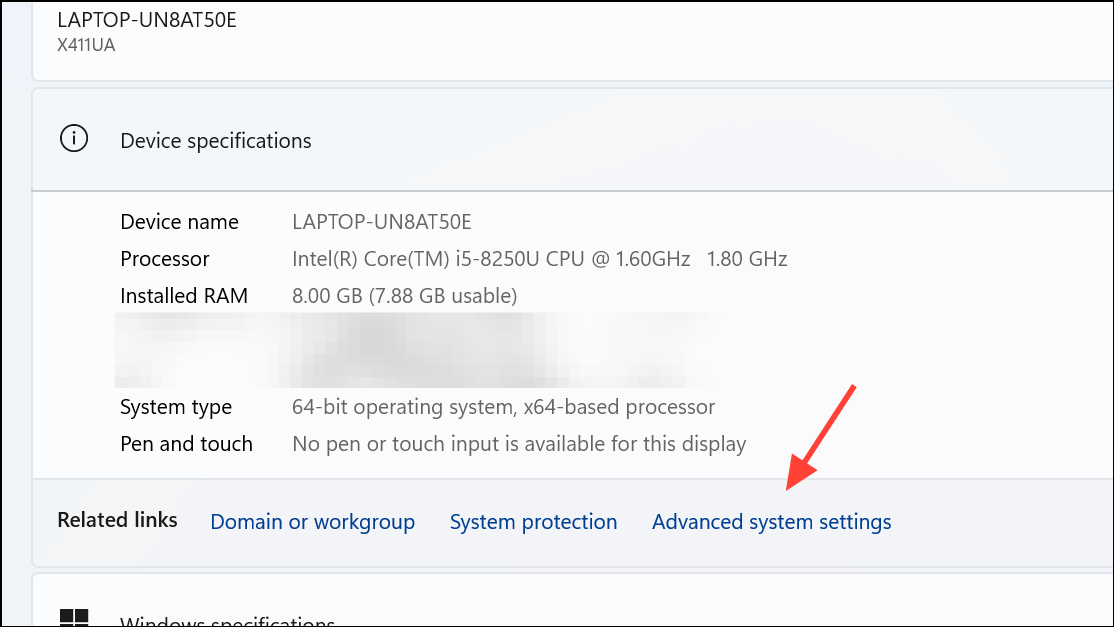
Step 1: Press Windows + S, type "View Advanced System Settings," and select the corresponding result. If the option is not available, click "System" and then click on "Advanced Sys
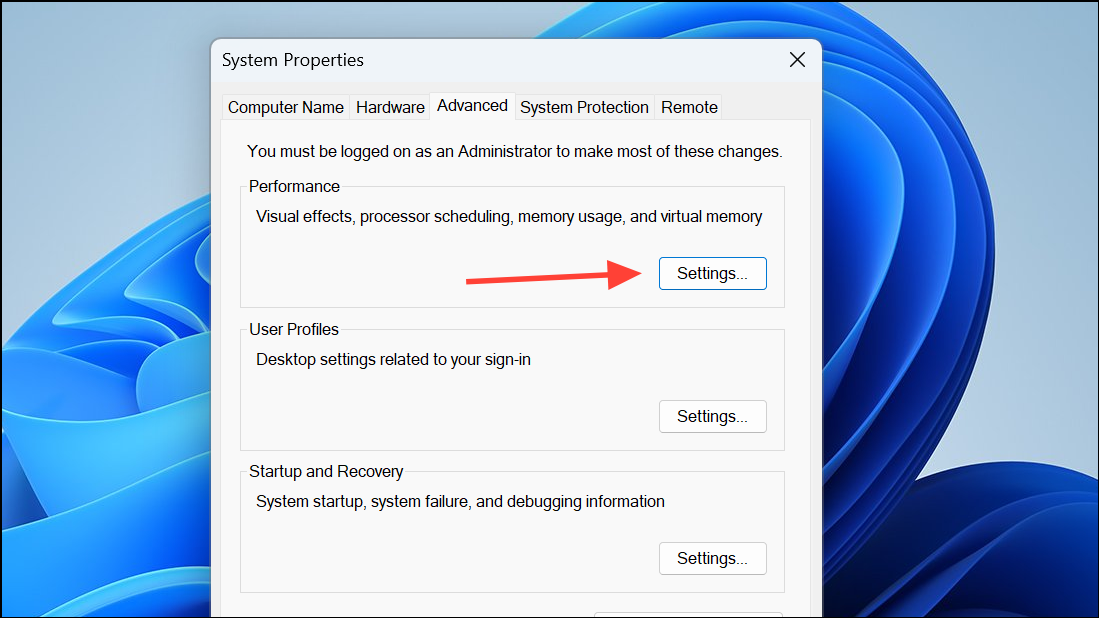
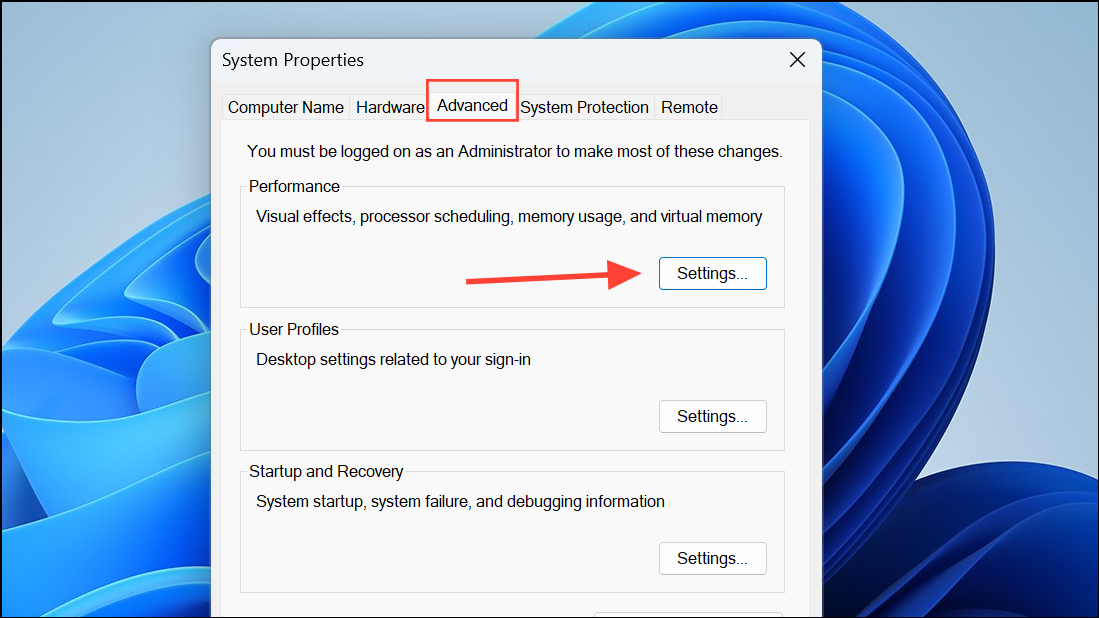
Step 2: In the "System Properties" window, under the "Performance" section, click "Settings."
Step 3: Switch to the "Advanced" tab, then select "Programs" under "Adjust for best performance of."
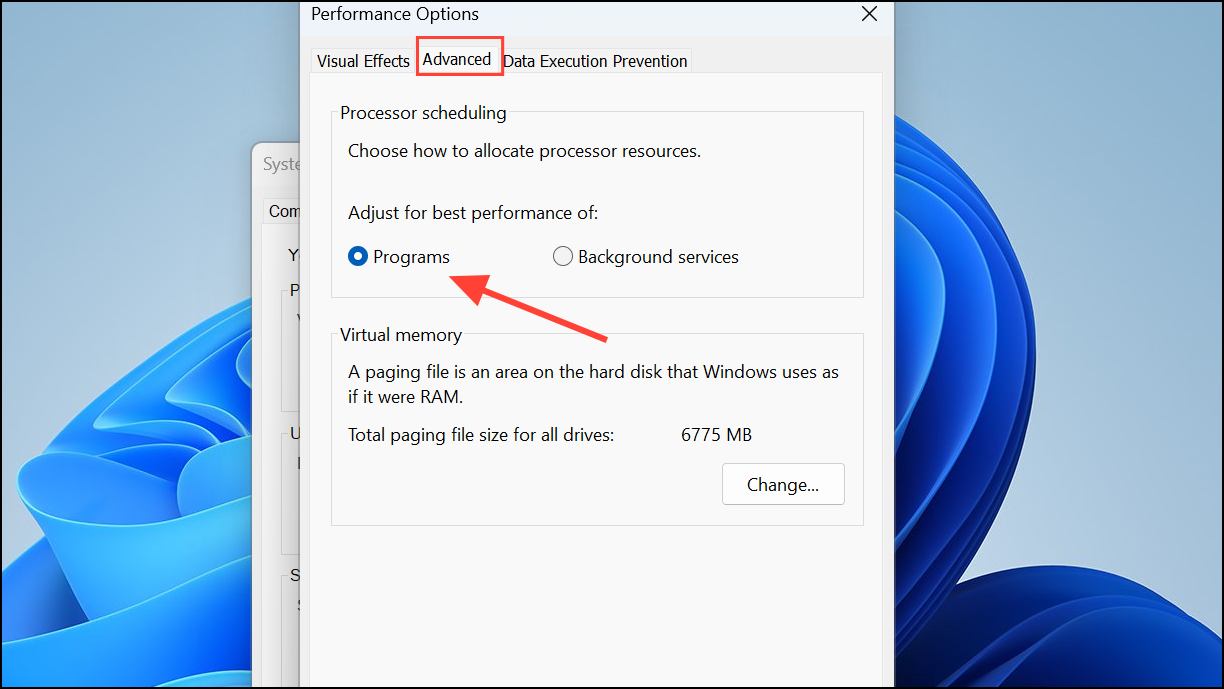
Step 4: Click "Apply" then "OK" to save your changes. This setting directs Windows to allocate more resources to active applications, improving responsiveness.
Increase Virtual Memory (Paging File)
Virtual memory acts as extra RAM by using disk space, useful when your physical RAM is fully utilized. Adjusting virtual memory can help prevent errors and slowdowns during heavy usage.
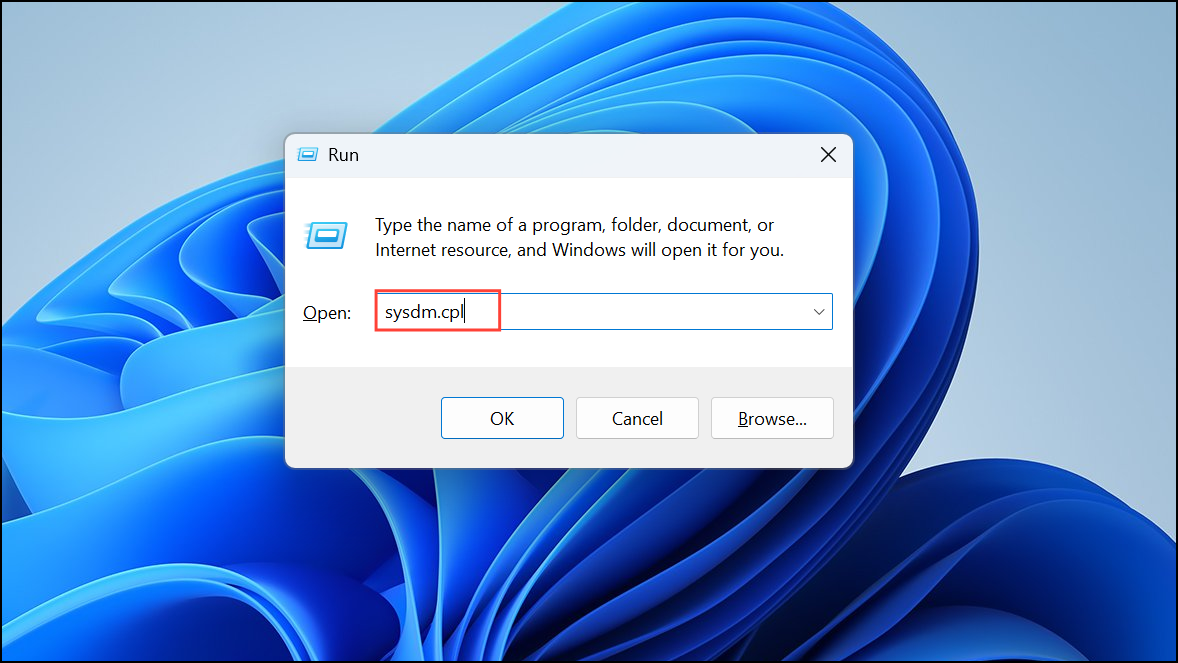
Step 1: Press Windows + R, type sysdm.cpl, and hit Enter.
Step 2: In "System Properties," click the "Advanced" tab, then select "Settings" under "Performance."
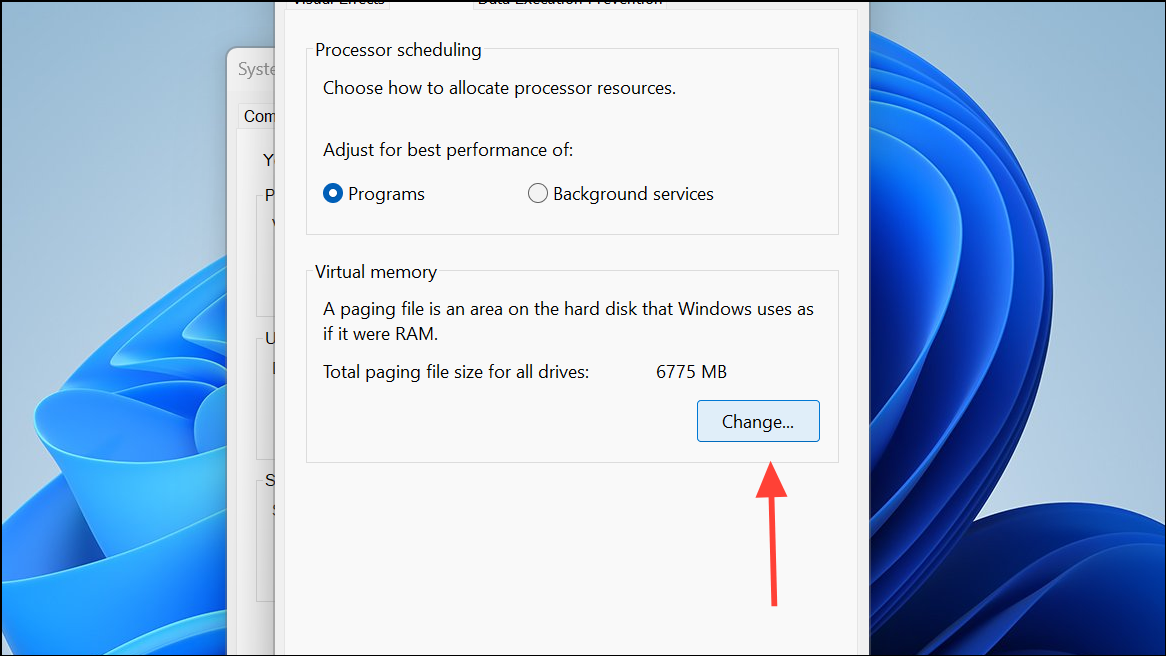
Step 3: In "Performance Options," click the "Advanced" tab and select "Change" under "Virtual Memory."
Step 4: Uncheck "Automatically manage paging file size for all drives," select your system drive (usually C:), and choose "Custom size."
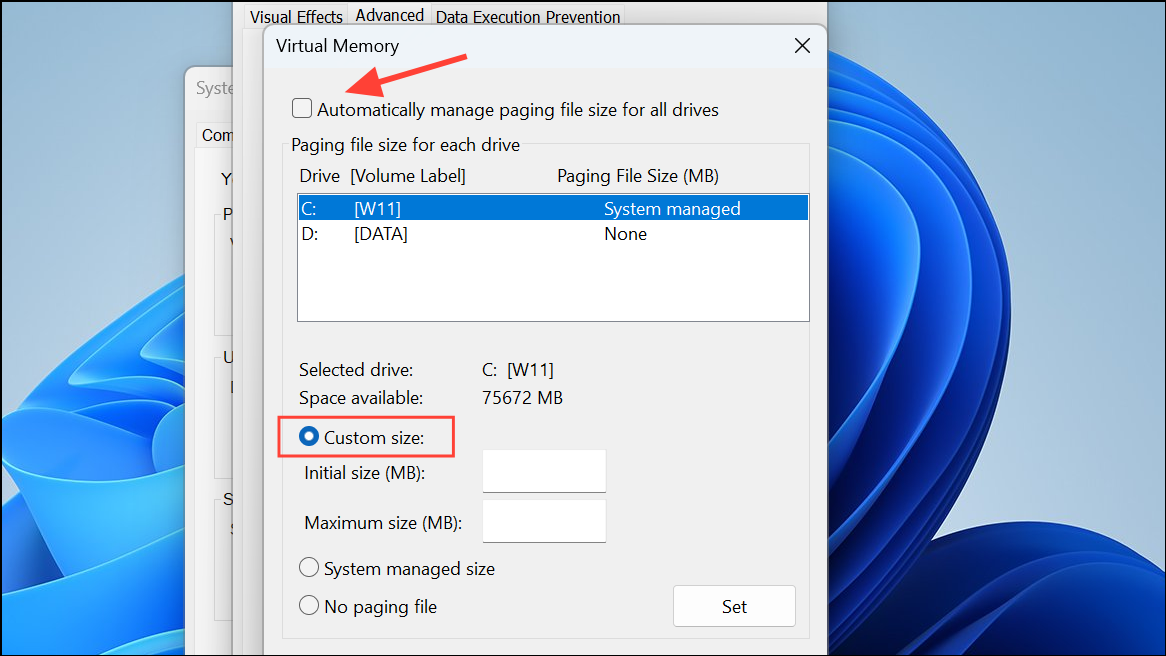
Step 5: Set the initial size to approximately 1.5 times your physical RAM and the maximum size to about 3 times your physical RAM. For example, an 8 GB RAM system (8192 MB) should have an initial size of around 12288 MB and a maximum size of around 24576 MB.
Step 6: Click "Set," then "OK," and reboot your PC to apply the changes.
Optimize Using Razer Cortex (Third-Party Tool)
Razer Cortex is a popular third-party optimization tool specifically designed for gaming. It automatically manages RAM and system resources to boost gaming performance.
Step 1: Download and install Razer Cortex from the official website.
Step 2: Launch Razer Cortex and select "Game Booster" or "System Booster."
Step 3: Click "Boost Now" or "Optimize" to automatically reallocate resources and improve performance.
Razer Cortex also offers an auto-boost feature that activates optimizations each time you launch a game.
Disable SysMain Service (Superfetch)
SysMain (formerly known as Superfetch) preloads frequently used applications into RAM. Disabling it can free up additional RAM, beneficial if you're running memory-intensive apps or games.
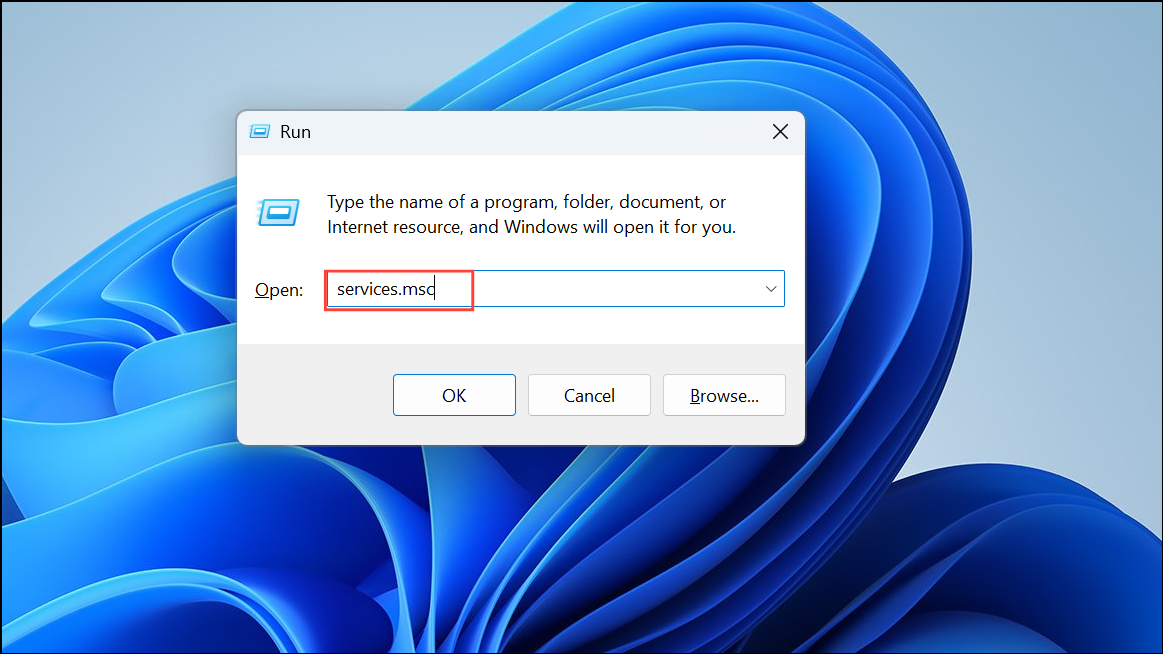
Step 1: Press Windows + R, type services.msc, and hit Enter.
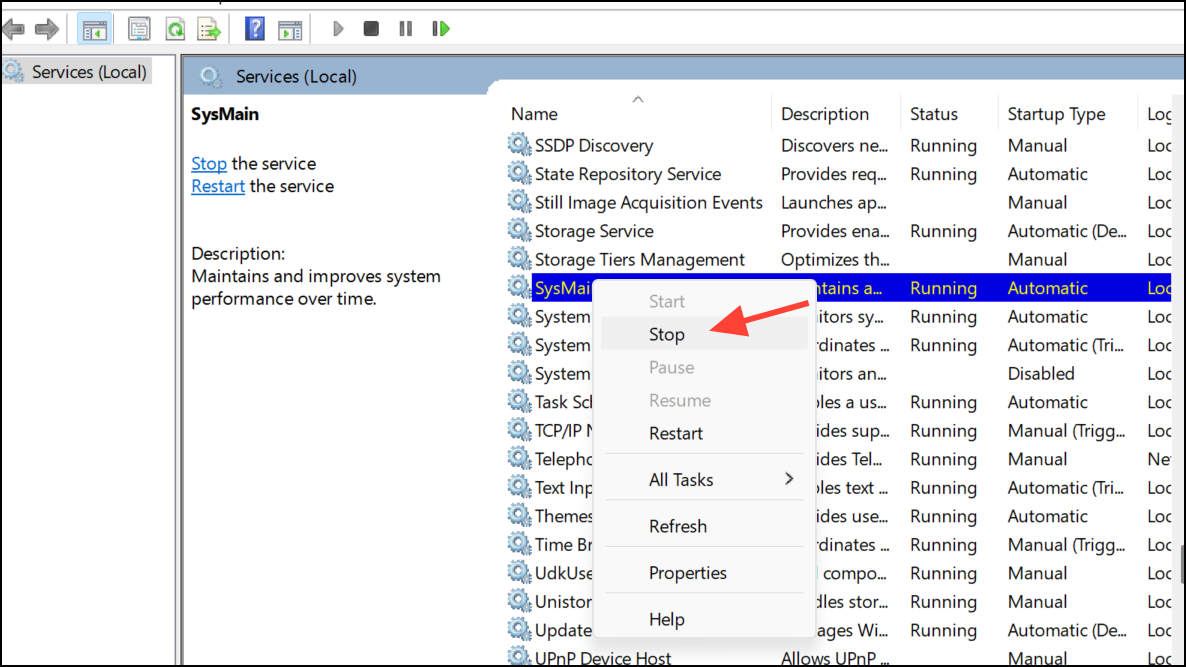
Step 2: Locate "SysMain," right-click it, and select "Stop."
Step 3: To permanently disable it, right-click again, choose "Properties," set "Startup Type" to "Disabled," and click "Apply," then "OK."
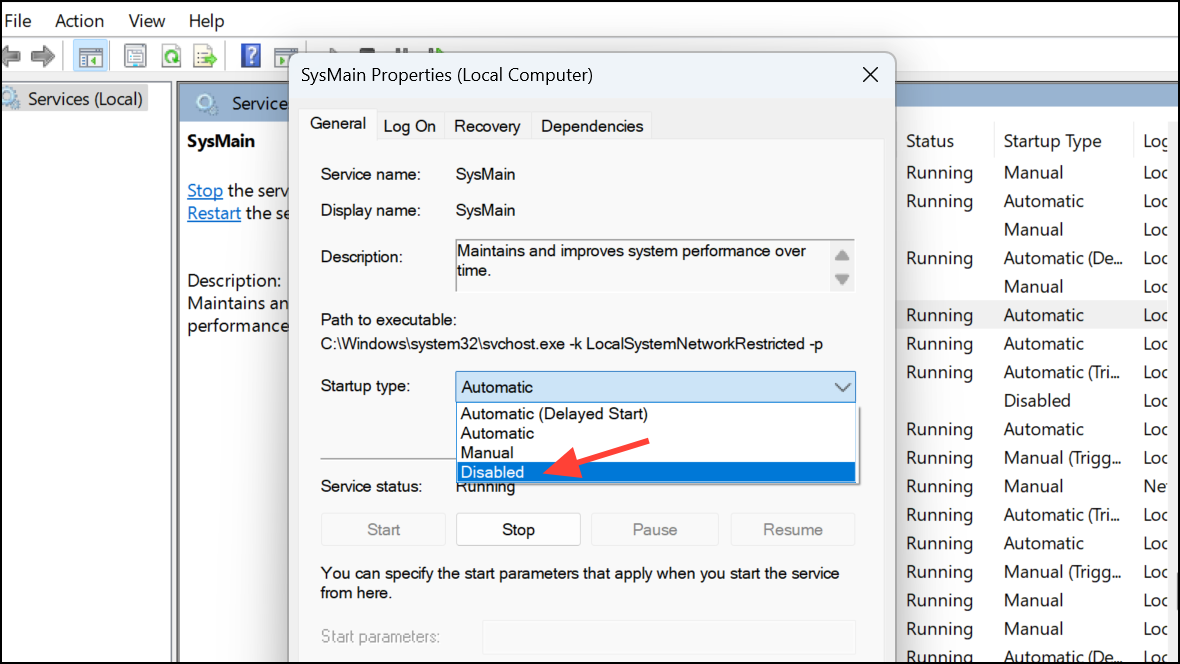
If you notice slower application loading times, you can re-enable SysMain by setting the startup type back to "Automatic."
Physically Add More RAM to Your PC
If software optimizations aren't sufficient, adding physical RAM modules provides the most effective, permanent solution.
Step 1: Open Task Manager (Ctrl + Shift + Esc), go to the "Performance" tab, and click "Memory" to see available RAM slots.
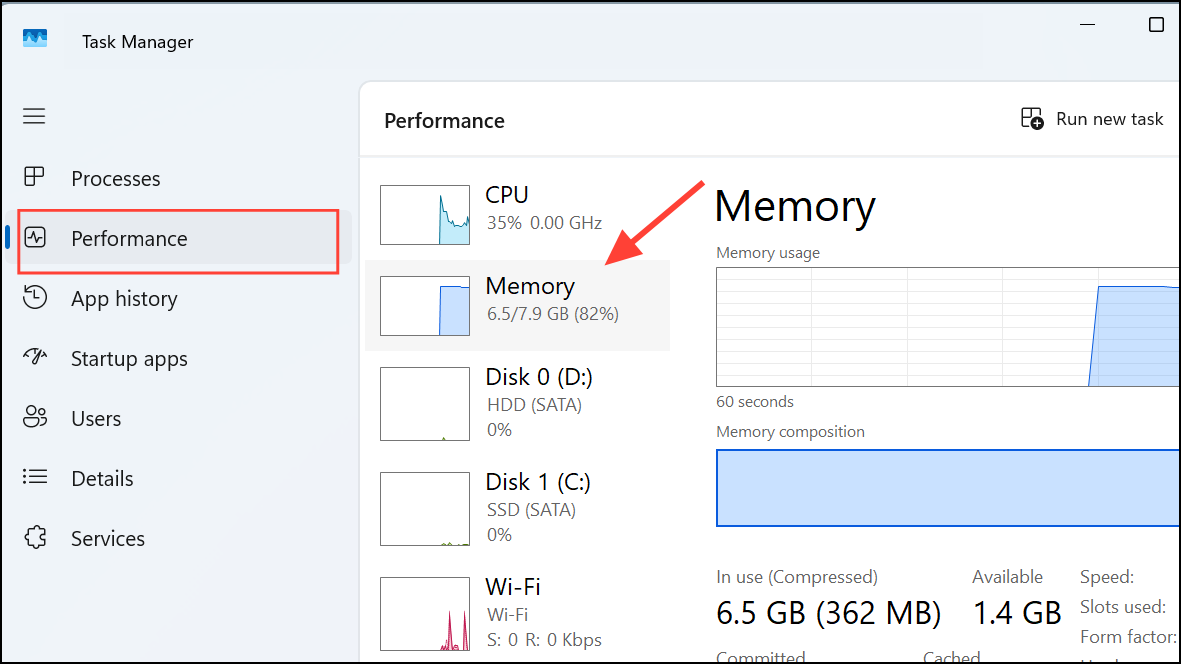
Step 2: Purchase compatible RAM modules matching your motherboard's specifications (type, speed, voltage).
Step 3: Shut down your PC, unplug it, open the case, and insert the RAM module firmly into an available slot until it clicks into place.
Step 4: Close the case, reconnect power, and start your PC. Verify the upgrade in Task Manager's "Memory" section.
This hardware upgrade significantly boosts performance, especially for multitasking, gaming, and resource-intensive software.
Choosing the Best Method for Your Needs
- Temporary boost: Adjust Task Manager priorities.
- System-wide improvement: Modify Windows performance settings or virtual memory.
- Gaming optimization: Use Razer Cortex or similar tools.
- Freeing RAM quickly: Disable SysMain service.
- Long-term solution: Physically upgrade your RAM.
Each method above can significantly improve your Windows 11 app and game performance by optimizing RAM allocation. Regularly monitor your system's performance and adjust accordingly to maintain optimal responsiveness.

