Having the header display on every page in Microsoft Word can sometimes clutter your document, especially when it's only needed on the first page for elements like a title or author's name. To enhance the professionalism and readability of your document, you can adjust the settings so the header appears solely on the first page.
Inserting a header only on the first page
Step 1: Open your Word document and navigate to the first page. Double-click in the header area at the top of the page to activate the header section.

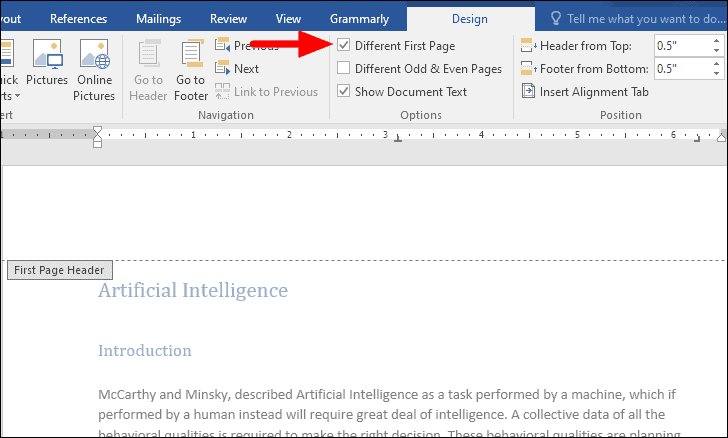
Step 2: With the header section active, the Header & Footer Tools will appear along with the Design tab on the ribbon. In the Options group, check the box labeled Different First Page.

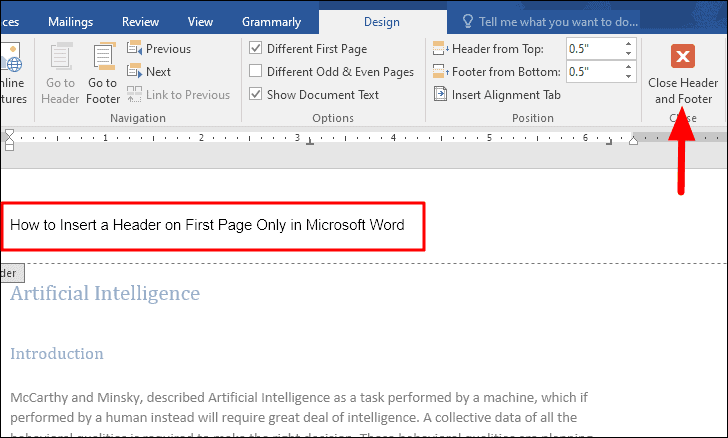
Step 3: Enter the header content that you want to display only on the first page, such as the document title or author's name. When you're finished, click on Close Header and Footer in the Design tab to exit the header editing mode and return to your document.

By adjusting the header settings to display only on the first page, you can create a cleaner and more organized document that highlights important information where it's most needed.

