Google's productivity tools like Google Docs and Google Sheets offer immense flexibility and ease of collaboration. While Google Docs is perfect for creating and editing documents, Google Sheets excels at handling spreadsheets. Both platforms allow multiple users to work together in real-time on the same file.
There are times when you might need to include data from a Google Sheet into a Google Doc—perhaps for reporting, analysis, or sharing purposes. Linking a spreadsheet to a document ensures that any updates made in the Sheet are reflected in the Doc automatically. Here's how you can insert a Google Sheet into a Google Doc and keep the data updated seamlessly.
Inserting a Google Sheet into Google Docs
Step 1: Open the Google Sheet containing the data you wish to insert. Select the entire dataset by pressing Ctrl + A on your keyboard.
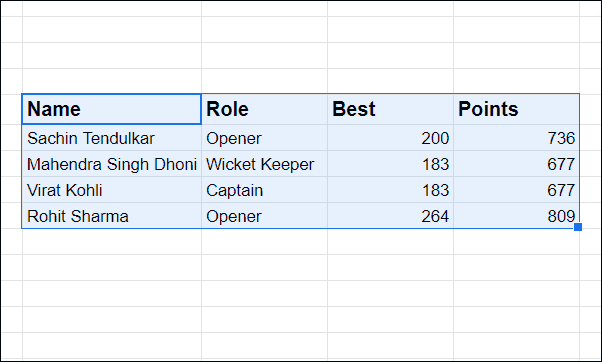
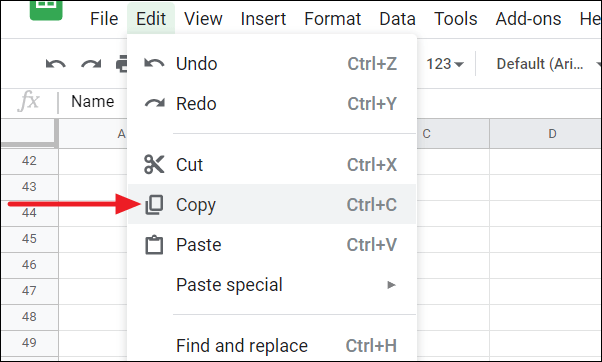
Step 2: Copy the selected data by clicking on the 'Edit' menu in the toolbar and choosing 'Copy' from the dropdown options.
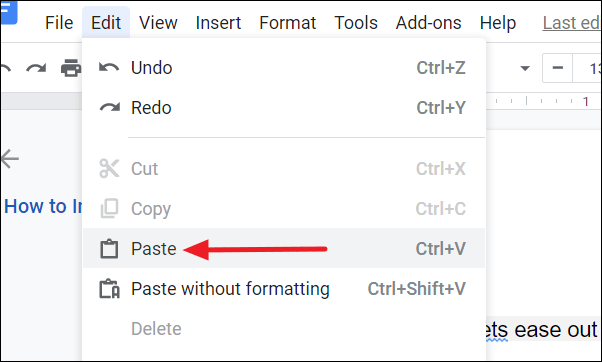
Step 3: Navigate to the Google Doc where you want to insert the data. Click on the spot in the document where you'd like the table to appear. Then, go to the 'Edit' menu and select 'Paste'.
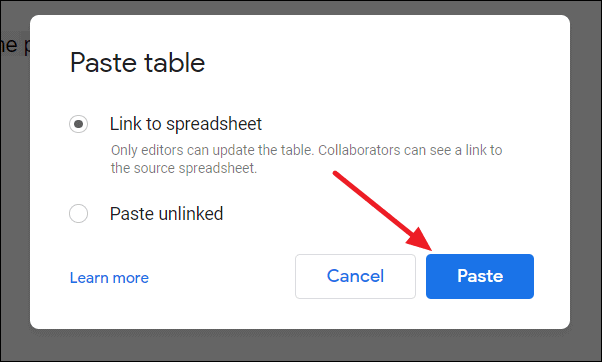
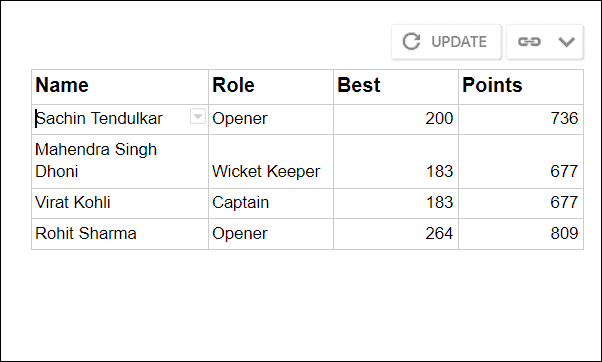
Step 4: A dialog box will appear, prompting you to choose how to paste the data. By default, 'Link to spreadsheet' is selected. This option keeps the data in your document connected to the original spreadsheet, so any updates in the Sheet will reflect in the Doc. Click 'Paste' to insert the table.
The spreadsheet data now appears in your document as a table that's linked to the original Google Sheet.
Updating the Table in Google Docs
If you make changes to your Google Sheet after linking it to your Google Doc, you can easily update the table in the document to reflect those changes.
Step 1: In the Google Sheet, edit the data as needed. For instance, add a new row with additional information.
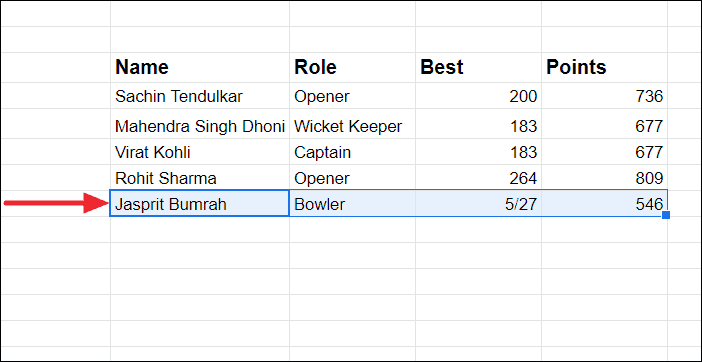
Step 2: Open the Google Doc. You'll notice an 'Update' button has appeared above the linked table. Click on this button to refresh the table with the latest data from the Google Sheet.
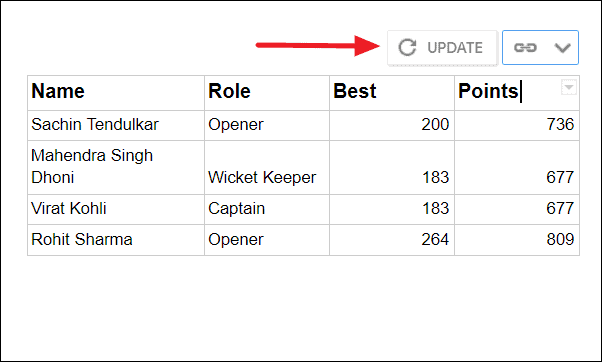
The table in your document will update to show the new data. However, if the changes include new rows or columns beyond the original range, they might not appear automatically.
Changing the Table Range
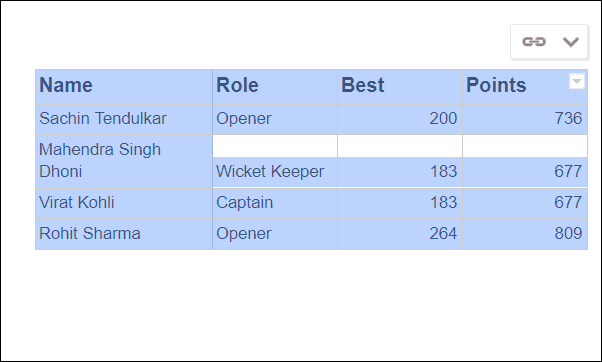
To include additional rows or columns from the Google Sheet in your Google Doc, you'll need to adjust the linked table's range.
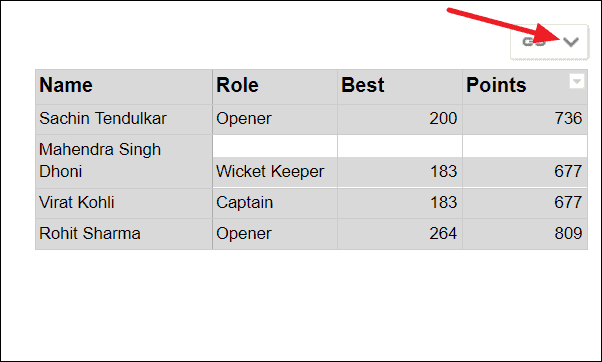
Step 1: In the Google Doc, click on the downward arrow next to the 'Linked table options' button above the table, and select 'Change range' from the dropdown menu.
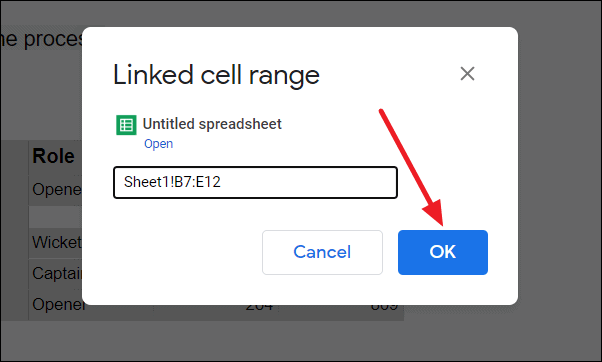
Step 2: A dialog box will appear, showing the current cell range of the linked data. Update the cell range to include the new data. For example, if the original range was 'A1:E11' and you've added data up to row 12, change it to 'A1:E12'. Click 'OK' to save the new range.
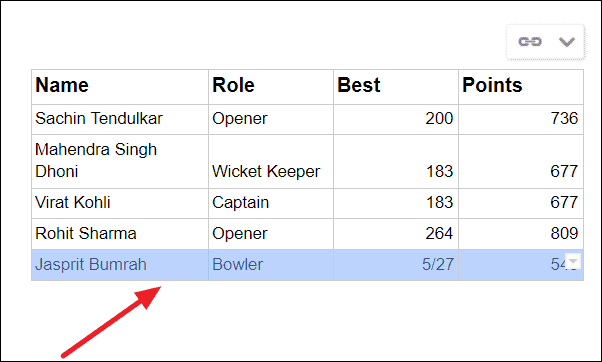
Step 3: After changing the range, click the 'Update' button above the table to refresh it. The table will now display the additional rows or columns from your updated Google Sheet.
By linking Google Sheets to Google Docs, you can efficiently present and update data within your documents, ensuring that all information remains current without manual copying and pasting.

