Have you ever been in a situation where you had to hand your iPhone to someone to use a particular app but fear they might check the other apps? Also, you might not be able to focus because of the distraction from all the other apps. This puts both your privacy and attention at risk.
Your iPhone has the perfect solution for this problem, ‘Guided Access’. With guided access, you can disable all the other apps and even limit what you can tap on the screen.
When you enable guided access on an app, you can’t open or access any other app on your iPhone. This ensures that you don’t lose focus and also that others cannot switch apps. Another feature of Guided Access is that you can disable touch on certain portions of the screen. This helps you disable the notification bar or certain icons on the screen. Also, if you are teaching someone to use an app, you can focus on certain icons and disable the remaining to retain focus.
Enabling Guided Access and Related Settings on iPhone
To use ‘Guided Access’ to lock your iPhone to a single app, you will first have to enable it from your iPhone Settings.
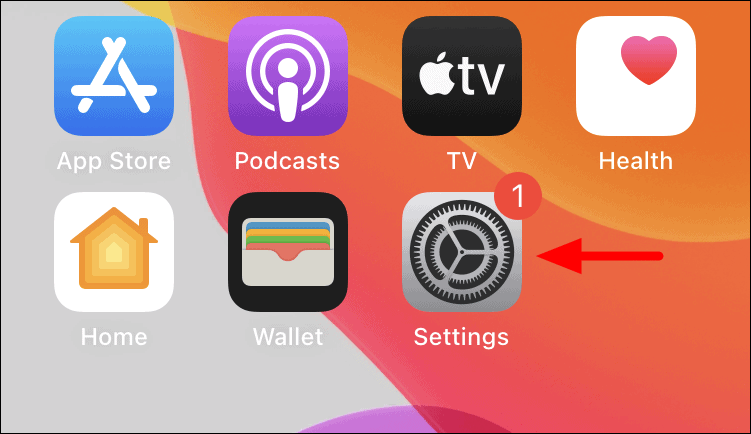
To enable ‘Guided Access’, tap on the ‘Settings’ icon on the iPhone home screen.
Now, tap on the ‘Accessibility’ settings from the list of options.

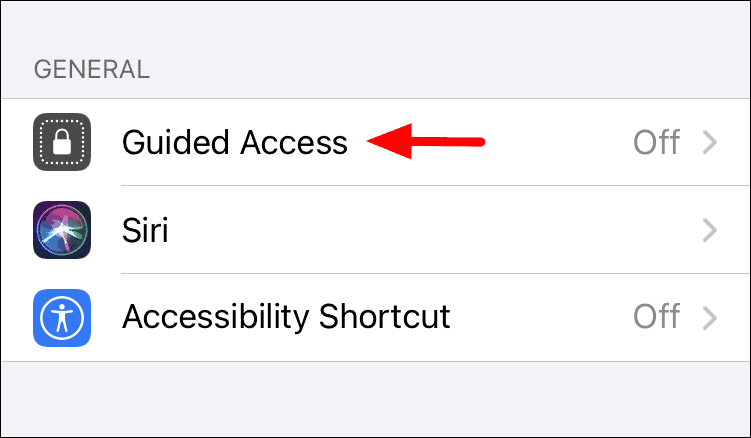
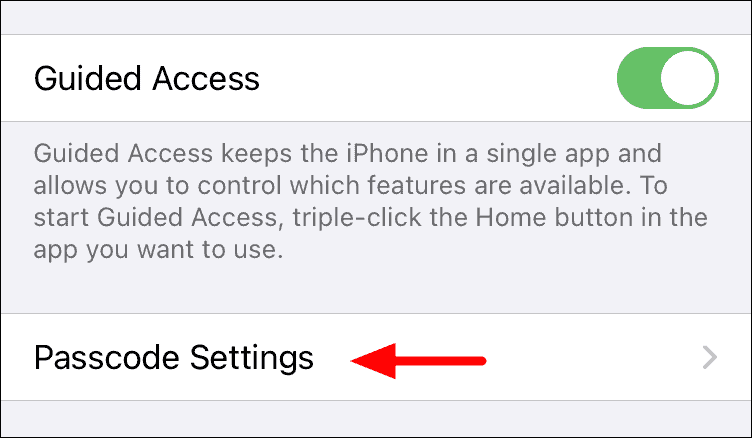
Next, scroll down and tap on on ‘Guided Access’ under the ‘General’ section.
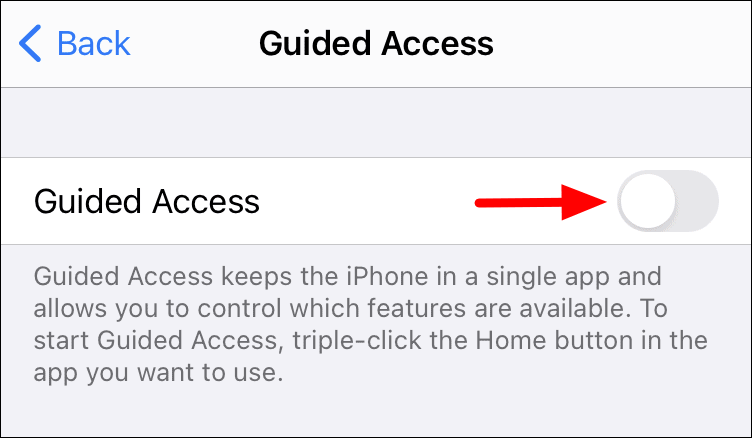
Tap on the toggle next to ‘Guided Access’ to enable the feature.
Setting a Passcode for Guided Access
Once you have enabled the guided access, a lot of related settings will appear. The first one is to set a passcode. Once you have set a passcode, you will be required to enter it to change any setting or end the session
To set a passcode, tap on the ‘Passcode Settings’ icon.
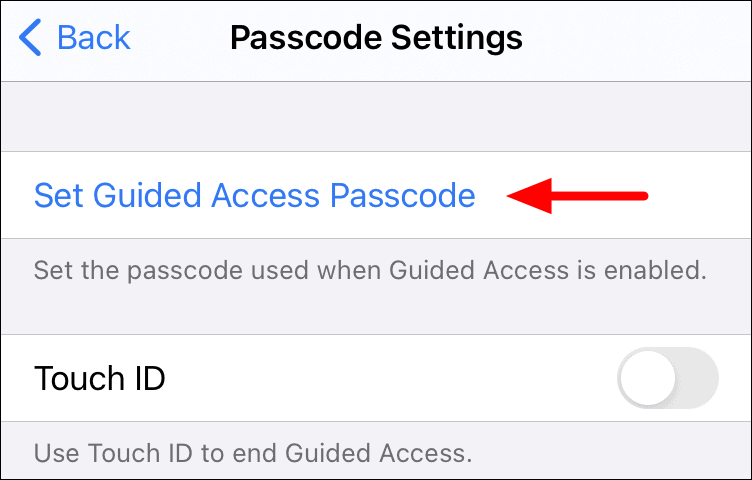
Next, tap on the ‘Set Guided Access Passcode’ icon, the first one on the page.
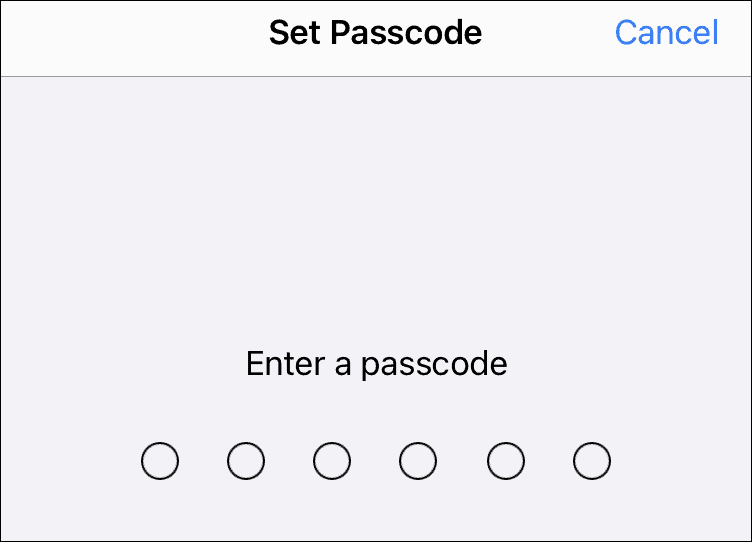
You will now be asked to enter a six-digit passcode for the guided access. It can be the same or different from your iPhone passcode. As soon as you enter the passcode, you will be redirected to the next screen.
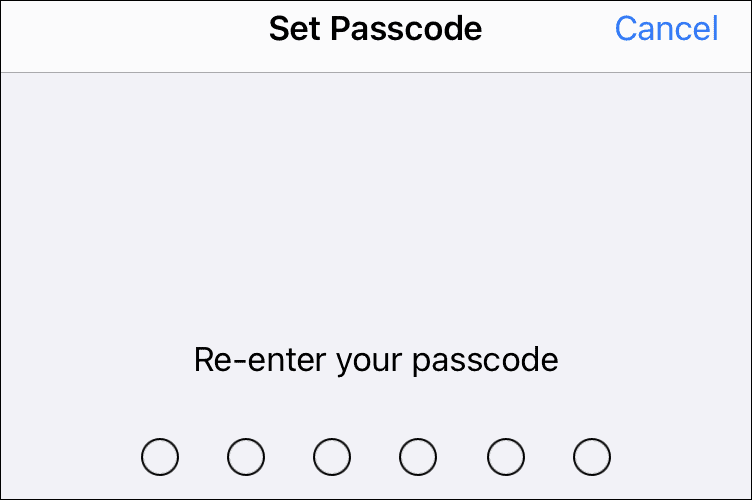
On the next screen, you will be be required to reenter the passcode. After you enter it, the passcode will be activated.
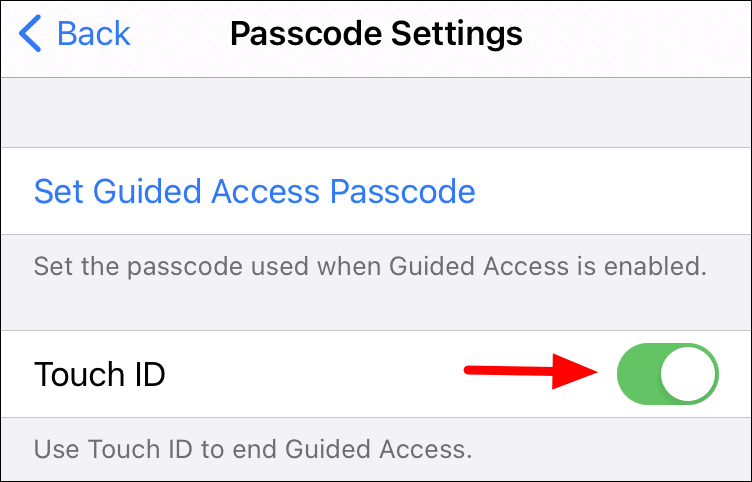
You can also use Touch ID to end the guided access session. To enable the feature, just tap on the toggle next to ‘Touch ID’ on the ‘Passcode Settings’ screen.
Changing Time Limit Settings for Guided Access
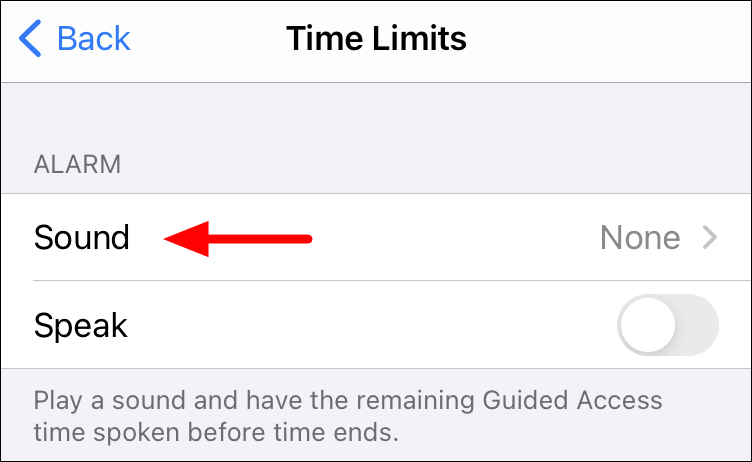
You can set an alarm for when the guided access ends. Also, you have the option where your iPhone will announce the remaining time for the guided access to end. Both these options only come into play if you have set a timer for guided access.
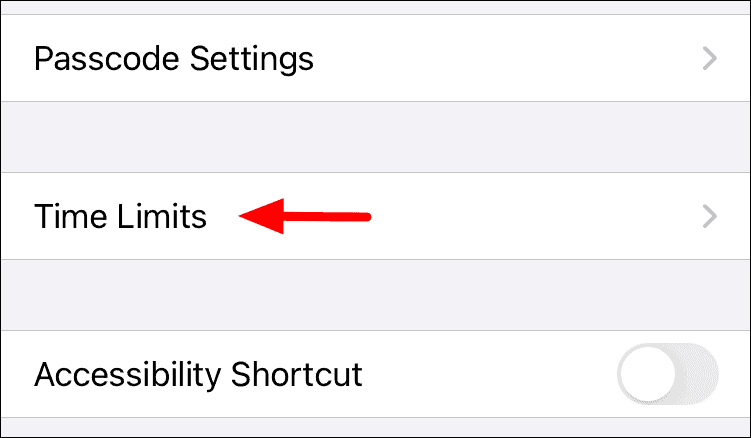
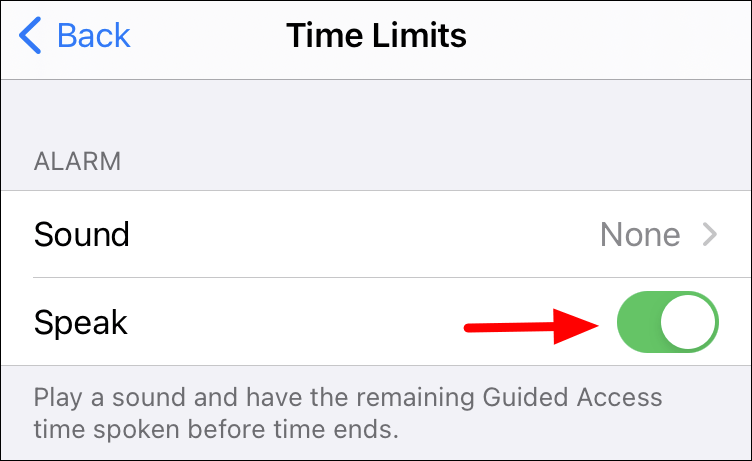
To set an alert tone to play when the guided access session end, tap on the ‘Time Limits’ option.
Next, tap on ‘Sound’, the first option.
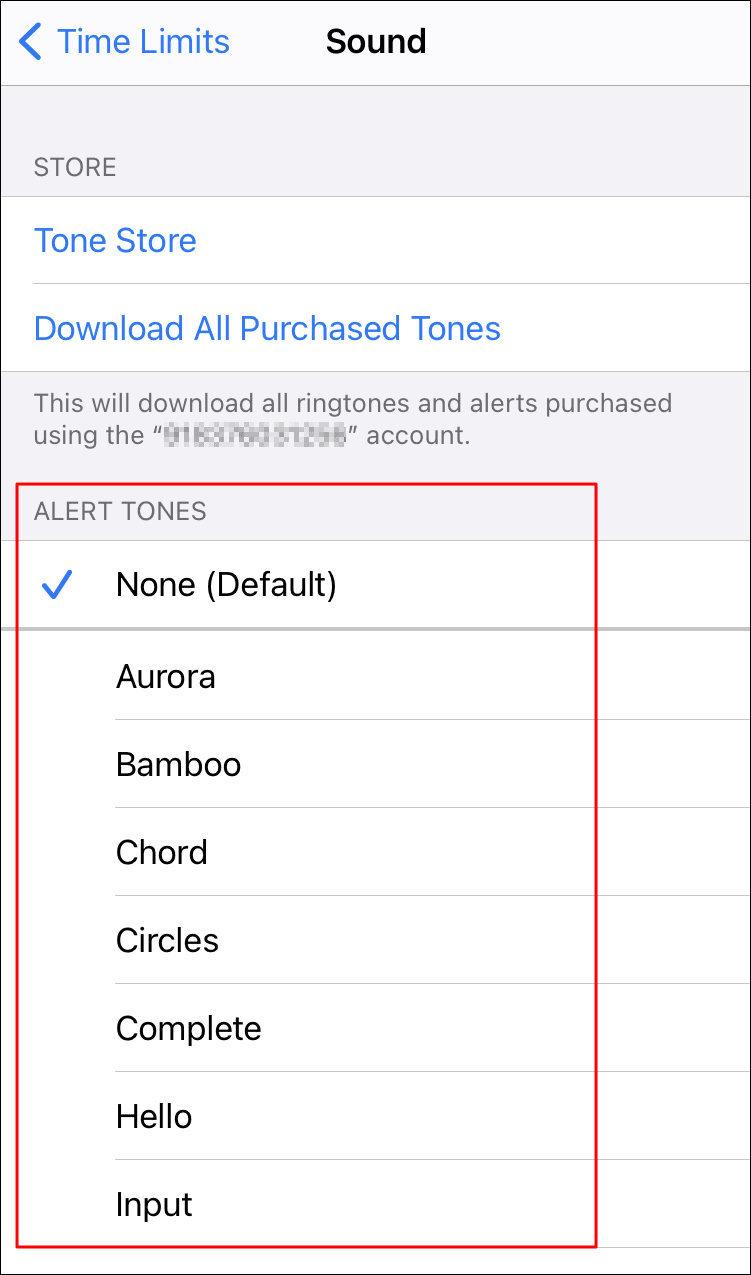
You will now find a list of tones in the bottom half of the screen. Select the one you that want to add as an alert for Guided Access.
After you have set an alert tone, you have the feature that announces the time remaining for the guided access to end. To enable it, tap on the toggle next to ‘Speak’.
Enabling Accessibility Shortcut for Guided Access
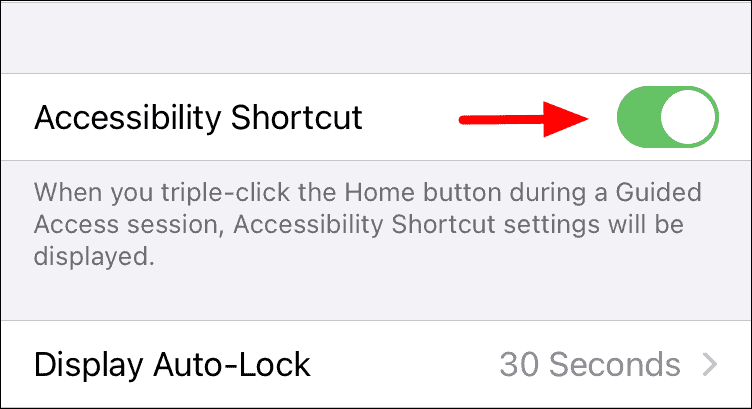
With this feature enabled, you can view the accessibility shortcuts by triple-clicking the home button.
To enable accessibility shortcut, tap on the toggle next to the ‘Accessibility Shortcut’ option on the screen.
Enabling Display Auto-Lock for Guided Access
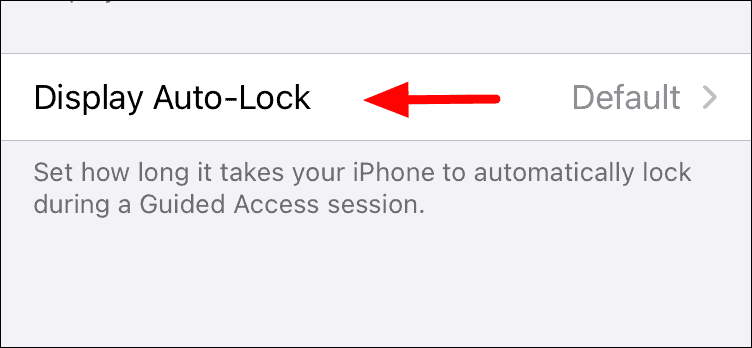
This feature allows you to set a timer to automatically lock your iPhone when the Guided Access session is in progress.
To enable this feature, tap on the ‘Display Auto-Lock’ option, the last one in the ‘Guided Access’ settings.
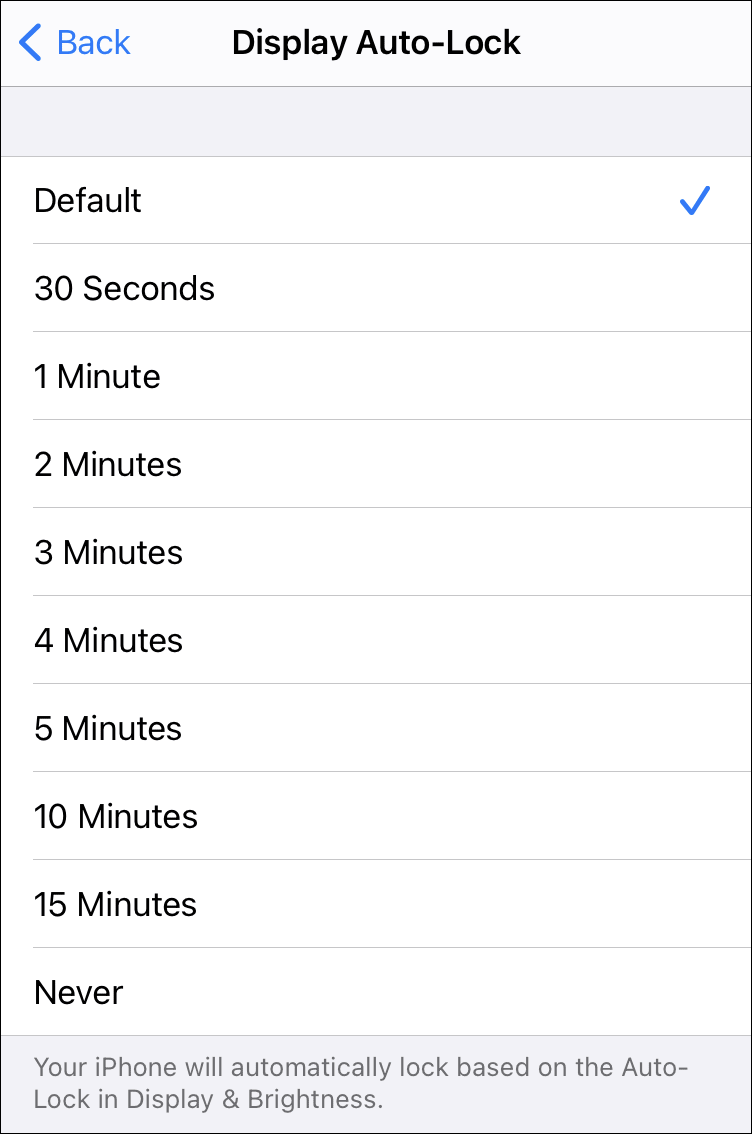
Now, select a time duration from the list of given options. You can set a duration ranging from 30 seconds to 15 minutes. You also have the option to set the ‘Display Auto-Lock’ to ‘Never’, in which case the display will not lock at all when Guided Access is enabled.
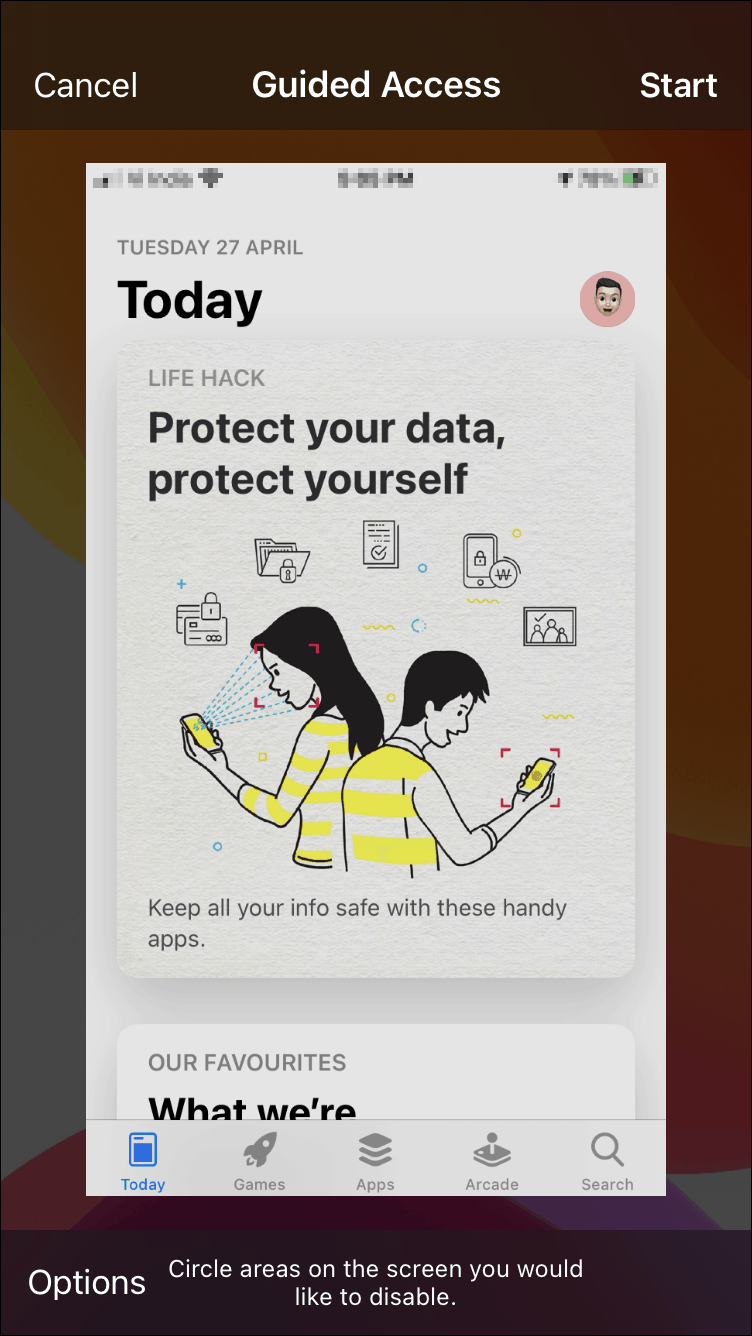
Locking your iPhone to a Single App Using Guided Access
After you have enabled the ‘Guided Access’ feature from the settings, open the app that you wish to lock your iPhone into and start a ‘Guided Access’ session.
Starting Guided Access Session
Once you have opened the app, either triple-click the ‘Home Button’ to start a Guided Access session. For the newer models without a home button, triple-click the ‘Side Button’ to start Guided Access. After you triple-click on either button, you will see a ‘Guided Access’ preview on the screen.
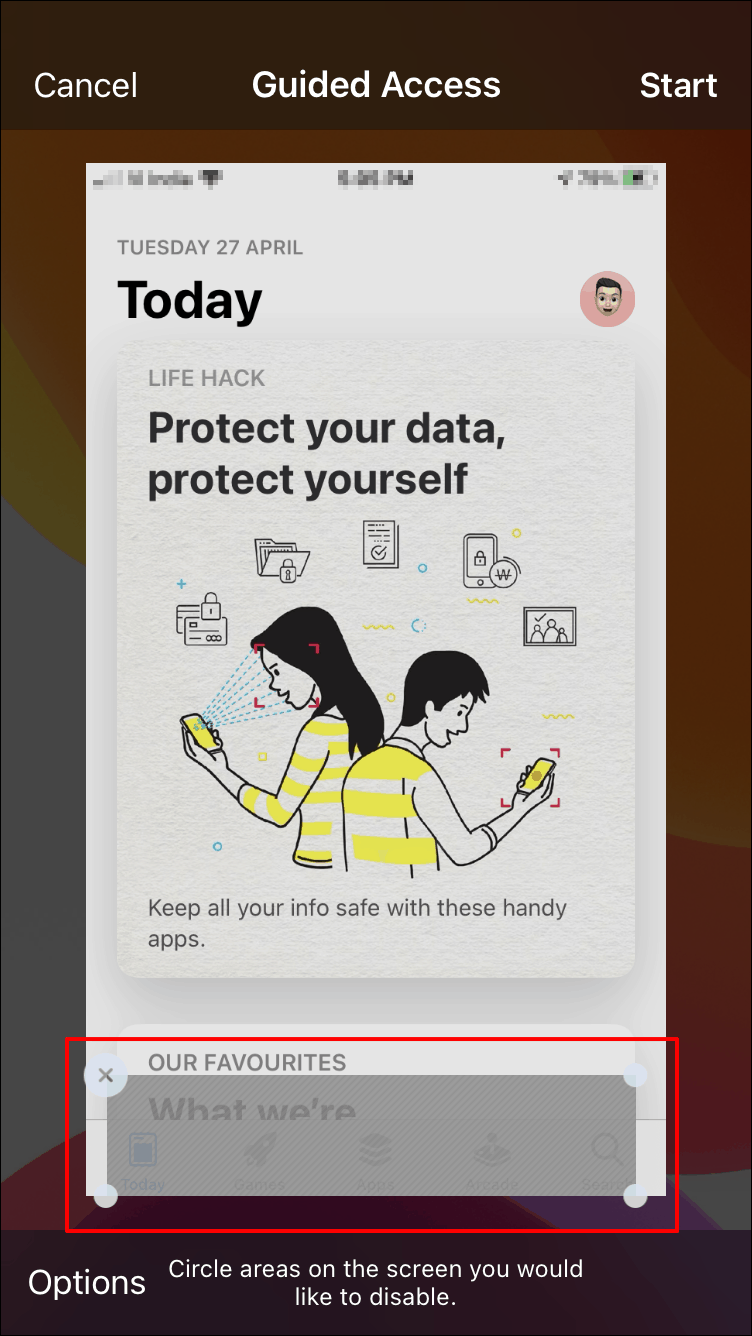
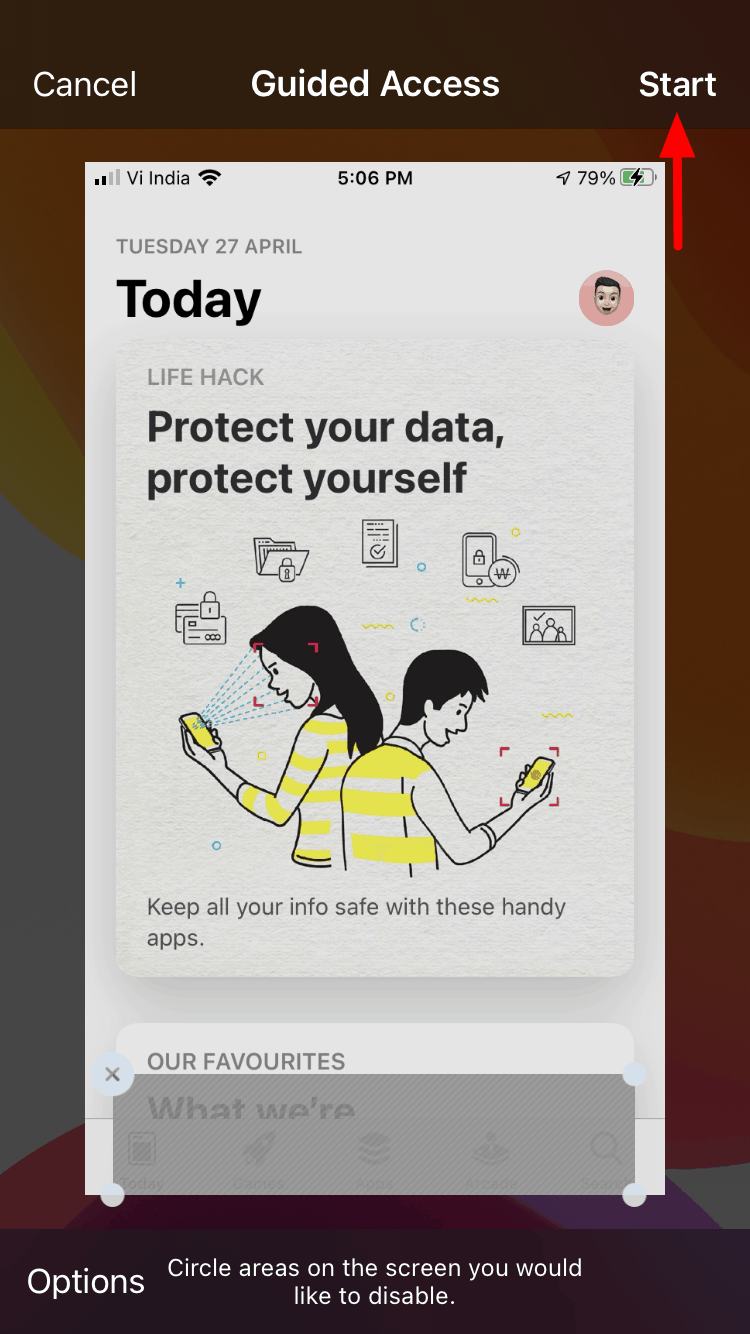
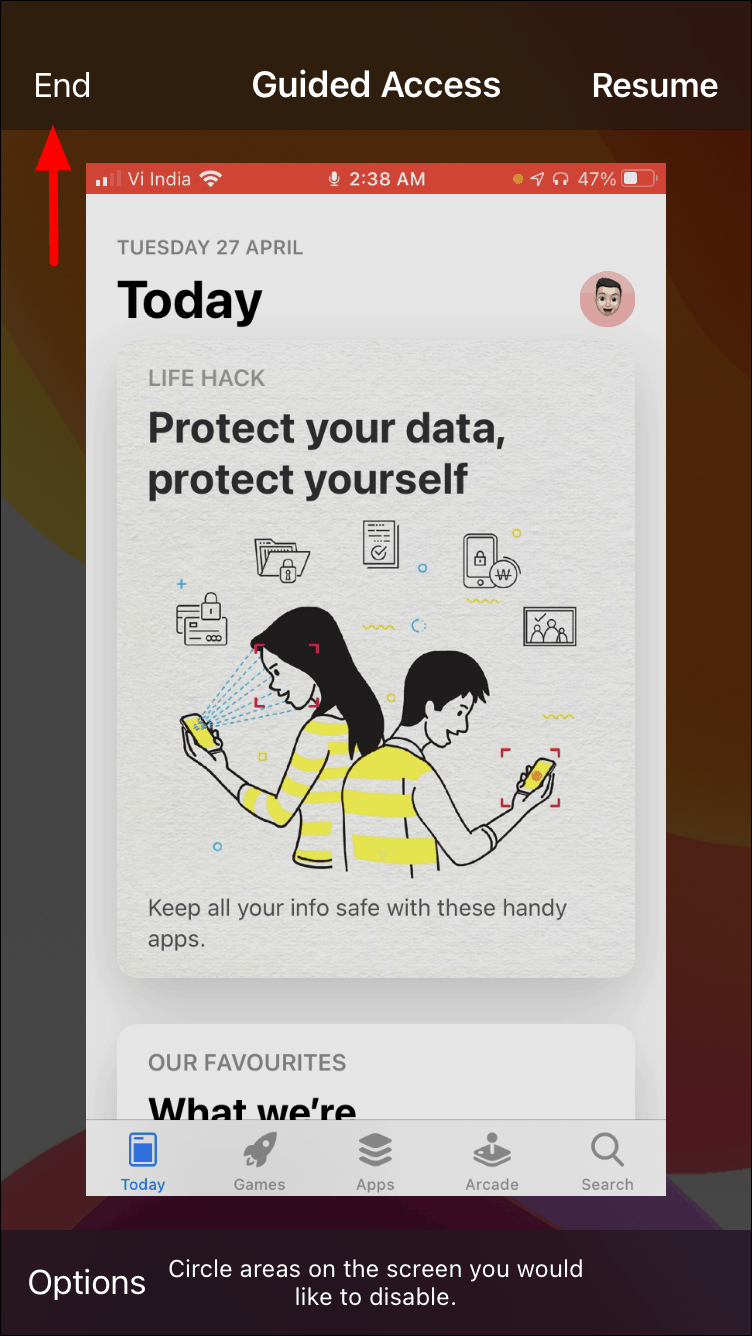
If required, the first thing you should do is disable certain parts of the screen. To disable, all you have to do is draw a circle around that portion and the iPhone will automatically disable it.
The disabled part will have a grey shape over it so as to distinguish it from the other parts. Also, you can change the size of the disabled area by using the handlebars around the selected area. To move the shape, tap and hold it and then drag it to the new position. If you want to delete the shape, tap the cross sign at the top-left corner of it.
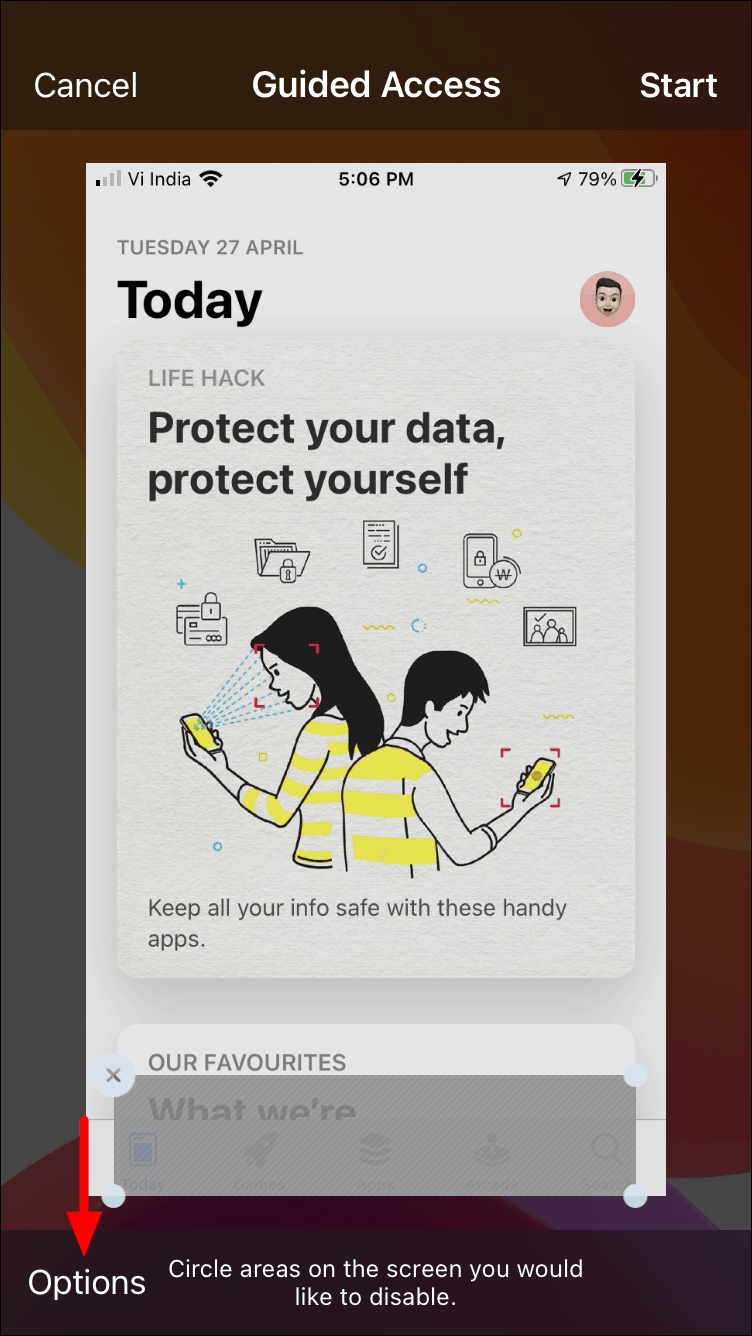
Next, you have various options to customize your Guided Access session. To access these options, tap on the ‘Options’ icon at the bottom-left corner of the screen.
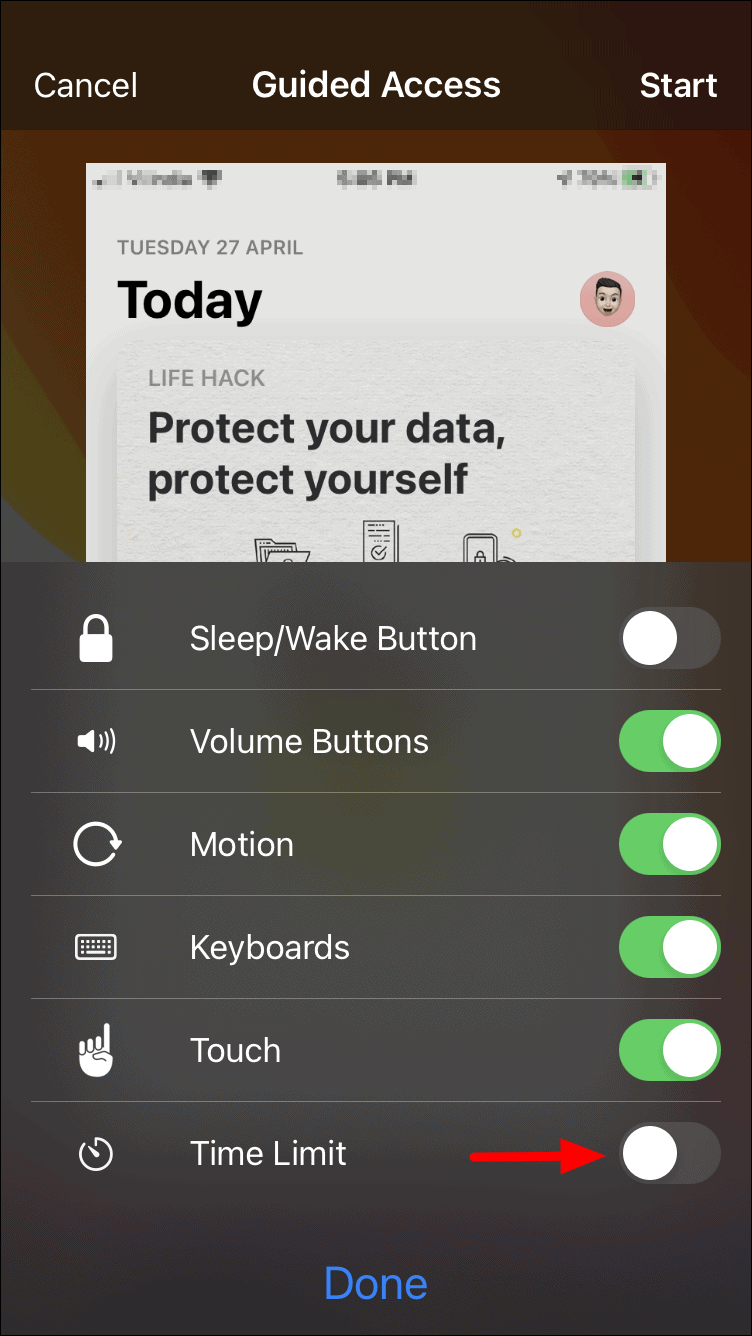
You will now find multiple options on the screen. We will explain each of them in brief for your understanding.
- Sleep/Wake Button: This option enables/disabled the power button. To use the power button during a guided access session, this option has to be enabled.
- Volume Button: This option enables/disables the volume button. To use the volume buttons during a guided access session, this option has to be enabled.
- Motion: This option enables/disables the motion. With ‘Motion’ enabled, you can use features like auto-rotate and shake to undo.
- Keyboards: This option enables/disables the keyboard.
- Touch: This option enables/disables the touch on your iPhone. It can be used if you are reading something and don’t want to be distracted, neither want to open any ads or click on pop-ups by mistake
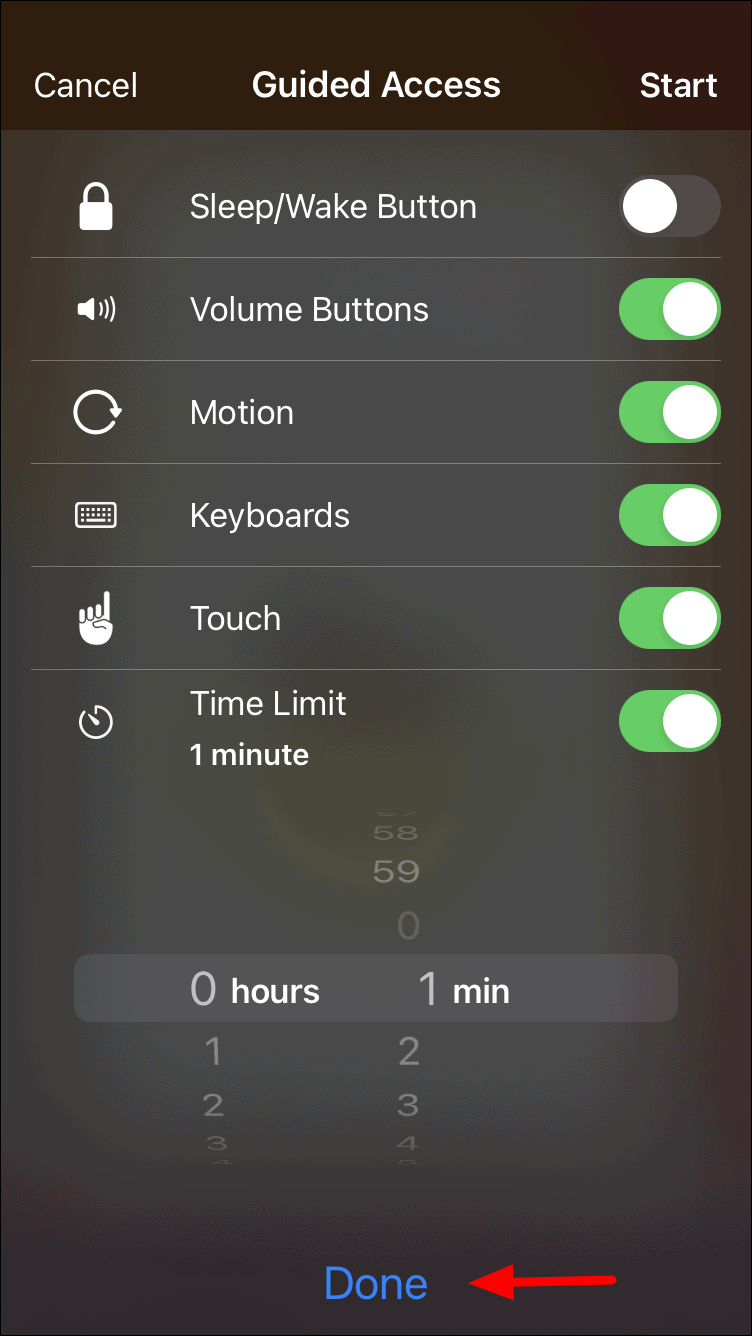
- Time Limit: This option allows you to set a duration for the guided access session.
To set a time limit, you will first have to enable the feature by tapping on the toggle next to it.
Now, select the time duration by sliding the hours and minutes section to set the desired time limit. Once you have selected the duration, tap on ‘Done’ at the bottom to set the time limit for guided access.
You have now seen all the settings and options for ‘Guided Access’ and the only thing left is to start the session. To start ‘Guided Access’ for an app, tap on the ‘Start’ icon at the top-right corner of the screen. If you have not set a passcode for guided access earlier, you will be asked to set one right now before the session starts.
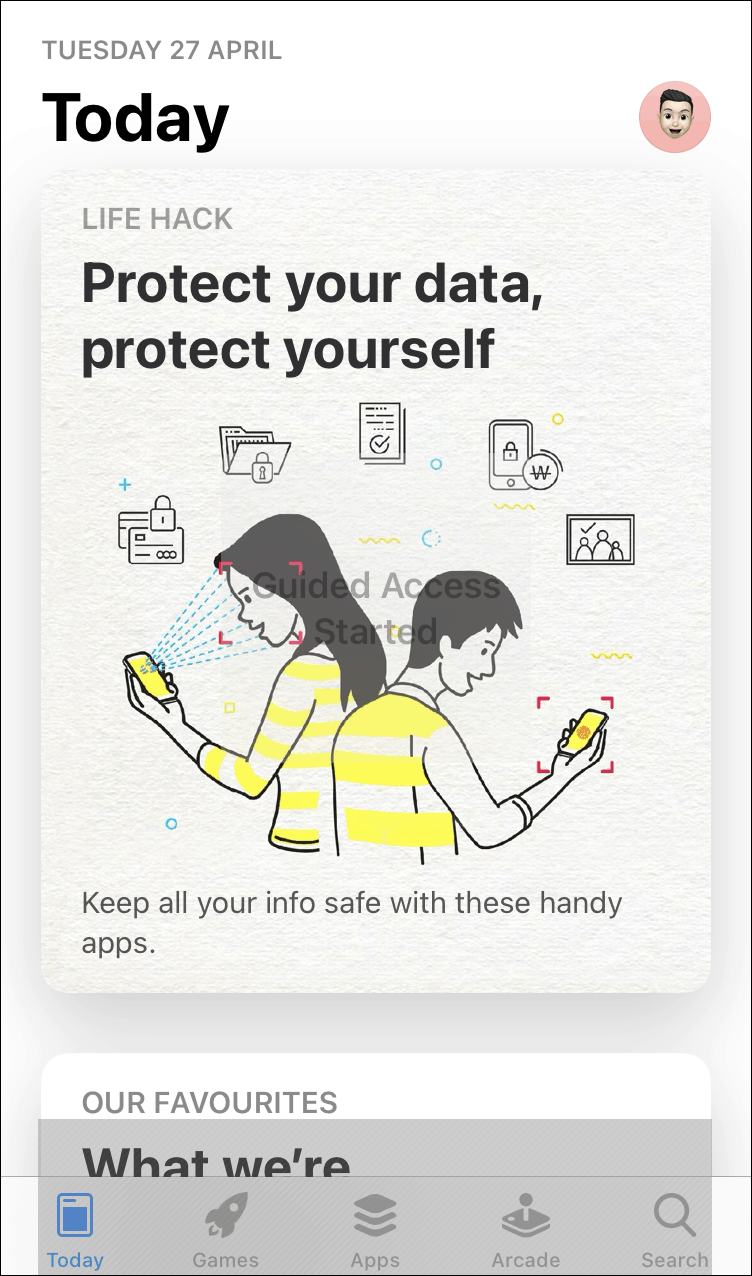
This is what the guided access session will look like for the ‘App Store’. Since we had disabled the bottom portion earlier, it has been shaded grey and the touch has been disabled in this portion.
Modifying Options While Guided Access Session is Active
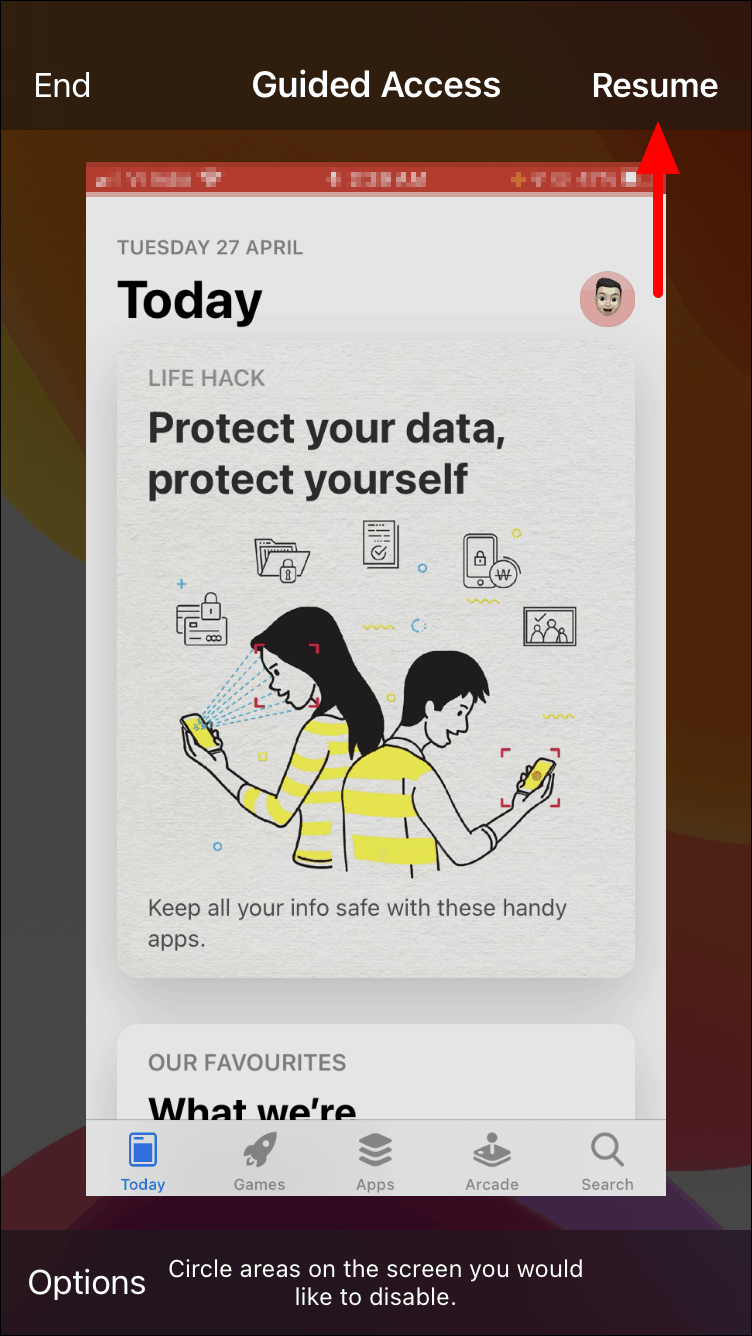
You don’t have to end the session and start a new one every time, in case you want to make changes to guided access options during a session. Just triple-click the home/side button, tap on options, make the necessary modifications as discussed earlier, and then tap on ‘Resume’ at the top-right corner of the screen.
Ending the Guided Access Session
If you have set a timer, the guided access session will end automatically after it. Also, you can end the session manually anytime you want.
To end the guided access session, triple-click the home/side (as the case may be) button and then tap on ‘End’ at the top-left corner to end the session. When you triple-click the home button, you will first be asked to authenticate by entering the six-digit passcode, that you set earlier.
One of the features of Guided Access that impresses users is that it saves your preferences for individual apps. If you have used guided access for a particular app, the next time you start a session, you will find the same set of options enabled and parts of the screen disabled, if any.
With a good understanding of the ‘Guided Access’ feature on the iPhone, you will be able to maintain focus and concentrate on the one hand, while ensuring privacy on the other.


