
Microsoft Teams might be a great app to collaborate and have video meetings. But it is in no way perfect for many people. Polling, for instance, is not available directly in meetings like in many other apps.
Polls are a perfect way to make online meetings more interactive and swerve them away from the boredom zone. This is why they’re ideal for the current scenario. But how do you go about creating polls in a Microsoft Teams meeting and not a channel? Microsoft has finally added support for live polls in a Teams meeting. It might be a little complicated but not impossible with the various apps Microsoft Teams offers.
Microsoft Teams is a powerhouse of apps, and it has had apps for Polling long before the current turn of events. So it stands to reason that they haven’t added the feature directly to the meeting interface. As many users were already familiar with these apps, adding the feature to the meeting interface might have been asinine as it would have required unnecessary resources.
All you need to do is learn how to use these apps in a meeting to conduct live polls. If you’re unfamiliar with any app to conduct polls, don’t worry. This guide will also introduce you to two such apps. So, let’s get rolling!
Creating Polls for Scheduled Meetings
Most professional meetings or classes in Microsoft Teams are scheduled. And incidentally, polls are most required in these environments to keep things interesting. Fortunately, in Microsoft Teams, you can create polls for scheduled meetings rather easily, and that too, both before and during the meeting.
Creating Polls Before a Meeting For Microsoft 365 Users
The interface for scheduling meetings is different for Microsoft 365 and Microsoft Teams Free users. So, the process is also different for creating polls before a meeting.
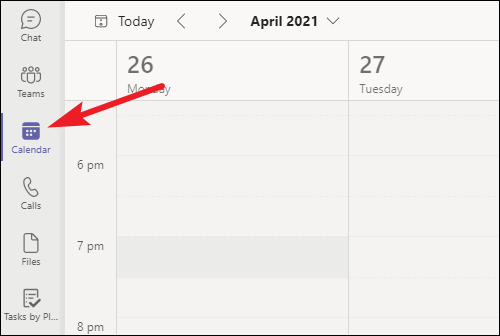
Go to the ‘Calendar’ tab from the navigation menu on the left.
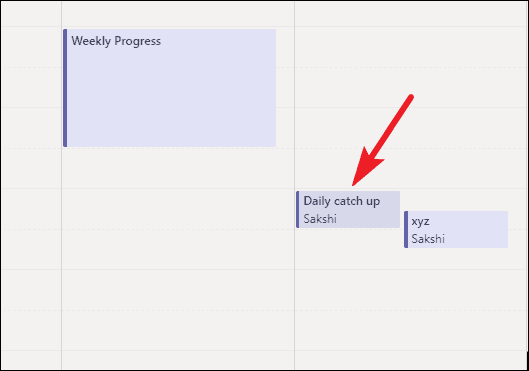
From your calendar, go to the meeting you want to create polls for and click it.
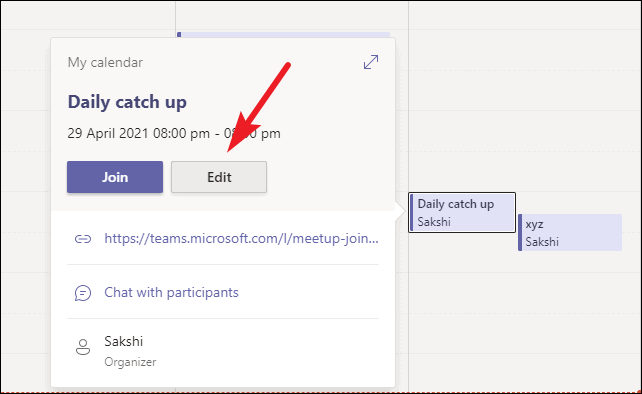
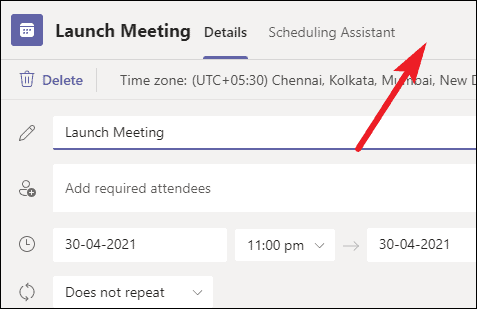
A pop-up will appear for the meeting; click on ‘Edit’.
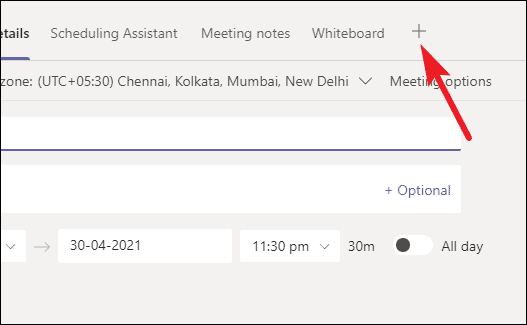
Then, click the ‘Add a Tab’ option (+ icon) towards the top.
If there is no option to add a tab, it means there are no attendees in your meeting yet.
Creating polls before a meeting only works when you have attendees added in the ‘Required Attendees’ option. It’s because adding a tab is a feature of the Chat, and meeting chat is available before a meeting only when there are other attendees to chat with.
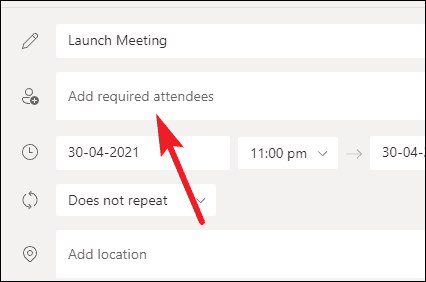
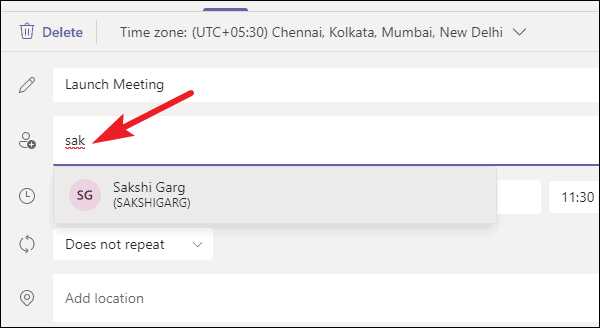
Go to ‘Required attendees’ and add a person from your organization. If you don’t want to add someone, you’d have to abandon the idea of creating polls before a meeting.
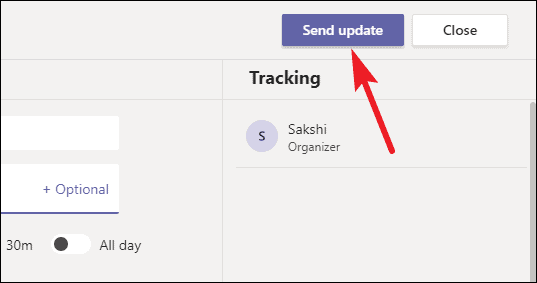
After you add an attendee, click the ‘Send Update’ button.
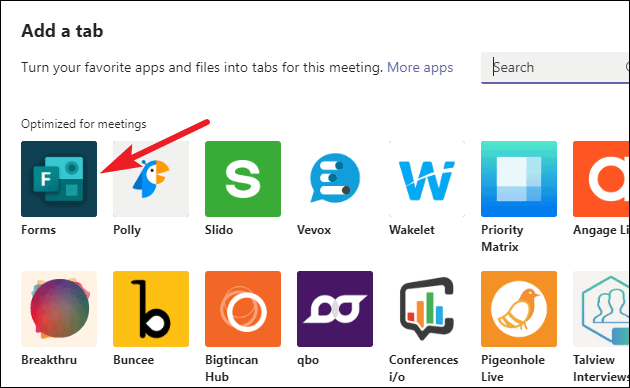
Then open the meeting again, and you’d find the ‘Add a Tab’ option has appeared. Click it and search for ‘Forms’ from the apps. Microsoft Forms is one of the best apps to conduct Polls in Teams for Microsoft 365 users.
Note: Only meeting organizers and presenters can create polls using the Forms app. Another app you could use for Polls is the Polly app, covered in the section for Microsoft Teams Free users.
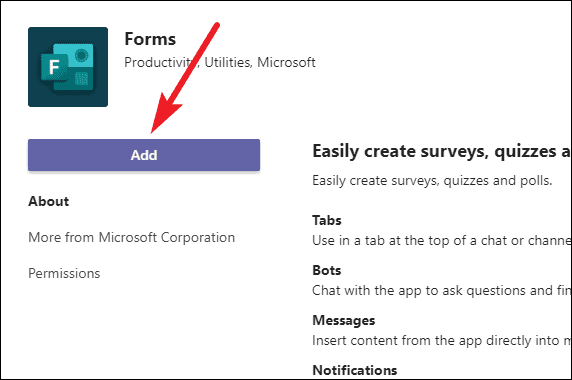
An overview of the app will open. Click the ‘Add’ button.
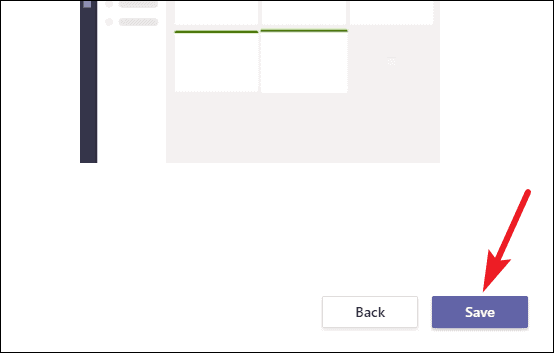
Another preview of what Forms can do will open. Click the ‘Save’ option.
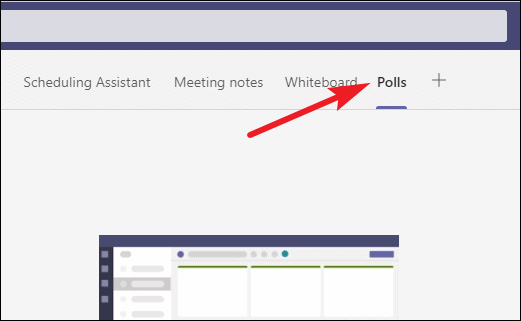
The tab for Forms will appear with the moniker ‘Polls’. Click it to start creating polls.
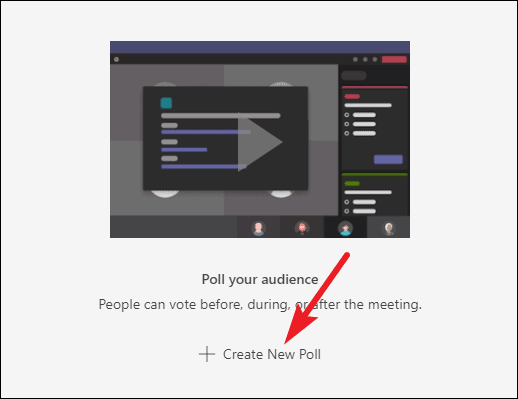
Now, click the ‘Create New Poll’ button.
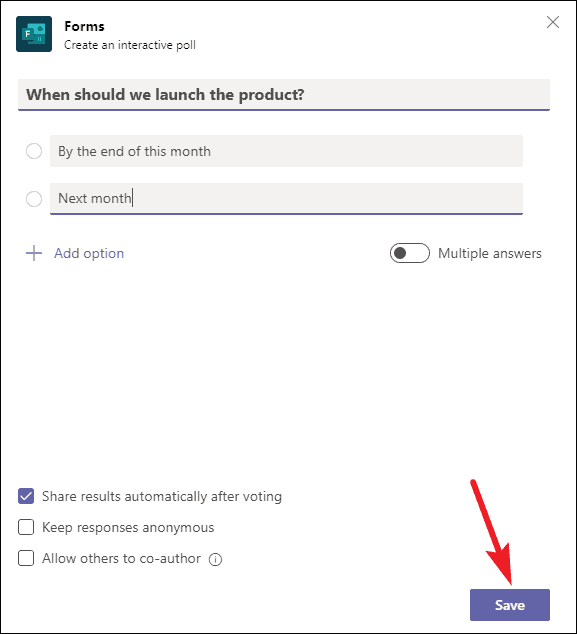
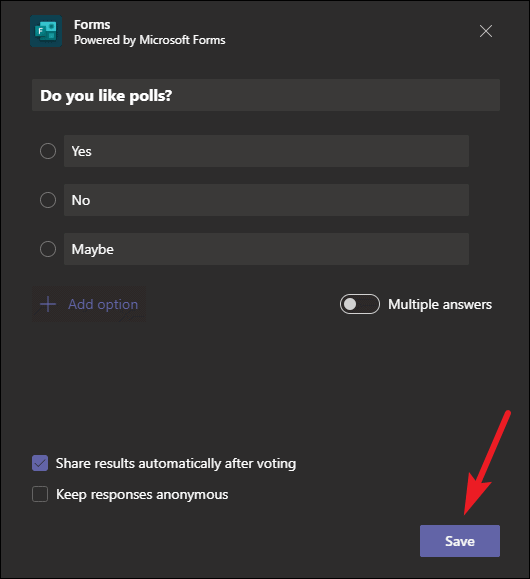
Add the question and responses and configure other settings. You can keep the poll anonymous or non-anonymous, share the results with others or choose not to share them. The question can also have multiple responses. After completing all configuration, click the ‘Save’ button.
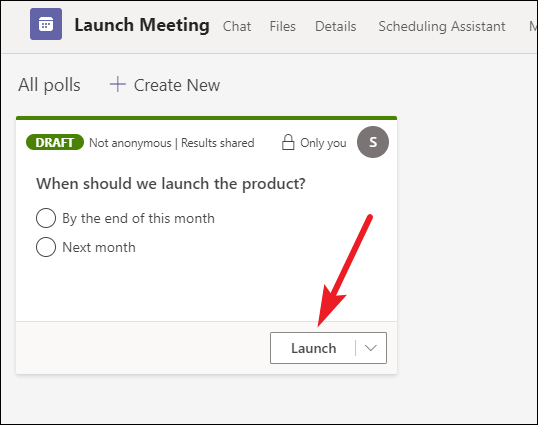
The poll will appear as a draft. Click the ‘Launch’ button to make it live. If you don’t launch it now, it’ll be available to launch during the meeting. You can create as many poll questions as you want, and launch all or some of them before the meeting.
Other participants will be able to see and participate in the active polls from the meeting chat before the meeting. You can monitor the results of the Poll from the chat.
Note: Presenters can also see any drafts and launch them or also create new polls themselves. You can remove the people you don’t want to have any say in creating polls from the role of presenters from the meeting options.
Creating Polls Before a Meeting For Microsoft Teams Free Users
Microsoft Teams Free users can also schedule meetings now. But the options for scheduling a meeting are nowhere near as extensive as for Microsoft 365 subscribers. For instance, one difference is that you cannot add participants while scheduling the meeting.
But with Microsoft Teams Free, meeting chat is created for every meeting you schedule even without any attendees. Go to ‘Chat’ from the navigation menu on the left.
Open the chat for the meeting you scheduled.
Then, click the ‘Add a Tab’ button on the right of the other tabs.
Now, Microsoft Forms isn’t available for Microsoft Teams Free users. But you can use the Polly app to create live, interactive polls. Search for ‘Polly’ and click the app icon.
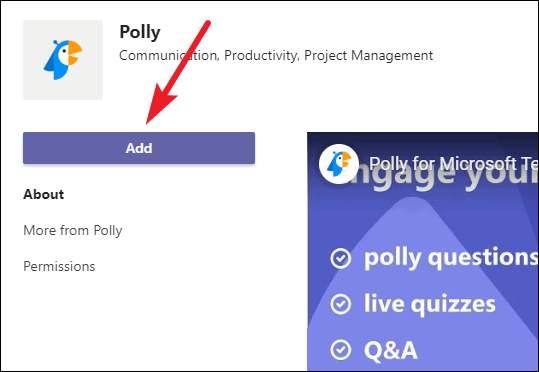
The app overview page will open. Click the ‘Add’ button.
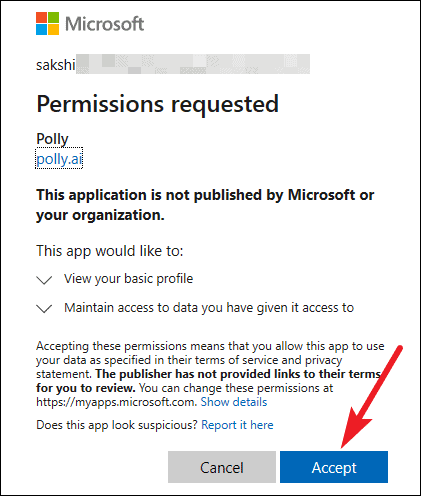
The first time you add it, it’ll ask for additional permissions. Click ‘Accept’ to proceed.
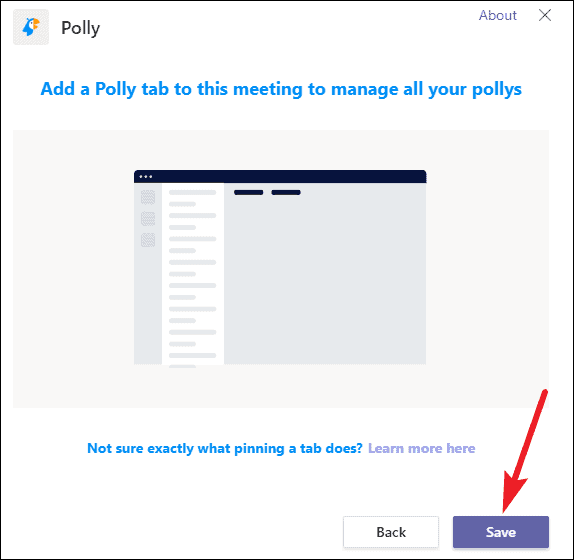
A preview page for what you can do with Polly will appear. Click ‘Save’.
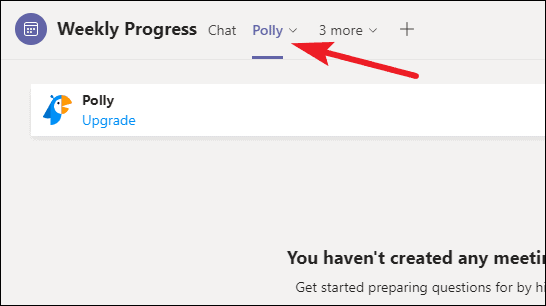
The tab for ‘Polly’ will be added. Go to it to create polls using Polly.
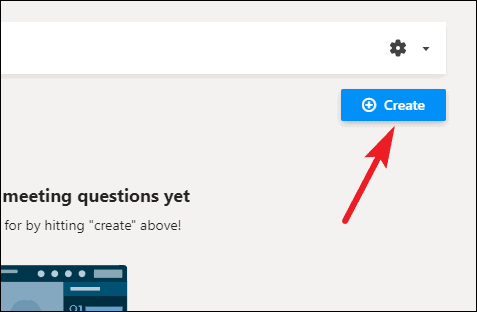
Click the ‘Create’ button to create a new poll.
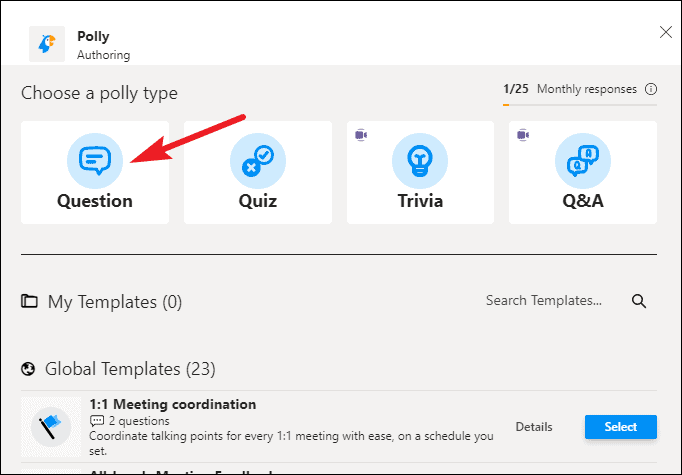
Using Polly, you can create MCQ questions, quizzes, Trivia, and Q&A. Choose the type of poll you want to create. You can also use one of the available templates.
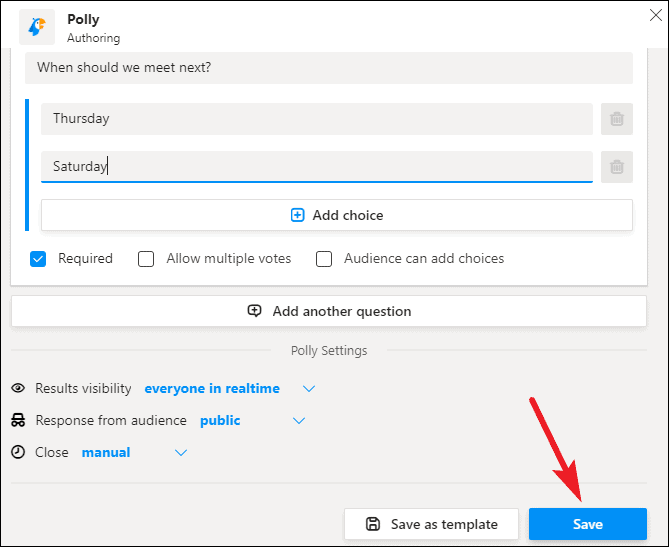
Create the question and options. With Polly, you can add multiple questions in a single poll. Configure additional settings for the poll and click ‘Save’.
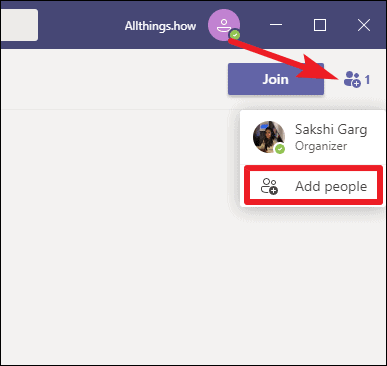
You could save the poll(s) to launch during the meeting. Or you could add participants to the chat and launch the poll before the meeting. To add participants, click the ‘Participants’ icon in the top right corner, and select ‘Add people’.
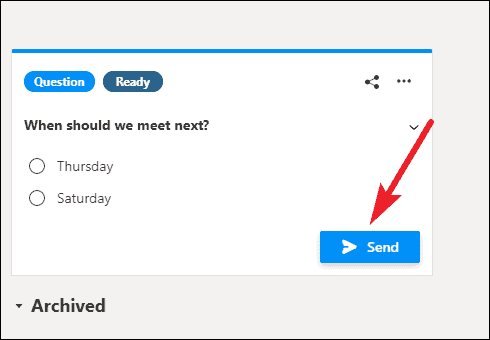
After adding people, click the ‘Send’ button to launch the poll question. You can view the results of the poll from the chat itself.
Creating Live Polls During a Meeting
Whether you’re a Microsoft 365 or Teams Free user, if you’ve added Forms/ Polly or any other polling app optimized for meetings to a scheduled meeting, conducting polls during these meetings will be as easy as a pie for you.
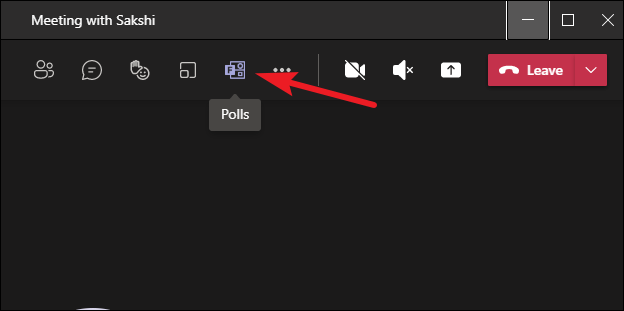
Go to the meeting toolbar in the meeting window, and you’ll see that an additional icon for Forms or Polly will appear there.
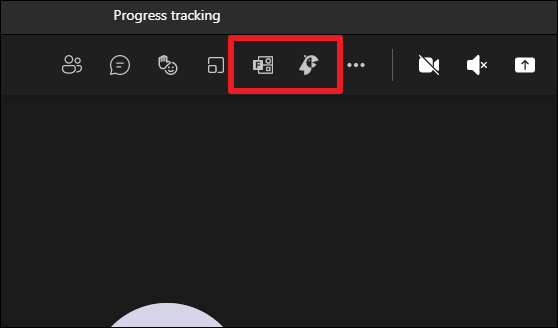
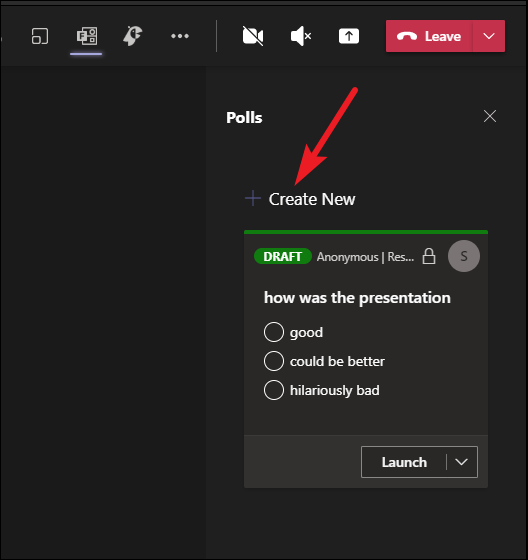
Click it to poll the attendees during the meeting. For Forms, the panel for Polls will open on the right. Any active polls or drafts will be available there. Click the ‘Create New’ button to start a new poll.
Similarly, the panel for Polly will also appear on the right with any drafts or active polls available. To create new polls, click the ‘Quick Create’ button.
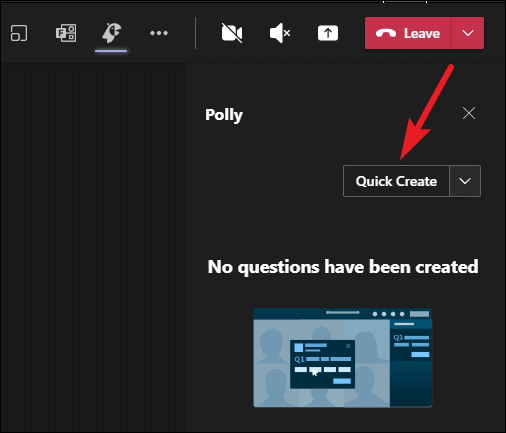
Launch the polls from the polling panel to conduct active polls during the meeting. The polls you launch will appear as a window on the attendees’ screens during an ongoing meeting. They can also access it any time from the meeting chat. You can track a poll’s progress and see the responses to it from the panel itself.
If you didn’t add the polling app to a scheduled meeting before the meeting started, then the process to add them during the meeting will be the same as for the Ad-Hoc Meetings explained below.
Creating Live Polls for Ad-Hoc Meetings
Polls aren’t available for just scheduled meetings, even though a Google search would have you believe that. There’s a certain workaround that’ll give you access to Polls in any ad-hoc Microsoft Teams meeting.
Now, if you only want to ask a quick little question, you wouldn’t even need the workaround. Let’s take a look at both the ways you can access Polls in a Microsoft Teams meeting that wasn’t scheduled.
Whether you are a Microsoft 365 or Teams Free User, the steps for creating polls in ad-hoc meetings will remain the same. Only your choice of the app might differ.
For a quick poll (with a single question), go to the meeting toolbar and click the ‘Chat’ icon.
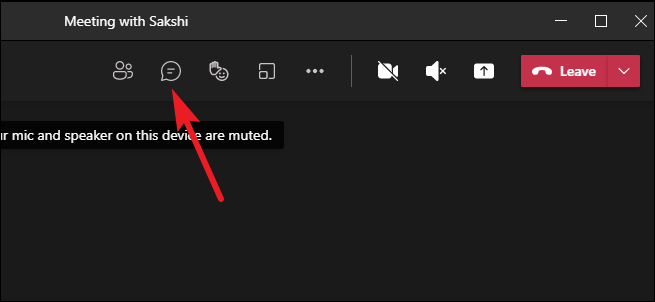
The chat panel will open on the right. Go to the compose box at the bottom of the screen, and click the ‘Messaging Extensions’ icon (three-dot menu).
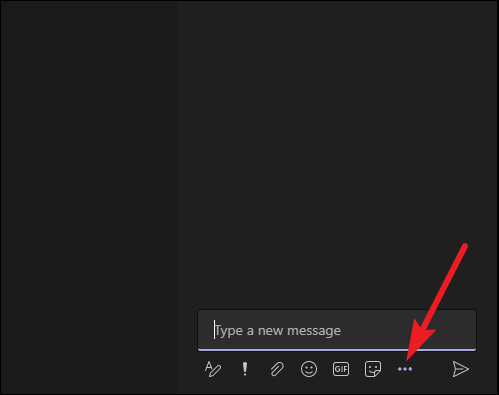
Then, click the polling app you want to use. If it isn’t visible right away, search for it.
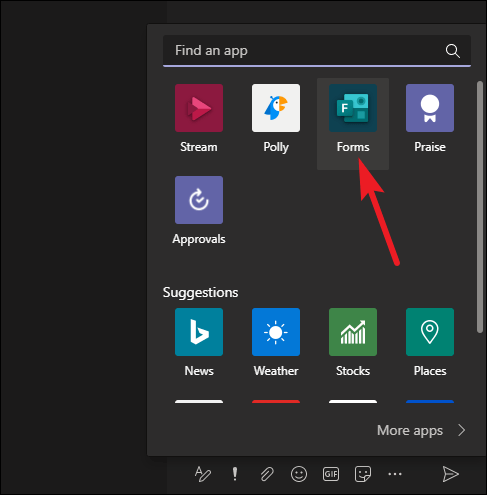
The interface for the app would appear. If you’re using Forms, the window for creating a question will open. Frame your question and options, configure the settings, and click the ‘Save’ button.
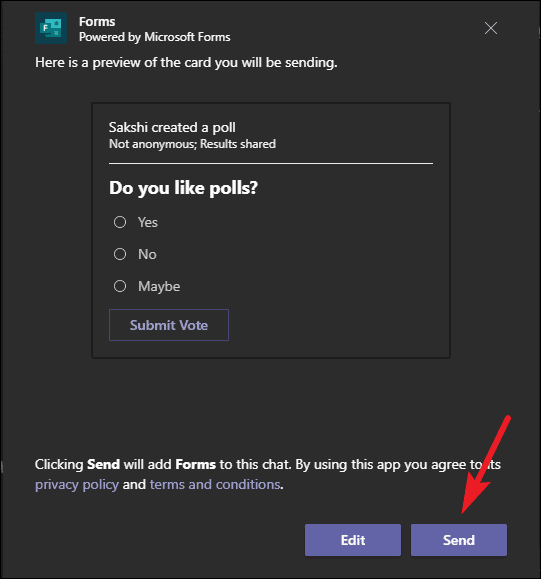
A preview of the poll will appear. Click the ‘Send’ button to launch it.
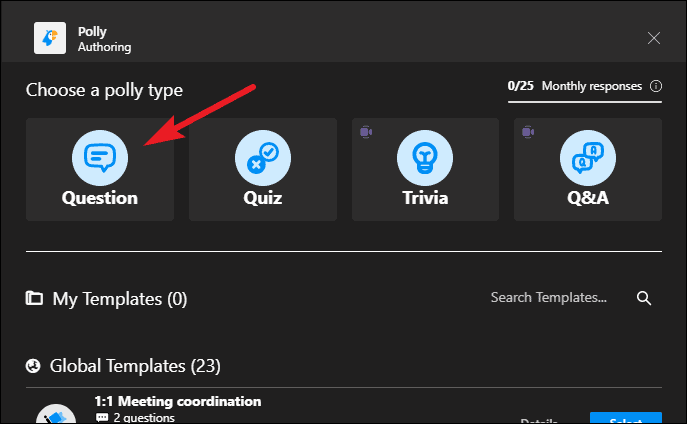
If you’re using the Polly app, the interface for choosing the type of poll will open. Choose ‘Question’ to create a multiple-type choice poll.
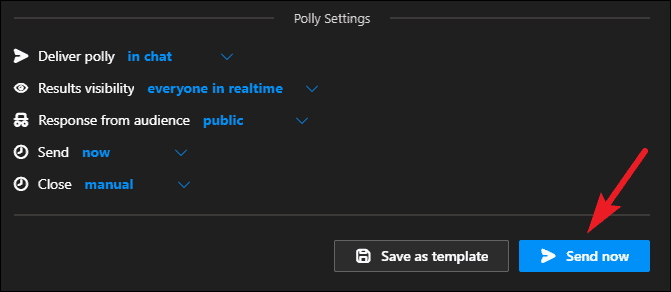
Formulate the question, and click the ‘Send now’ button to launch the poll.
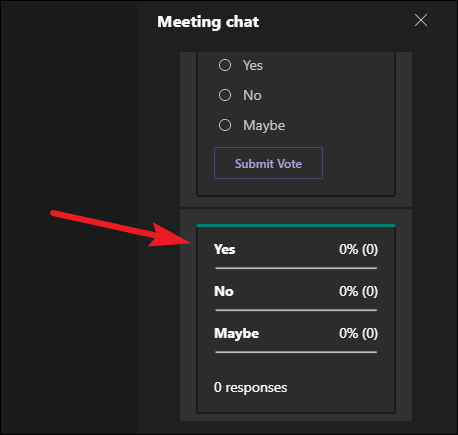
The poll will appear on attendees’ screen as well as in the chat. You can view the poll and responses to it from the chat.
Note: The ‘Messaging Extensions’ icon is unclickable for channel meetings. To create a poll for a channel meeting, minimize the meeting window and go to the channel in Microsoft Teams. Go to the ‘Meeting in <Channel name>’ post and click the ‘Reply’ button. The compose box will appear. Click the ‘Messaging Extensions’ icon and follow the rest of the steps as above.
The above option is suitable when you don’t need to create too many questions in a poll. But for a long poll, it isn’t feasible. For Starters, you’d have to repeat the process every time you want to add a question. Also, managing the poll from the chat panel can get tedious.
It’s time to get to the workaround. This method will add the icon for the Polling app to the meeting toolbar, just like in scheduled meetings.
Note: This hack doesn’t work with Channel meetings, but only with private meetings started from the ‘Calendar’/ ‘Meetings’ tab. For channel meetings, you can conduct polls in the channel instead.
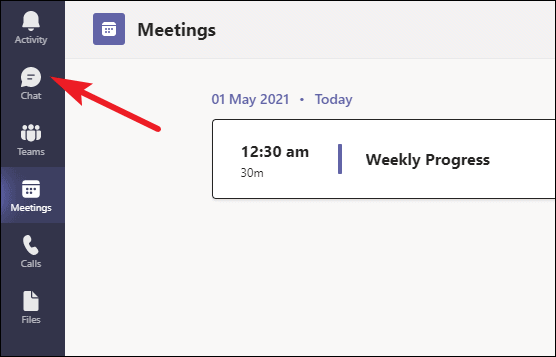
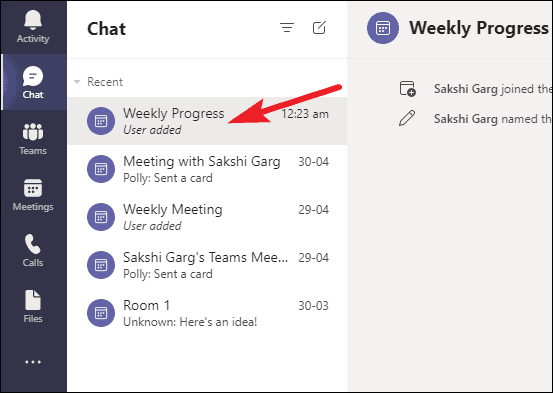
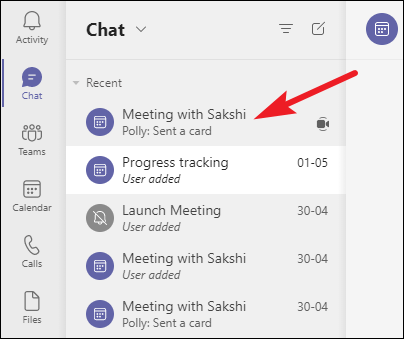
Minimize the meeting window with the meeting still ongoing and open the Microsoft Team window. Go to ‘Chat’ from the navigation menu on the left.
A chat for the ongoing meeting will appear with the meeting name in the list of chats. It’ll also have a video camera icon to indicate that the meeting is ongoing. Click it to open the meeting chat.
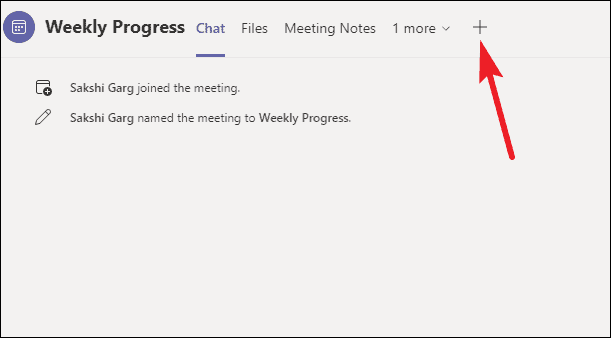
Then, click the ‘Add a Tab’ option (+ icon) on the right of the present tabs.
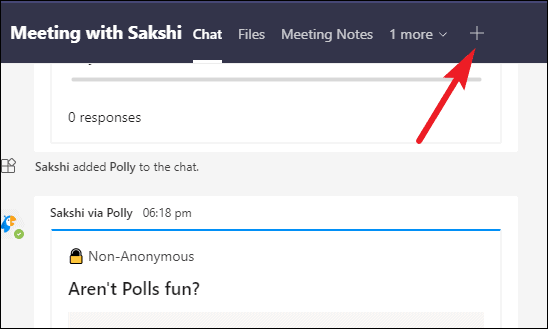
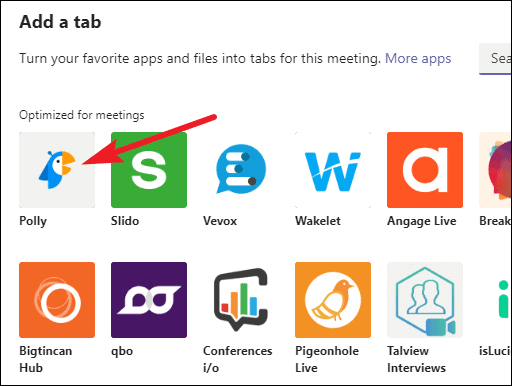
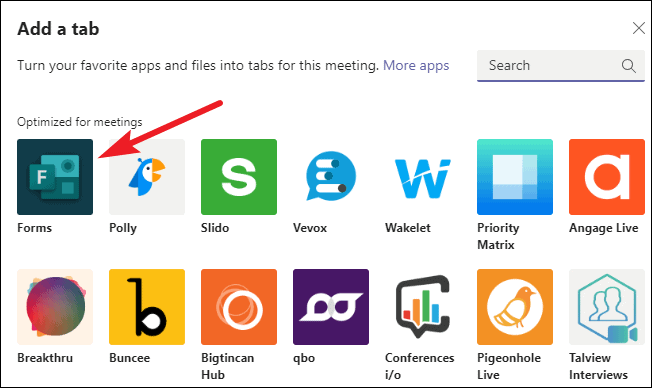
The window for adding an app will pop up. Add the Forms/ Polly app for polls. For the sake of this example, we’ve added only the Forms app, but you could choose either.
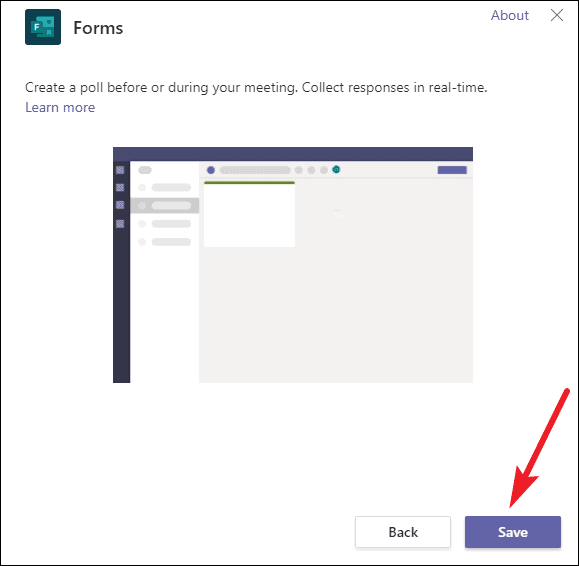
Click the ‘Save’ button when the window appears to add the app to the meeting.
Now, return to the meeting window. The icon for the polling app will appear on your meeting toolbar. Click it to create and monitor live polls in the meeting chat from the polls panel.
Using polls to have quizzes or to gather feedback can make virtual meetings a lot more interactive. And with the help of this guide, you can create live polls in any Microsoft Teams meeting like a Pro.