
Adding a table of contents in Google Docs streamlines your document by providing an organized overview and allowing readers to navigate easily between sections. By utilizing the built-in heading styles, you can automatically generate a dynamic table of contents that reflects the structure of your document.
Applying Headings to Your Document
To create a table of contents, you first need to apply heading styles to the relevant sections of your document. Different heading levels (Heading 1, Heading 2, Heading 3, etc.) represent the hierarchy of your content and will be mirrored in the table of contents.
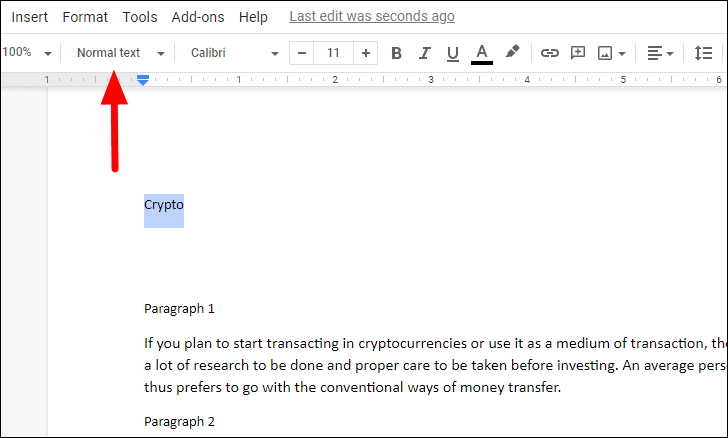
Select the text you want to turn into a heading and click on the ‘Styles’ dropdown menu in the toolbar.
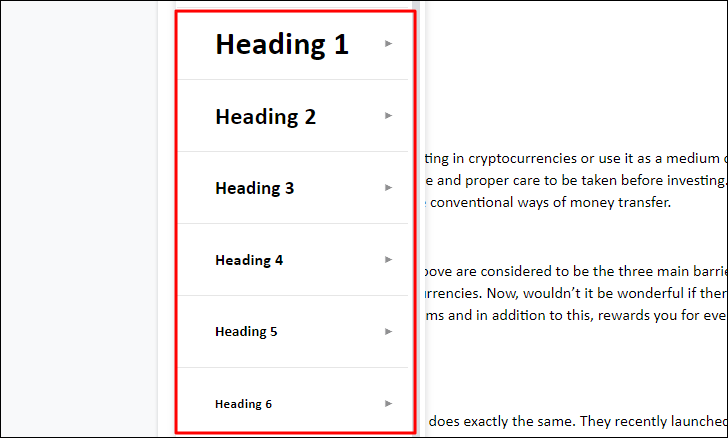
Choose the appropriate heading level from the list. The selected text will automatically change to match the formatting of that heading style. For quick formatting, you can use keyboard shortcuts: press CTRL + ALT + 1 for ‘Heading 1’, CTRL + ALT + 2 for ‘Heading 2’, and so on, replacing the last number with the desired heading level.
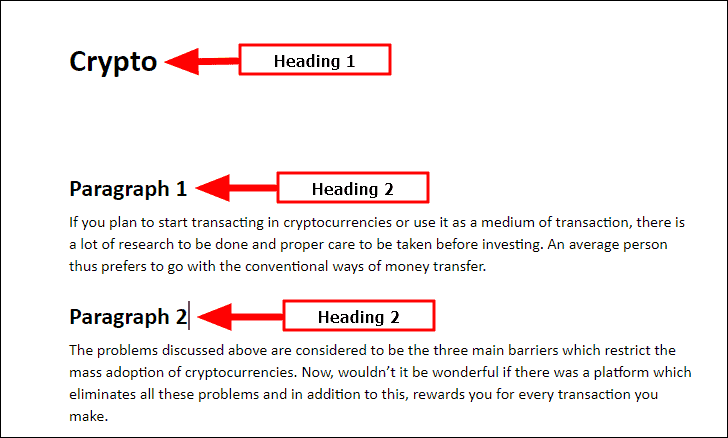
Continue to apply heading styles throughout your document where appropriate. In this example, main sections are formatted as ‘Heading 1’, subsections as ‘Heading 2’, and additional sub-points as ‘Heading 3’. This hierarchical formatting ensures that your table of contents accurately reflects the structure of your document.
Inserting the Table of Contents
With your headings in place, you’re ready to insert the table of contents. This is typically added at the beginning of your document, either on the first page or after a title page. Google Docs offers two styles of table of contents: one that displays page numbers and another that uses blue hyperlinks.
If your document will be printed, the version with page numbers is most appropriate. For digital documents shared online, the version with blue hyperlinks allows readers to jump directly to sections with a click.
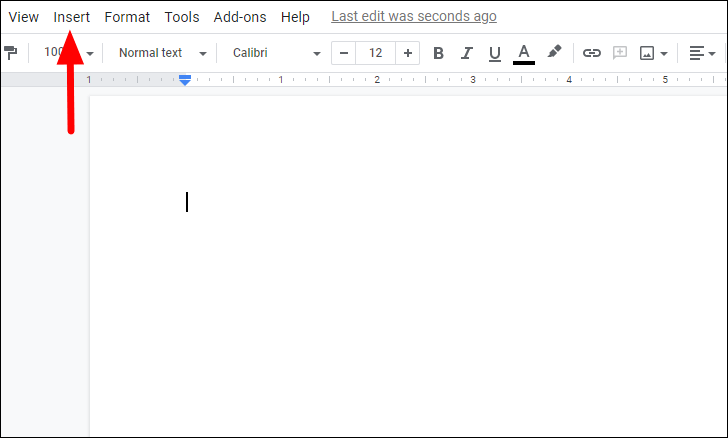
To insert the table of contents, place your cursor where you want it to appear. Click on the ‘Insert’ menu at the top of the screen.
Select ‘Table of contents’ from the dropdown menu. A submenu will appear with the two style options: ‘With page numbers’ and ‘With blue links’. Choose the one that suits your document.
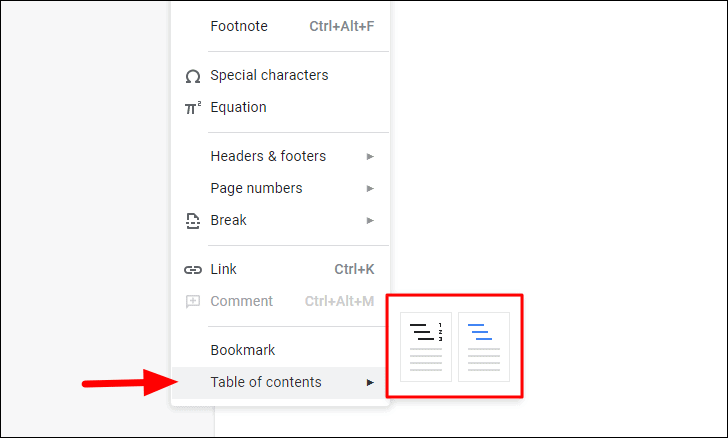
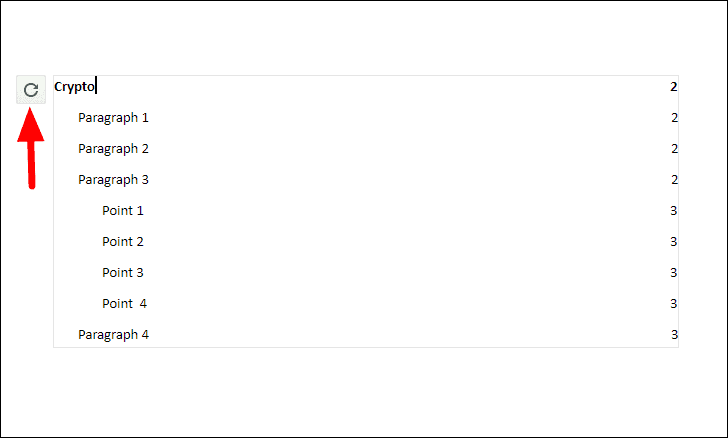
Table of Contents with Page Numbers
Selecting the ‘With page numbers’ option will generate a table of contents that lists your headings along with their corresponding page numbers. ‘Heading 1’ entries appear in bold and at the top level, ‘Heading 2’ entries are indented slightly, and ‘Heading 3’ entries are further indented with a smaller font size.

You can navigate to any section by clicking on its entry in the table of contents and then clicking the link icon that appears. Additionally, you can copy, edit, or remove the link using the options that appear when you hover over the entry.
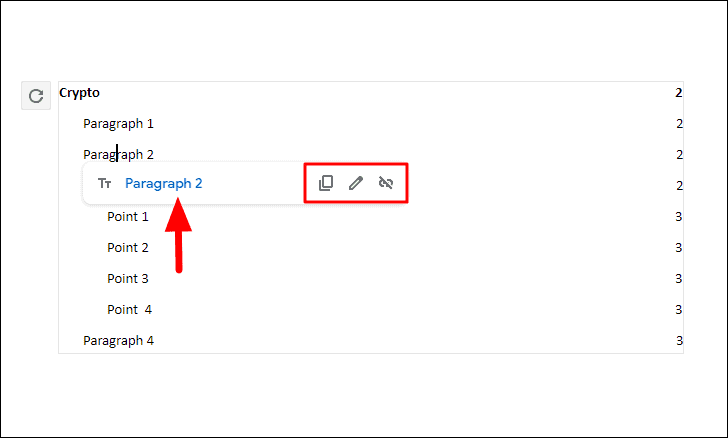
Table of Contents with Hyperlinks
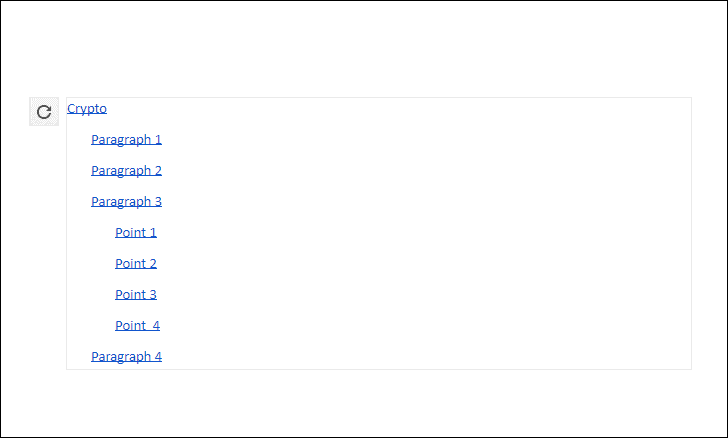
The ‘With blue links’ option creates a table of contents where each entry is a clickable hyperlink to that section of the document. This version does not display page numbers and is ideal for documents that will be shared and viewed electronically.
Updating the Table of Contents
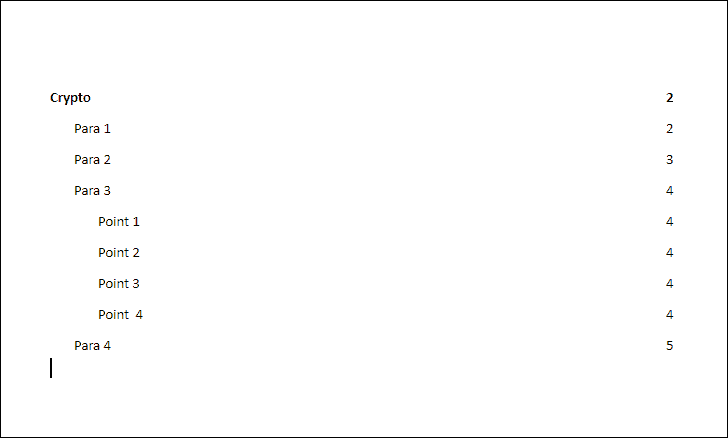
If you add new sections or make changes to your headings after inserting the table of contents, you’ll need to update it to reflect those changes. The table of contents does not update automatically. For instance, if you’ve modified headings from ‘Paragraph’ to ‘Para’ and rearranged them using the ‘Page Break’ feature, you’ll want these updates reflected.
Related: How to Add a Page on Google Docs
To update the table of contents, click on it to select it, then click on the ‘Update table of contents’ icon that appears at the top-left corner.
The table of contents will refresh, displaying the updated headings and page numbers.
Customizing the Table of Contents
You can tailor the appearance of your table of contents to better match your document’s style. Highlight the text within the table of contents that you want to modify, and use the formatting options in the toolbar to adjust the font size, style, color, and line spacing.
Related: How to Double Space on Google Docs
For example, to change the spacing between lines, use the ‘Line spacing’ icon after selecting the text you wish to adjust.

Removing the Table of Contents
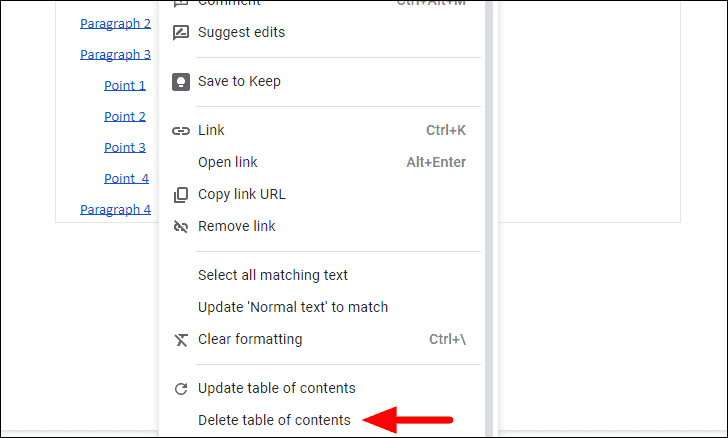
If you decide to delete the table of contents, perhaps to replace it with a different style or remove it altogether, you can do so easily. Right-click on the table of contents and select ‘Delete table of contents’ from the menu. The surrounding text will adjust to fill the space left by the removed table.
By following these steps, you can efficiently create, update, and customize a table of contents in Google Docs, enhancing the organization and navigability of your documents for your readers.