If you aren’t making playlists on Spotify, are you even using the app to its full extent? Everyone goes on to make at least one playlist on the app. But setting a playlist to go live, i.e., public, the moment you create it? That requires a certain level of expertise, confidence, and knowledge of good playlisting. Nonetheless, you can opt for every new playlist to go live automatically, whether you consider yourself an expert or an amateur. This helps build your Spotify portfolio in the best way possible.
Creating playlists on Spotify is easy. But making them go live automatically, not so much. That’s because the option to make new playlists go public automatically is available only on the Spotify desktop application. And if you don’t know that, you find yourself in a fix.
But once you know the correct device to use, it’s a piece of cake. Your selection on the desktop app will invariably reflect on other Spotify devices as well. So, you only need to use the desktop app once to change the setting. Here’s how you can make your new playlists go public automatically from the Spotify desktop app.
Setting New Playlists to Go Public on Spotify Desktop App
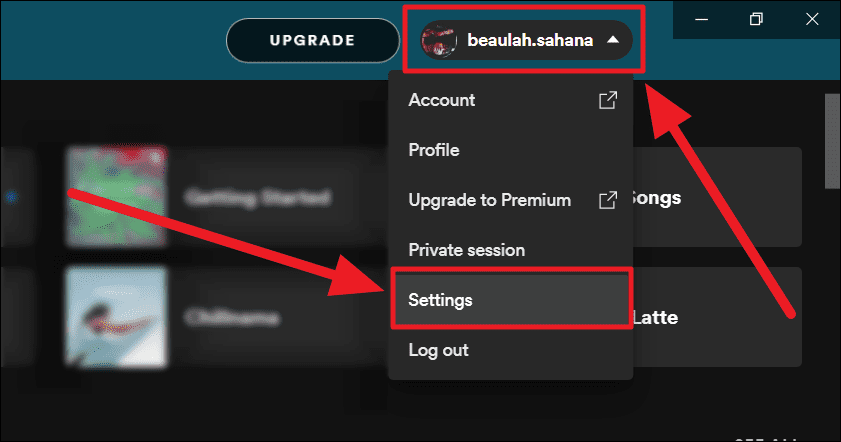
Launch Spotify on your desktop and click your username at the top right corner of the screen. Now, select ‘Settings’ from the drop-down menu that appears.
Scroll through to the end of the ‘Settings’ page to find the ‘Social’ section. Click the toggle next to the option – ‘Make my new playlists public’. The toggle ought to go green.
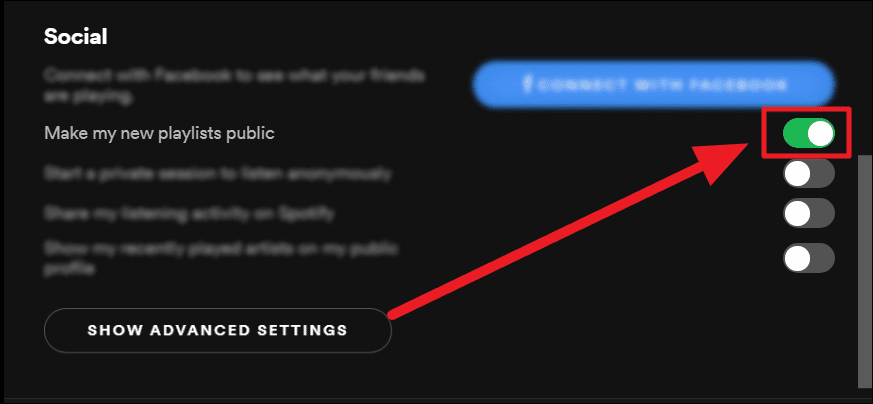
All new playlists will henceforth be automatically visible on your profile.
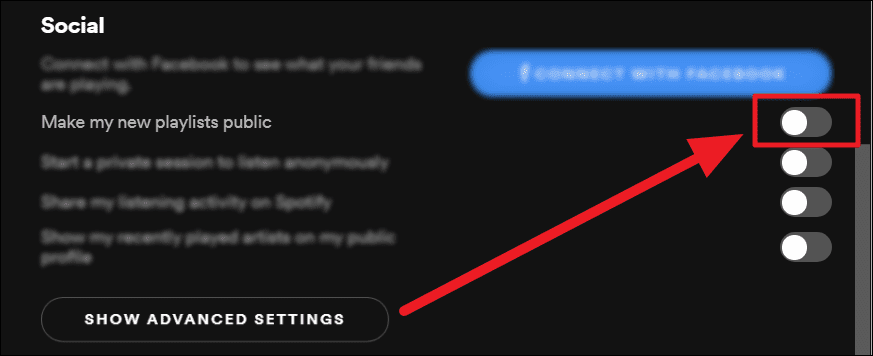
To reverse this option head back to the ‘Social’ settings section. Click the ‘Make my new playlists public’ toggle to grey.
And that’s it! In addition to your own playlists, you can also add playlists made by others on your profile. Hope you found our guide useful and we hope you build a great Spotify profile!


