- iOS 17 introduces a new feature allowing users to transform photos into customizable stickers for use in messages and other apps.
- Stickers can be created directly from the Photos app or within any app that allows access to the Emoji keyboard, like the Messages app.
- Users can also create animated stickers from Live Photos, though these cannot have additional effects applied.
- Custom stickers can be sent in messages, stuck onto message bubbles, and potentially used to react to messages in future updates.
iOS 17 comes with many new features, but nothing might be as fun as this one. The latest OS makes your photos come alive in the form of stickers you can send in messages. And not just the Messages app; with iOS 17, stickers will be available in the Emoji keyboard, so you can use these stickers in any app where you can use emojis.
You can even make animated stickers from Live photos and stylize them with different effects. The feature builds on the ability to lift subjects from the background that Apple introduced last year. Trust me; this is so much fun that you might find yourself transforming your entire camera roll into a sticker album. So, are you ready to add some extra pizzazz to your iMessage conversations? Let’s roll!
Making Live Stickers from Your Photos
There are two ways you can make stickers from your Photos: either from the Photos app or any app where you can access Stickers, say, Messages. For your convenience, we’ll showcase both.
Make a Sticker from the Photos App
Tap on the Photos app on your iPhone to open your camera roll. Don’t get lost in the memories, though; we have a mission to accomplish!
Scroll through your photos and choose the one you want to transform into a cute, custom sticker. Maybe that goofy selfie from last weekend? Or perhaps your cat doing something hilarious? Go wild; the choice is yours! As long as the subject can be lifted from the background, you can turn it into a sticker.
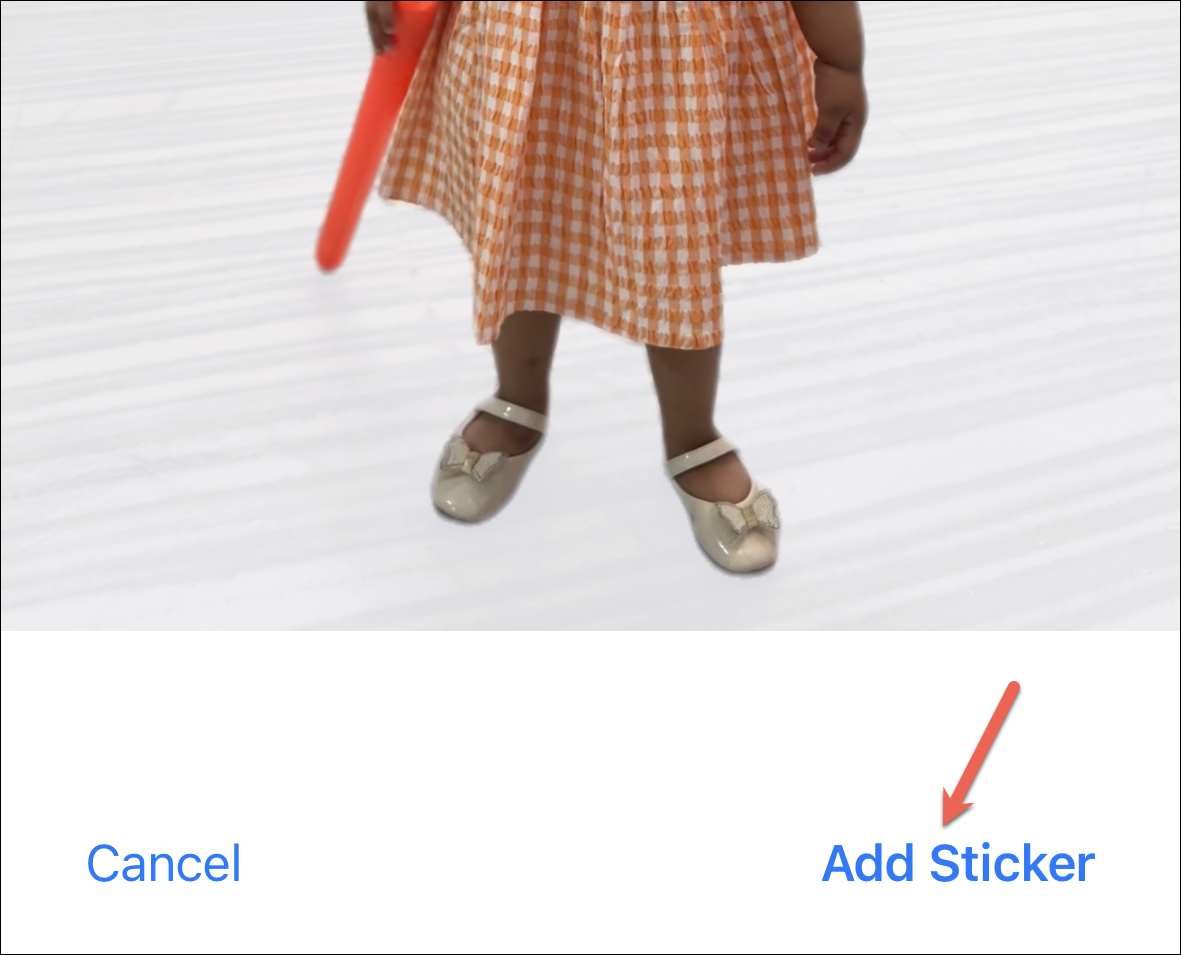
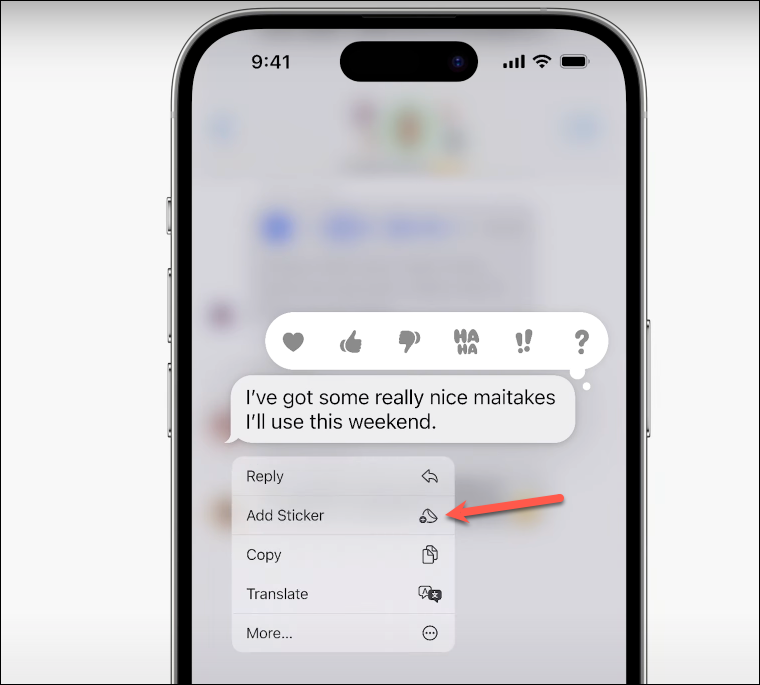
Long press on the chosen photo until a context menu pops up like a genie from the lamp. In the menu that appears, tap on ‘Add Sticker’.
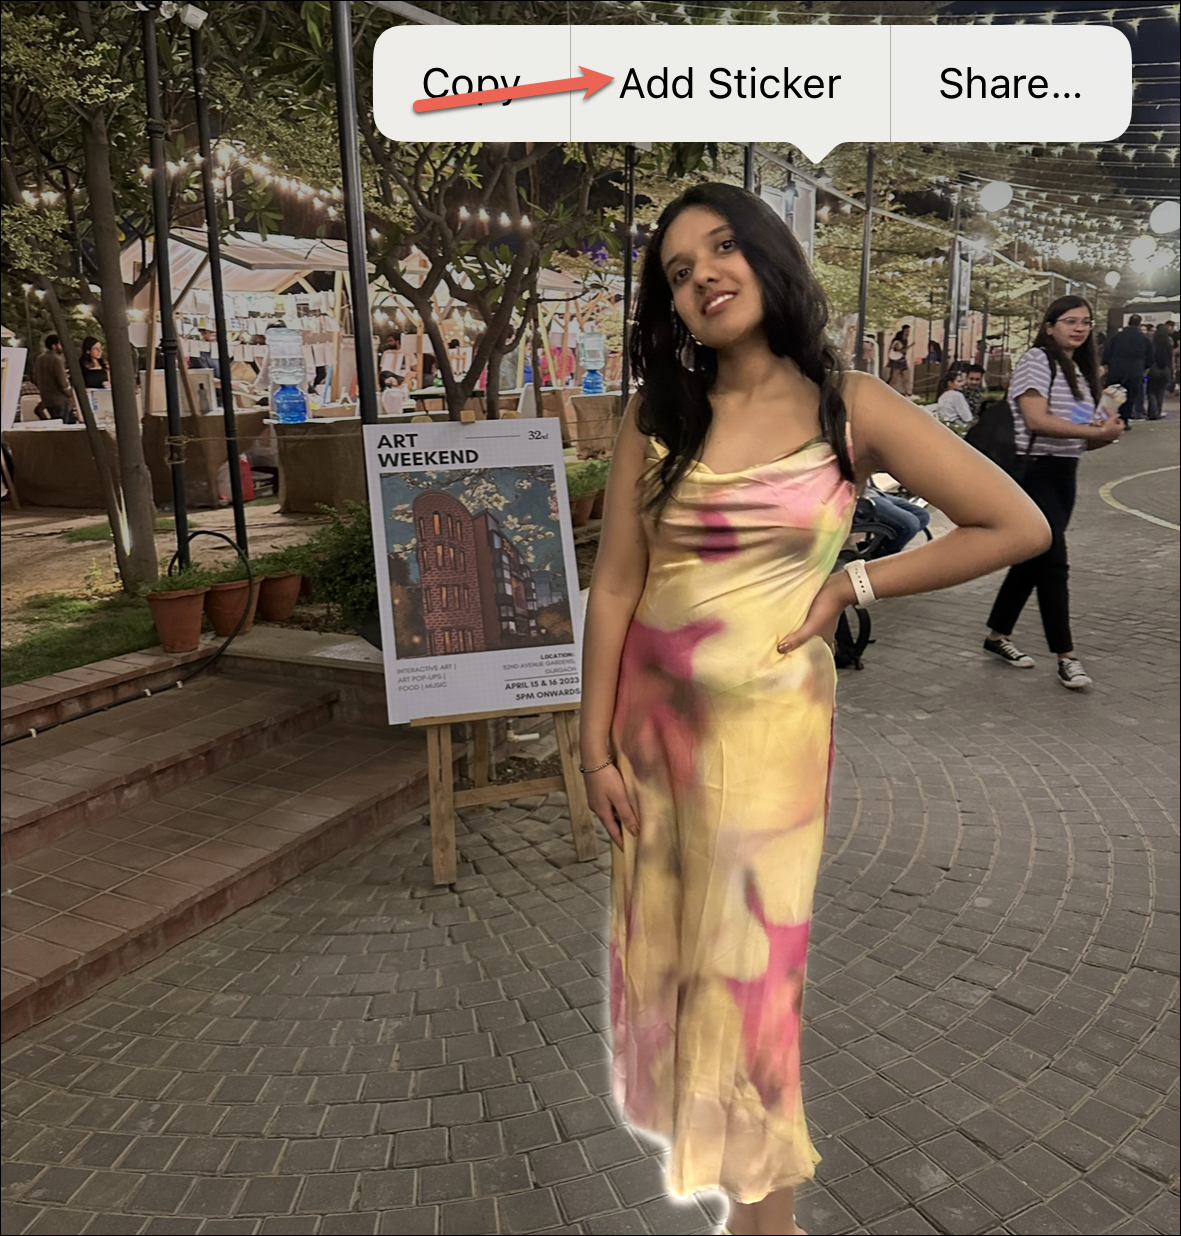
And voila, just like that, your chosen photo is now a stylish sticker. A pop-up window will appear below, showcasing the brand-new sticker you just created. It’s a proud moment; take a second to bask in it!
Make a Sticker from the Messages App
You can also make stickers right from the Messages app (or any other app where you can access the Emoji keyboard, which is practically everywhere). But for the sake of this guide, we’ll use the Messages app.
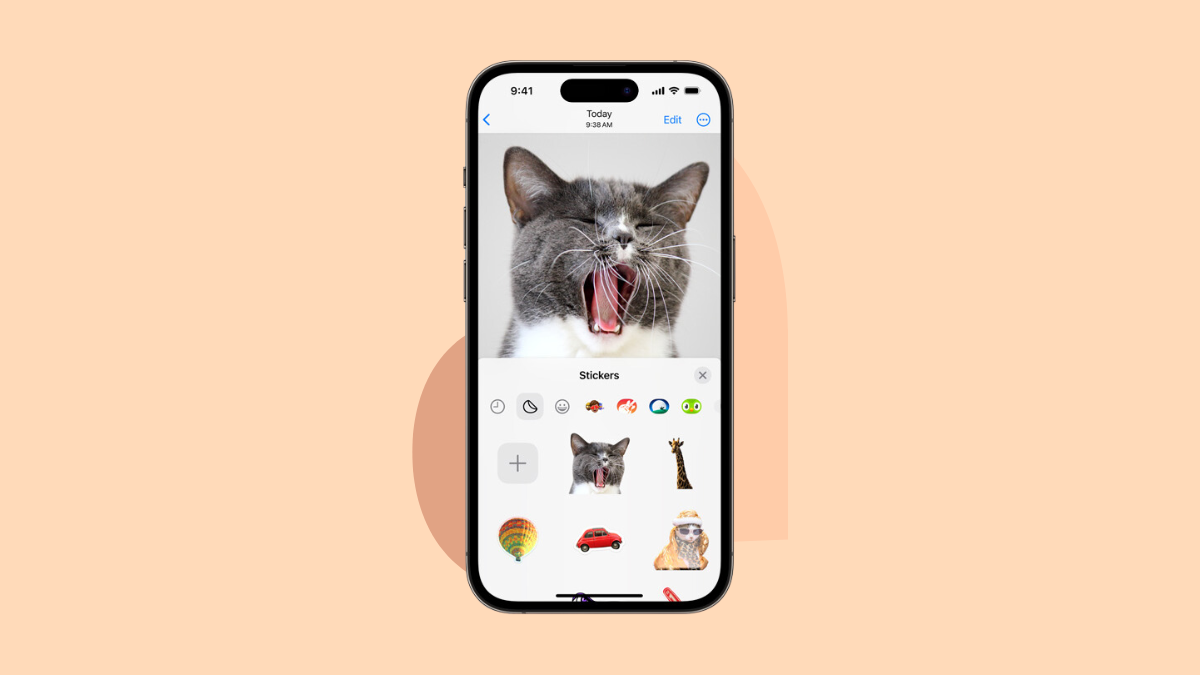
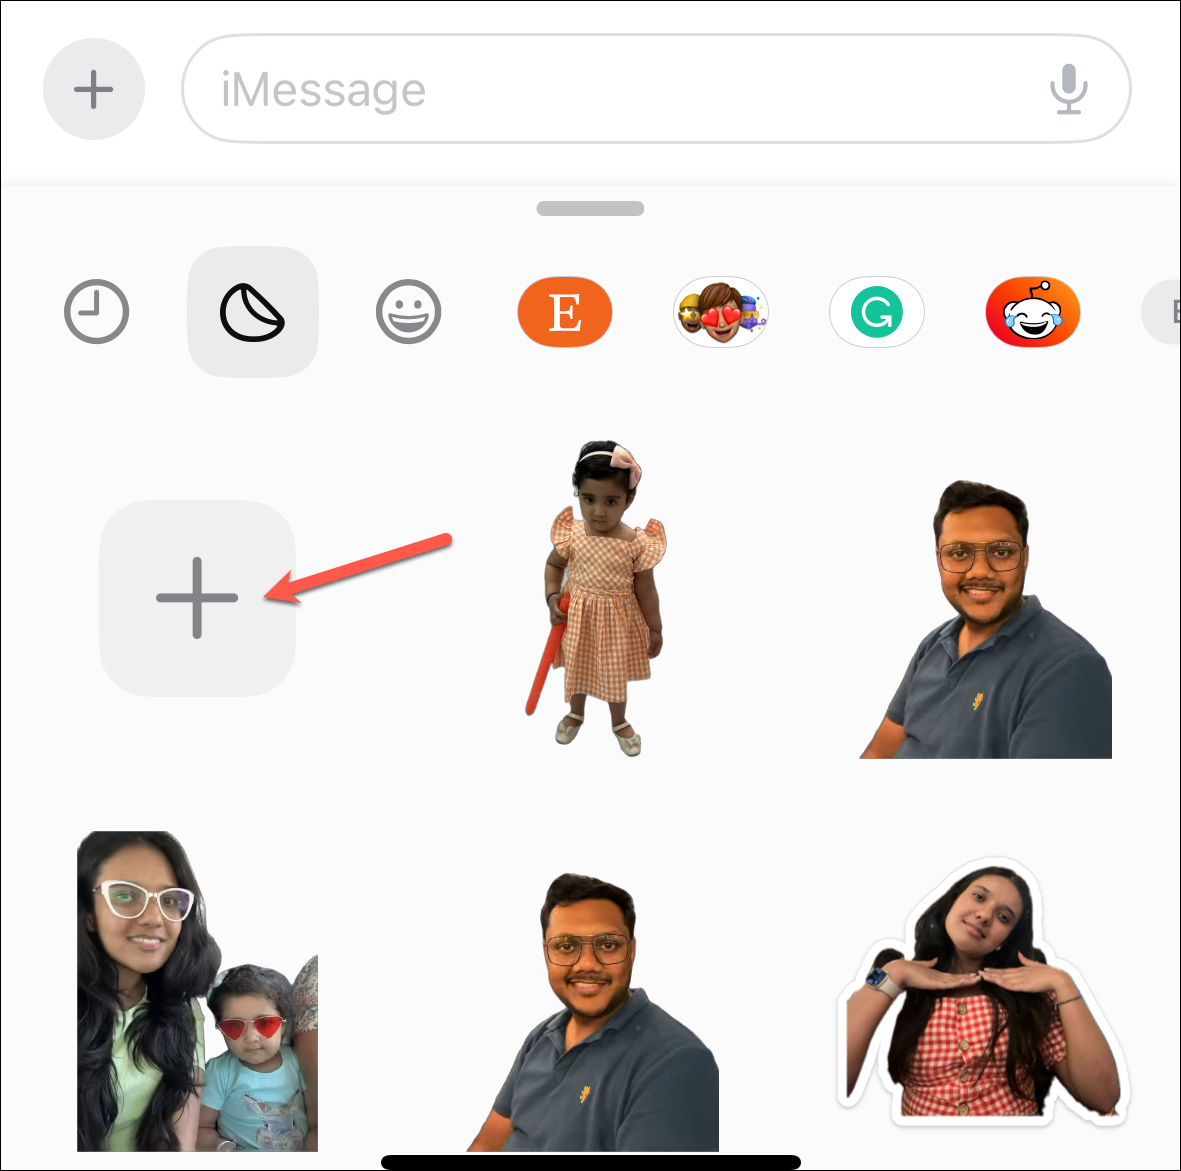
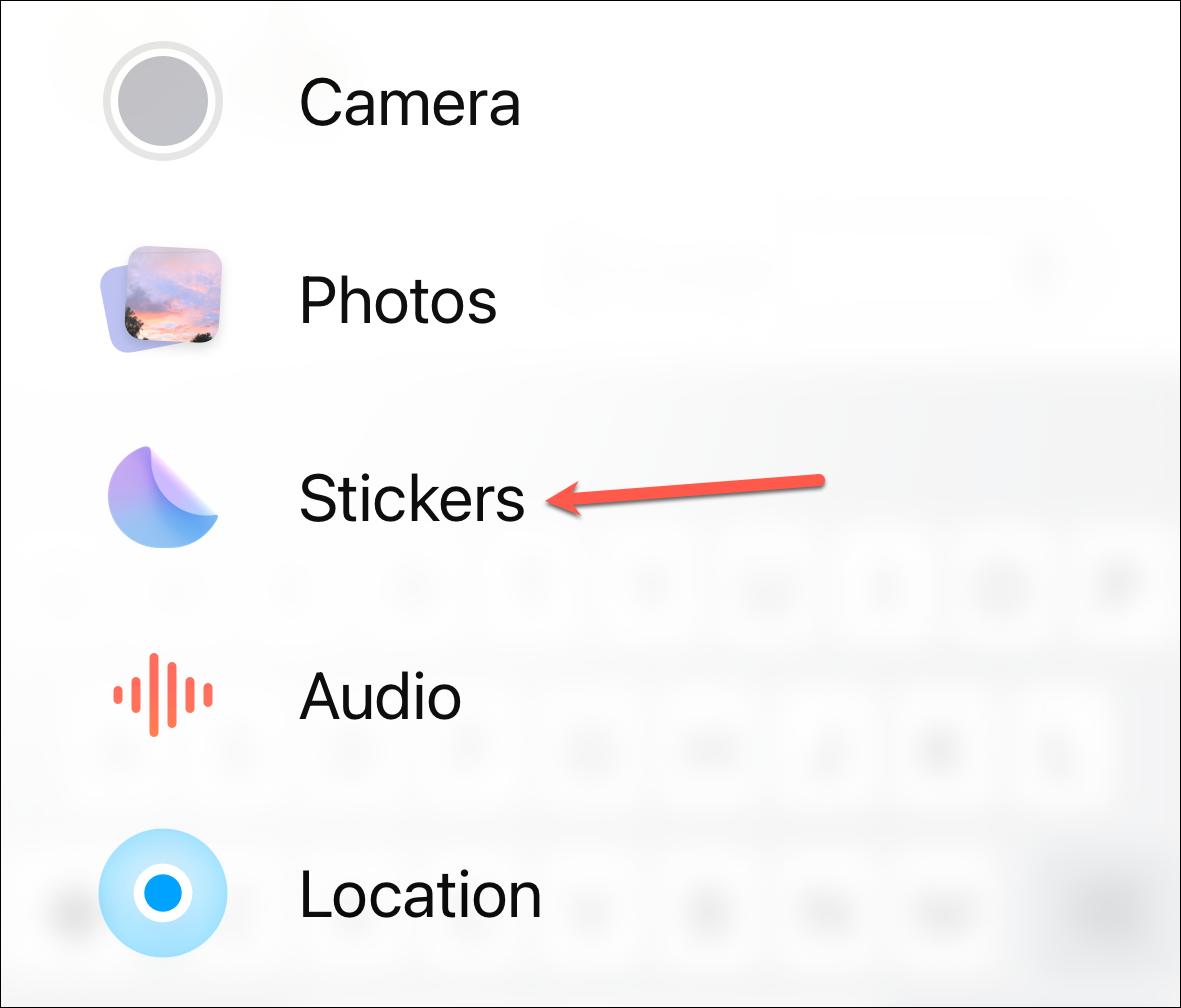
Open the Messages app and navigate to any conversation, preferably where you want to send the sticker. Then, tap the ‘+’ icon to access the iMessage apps.
Tap the option for ‘Stickers’.

Then, tap the ‘+’ icon to add a new sticker.
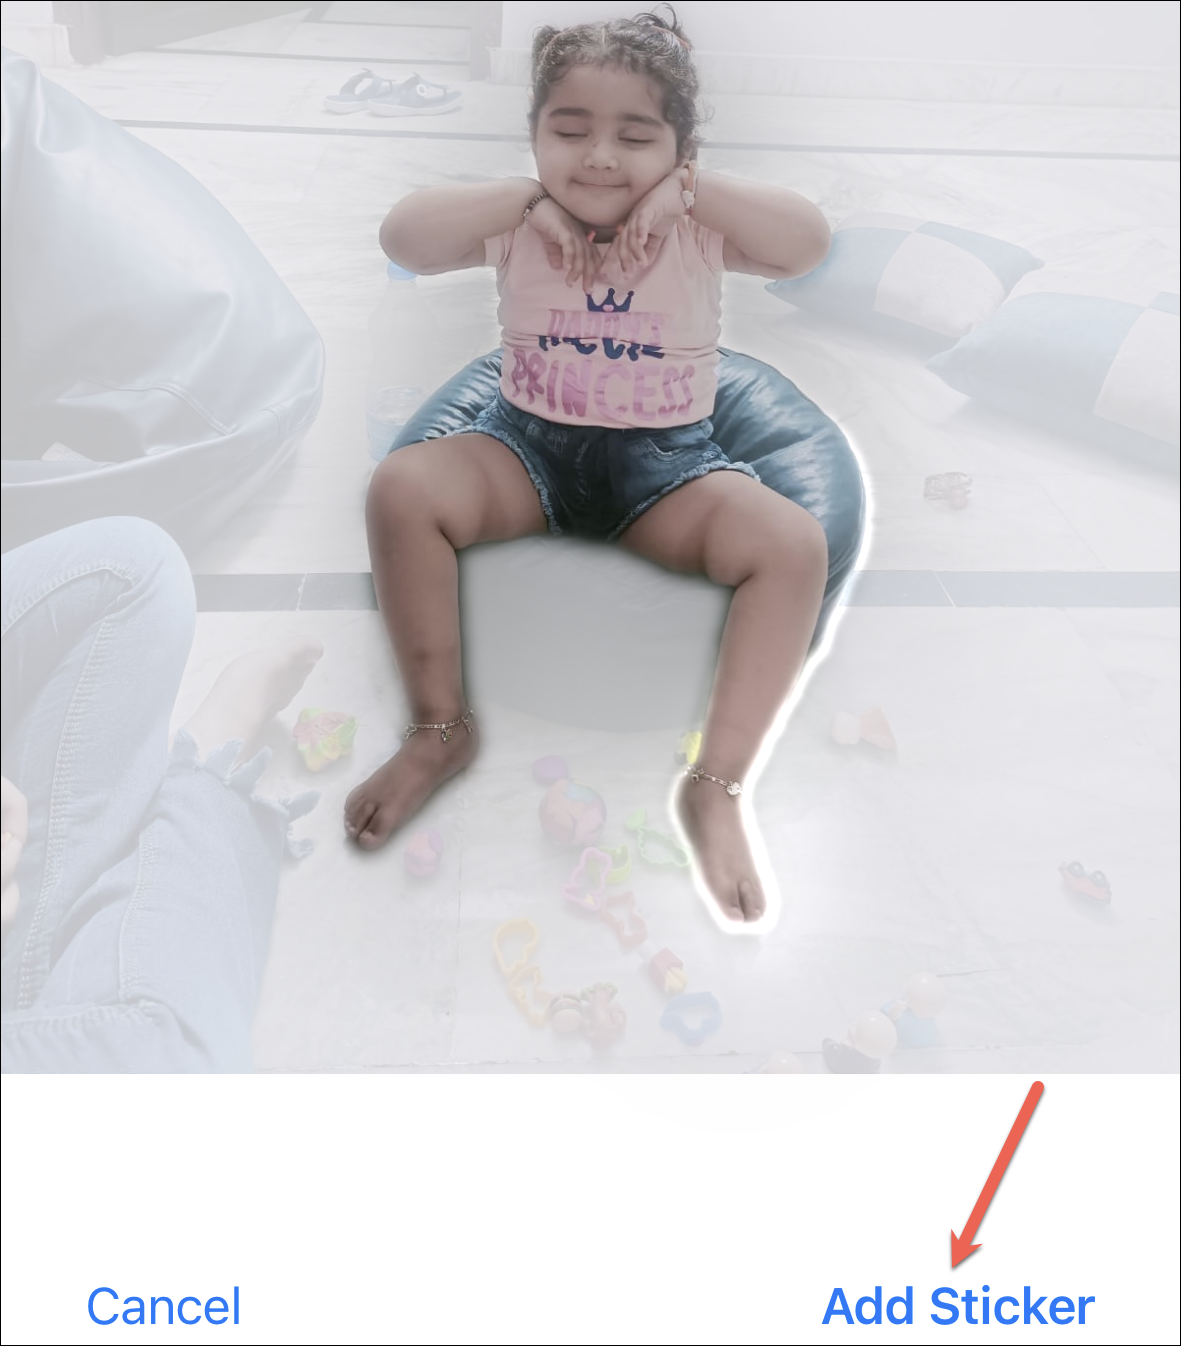
The photo picker will open. Open the photo you want to use as a sticker. It will automatically lift the subject from the background. Then, tap ‘Add Sticker’ in the bottom right corner.
The sticker will appear in the Stickers panel.
Add Effects to Stickers
You can also add effects to the custom sticker before using it. Because why send a regular sticker when you can send a disco-dancing, rainbow-spewing, glitter-exploding sticker? No matter which method you used to make the sticker, the steps to add the effect are the same.
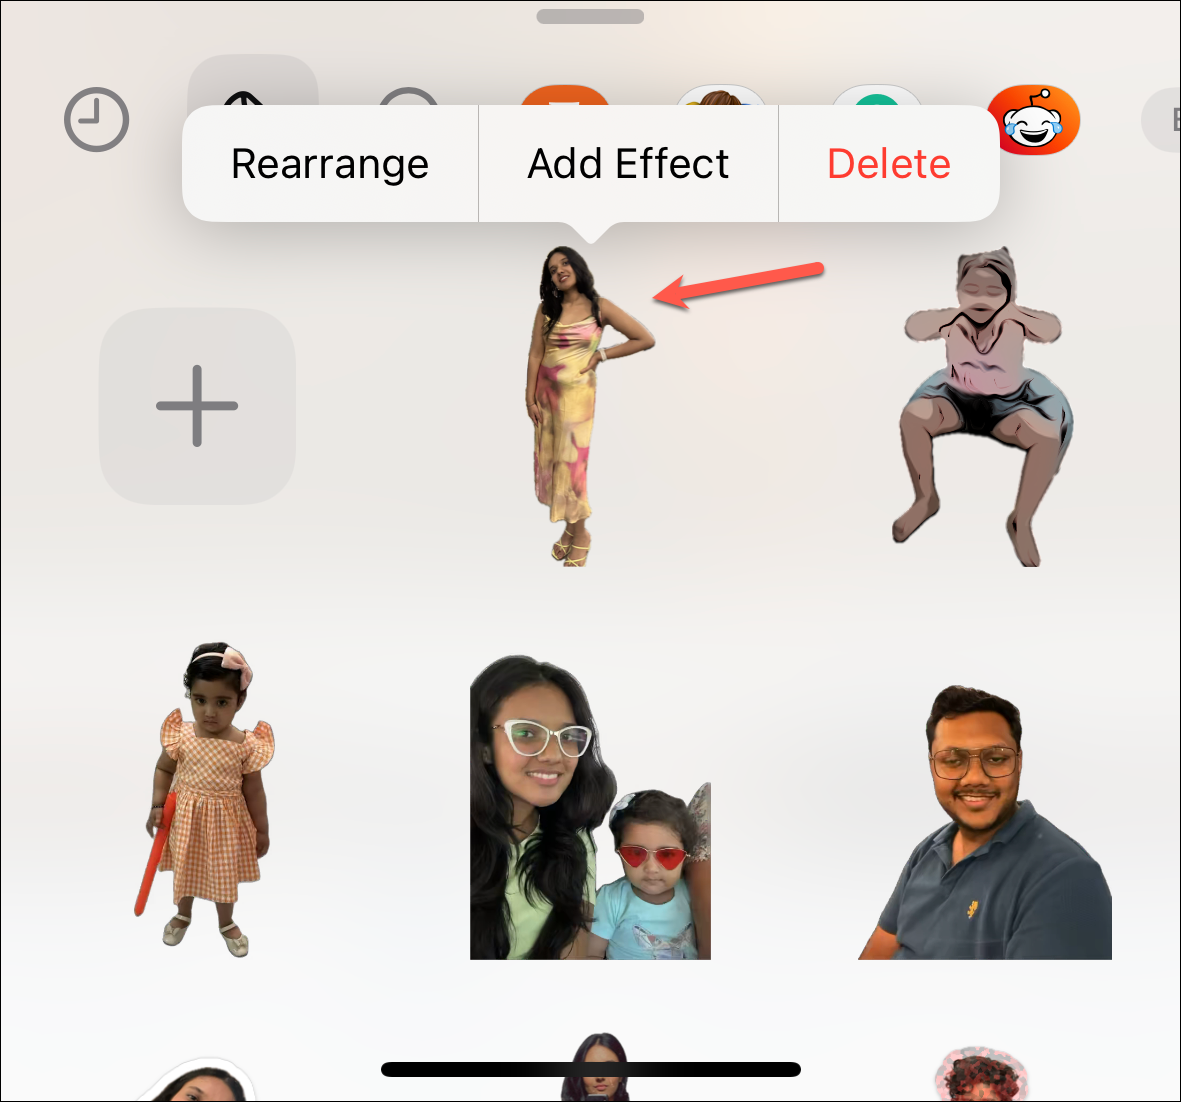
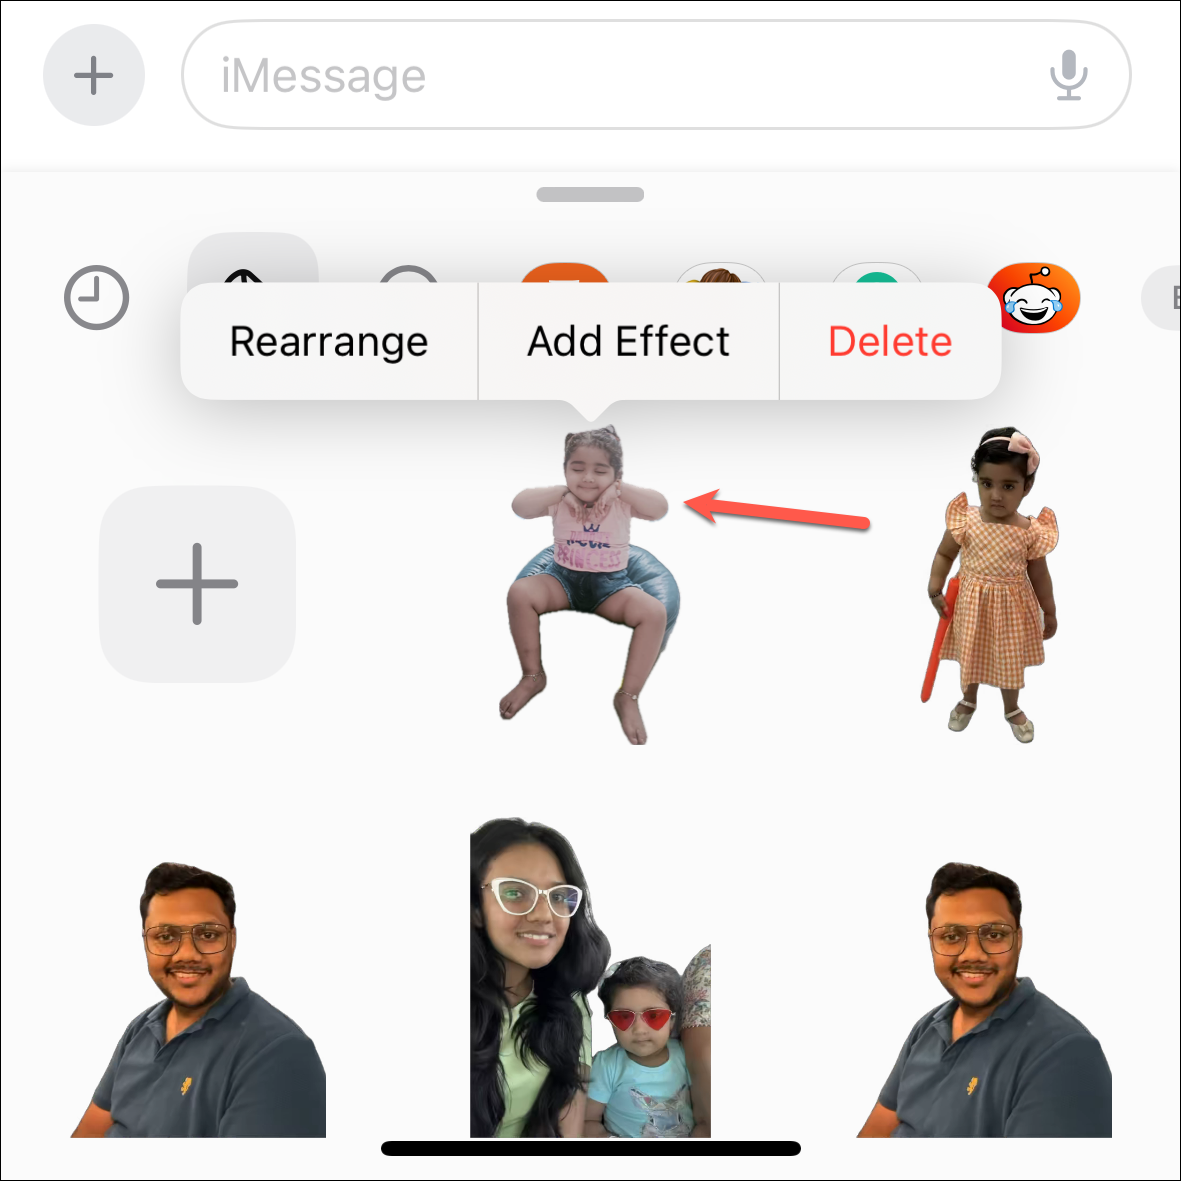
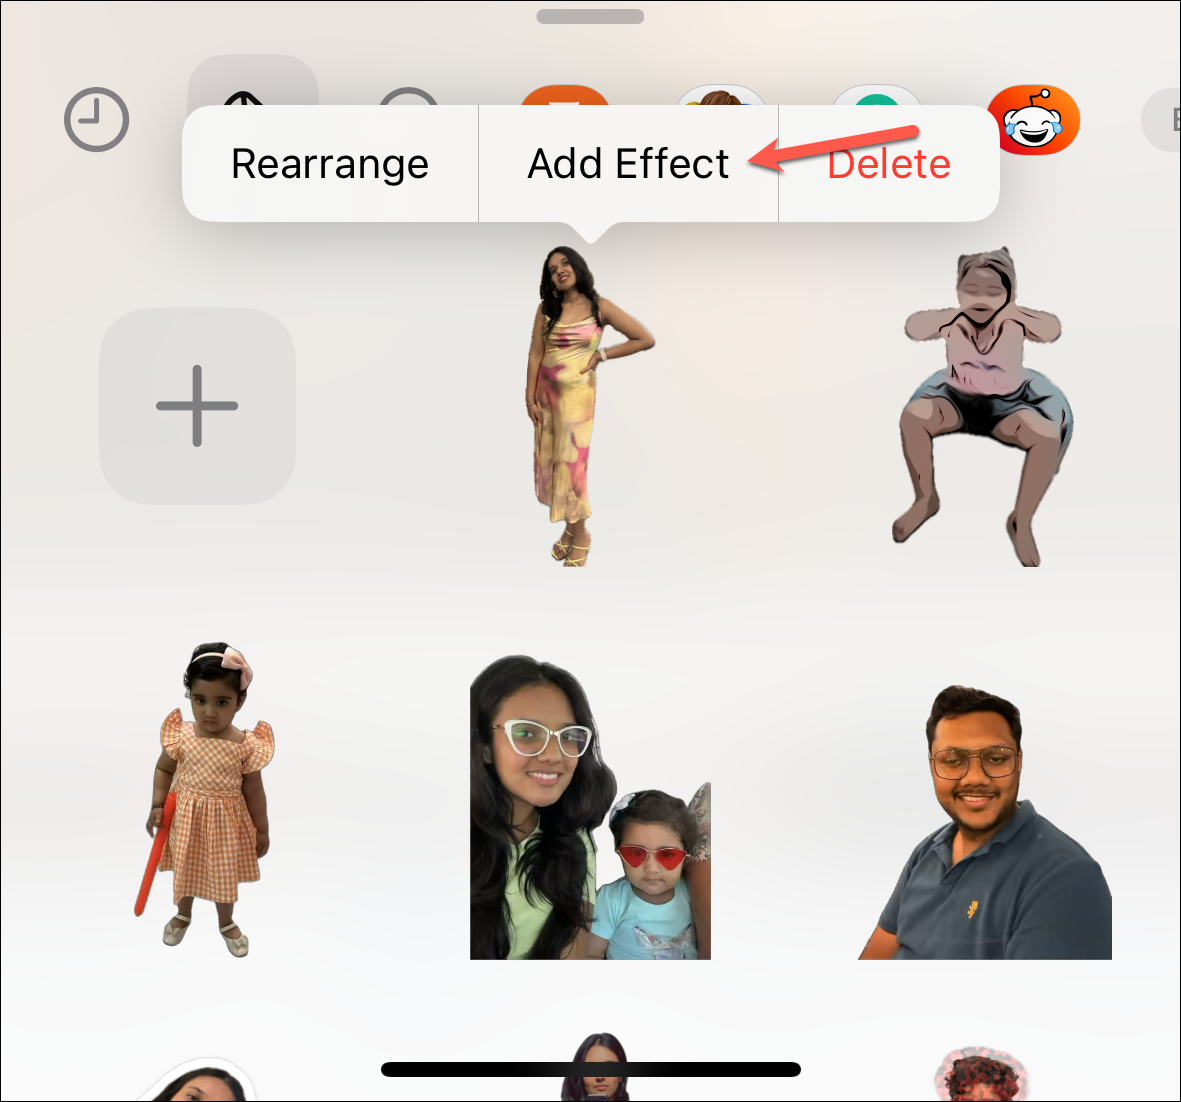
A context menu with a couple of options will appear in the stickers pop-up panel as soon as you add the sticker. If you want to add effects to the sticker, tap ‘Add Effect’ from the menu. (Don’t worry if the menu disappeared before you could tap; you can long-press the sticker anytime to bring it up again).
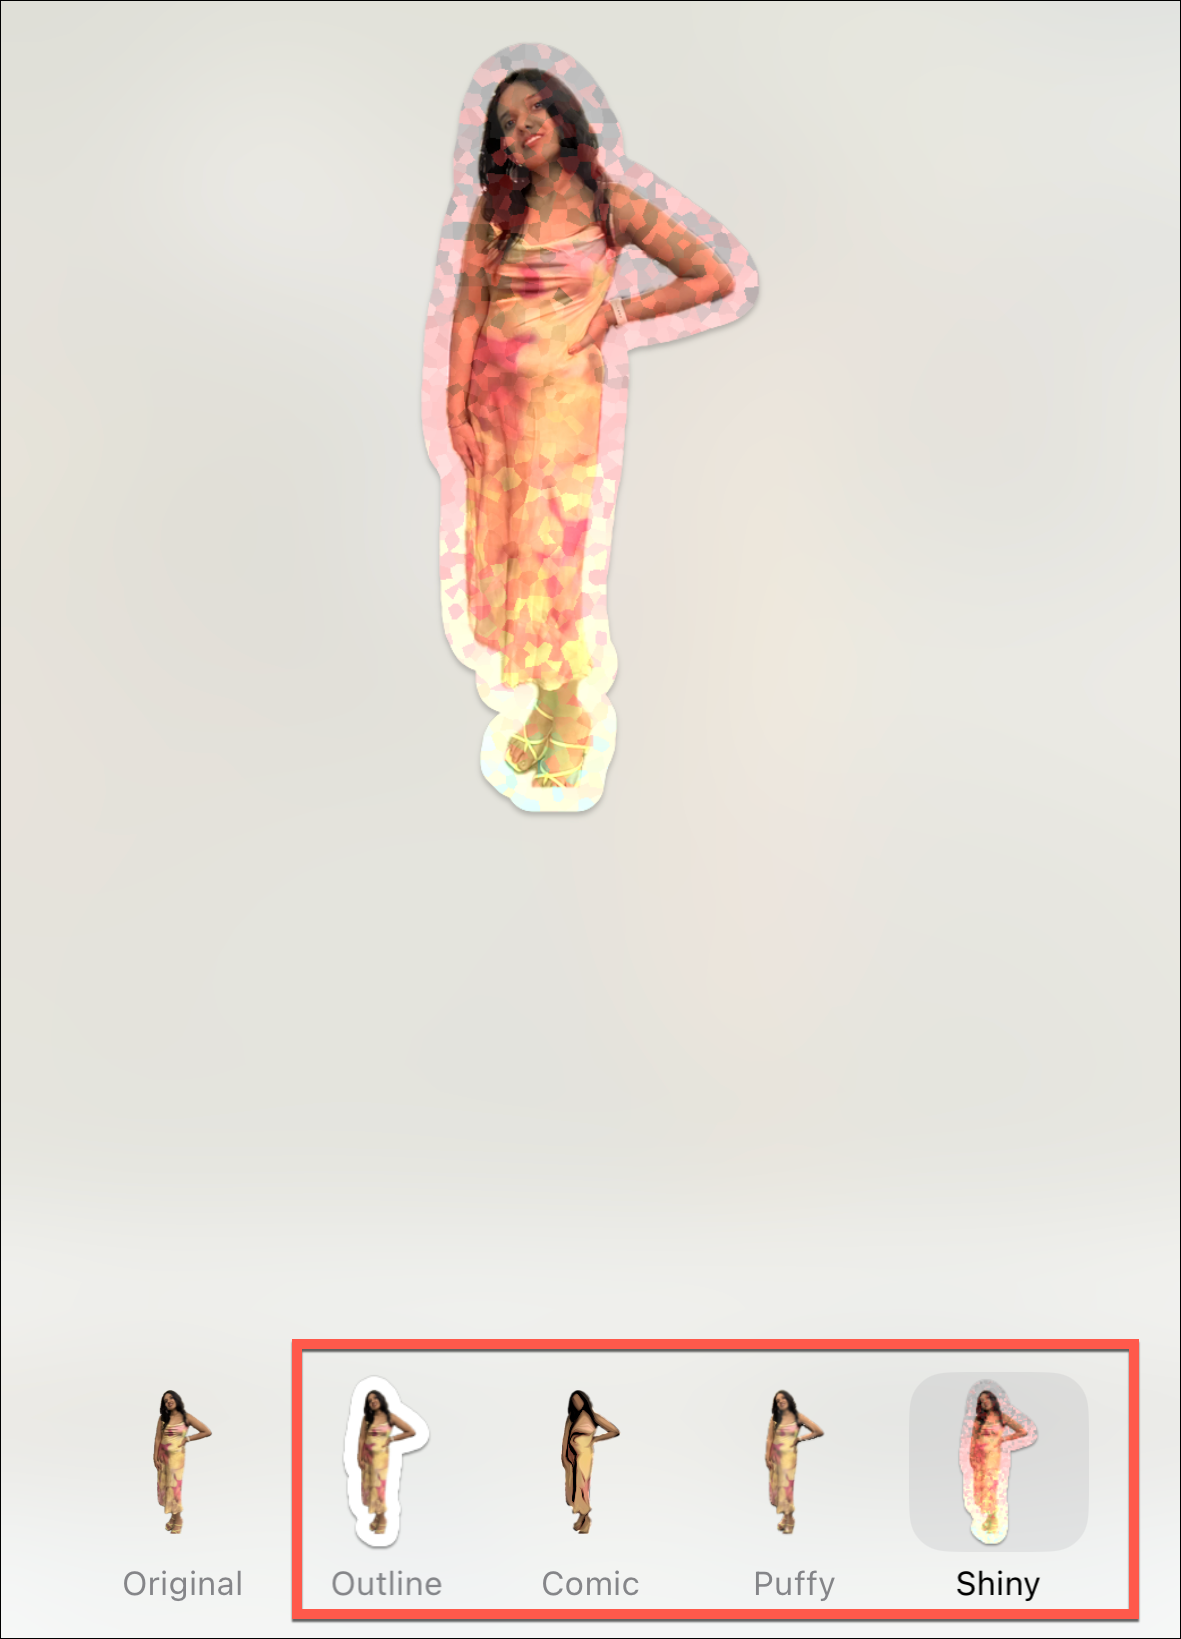
Sticker effects will open. Choose from the available effects: ‘Outline’, ‘Comic’, ‘Shiny’, and ‘Puffy’. You can even expand the pop-up menu on the screen by swiping it up to get a better look at the effects.
Tap ‘Done’ in the upper-right corner to save the changes.

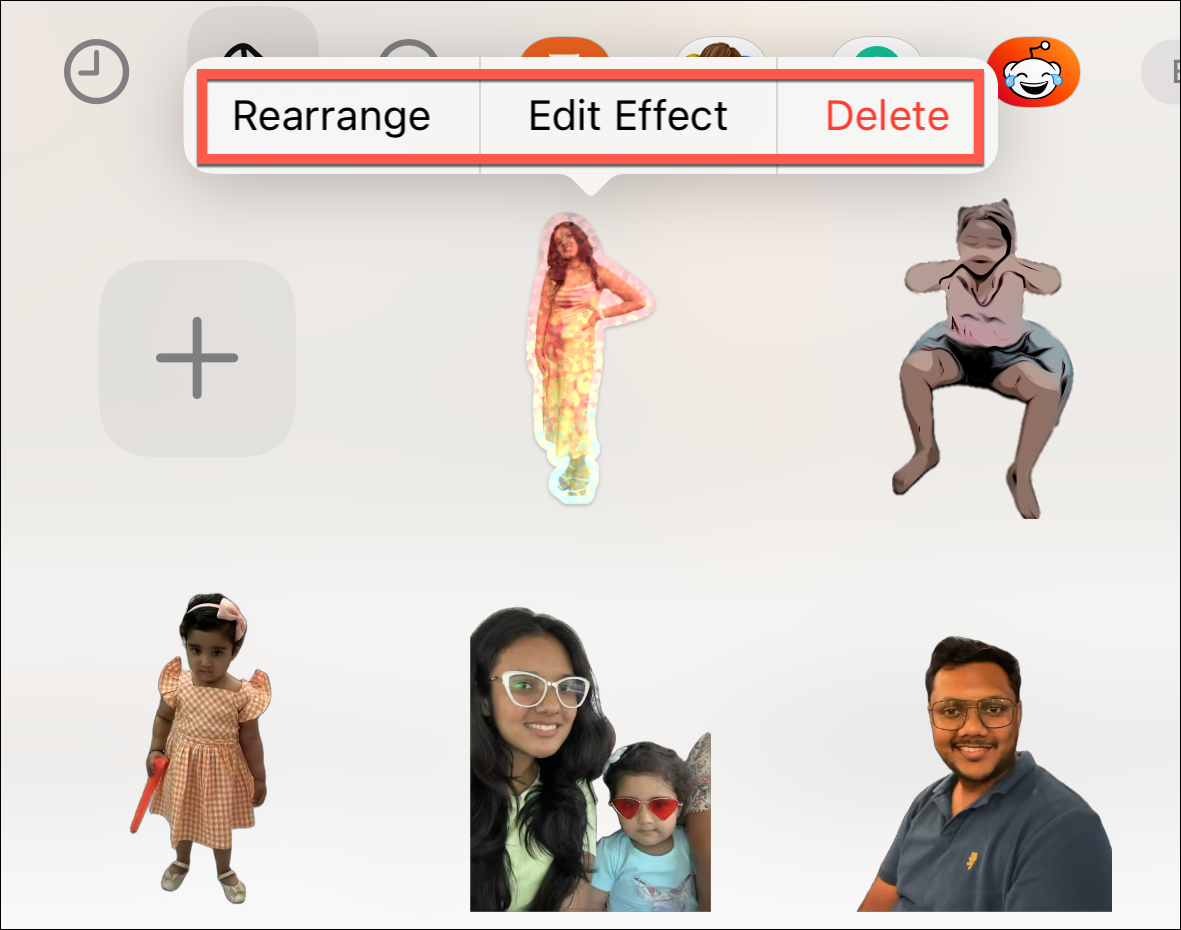
You can also edit the effect, rearrange the stickers, or delete the sticker anytime from the context menu.
Make Animated Stickers from Live Photos
You can also make animated stickers from Live Photos in iOS 17. But there’s a catch: you cannot apply the sticker effects to them. Applying any effect would automatically turn off the ‘Live’ effect.
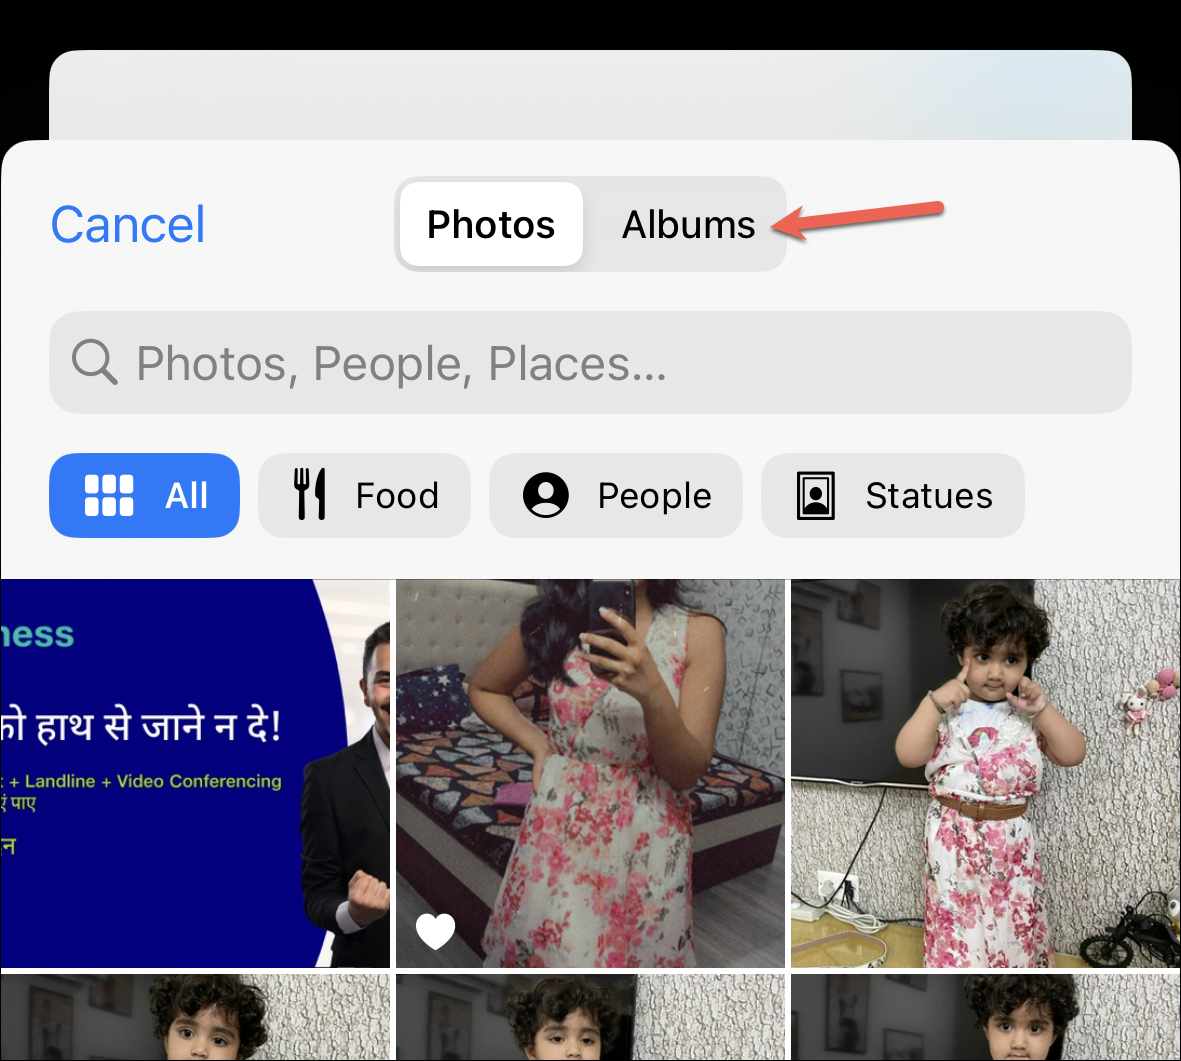
The process to add an animated sticker is the same as adding a normal sticker. Tap the ‘+’ option to add a new sticker and go to the ‘Albums’ tab. (You can also add the live sticker from the Photos app just like a normal sticker.)
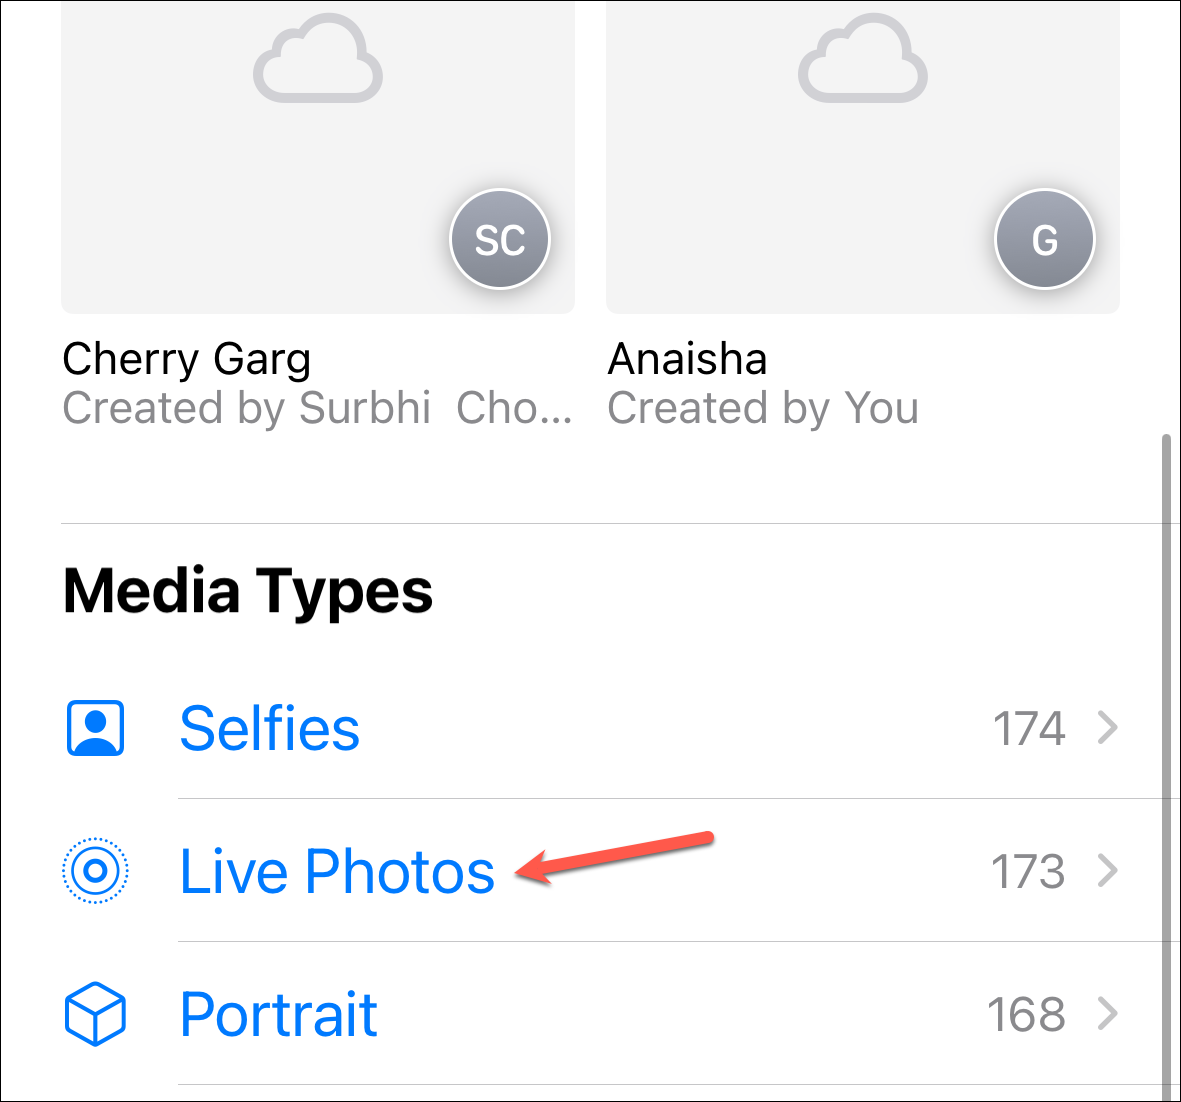
Navigate to ‘Live Photos’. In subsequent updates, the ‘Live’ tab might become more easily accessible, as showcased at WWDC.
Open the photo you want to turn into an animated sticker. Make sure that you don’t turn off the ‘Live’ Effect from the top left corner of the screen.
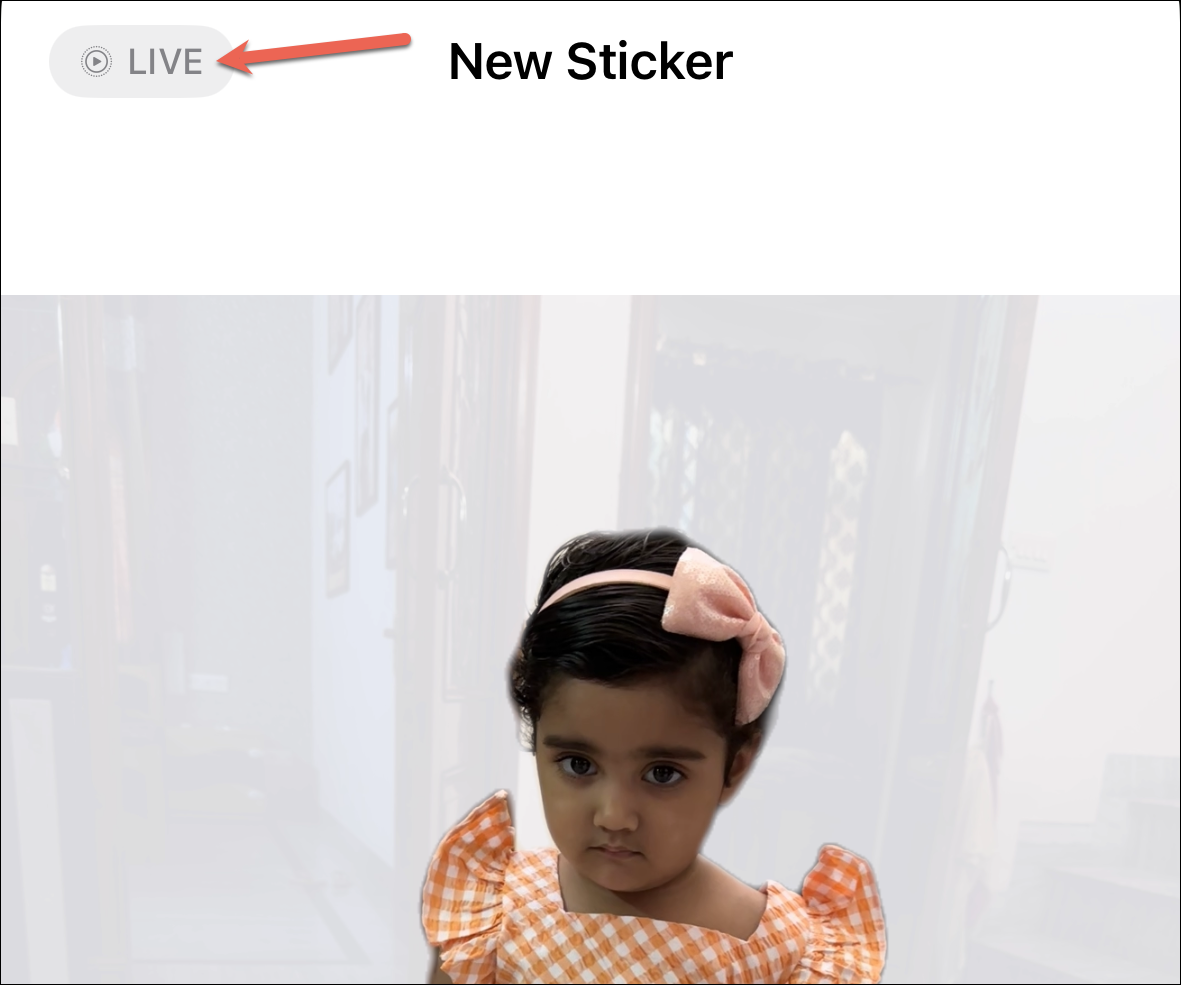
Then, tap ‘Add Sticker’ from the bottom-right corner.
Sending the Sticker
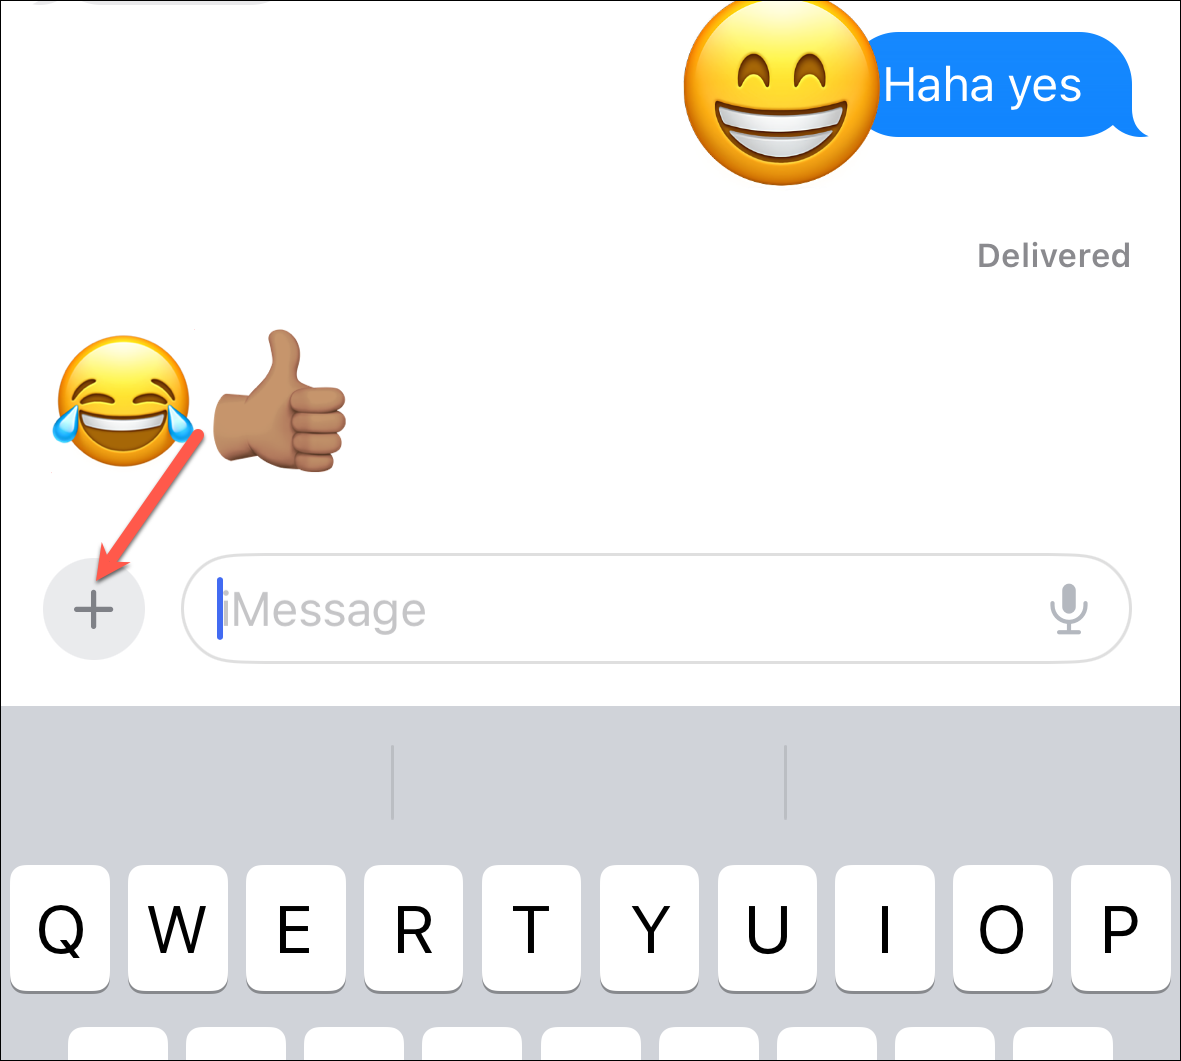
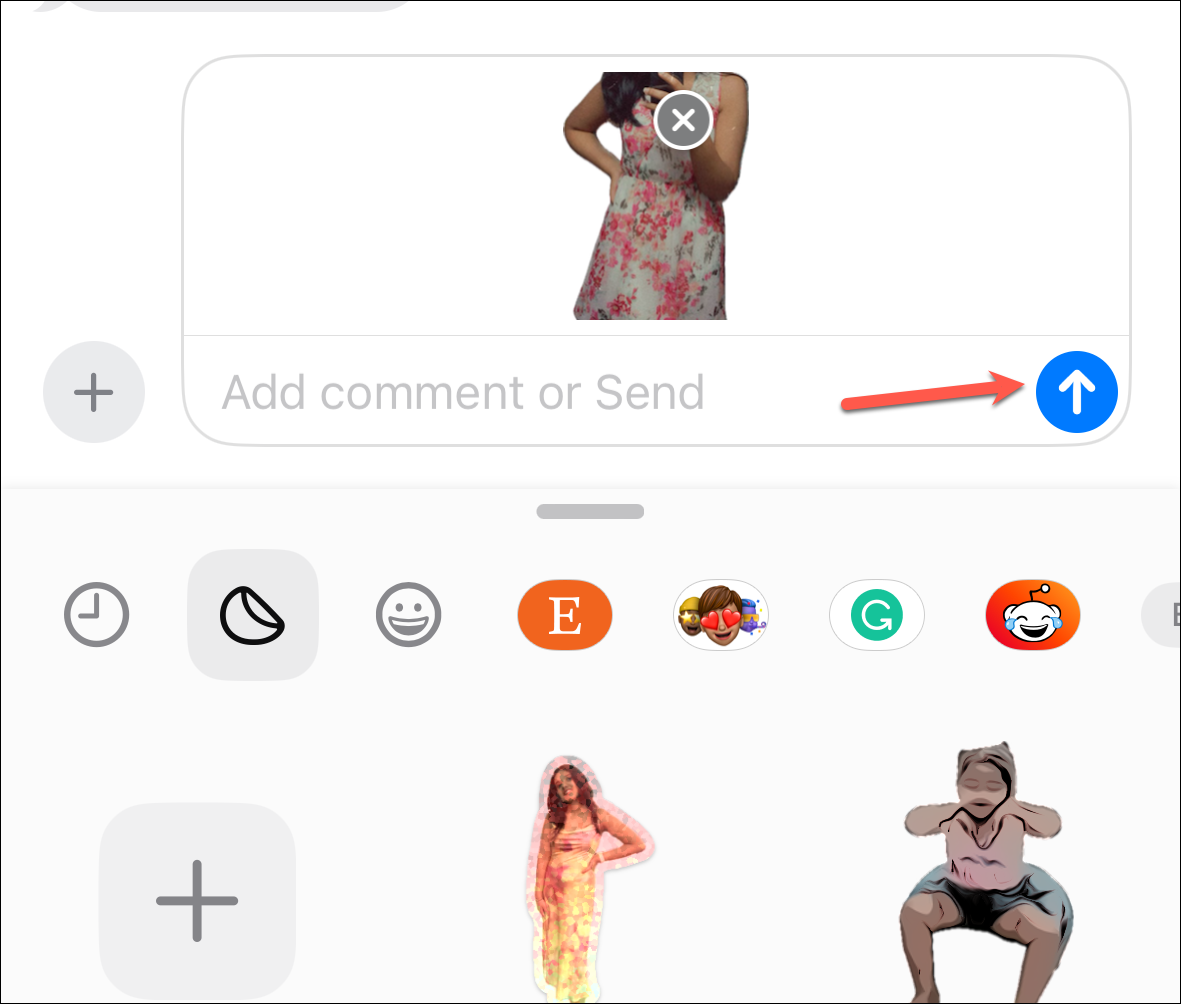
Sending the Sticker is a walk in the park. Open the ‘Stickers’ panel in the Messages app.
Then, tap the sticker you want to send. It will load in the message box. You can also add any comment with the sticker. Tap the blue arrow to send it.
You can also peel and stick the sticker to any message. Hold and drag the sticker from the panel and stick it to any message bubble; you can tilt it or resize it before sticking it.
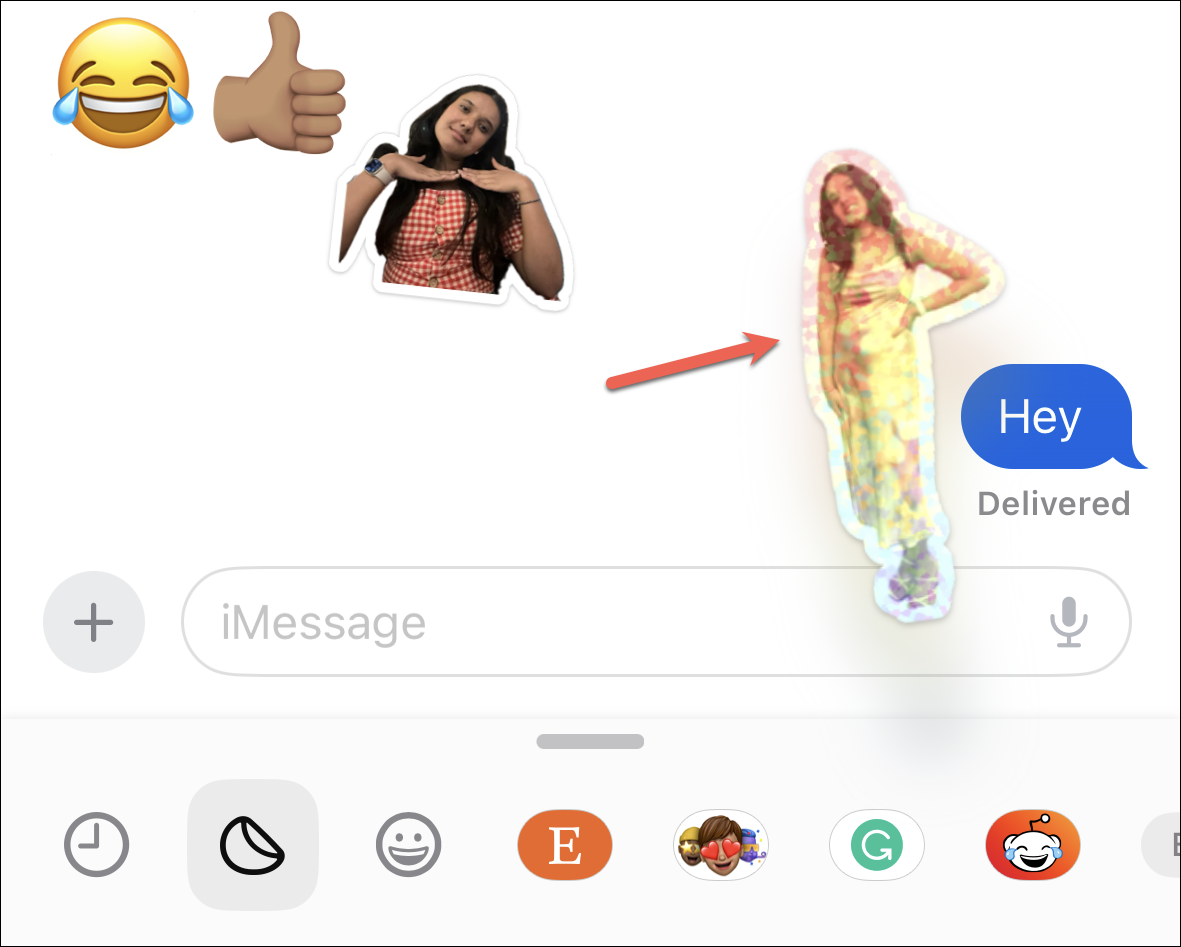
Moreover, you will also be able to react to any message with a sticker by adding it to the bubble from the Tapback menu, as showcased at WWDC. (The ability has not yet been implemented in the Developer Beta 1 used to write this guide, though).
That’s all there is to it. So the next time you’re texting someone and words just don’t cut it, remember you’ve got your own personal sticker arsenal at your fingertips.


