Mastodon is the hottest new microblogging platform these days ever since Twitter has gone in a different direction. But Mastodon isn’t as simple to use as Twitter. And servers are the major reason behind this reputation that Mastodon has garnered.
To recap: Mastodon is a decentralized social network that does not operate as one big entity. It is instead made up of several independently owned servers. And the first step in creating an account on Mastodon includes choosing which server you want to join.
Now, while you can communicate with users on any server on Mastodon from your server, some people might find that the server they’re currently on is not the right fit for them. Maybe their content and moderation policies don’t fit you. Or you found that the community on your current server does not align with your ideas but there’s another server that better fits your needs. Or, your current server is shutting down. Whatever may be the reason, you don’t have to regret your decision of joining your current server. Mastodon makes it extremely easy to migrate from one server to another. So, let’s dive in.
Do You Need to Change Servers?
Before you go on this journey to migrate your server, you need to ask yourself the most important question: Do you really need to change your server?
If your server is shutting down, then the answer is an absolute yes. You need to migrate your servers now because once your server shuts down, you won’t be able to get your data.
But if you want to change servers just because you’re afraid you’re not on the main Mastodon server, like Mastodon.social, you don’t need to change servers. Even though servers like Mastodon.social and Mastodon.online are administered by Eugen Rochko (Mastodon’s founder), they are in no way different or better than other servers out there.
The only other reason you should migrate servers is if you don’t agree with their content or moderation policies or find yourself on a server that’s completely out of sync with your needs. For example, if you don’t speak French but ended up on a French server where most users in your local feed are communicating in French, you can migrate servers. Even then, it’s not entirely necessary. You can always follow users from other servers and curate your home feed carefully.
Moreover, if your server has blocked a server you wanted to interact with, that’s another reason to switch servers. Now, let’s see how you can accomplish this task.
Migrating Servers: A Step-by-Step Summary
To migrate servers, here’s an overview of what you need to do step-by-step.
- Export your data by archiving it from your current account (optional).
- Make an account on the new server you want to migrate to.
- Notify your new server of your old account by creating an alias on the new account.
- Notify your old account of the move by redirecting your old account to your new account and move your followers in the process.
- Import the data from your old account to your new account (optional).
Let’s see each step in detail.
1. Export your Data (Optional)
While Mastodon’s account migration option automatically moves your followers when you move accounts, your other data like followings, mute lists, block lists, bookmarks, domain blocks, etc. are not moved. But if you export CSV files for this data for your account, you can import them to your new account. If you don’t want to import this data to your new account, you can skip this step.
To get CSV files for your ‘Follows’, ‘Lists’, ‘You block’, ‘You mute’, ‘Domain blocks’, and ‘Bookmarks’, go to your current Mastodon server and log in to your account.
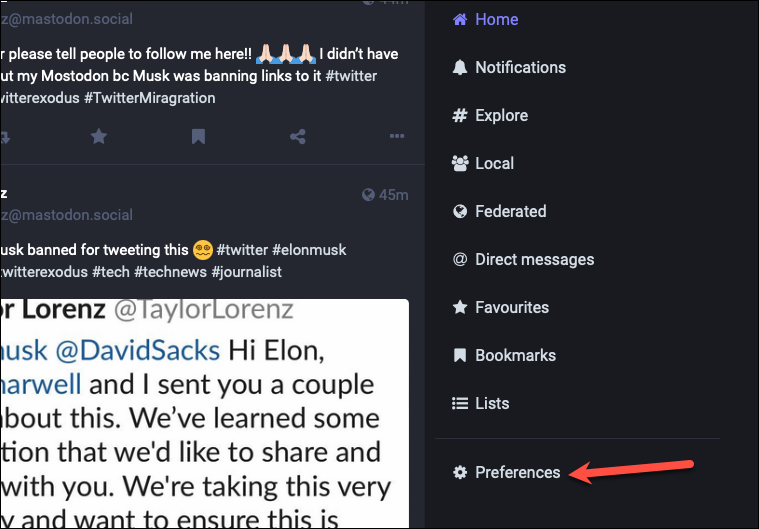
Then, go to ‘Preferences’ from the menu on the right.

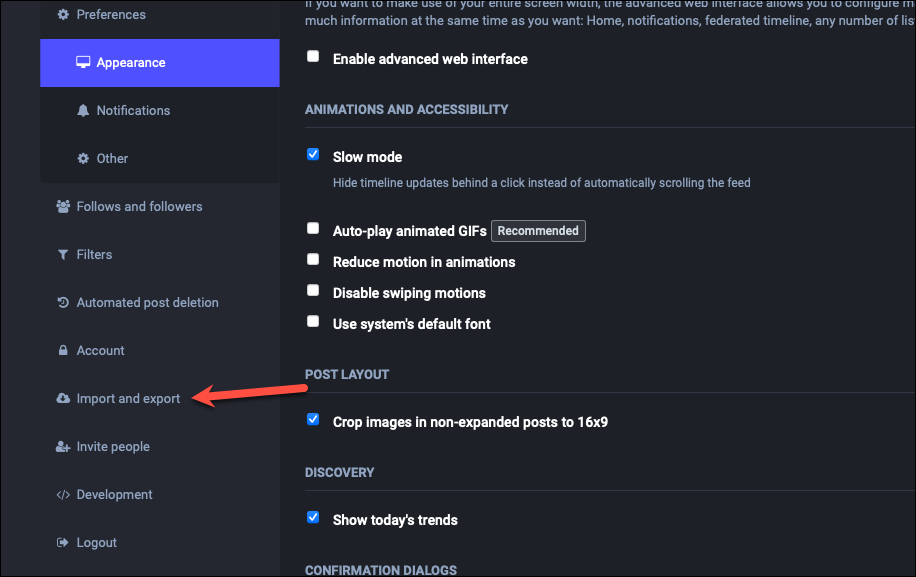
Now, click the option for ‘Import and Export’ from the navigation menu on the left.
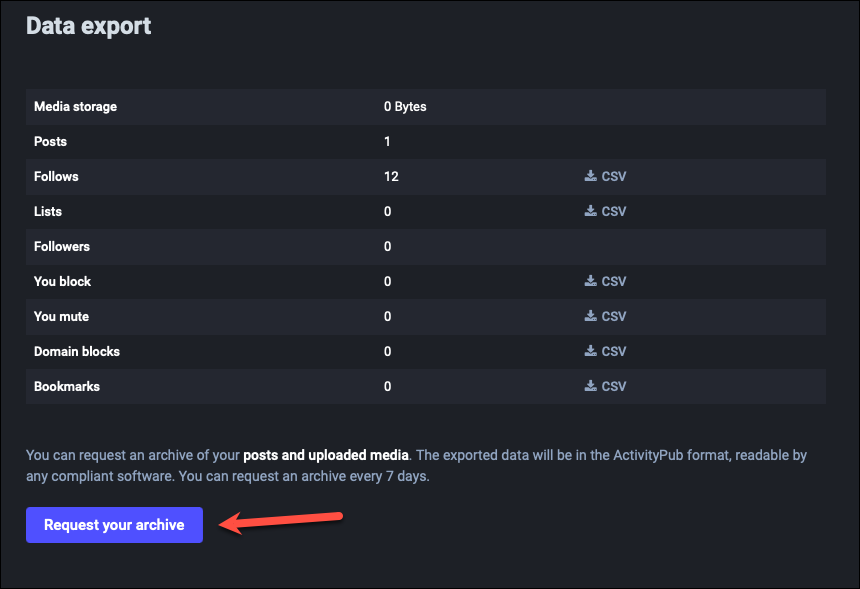
Make sure you’re on the ‘Data Export’ sub-menu. Click the ‘CSV’ option on the right of each tile you want to export.

You can also get an archive of your posts and media. You cannot import these to your new account but you’ll still have a copy for yourself which any software that understands how to read ActivityPub software can read. And who knows, maybe Mastodon’s developers will implement a way to import posts and media as well in the future, in which case, you’d be happy to have an archive.
To create an archive, click the ‘Request an Archive’ option.
Once the archive is prepared, click the ‘Download your archive’ button.

And that’s it. An archive of your data will be downloaded on your computer in a CSV file format that’s readable by any ActivityPub software, not just Mastodon.
2. Create an Account on New Mastodon Server
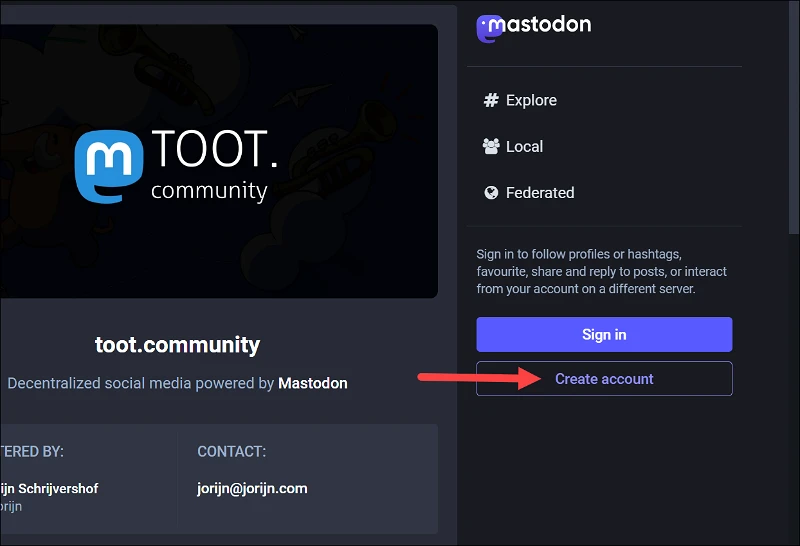
Now, to migrate your account to the new server, you’ll first need to create an account on the new server. You cannot directly migrate your old account to the new server. Go to the server domain where you want to create the account. Then, click the ‘Create Account’ option on the right.
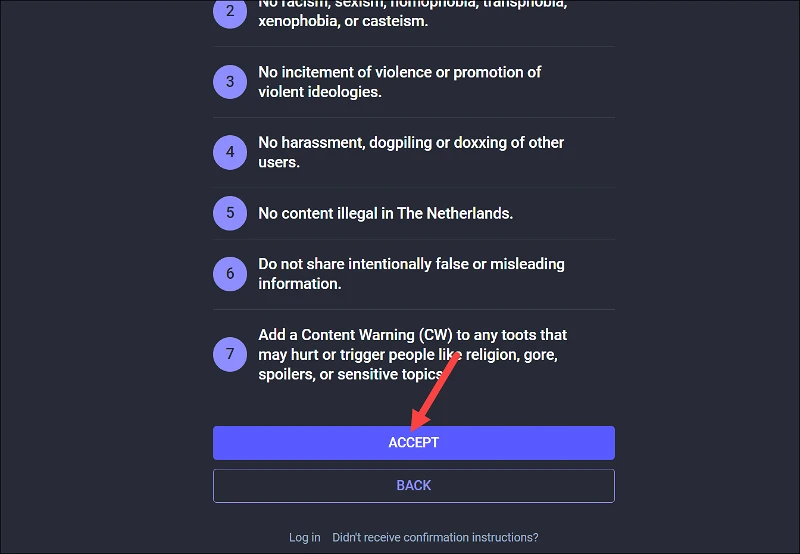
Rules for the server will appear. Read them and click the ‘Accept’ button to proceed.
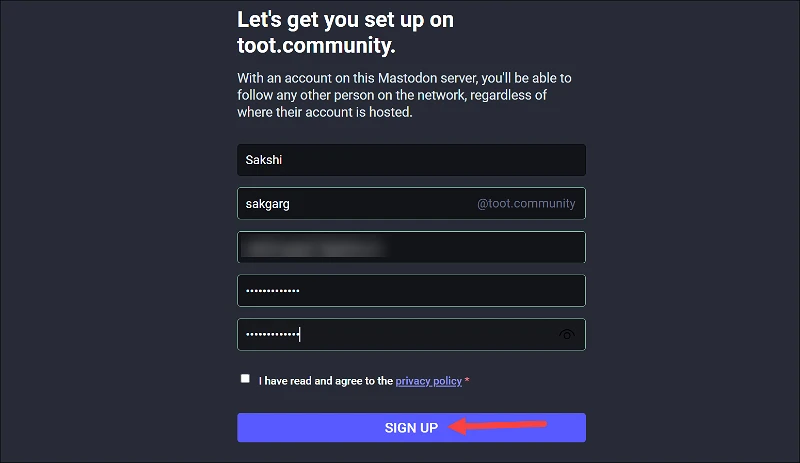
Next, fill out the registration form with your name, username, password, and if the server asks for it, the reason for joining. While creating a username, you can create the same username as your old username if it’s available for grabbing on the new server. But it’s not a necessity for migrating accounts, i.e., your usernames don’t have to be the same to use this functionality.
Check the privacy policy checkbox and click the ‘Sign Up’ button.
Now, depending on the server’s sign-up policy, you’ll either need to wait to be accepted to the server or you’ll receive a confirmation email directly. Click the confirmation email whenever you receive it to activate your account.
You’ll be redirected to the new server where you’ll be logged in with the new account.
3. Create an Alias on the New Account
Now, you need to first configure your new account to back reference your old account. Log in to your new account on the new server.
Then, go to ‘Preferences’ from the menu on the right.
Go to ‘Account’ from the menu on the left.

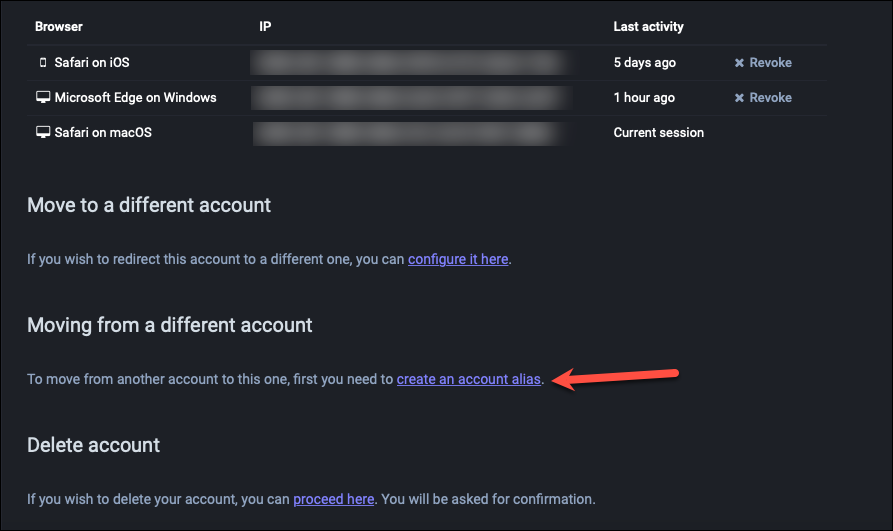
Then, under the ‘Moving from a Different Account’ section, click the ‘create an account alias’ link.
Now, enter the handle of the old account in the field provided. Remember to enter the complete handle, i.e., username@domain. For example, if your old username is abc on the Mastodon Social server, enter [email protected] in the field. Then, click ‘Create Alias’.
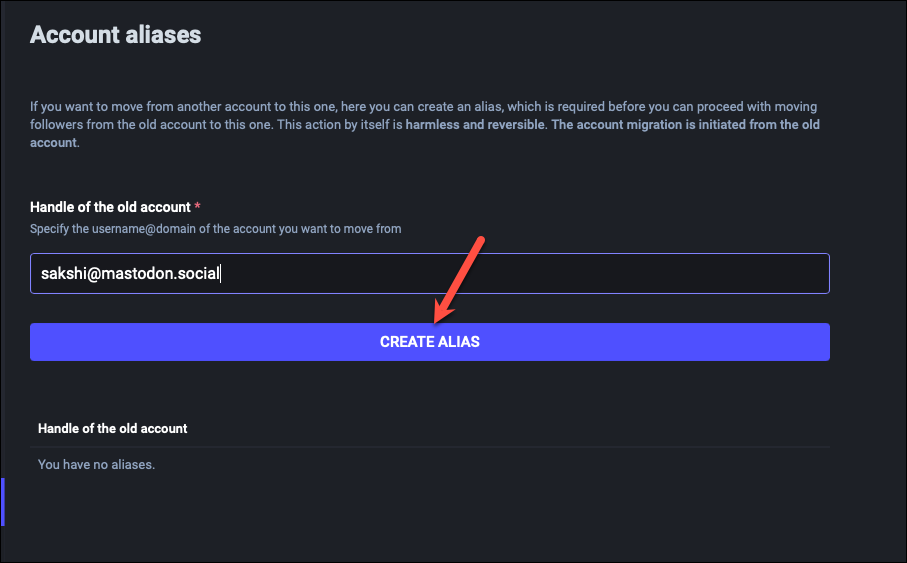
Now, creating an alias is a necessary step in initiating the account move, but it does not do anything on its own. It’s a completely harmless and reversible move. The most important step in account migration is the next step where you redirect your old account to your new account.
4. Make Sure your Follow Requests are Open
Now, before you move your followers from your old account to your new account, make sure you don’t have follow requests enabled on your new account. If you have them enabled, you’ll have to manually approve each follow request on your new account when you move followers from the old account.
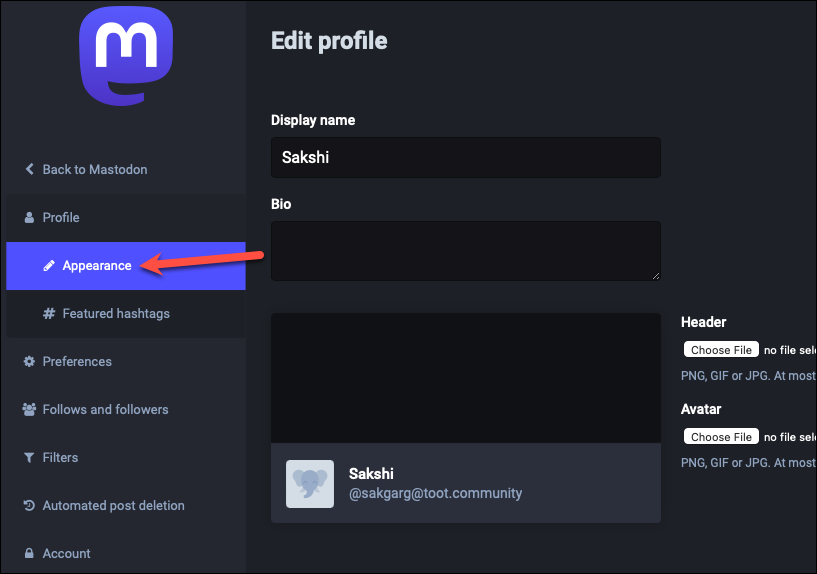
Log in with your new account on the new server. Then, go to ‘Preferences’ from the menu on the right. Then, go to ‘Profile’ from the menu on the left.
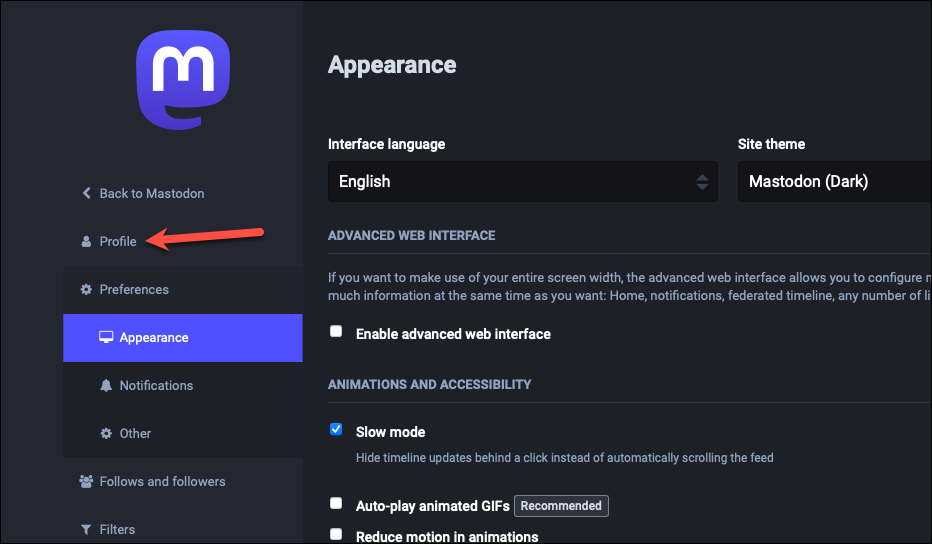
Make sure you’re on the ‘Appearance’ sub-menu.
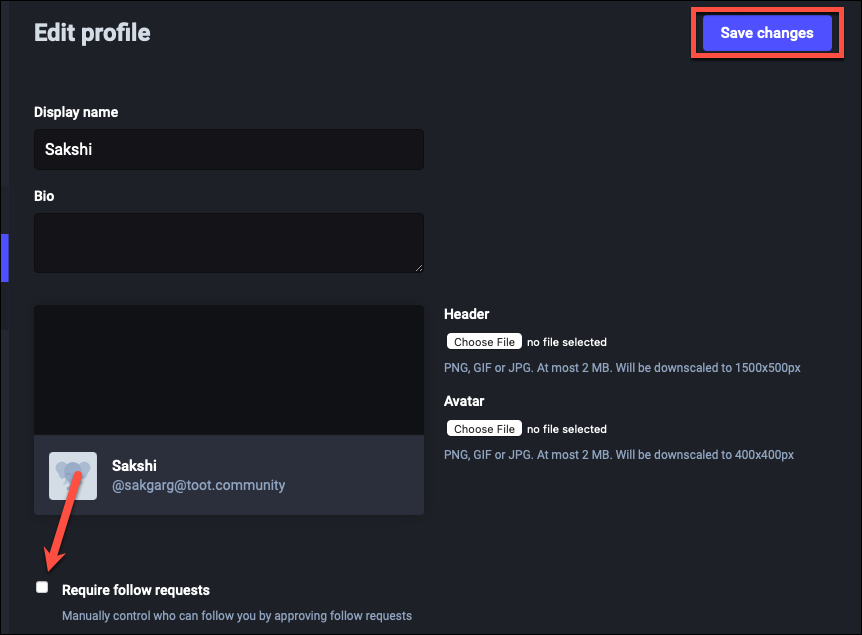
Now, uncheck the option for ‘Require follow requests’ if it is checked and click ‘Save Changes’.
5. Move your Old Account
Finally, it’s time for the main step of the entire process: redirecting your old account to your new account and moving your followers.
Go to your old server domain and log in to your old account.
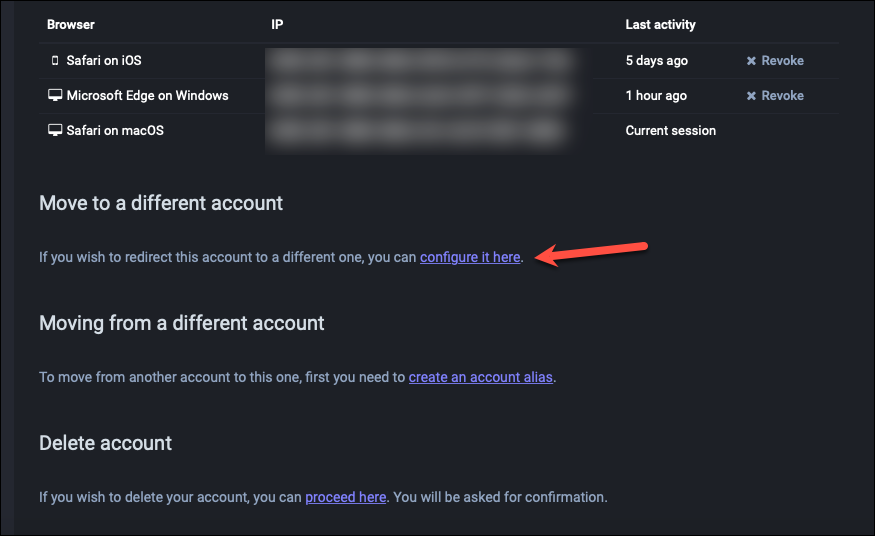
Then, open ‘Preferences’ and click the option for ‘Account’ from the menu on the left.
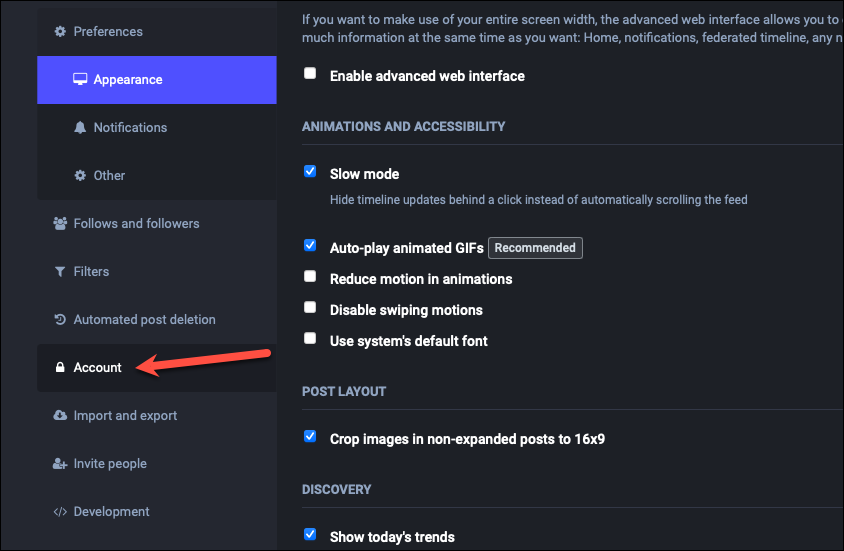
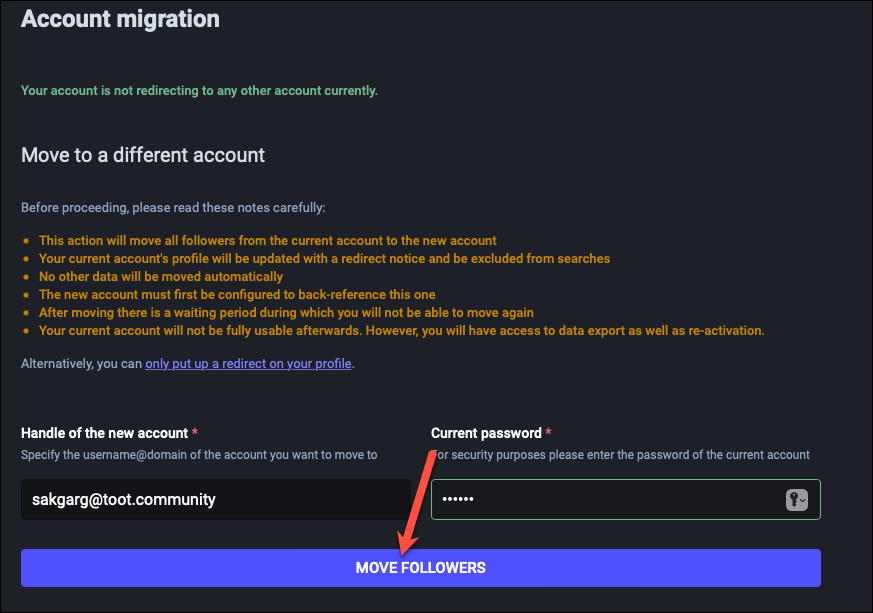
Scroll down and click the option for ‘Configure it here’ under the ‘Move to a different account’ section.
Then, enter the complete handle of your new account in the username@domain format in the field under ‘Handle of the new account’. For example, if your new username is xyz on Mastodon.online, enter [email protected] in the field.
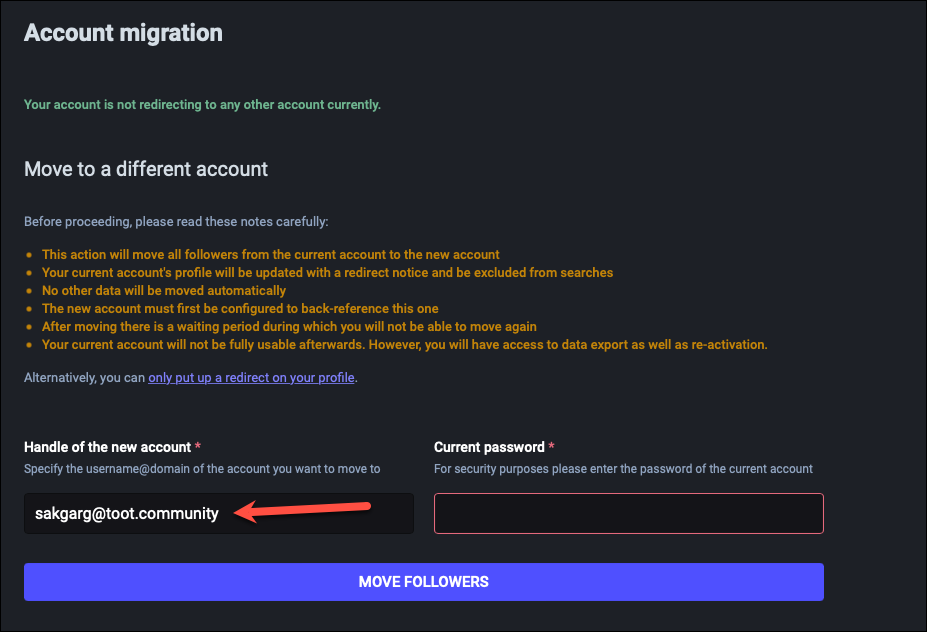
Now, enter the password of your current (old) account in the field for ‘Current Password’.
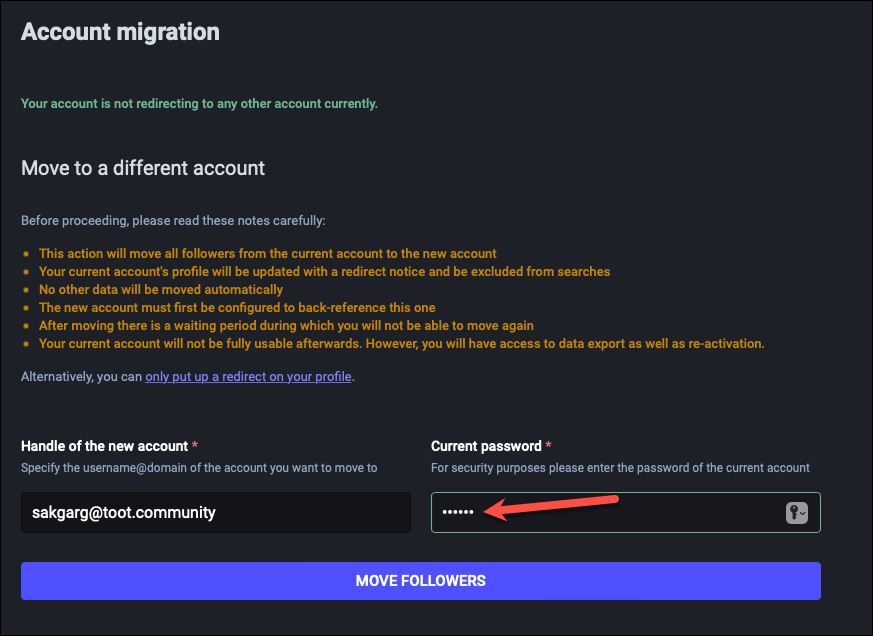
Finally, click ‘Move Followers’.
And you’re done.
What Happens When you Move your Account?
When you complete the above step, the following things will happen.
- All followers from your current account will be moved to your new account. This step is irreversible, i.e., once they’re forced to unfollow your current account and made to follow the new account, you cannot get them back at the old account without migrating servers again. And you can only migrate servers again after the cooldown period is over. No other data will be moved automatically, though. You’ll have to move it yourself, which we’ll see in the next step.
- Your current profile will be updated with a redirect notice, i.e., if someone visits your old account, they’ll see a redirect notice pointing to your new account.
- Your current profile will be excluded from all searches.
- Your current account will not be usable after you move it to a new account. But you can always have access to its data to export it or reactive it (unless your server isn’t shutting down in the near future).
- After moving your account once, there’s a waiting period of 30 days during which you cannot move again.
6. Importing Other Data to your New Account (Optional)
When you move accounts, Mastodon only moves your followers. If you want to move other data, like your followings, mute lists, block lists, etc., you’ll have to manually move it using the CSV files we exported earlier. Note that you cannot move your posts and media to the new account; you can only have an archive of your posts and media for yourself.
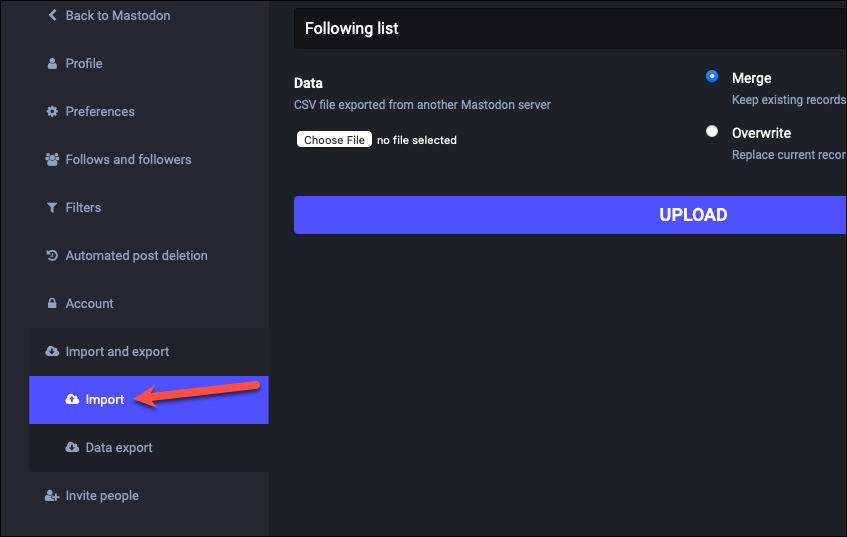
Go to your new server and log in to your new account. Then, open ‘Preferences’ and click the ‘Import and Export’ option from the navigation menu on the left.

Switch to the ‘Import’ option under the Import and Export menu options on the left.
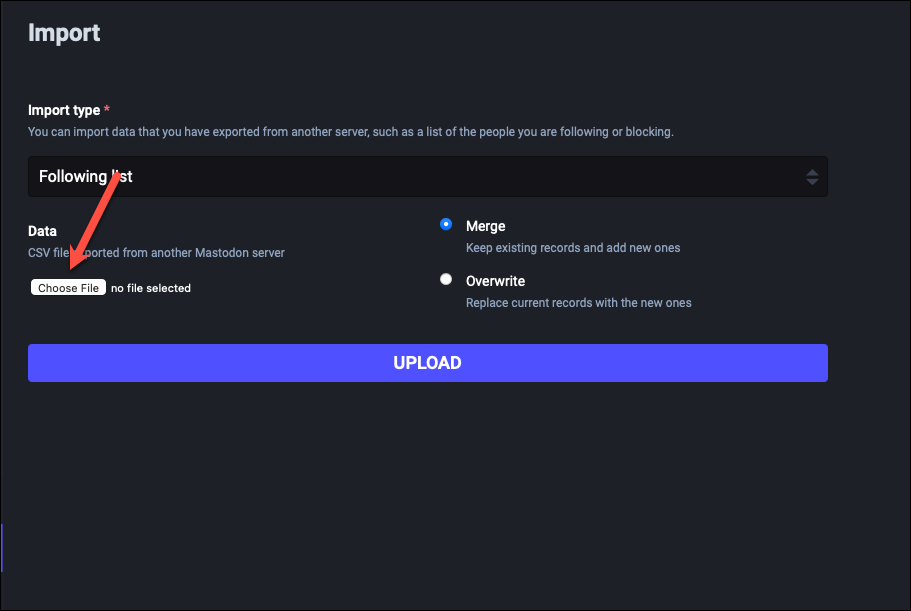
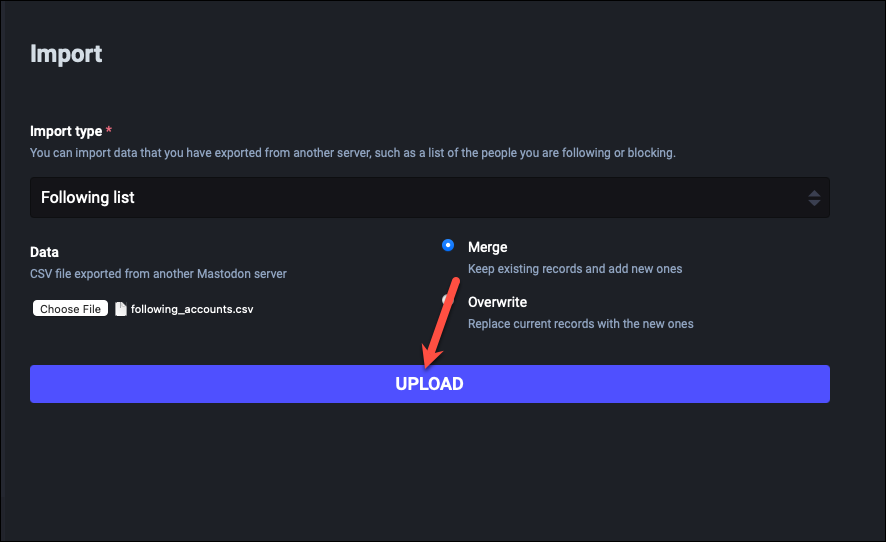
Then, from the drop-down menu on the right pane, select the list you want to import.

Following list is selected by default, so, for this guide, we’ll use it as an example.

Click the ‘Choose File’ button under the ‘Data’ field.
An ‘Open’ dialog box will open. Select the file for the Following list you downloaded earlier; Mastodon labels the files clearly when downloading them so it will be easy to identify them.
Then, select whether you want to ‘Merge’ the data from your old account and the new account or if you want the data from your old account to ‘Overwrite’ any existing data in your new account.
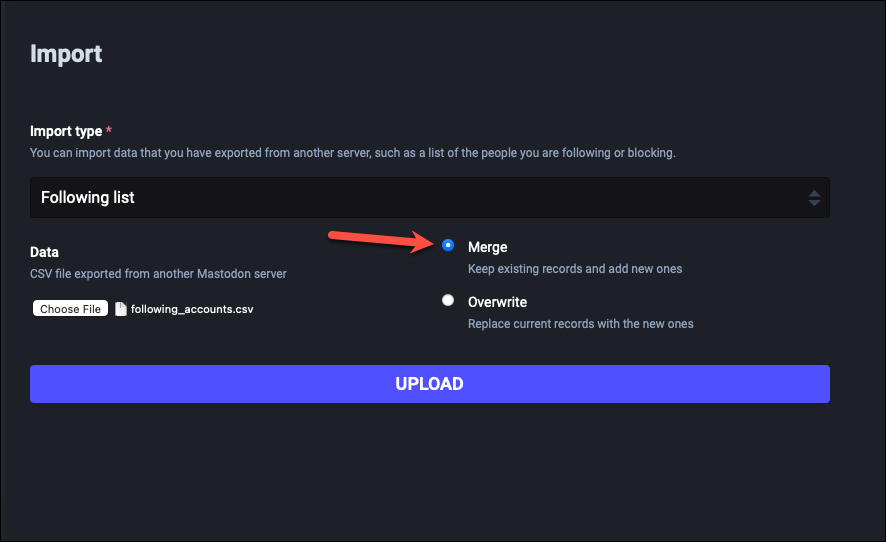
Finally, click ‘Upload’.
Repeat the above steps for all other available categories.
There you go. It’s so simple to migrate servers on Mastodon without losing followers or any of your data.