
If you’re experiencing screen flickering on your Windows 11 PC, it can be both disruptive and concerning. This issue can arise due to several reasons, such as incompatible apps, outdated or corrupted graphics drivers, incorrect refresh rate settings, or hardware malfunctions. Fortunately, there are effective methods to resolve this problem.
1. Update or Reinstall Graphics Drivers
One of the most common causes of screen flickering is outdated or corrupted graphics drivers. Updating or reinstalling your graphics drivers can often resolve the issue.
Update Graphics Drivers via Device Manager
You can update your graphics drivers using the Device Manager:
- Right-click on the
Startmenu and select Device Manager, or pressWin+Xand choose Device Manager. - In Device Manager, expand the Display adapters section.
- Right-click on your graphics driver and select Update driver.
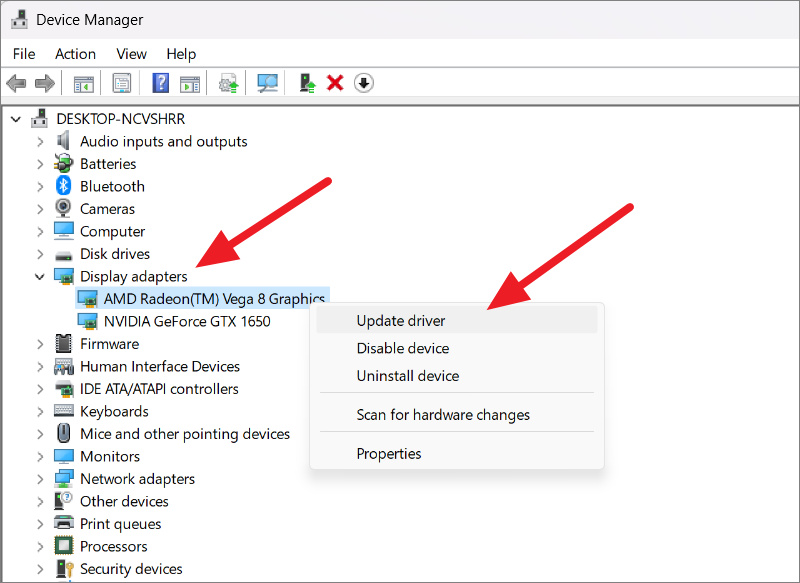
- Choose Search automatically for drivers.
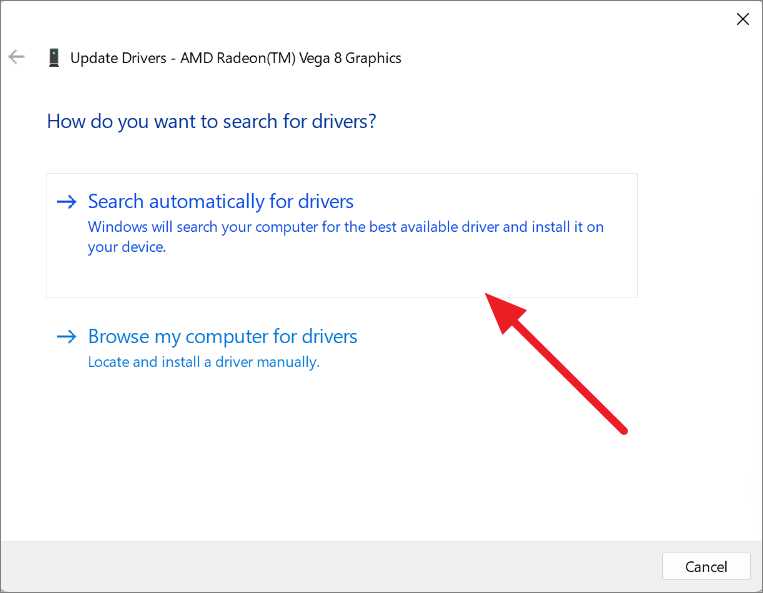
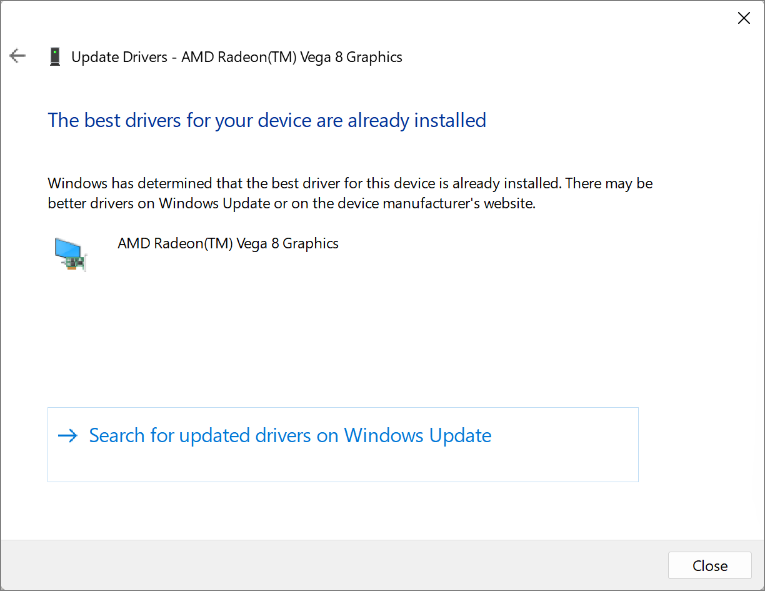
Windows will search for the latest driver and install it. If prompted, restart your PC to complete the installation.
Update Drivers through Windows Update
- Open Settings by pressing
Win+Iand select Windows Update from the left pane. - Click Check for updates.
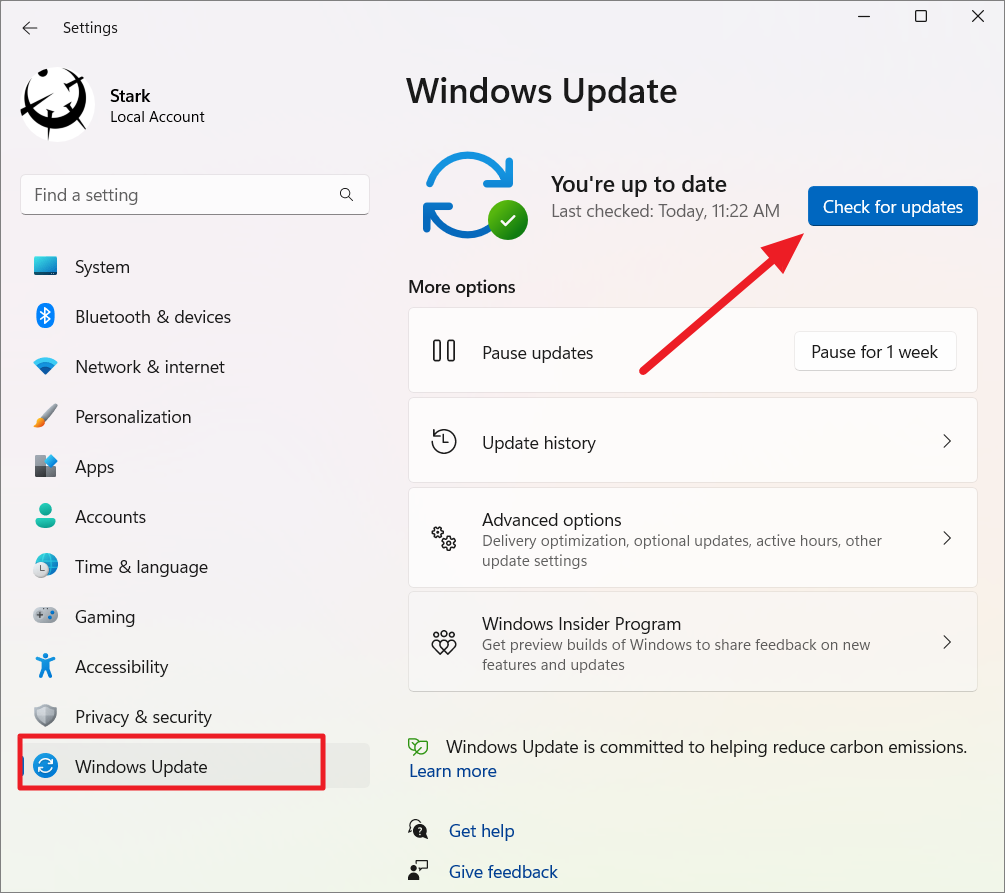
- Install any available driver updates.
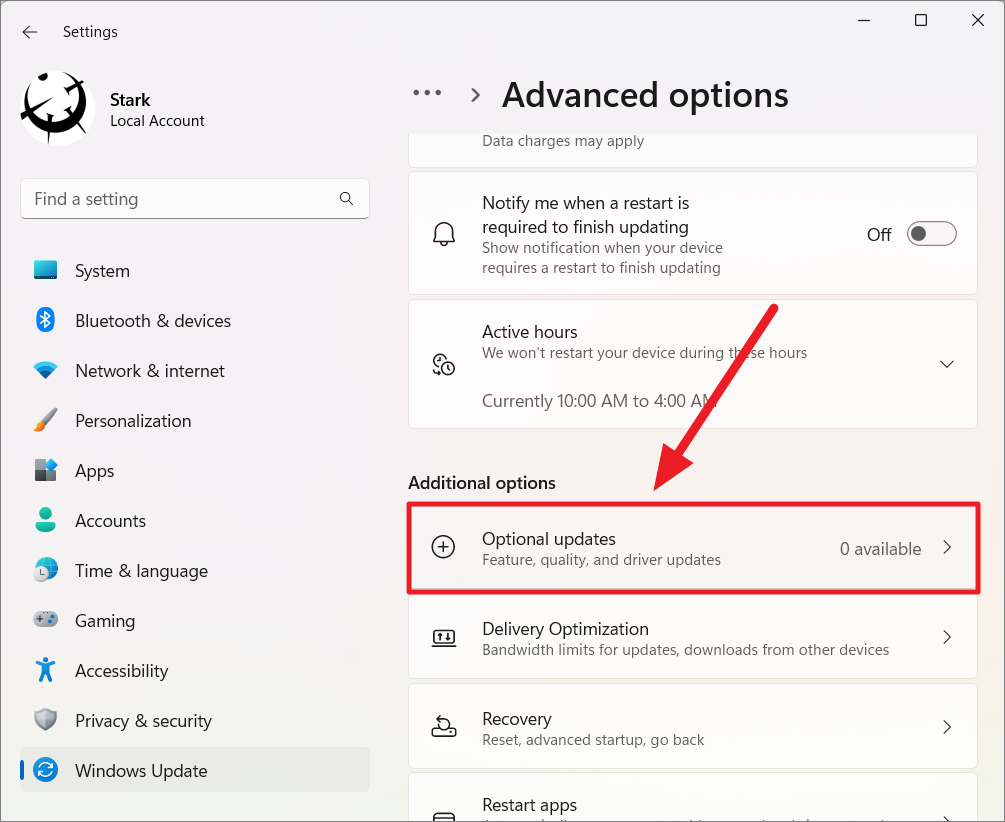
- If no updates are found, click on Advanced options.

- Select Optional updates and install any available graphics driver updates.
Reinstall Graphics Drivers
If updating doesn’t help, try reinstalling the graphics drivers:
- Open Device Manager and expand Display adapters.
- Right-click on your graphics driver and select Uninstall device.
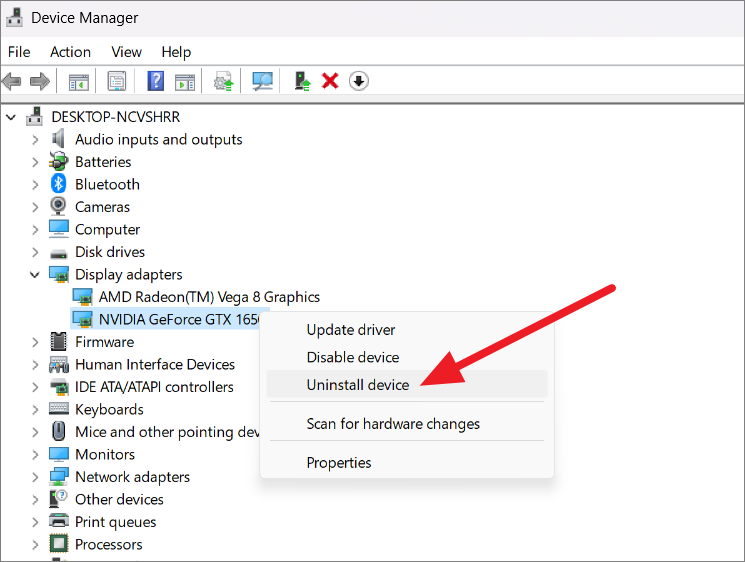
- Check the box Attempt to remove the driver for this device and click Uninstall.
- Restart your PC.
After restarting, Windows should automatically reinstall the driver. If not, download the latest driver from the manufacturer’s website and install it manually.
Download Drivers from Manufacturer’s Website
You can download the latest drivers from your graphics card manufacturer’s website:
Ensure you select the correct driver matching your graphics card model and Windows version.
2. Check Cables and Monitor
Loose or faulty cables and monitors can cause screen flickering. Here’s what you can do:
- Turn off your PC and monitor. Unplug all cables (VGA, DVI, HDMI) and reconnect them securely. Replace any damaged cables.
- If possible, connect your PC to a different monitor to see if the issue persists.
- For laptops, check if the hinges are intact. Connect to an external monitor to determine if the laptop’s screen is the problem.
- If the external display works fine, the laptop screen might be faulty. Consider contacting the manufacturer or a service center.
3. Adjust Screen Refresh Rate
An incorrect refresh rate can lead to screen flickering. Adjusting it may resolve the issue:
- Open Settings by pressing
Win+I, and select System > Display. - Scroll down and click on Advanced display under Related settings.
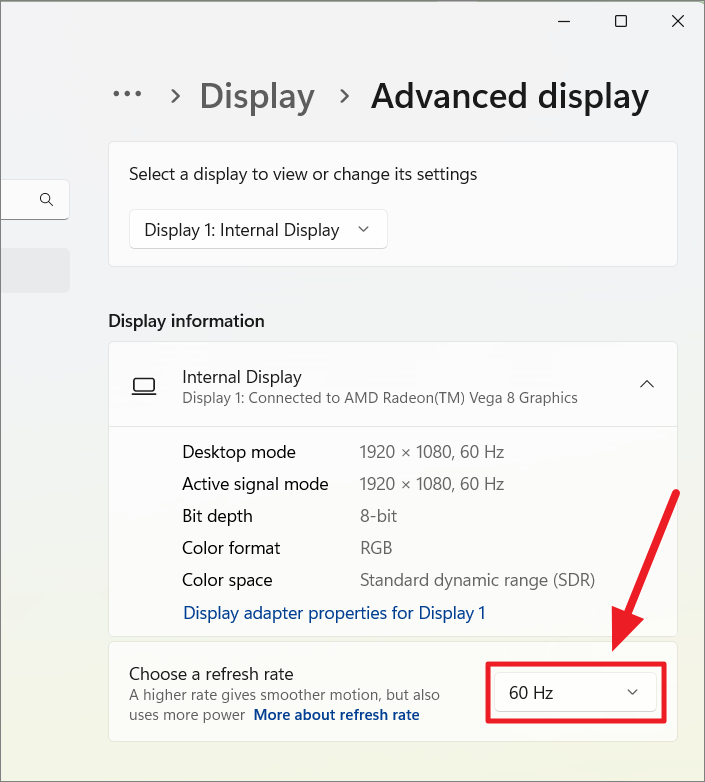
- Select your display from the drop-down menu.
- Under Choose a refresh rate, select a suitable refresh rate. A higher rate is preferable if supported.
4. Disable Desktop Window Manager
Restarting the Desktop Window Manager process may fix flickering issues:
- Press
Ctrl+Shift+Escto open Task Manager. - Locate Desktop Window Manager under Processes.
- Right-click it and select End task.
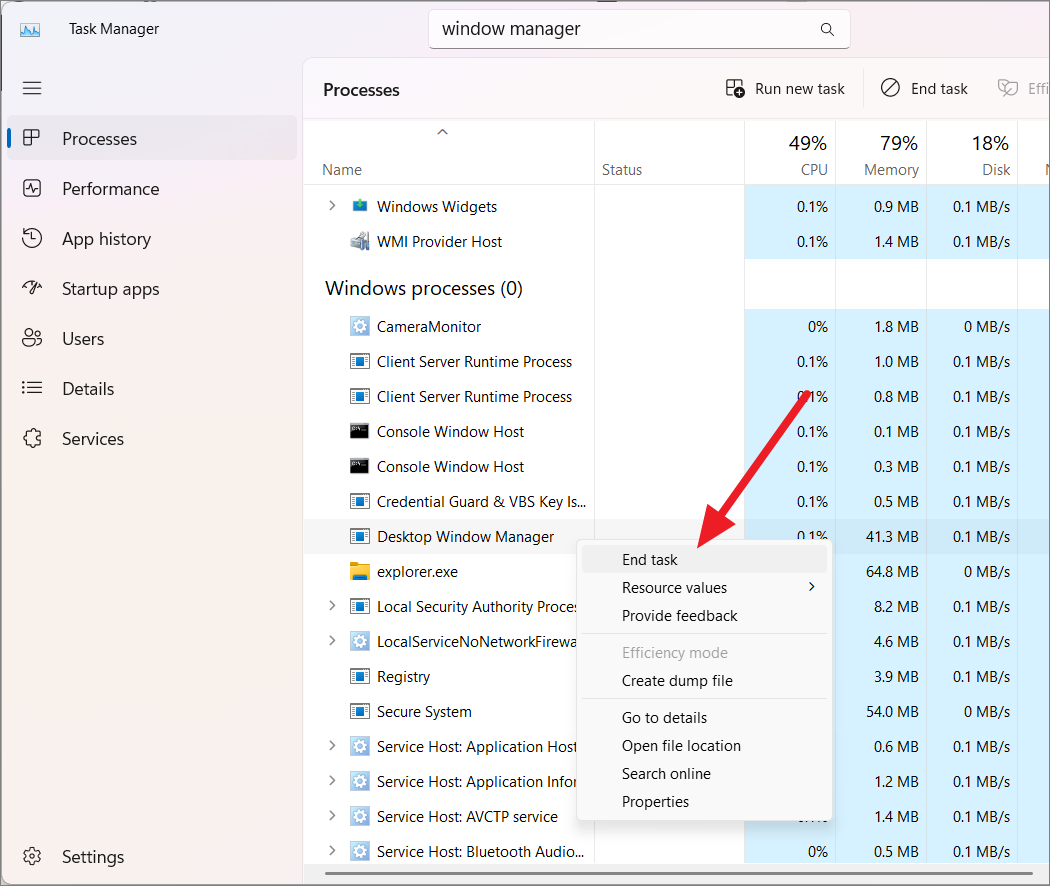
- Confirm the action. The process will restart automatically.
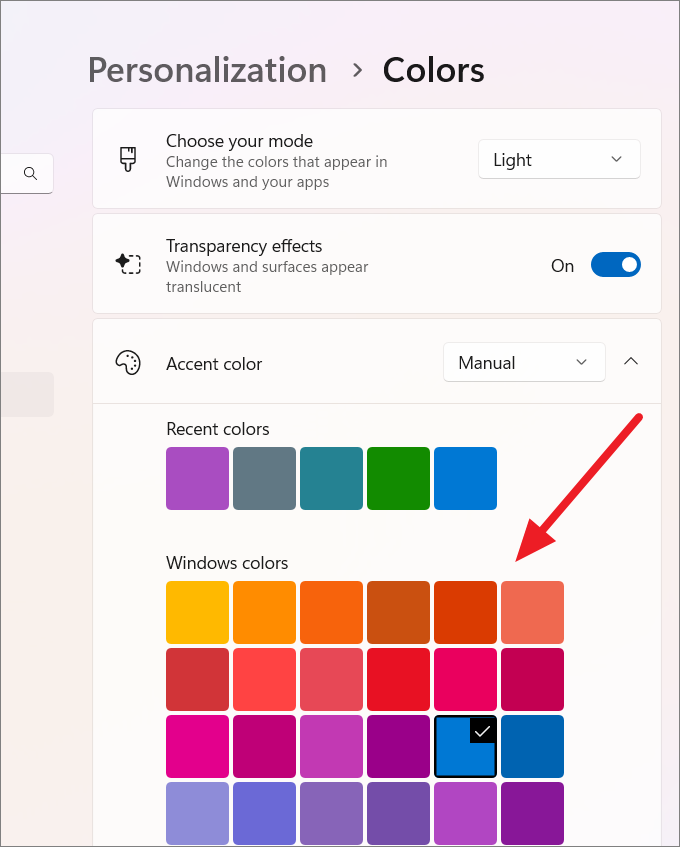
5. Change Accent Color and Background
Sometimes, display settings can cause flickering:
- Open Settings and select Personalization > Colors.
- Set Accent color to Manual and choose a color.
- Go back and select Background.
- Choose Picture or Solid color as your background.
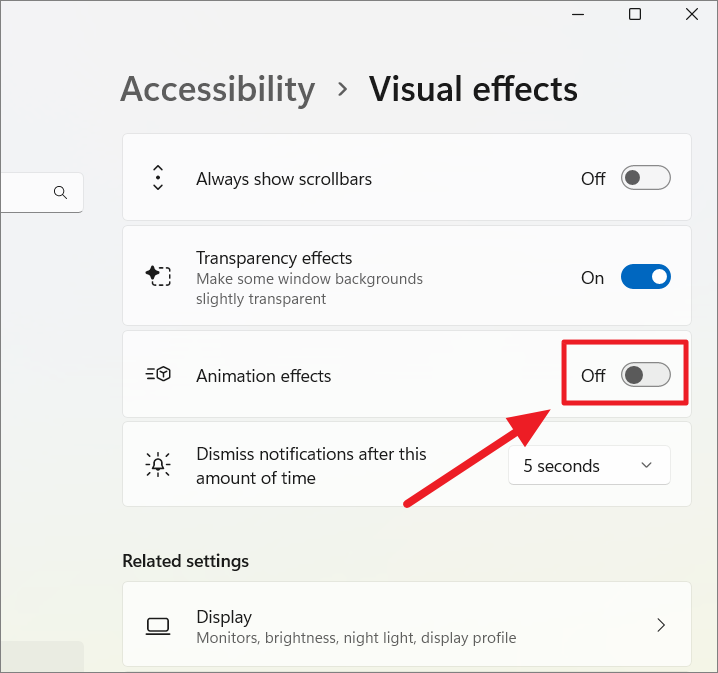
6. Disable Animation Effects
Disabling animation effects can improve system performance and potentially stop screen flickering:
- Open Settings and select Accessibility > Visual effects.
- Turn off the toggle for Animation effects.
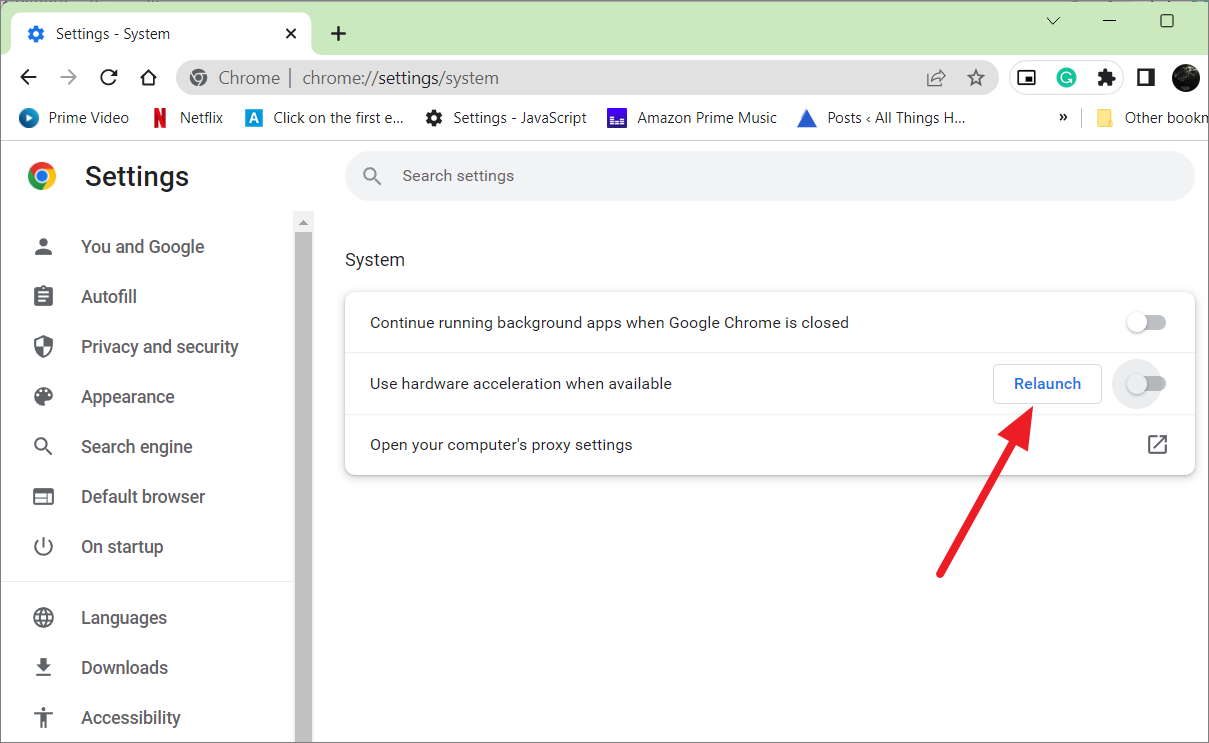
7. Disable Hardware Acceleration in Chrome
If flickering occurs while using Chrome, try disabling hardware acceleration:
- Open Chrome and click the three dots menu.
- Select Settings > System.
- Turn off Use hardware acceleration when available.
- Click Relaunch to restart Chrome.
8. Disable Hardware Acceleration in Windows
If the issue persists, disable hardware acceleration system-wide:
- Press
Win+Rto open the Run dialog, typeregedit, and pressEnterto open the Registry Editor.
Backup the registry before proceeding:
- In Registry Editor, click File > Export.
- Choose a location, name the backup, and click Save.
- Navigate to
HKEY_CURRENT_USER\SOFTWARE\Microsoft\Avalon.Graphics.
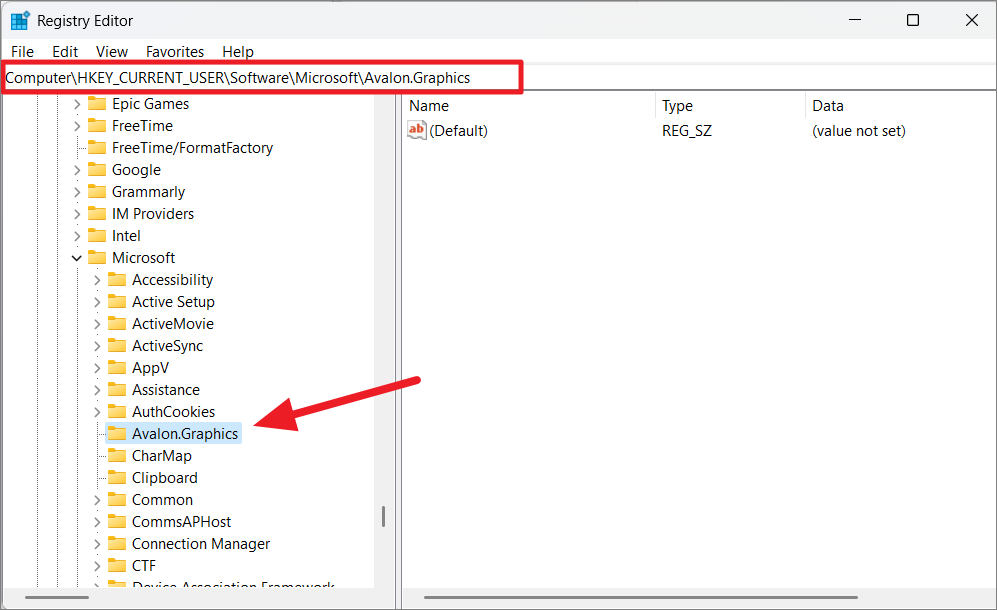
- Right-click on the right pane and select New > DWORD (32-bit) Value.
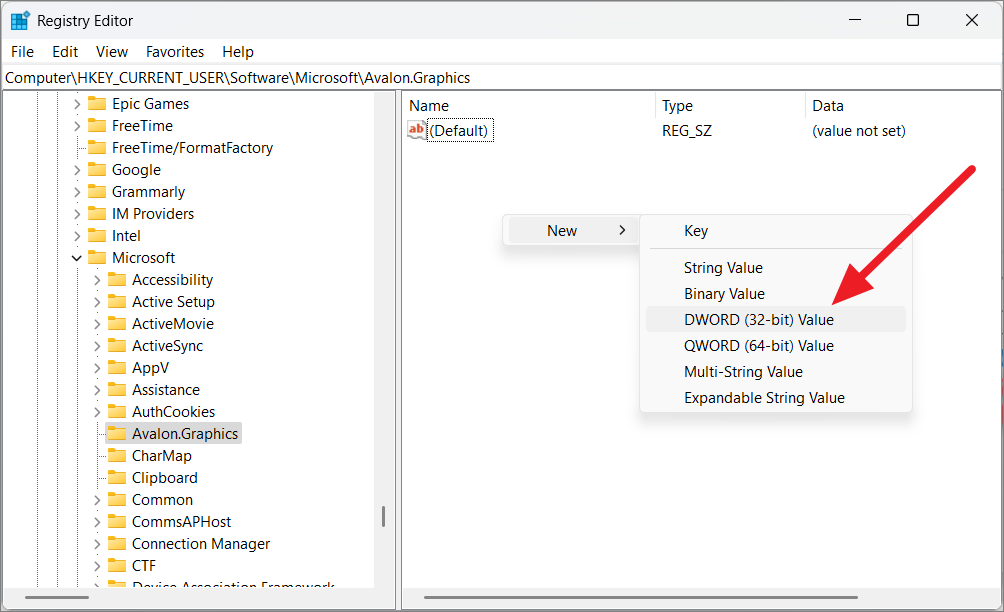
- Name the new DWORD as
DisableHWAcceleration. - Double-click it and set the value data to
1. - Click OK and restart your PC.
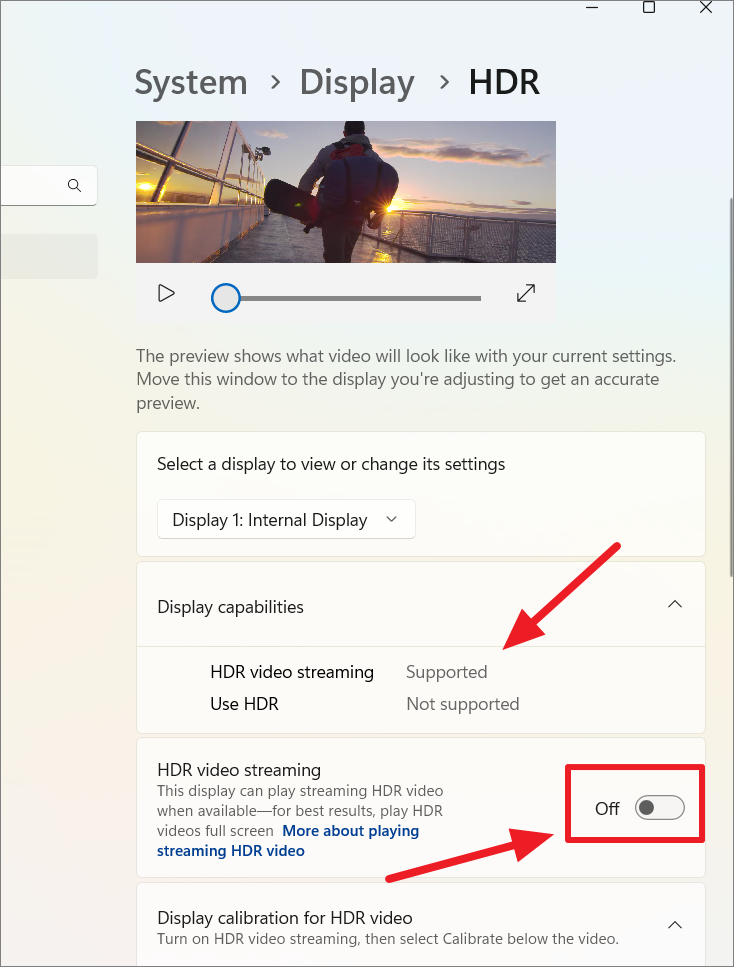
9. Disable HDR
Disabling HDR can help if your display doesn’t fully support it:
- Open Settings and select System > Display.
- Click on HDR under Brightness & color.
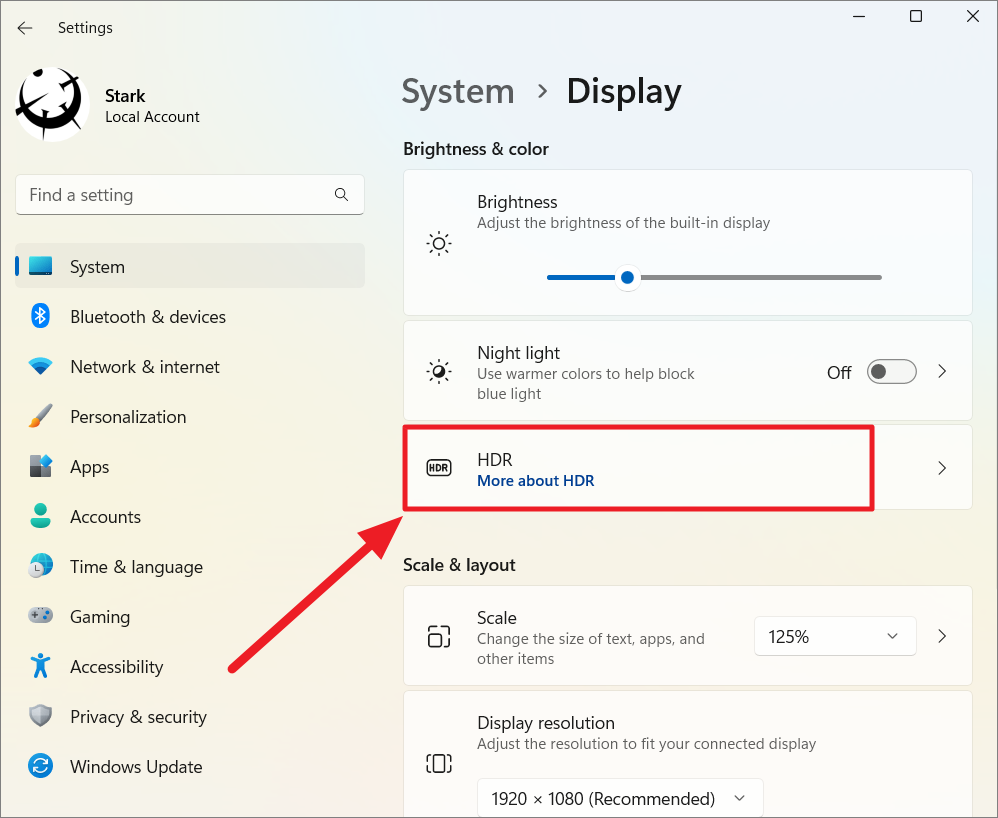
- Select your display and turn off Use HDR and HDR video streaming.
10. Reseat the Graphics Card
If you’re using a desktop PC, reseating the graphics card can help:
- Turn off and unplug your PC.
- Open the case and carefully remove the graphics card.
- Clean any dust from the card and the slot.
- Reinsert the card securely into the slot.
- Reconnect any cables and power on your PC.
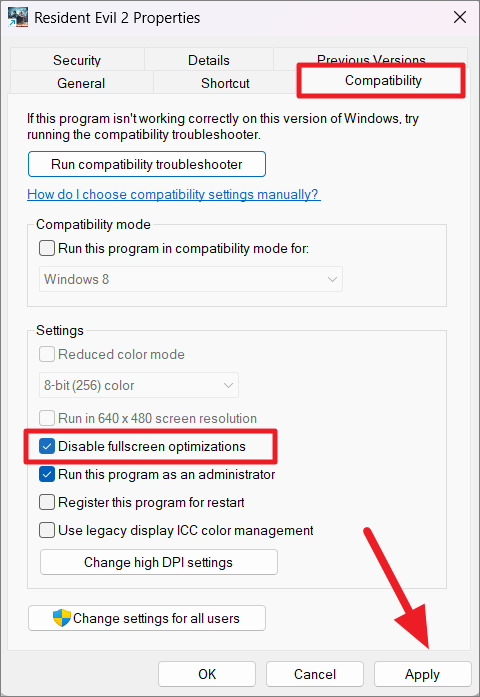
11. Disable Full-Screen Optimization for Games
If flickering occurs during gaming, try disabling full-screen optimization:
- Right-click on your game’s shortcut and select Properties.
- Go to the Compatibility tab.
- Check Disable fullscreen optimizations.
- Click Apply and OK.
12. Change Power Settings
Adjusting power settings can resolve flickering issues:
- Open the Control Panel and select Power Options.
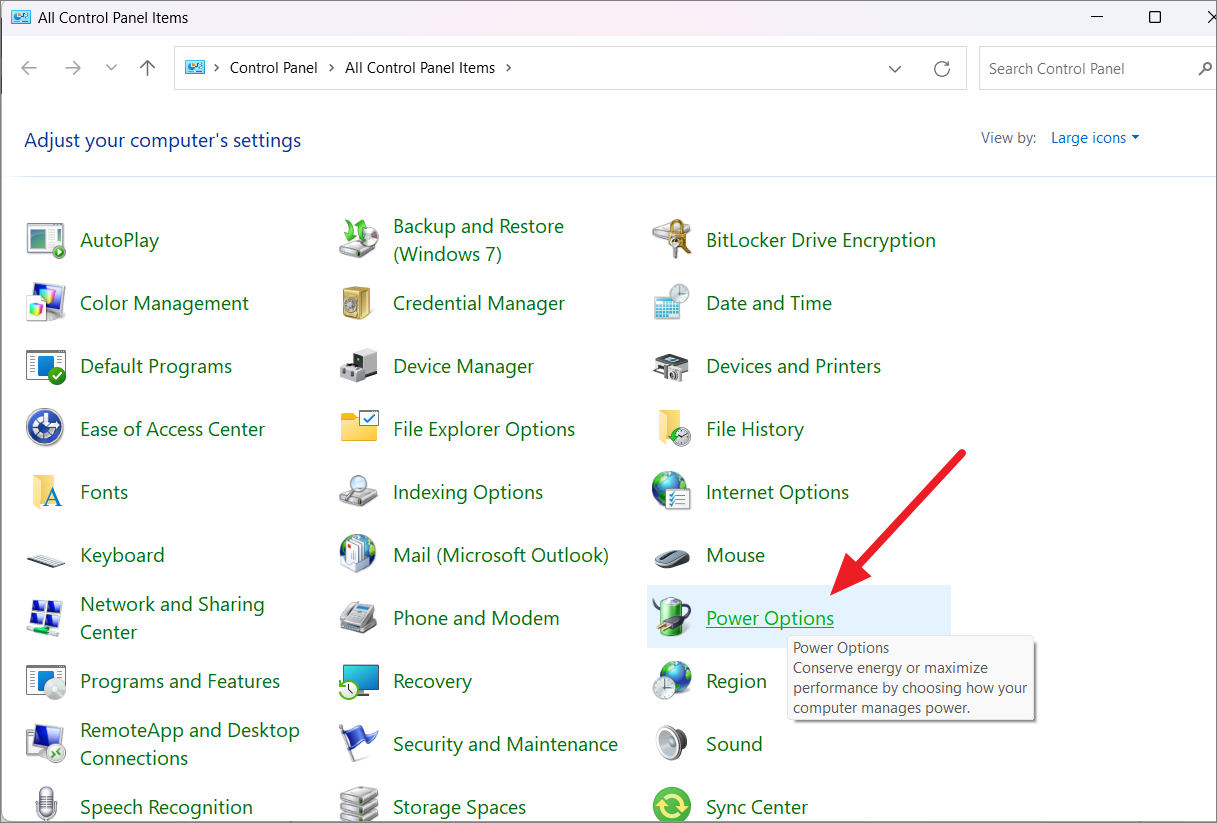
- Click on Choose what the power button does.
- Select Change settings that are currently unavailable.
- Uncheck Turn on fast startup, Sleep, and Hibernate.
- Click Save changes.
13. Adjust Graphics Card Energy Settings (NVIDIA Control Panel)
Modify your graphics card’s power management settings:
- Right-click on the desktop and select NVIDIA Control Panel.
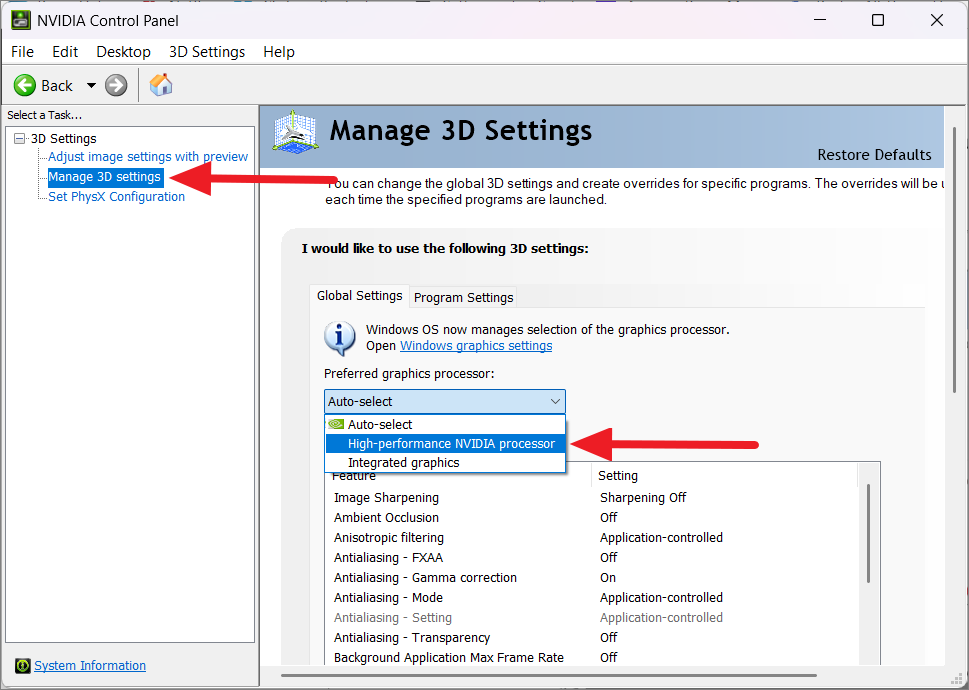
- Under 3D Settings, click on Manage 3D settings.
- Set Power management mode to Prefer maximum performance.
- Click Apply.
14. Enter Safe Mode to Troubleshoot
Booting into Safe Mode can help identify the cause:
- Press
Win+R, typemsconfig, and pressEnter.
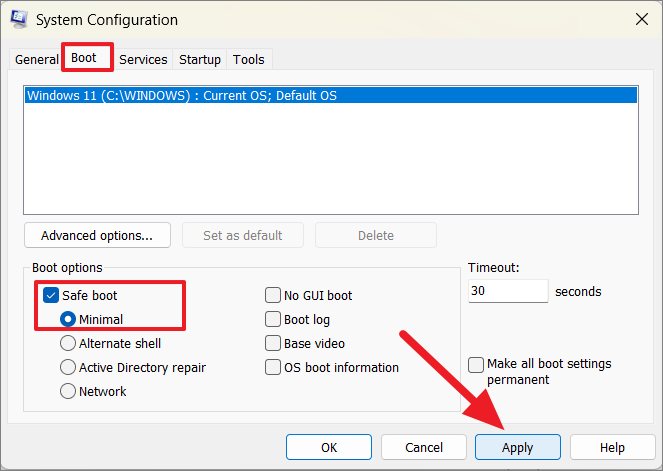
- In the Boot tab, check Safe boot and click OK.
- Restart your PC.
Your computer will boot into Safe Mode, allowing you to troubleshoot further.
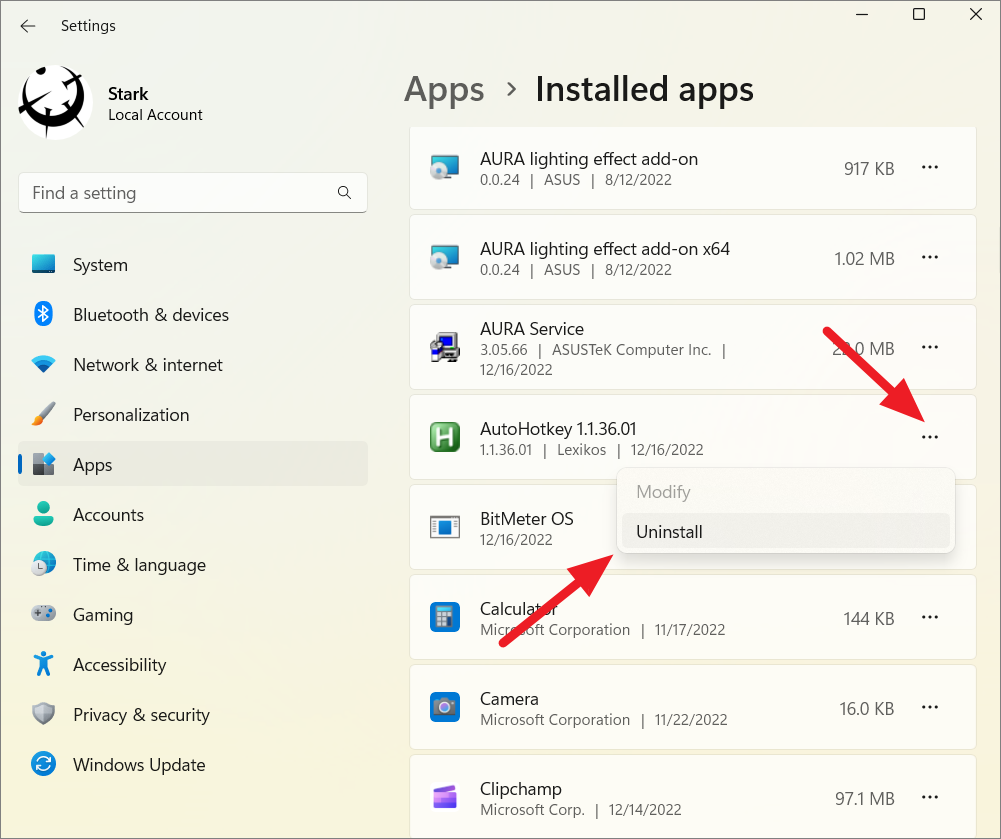
15. Uninstall Incompatible Applications
Certain applications can cause screen flickering. Uninstall any recently installed or known problematic apps:
- Open Settings and select Apps > Installed apps.
- Find the app, click the three dots, and select Uninstall.
16. Restore Your System using System Restore
If the issue started after a recent change, restoring your system might help:
- Search for Create a restore point in the Start menu and open it.
- Click on System Restore.
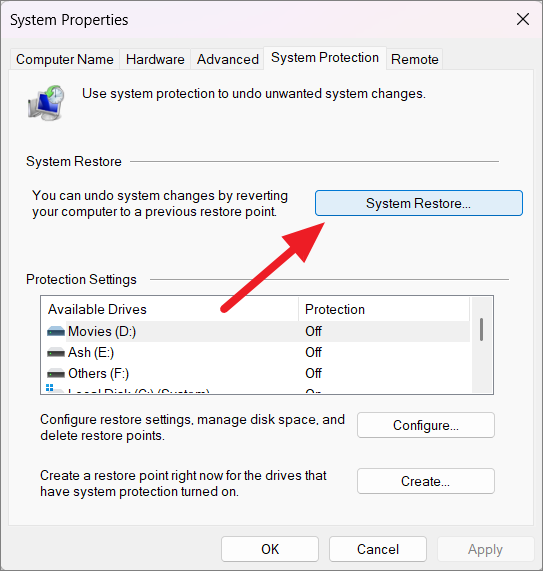
- Select a restore point from before the issue began and click Next.
- Follow the prompts to restore your system.
By following these methods, you should be able to resolve the screen flickering issue on your Windows 11 PC. If the problem persists, consider seeking professional assistance, as it might be a hardware-related issue.


