
Reordering rows and columns in Excel spreadsheets is often necessary when adjusting data layout or correcting input mistakes. Knowing how to efficiently move rows and columns can streamline your workflow and ensure your data is organized effectively. There are several methods to accomplish this in Excel, including drag-and-drop techniques, using cut and paste, and utilizing the Data Sort feature. This guide will explore these methods in detail.
Move Rows and Columns by Dragging and Dropping in Excel
One of the quickest ways to rearrange rows or columns in Excel is by using the drag-and-drop method. This technique allows you to move data seamlessly within your worksheet. There are different variations of this method, such as replacing existing data, moving data without overwriting, and copying data to a new location.
Drag and Replace Row
This approach lets you move a row to a new location, replacing any data that is already there.
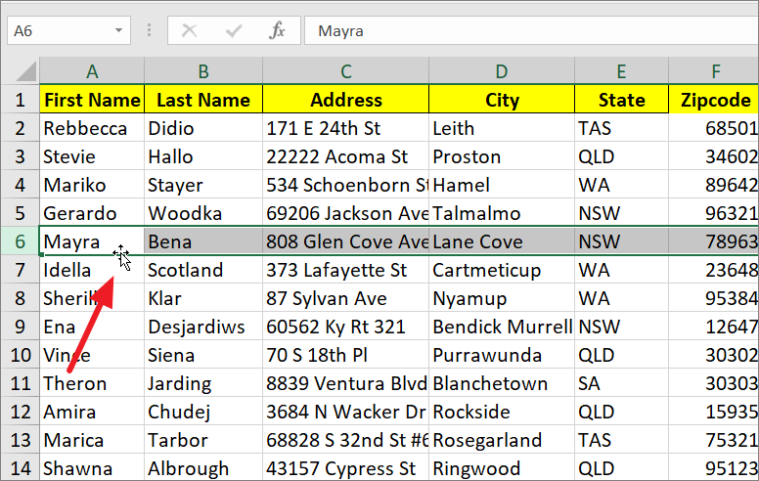
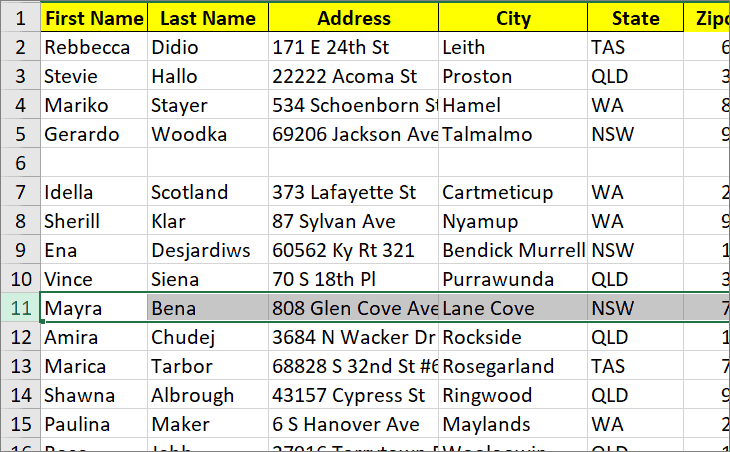
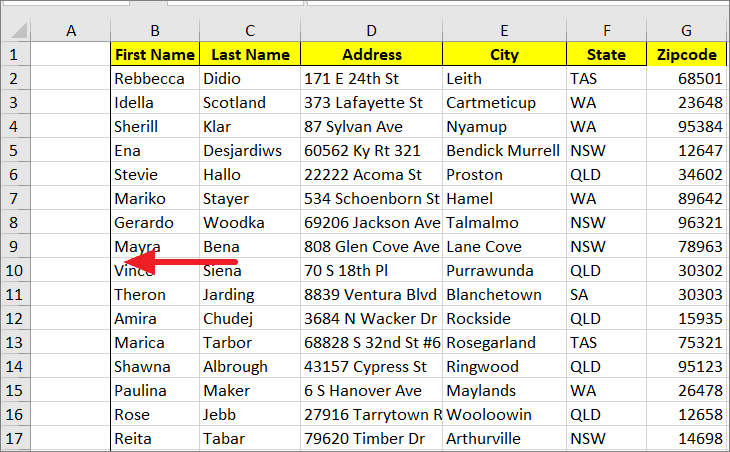
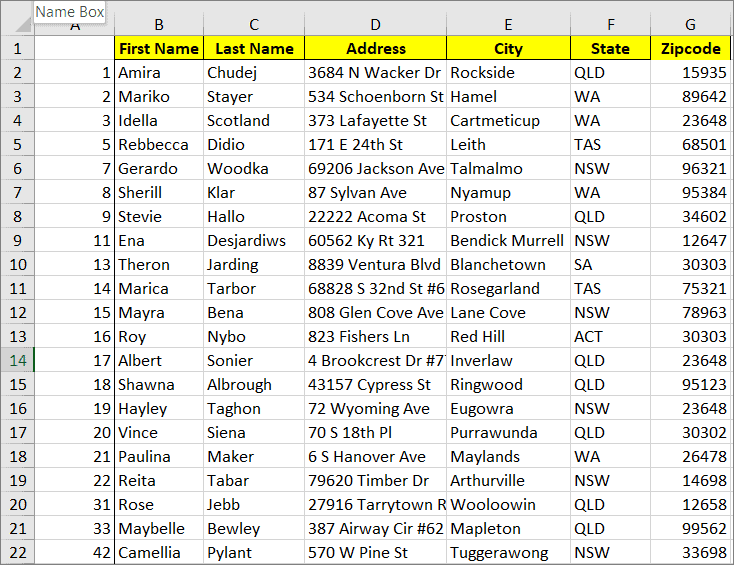
Step 1: Select the entire row you wish to move by clicking on the row number. For example, to select row 6, click on the number 6 on the left side of the spreadsheet.
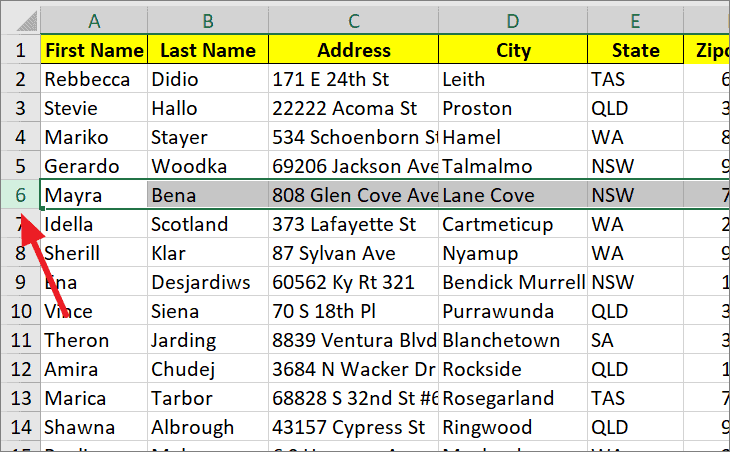
Step 2: Hover your cursor over the edge of the selected row until it changes to a move pointer (a cross with arrows).
Step 3: Click and hold the left mouse button, then drag the row to the desired location. As you drag, a green border will highlight the destination row. For instance, dragging row 6 down to row 11.
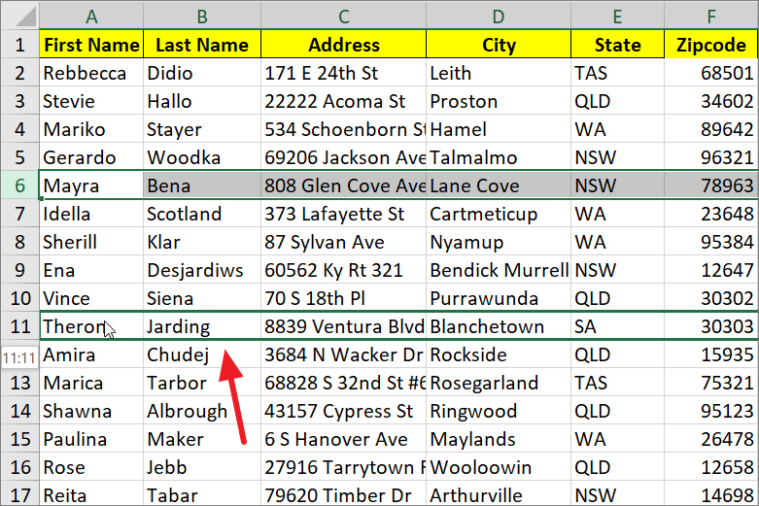
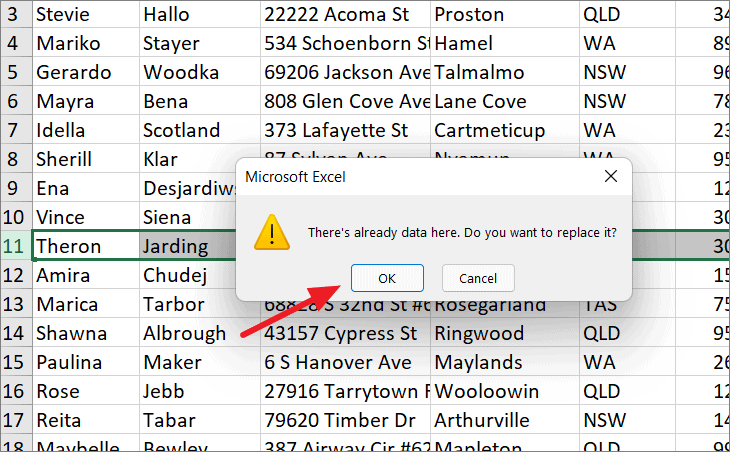
Step 4: Release the mouse button. If you're moving the row to a location that already contains data, Excel will prompt you with a message saying, "There's already data here. Do you want to replace it?" Click OK to confirm the replacement.
If you're moving the row to an empty row, it will transfer without any prompts.
After the move, the original data in the destination row will be replaced with the data from the row you moved.
Drag and Move or Swap Row
To move a row without overwriting existing data, you can use the drag-and-drop method while holding the Shift key.
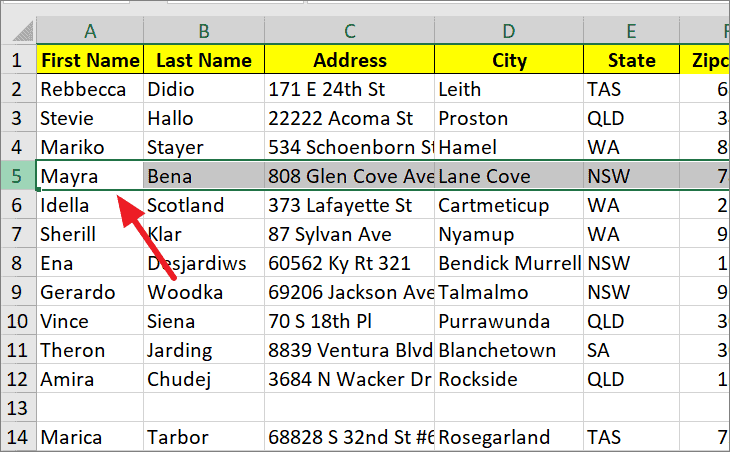
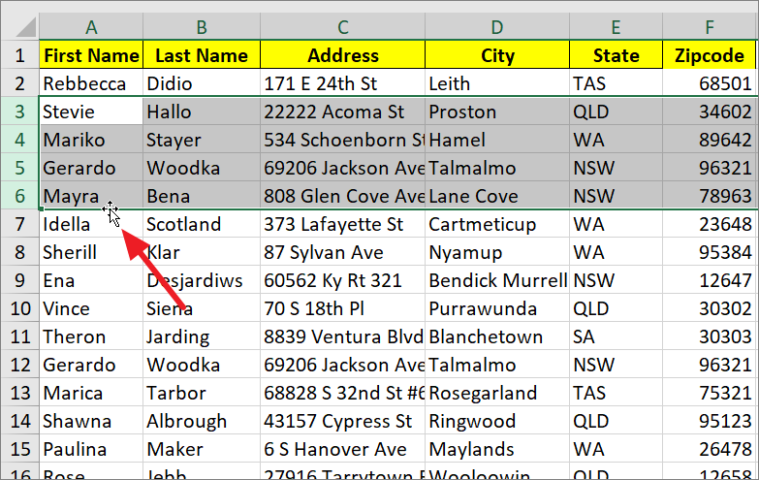
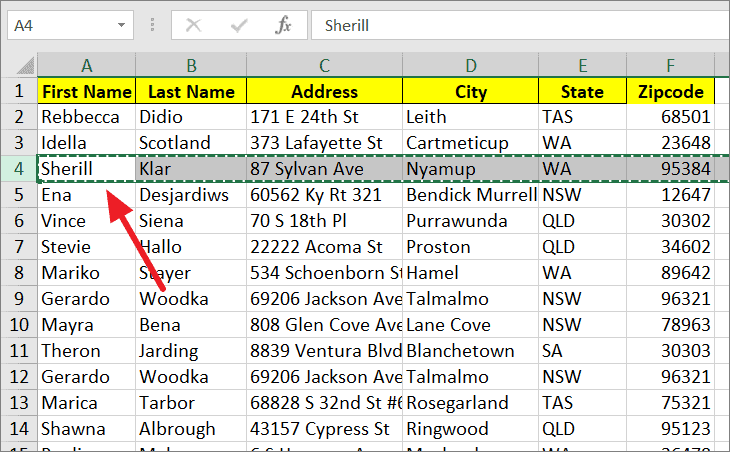
Step 1: Select the row you want to move. For example, select row 5 by clicking on its row number.
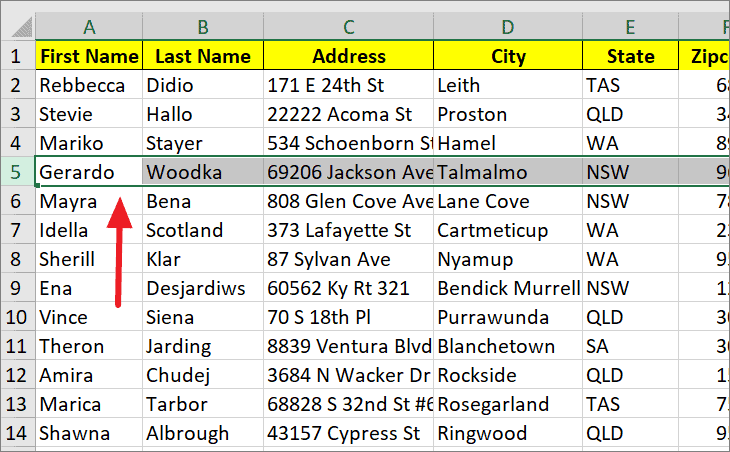
Step 2: Press and hold the Shift key. Hover over the edge of the selected row until the cursor becomes a move pointer.
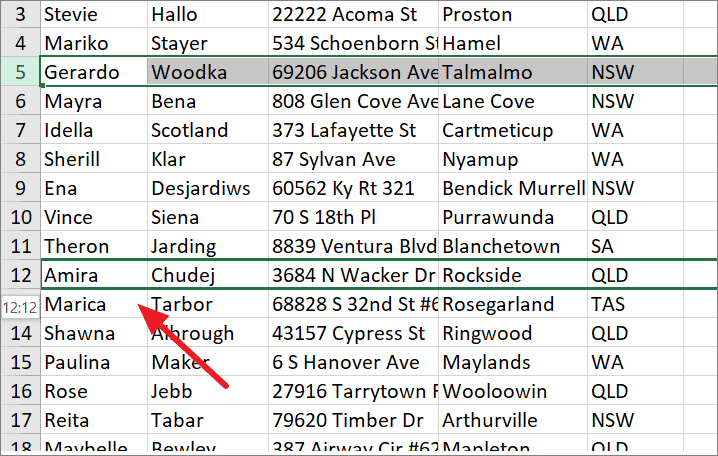
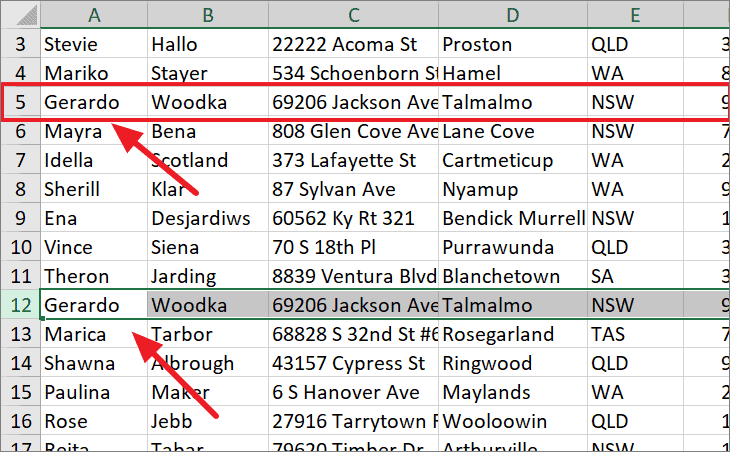
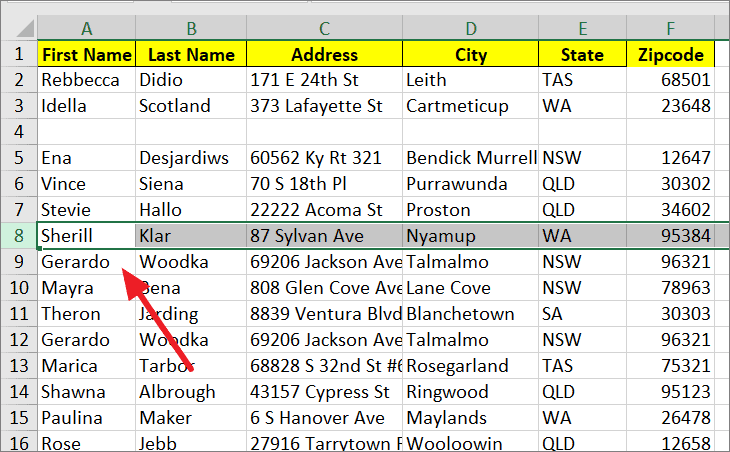
Step 3: Click and hold the left mouse button, then drag the row to the new location. A bold green line indicates where the row will be inserted. For instance, moving row 5 between rows 9 and 10.
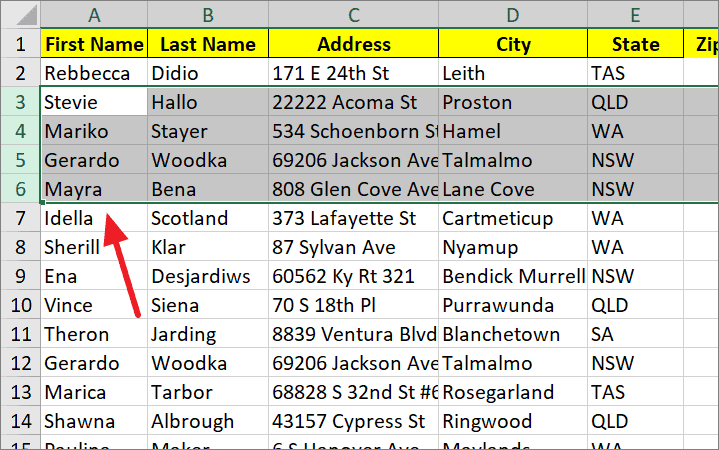
Step 4: Release the mouse button and the Shift key. The selected row will be inserted at the new location, and the existing rows will shift accordingly.
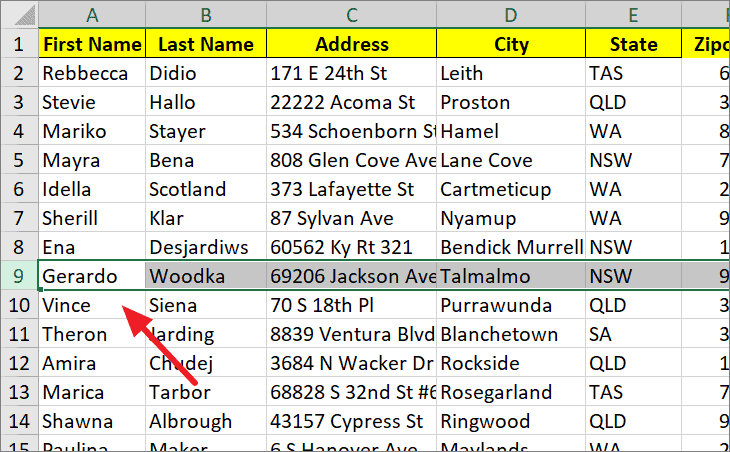
This method moves the row and inserts it without overwriting any data.
Drag and Copy Row
If you want to copy a row to a new location while keeping the original, you can use the drag-and-drop method with the Ctrl key.
Step 1: Select the row you wish to copy, such as row 5.
Step 2: Press and hold the Ctrl key. Hover over the edge of the row until the cursor changes to the move pointer.
Step 3: Click and hold the left mouse button, then drag the row to the desired location. When you release the mouse button and the Ctrl key, the row will be copied to the new location, overwriting any existing data there.
This method duplicates the row, placing a copy at the new location while leaving the original row unchanged.
Move Multiple Rows at Once by Dragging
You can also move several adjacent rows simultaneously using the drag-and-drop method.
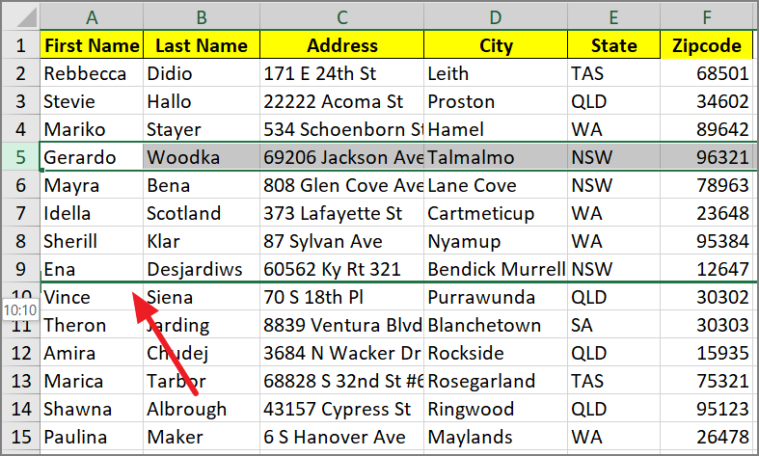
Step 1: Select the contiguous rows you want to move by clicking and dragging over their row numbers. For example, to select rows 3 to 6.
Step 2: Use the drag-and-drop method, with or without the Shift or Ctrl keys, to move the selected rows to a new location. In this example, hold the Shift key to move the rows without overwriting data.
Step 3: Drag the rows to the desired location, indicated by the bold green line, and release the mouse button and the Shift key. The selected rows will be inserted at the new location.
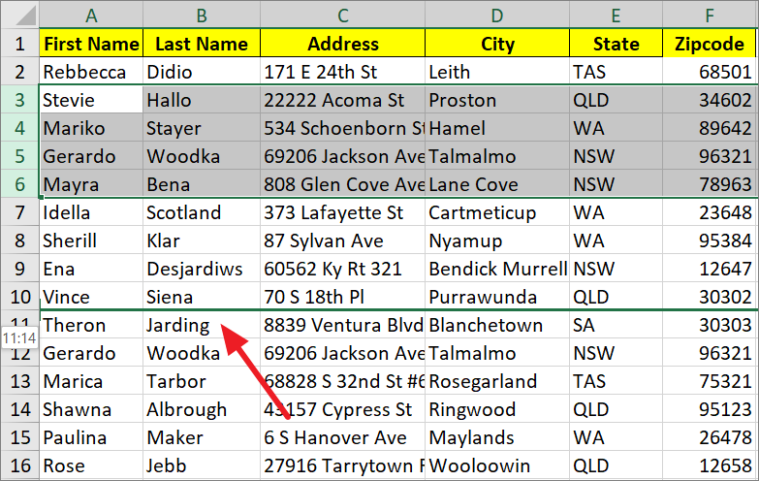
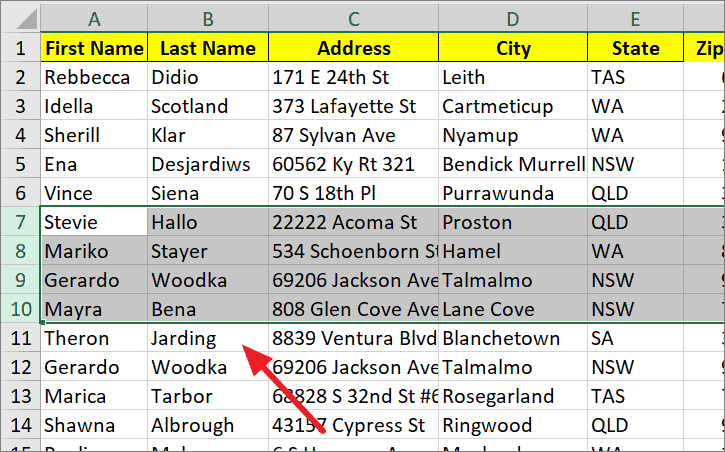
The selected rows are now moved to the new location, and any existing rows have shifted accordingly.
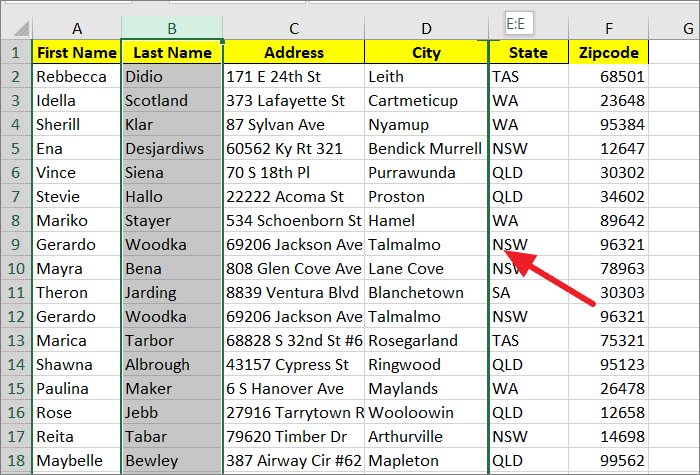
Move Columns Using Mouse Drag
The drag-and-drop method can also be applied to columns.
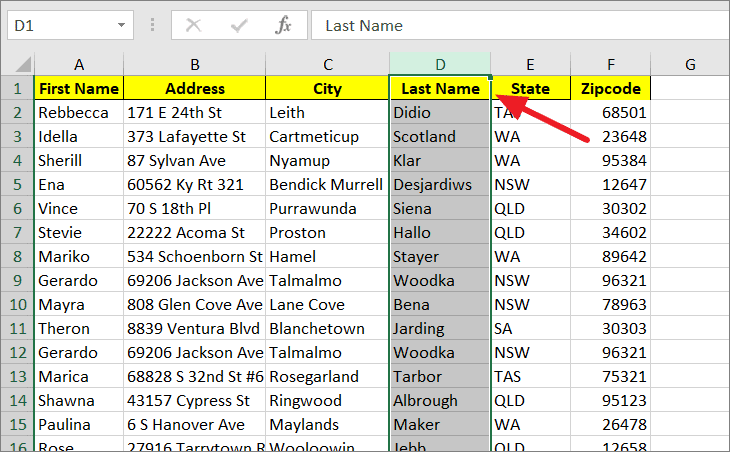
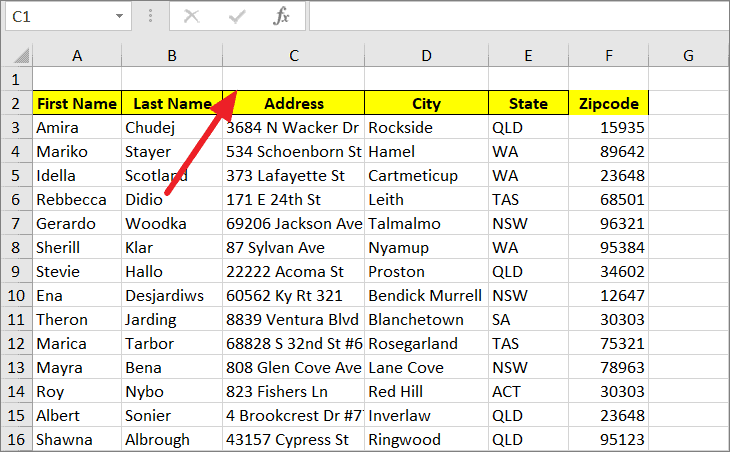
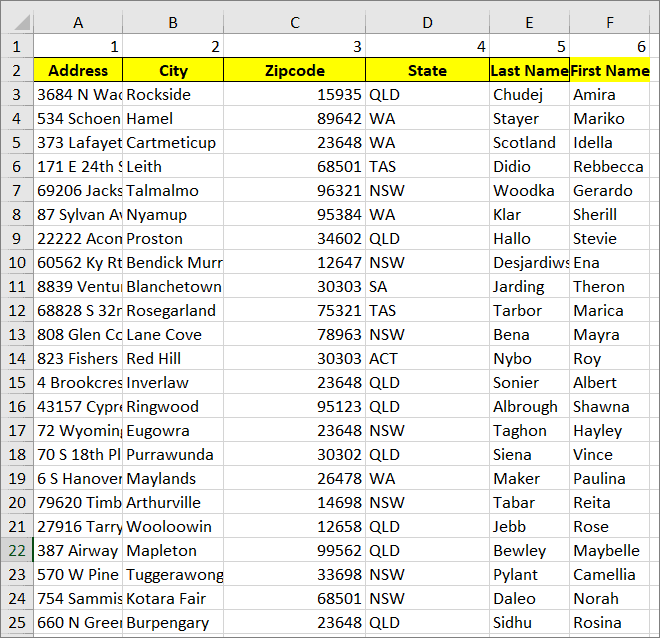
Step 1: Select the column you want to move by clicking on the column header. For example, to move column B (Last Name) after column D (City), select column B.
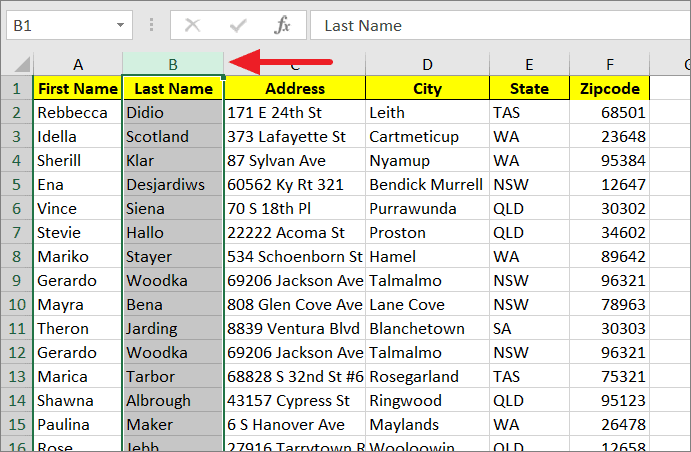
Step 2: Press and hold the Shift key. Hover over the edge of the selected column until the cursor becomes a move pointer.
Step 3: Click and hold the left mouse button, then drag the column to the desired location. Release the mouse button and the Shift key when the bold green line appears between the target columns (between columns D and E in this case).
The selected column will be moved to the new location, and existing columns will shift accordingly.
You can also use the drag-and-drop method without holding the Shift key to replace existing columns, or hold the Ctrl key to copy the column.
Move Rows and Columns Using Cut and Paste
The cut and paste method is a straightforward way to move rows or columns without dragging.
Step 1: Select the row or rows you want to move. You can select entire rows or specific cells within the rows.
Step 2: Press Ctrl+X to cut the selected rows. A dotted border (marching ants) will appear around the selection.
Step 3: Select the destination row where you want to move the data. Click on the row number to select the entire row.
Step 4: Press Ctrl+V to paste the cut rows. This will replace any data in the destination rows with the cut data.
If you prefer not to overwrite existing data, you can insert the cut rows instead.
Step 5: After cutting the desired rows, right-click on the row below where you want to insert the cut rows and select Insert Cut Cells from the context menu.
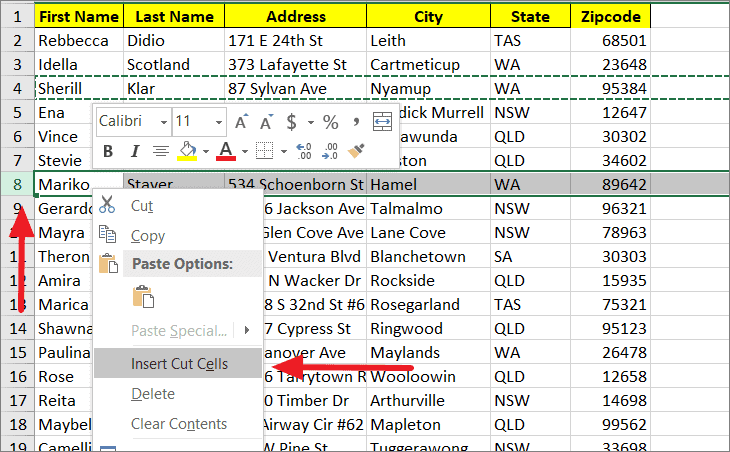
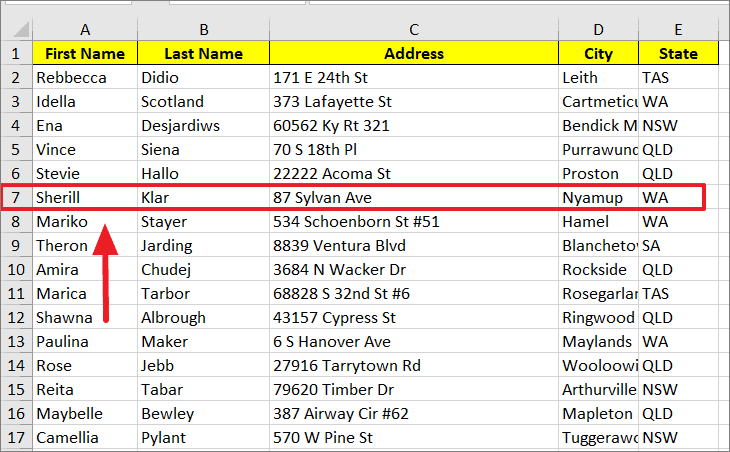
The cut rows will be inserted at the new location, and existing rows will shift down.
To copy rows instead of moving them, use Ctrl+C to copy and then paste them at the desired location.
The same method applies to moving columns. Select the columns you want to move, cut them using Ctrl+X, then paste or insert them at the new location.
Cut and Insert Multiple Rows
You can also move a range of cells from multiple adjacent rows.
Step 1: Select the range of cells you want to move. For example, select cells C2:F4.
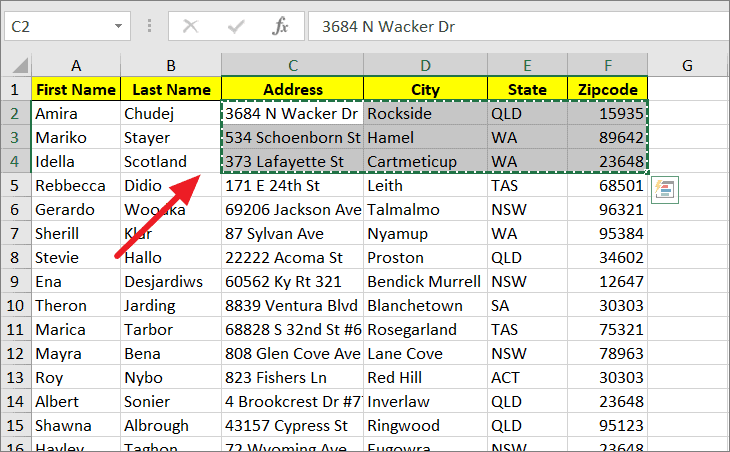
Step 2: Press Ctrl+X to cut the selected cells.
Step 3: Select the destination where you want to insert the cut cells. Ensure the destination range matches the size of the cut range.
Step 4: Right-click the destination and choose Insert Cut Cells from the context menu.
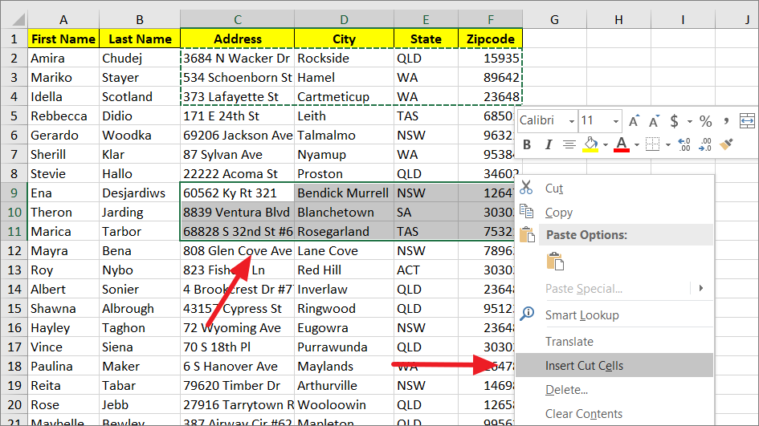
The selected cells will be inserted at the new location.
Move Rows Using the Data Sort Feature
When working with large datasets, the Data Sort feature is useful for rearranging multiple rows based on custom criteria.
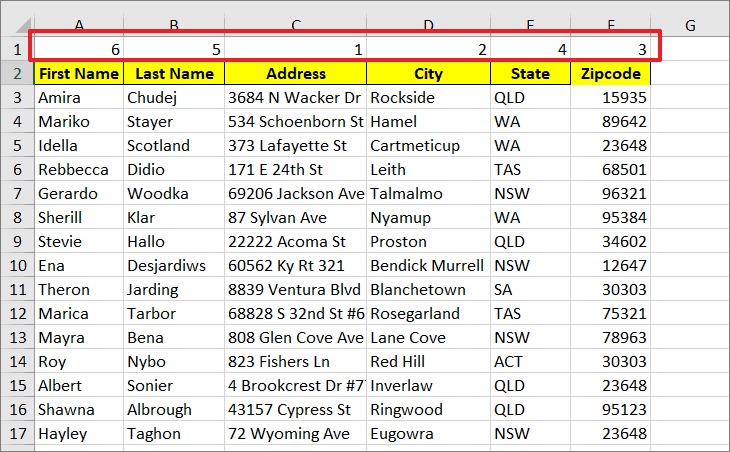
Step 1: Insert a new column at the left of your dataset. Right-click on any cell in the first column and select Insert, then choose Entire Column.
Step 2: In the new column, assign numbers to each row in the order you want them to appear.
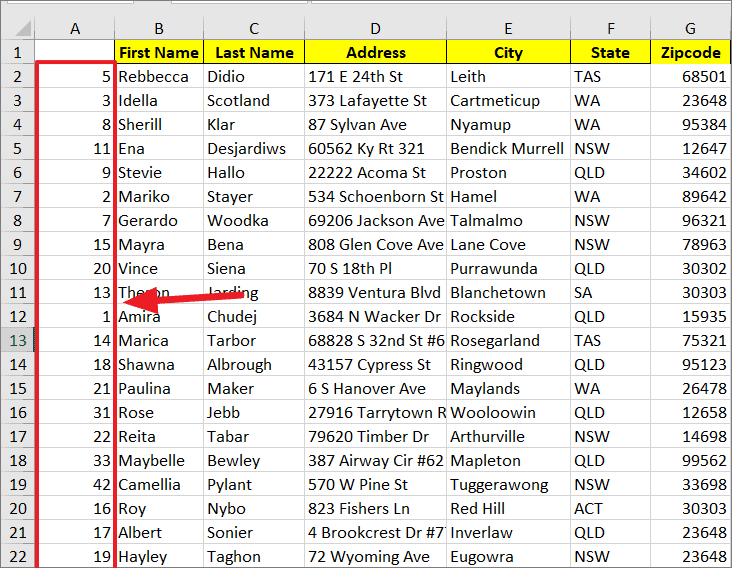
Step 3: Select the entire dataset, including the new numbering column.
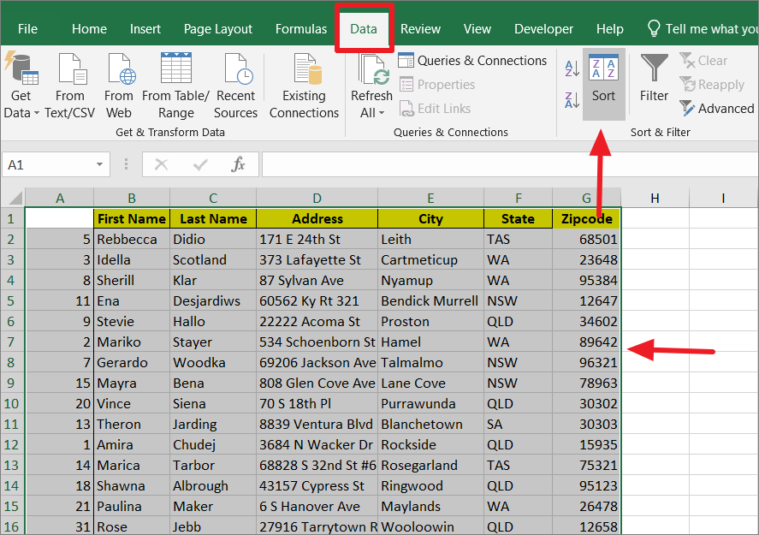
Step 4: Go to the Data tab and click on Sort in the Sort & Filter group.
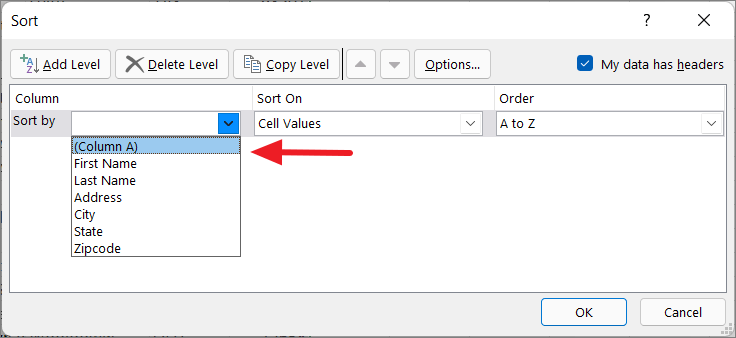
Step 5: In the Sort dialog box, ensure that the sorting is set to sort by columns. If not, click on Options and select Sort top to bottom.
Step 6: Set the Sort by field to the new numbering column (e.g., Column A) and order it from Smallest to Largest. Click OK.
The rows will rearrange according to the numbers you've assigned. Once sorted, you can delete the temporary numbering column.
Move Columns Using the Data Sort Feature
Similarly, you can rearrange columns using the Data Sort feature.
Step 1: Insert a new row at the top of your dataset. Right-click on any cell in the first row and select Insert, then choose Entire Row.
Step 2: In the new row, assign numbers to each column in the order you want them to appear.
Step 3: Select the entire dataset, including the new numbering row.
Step 4: Go to the Data tab and click on Sort.
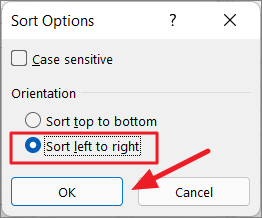
Step 5: In the Sort dialog box, click on Options and select Sort left to right.
Step 6: Set the Sort by field to the new numbering row (e.g., Row 1) and order it from Smallest to Largest. Click OK.
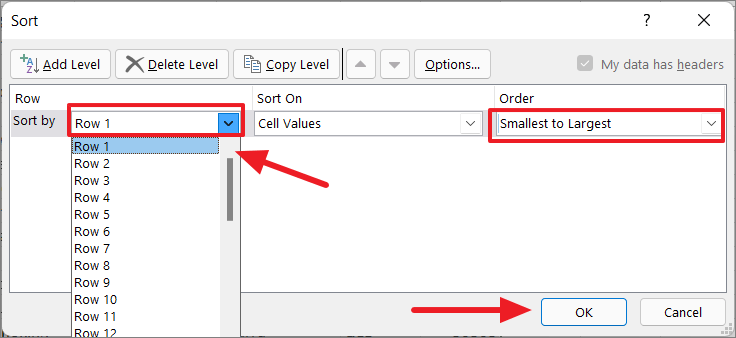
The columns will rearrange according to the numbers you've assigned. After sorting, you can delete the temporary numbering row.
Mastering these methods for moving rows and columns in Excel enhances your ability to manage and organize data efficiently.