The Control Panel remains a vital tool in Windows 11, offering advanced settings and configurations that aren't always accessible through the new Settings app. Whether you need to adjust user accounts, manage installed software, or configure hardware settings, accessing the Control Panel is essential. Here are several effective methods to open the Control Panel on your Windows 11 PC.
Method 1: Use the Run Command to Open Control Panel
Step 1: Press the Windows+R keys on your keyboard to open the Run dialog box.
Step 2: In the Run dialog, type control and press Enter or click 'OK'.
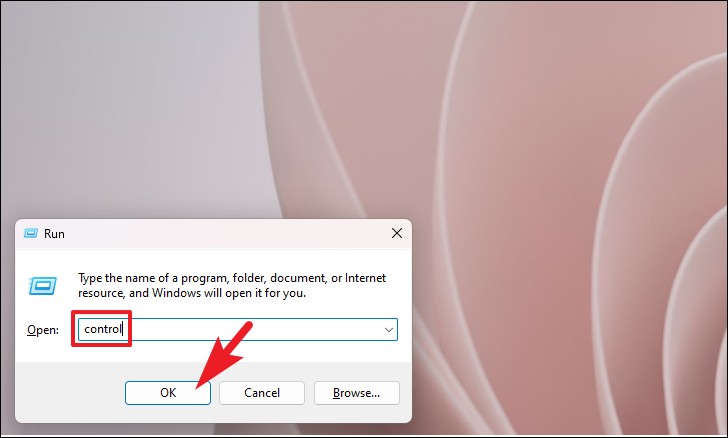
The Control Panel will open immediately.
Method 2: Search for Control Panel from the Start Menu
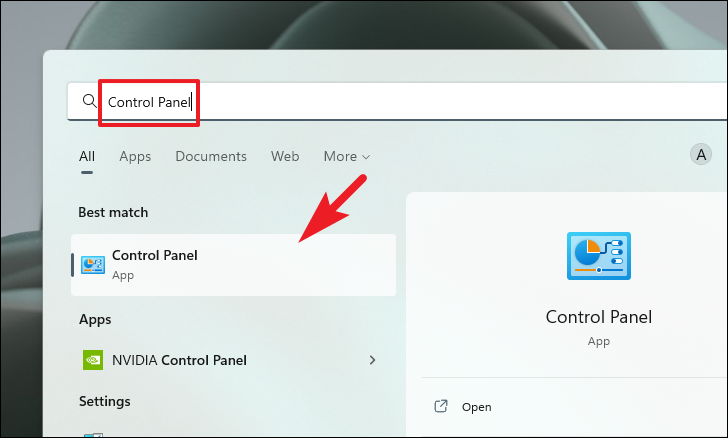
Step 1: Click on the Start button on your taskbar or press the Windows key to open the Start Menu.
Step 2: Type Control Panel into the search bar at the top.
Step 3: In the search results, click on the 'Control Panel' app to open it.
Method 3: Open Control Panel Using the Settings App
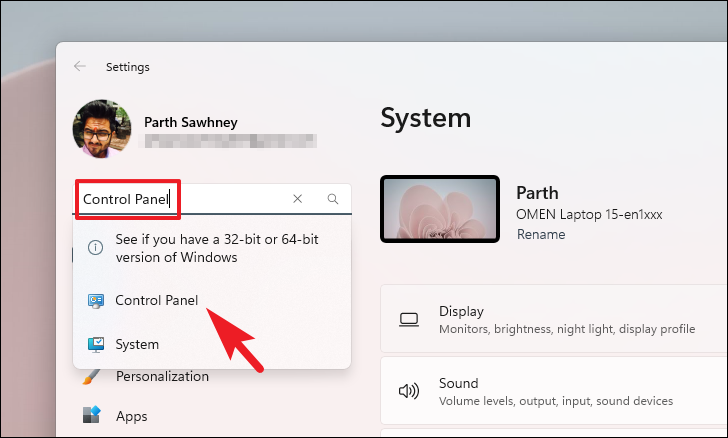
Step 1: Open the Settings app by clicking on the 'Settings' icon in the Start Menu or by pressing Windows+I.
Step 2: In the Settings window, locate the search bar at the top left and type Control Panel.
Step 3: From the search results, click on 'Control Panel' to open it in a new window.
Method 4: Open Control Panel Using the Task Manager
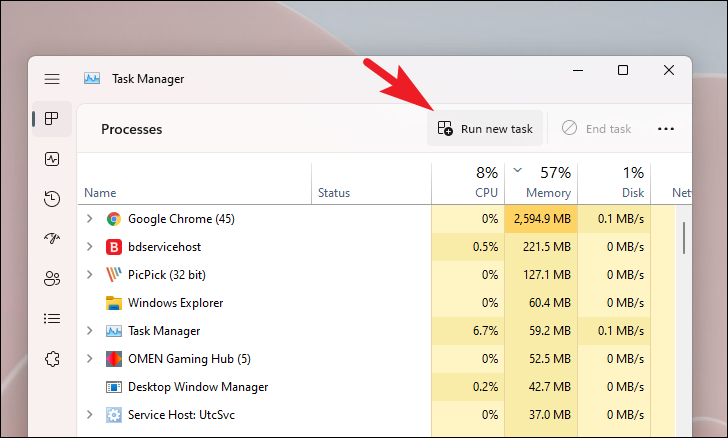
Step 1: Open the Task Manager by right-clicking on the taskbar and selecting 'Task Manager', or press Ctrl+Shift+Esc.
Step 2: In the Task Manager window, click on 'Run new task' at the top right corner.
Step 3: In the 'Create new task' dialog box, type control and press Enter or click 'OK'.
Method 5: Access Control Panel from File Explorer
Step 1: Open File Explorer by clicking its icon on the taskbar or pressing Windows+E.
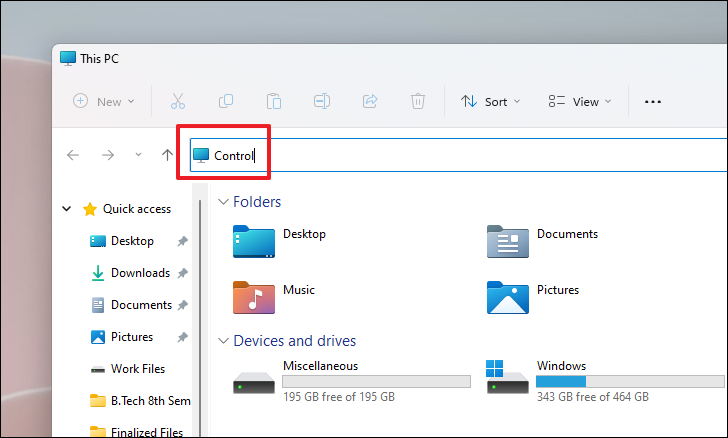
Step 2: Click on the address bar at the top of the File Explorer window.
Step 3: Type control and press Enter.
Method 6: Pin Control Panel to Start Menu or Taskbar
Step 1: Open the Start Menu and search for Control Panel.
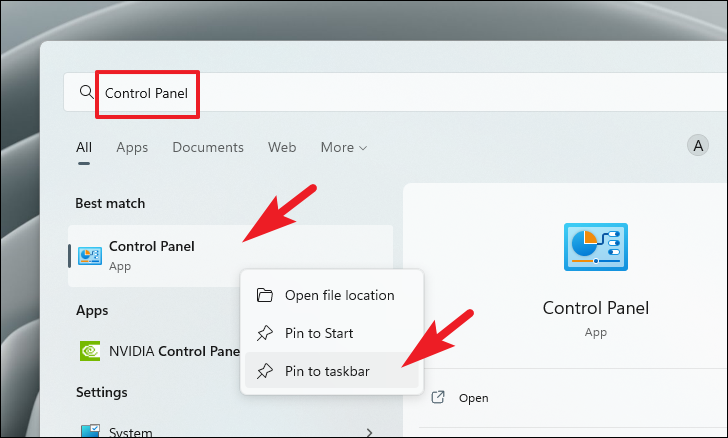
Step 2: Right-click on the 'Control Panel' app in the search results.
Step 3: Select 'Pin to Start' to add it to your Start Menu, or 'Pin to taskbar' to add it to the taskbar for quick access.
Method 7: Create a Desktop Shortcut for Control Panel
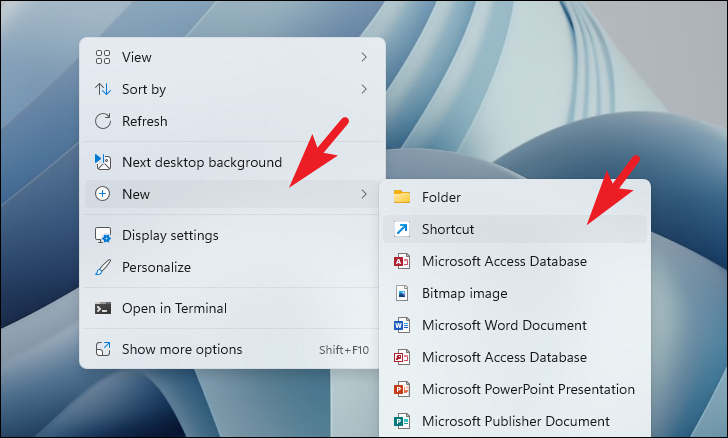
Step 1: Right-click on an empty area of your desktop, hover over 'New', and click on 'Shortcut'.
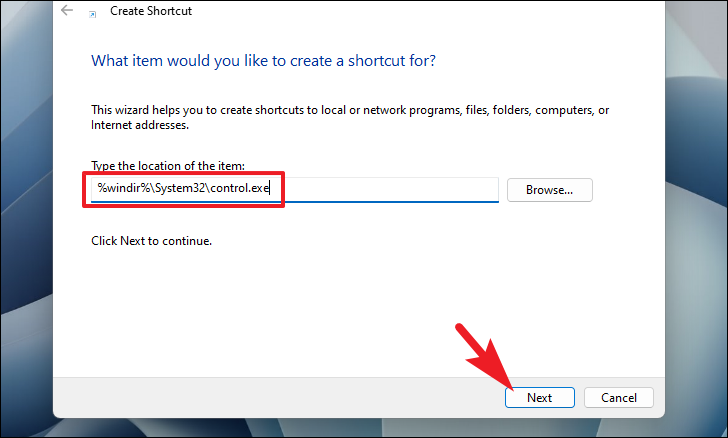
Step 2: In the 'Create Shortcut' window, enter %windir%\System32\control.exe in the location field, then click 'Next'.
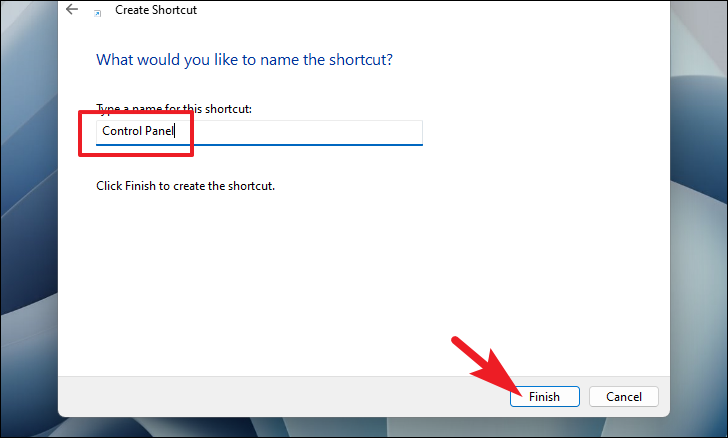
Step 3: Name the shortcut 'Control Panel' and click 'Finish'.
The Control Panel shortcut will now appear on your desktop, and you can move it to any preferred location.
Method 8: Add Control Panel Icon to Desktop
Step 1: Open the Settings app by pressing Windows+I.
Step 2: Click on 'Personalization' in the left sidebar.
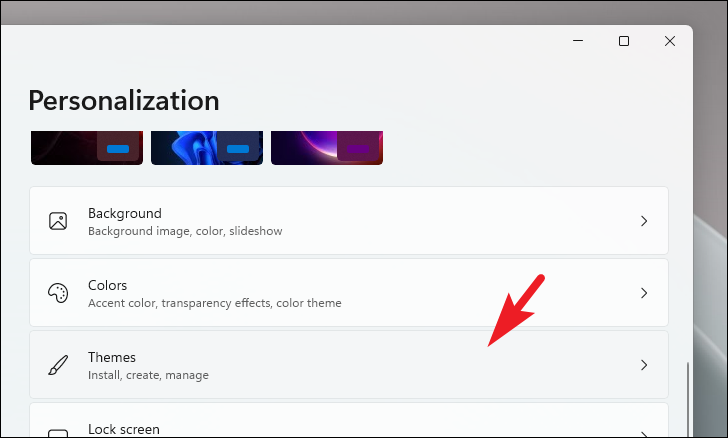
Step 3: On the right side, select 'Themes'.
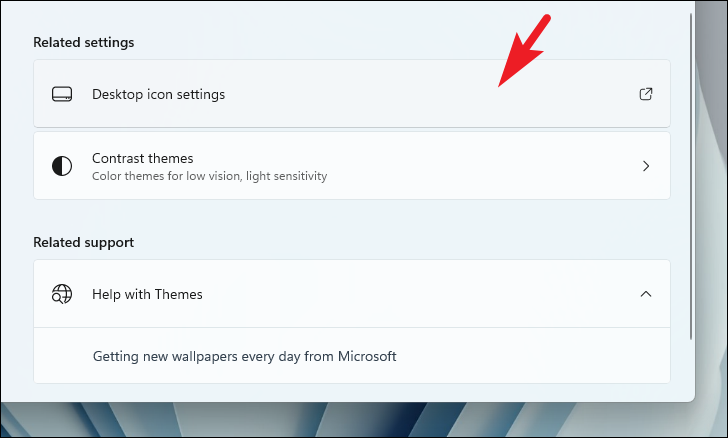
Step 4: Scroll down and click on 'Desktop icon settings' under the 'Related settings' section.
Step 5: In the 'Desktop Icon Settings' window, check the box next to 'Control Panel'. Then, click 'Apply' and 'OK'.
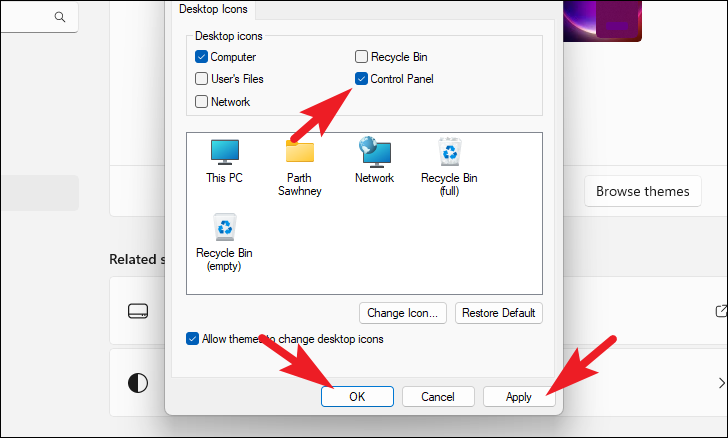
The Control Panel icon will now be displayed on your desktop for easy access.
Method 9: Open Control Panel Using Command Prompt or PowerShell
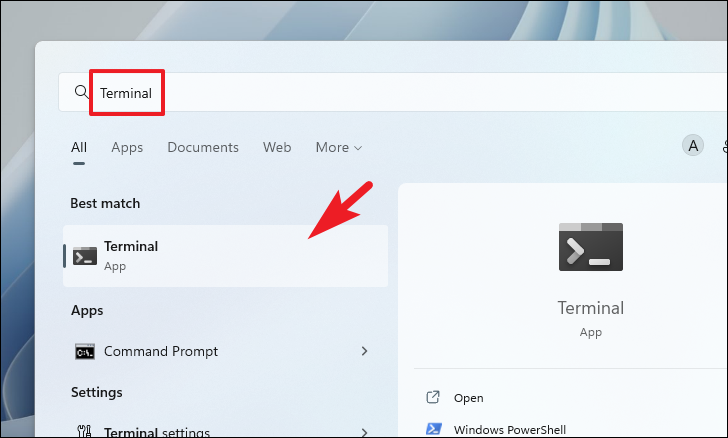
Step 1: Open the Terminal app by searching for 'Terminal' in the Start Menu and clicking on it.
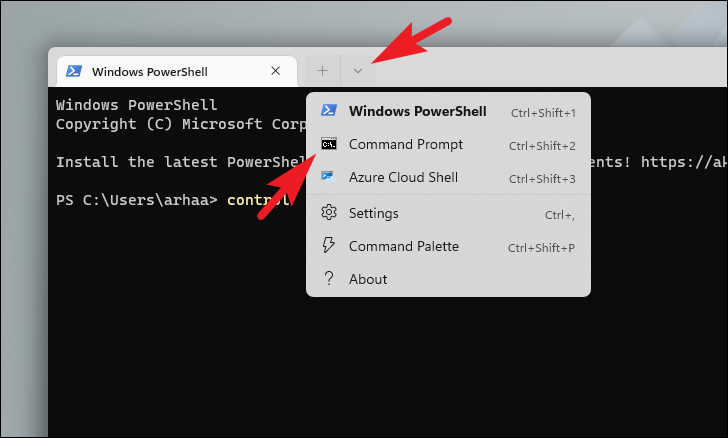
Step 2: In the Terminal window, you can use PowerShell or Command Prompt. To switch to Command Prompt, click the downward arrow at the top and select 'Command Prompt'.
Step 3: In the command line, type control and press Enter.
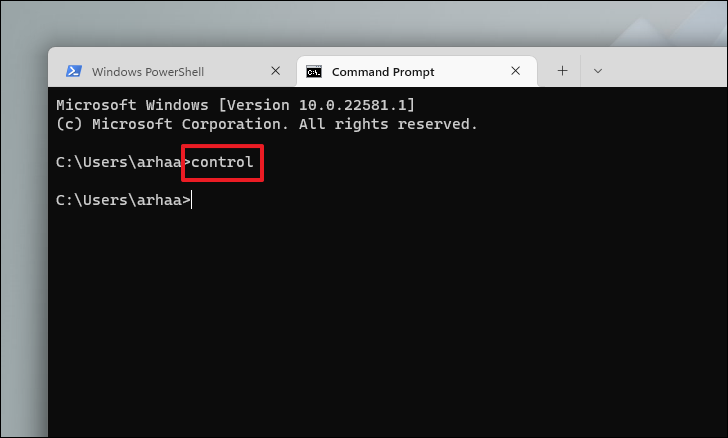
The Control Panel will open in a separate window.
Using these methods, you can choose the one that fits your workflow best to access the Control Panel whenever you need it.

