Taking notes or remembering everything that is said and happened in meetings is hard. Often the crucial happenings of the meetings are summarized into minutes, manually. It would be a puzzle to those who couldn’t attend the meetings to put together what had happened in the meetings. Now in the times of the digital revolution and the pandemic to hike the necessity, almost all the meetings are happening virtually through various platforms.
GoToMeeting is one such platform to conduct virtual meetings and webinars. Recording the meetings or webinars is much easier on this platform which can be saved either locally or on the cloud. You can view them for future references or even share them with the members of your organization easily with a few clicks. Let’s see how we can record, view, and share a meeting on GoToMeeting.
Who can record a GoToMeeting?
Only the organizers and co-organizers can record the meetings in GoToMeeting. The attendees can only use the ‘Snapshot’ feature to capture still image shots while in the meeting. The organizer can share(if he/she chooses to) the recorded file with attendees if they need it.
Even the organizer is controlled by the account administrator(a person can be both admin and organizer). The admin controls everything from enabling or disabling the recording function to the organizers to choosing where to save the recorded files (local or on the cloud) and adding people as organizers or co-organizers, etc.
How to record a GoToMeeting
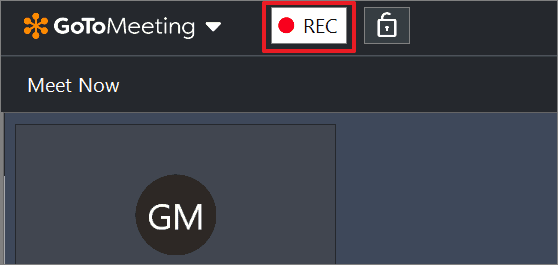
Recording a meeting in GoToMeeting is a no-brainer. After you’ve joined the meeting, just hover over the ‘REC’ button in the top bar of the meeting window. You will then find the ‘Start Your Recording’ button in the pop-up. Simply click on the button.
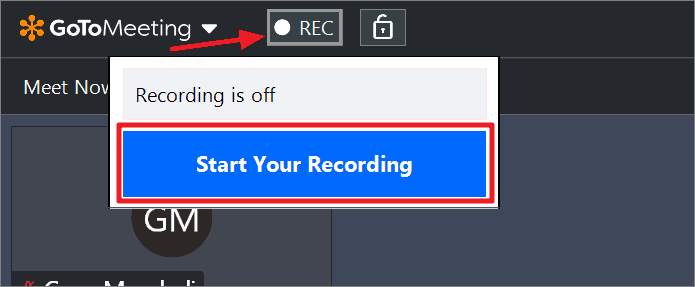
You will hear an audio notification saying ‘this conference will now be recorded’, confirming that the meeting is being recorded. The black and white record button will turn into red and white while recording.
After the completion of your meeting, you can stop recording the same way you started it. Just hover over to the active ‘record’ button, and click the ‘Stop Your Recording’ button in the pop-up menu.
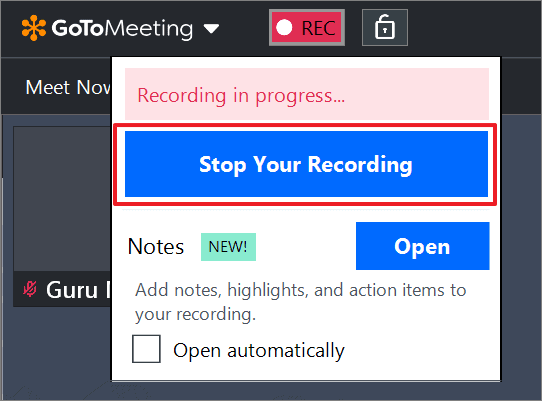
You’ll hear another audio notification ‘this conference is no longer recorded’ after you click on the ‘Stop Your Recording’ button.
By default, the recorded file is saved on the cloud. If you are an account administrator, you can change it by logging into your admin account on GoToMeeting.
How to View or Share GoToMeeting Recordings
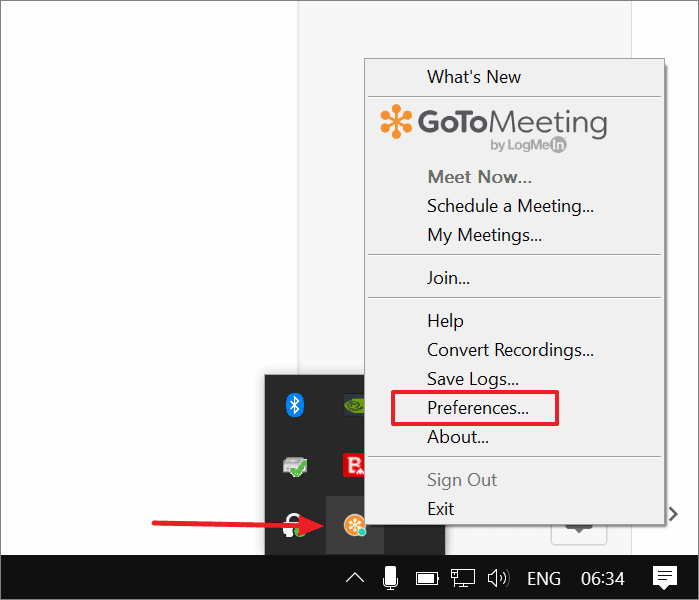
To view the GoToMeeting recorded file, go to the taskbar of your computer and right-click on the ‘GoToMeeting’ icon in the tray. From the available options, select ‘Preferences’.
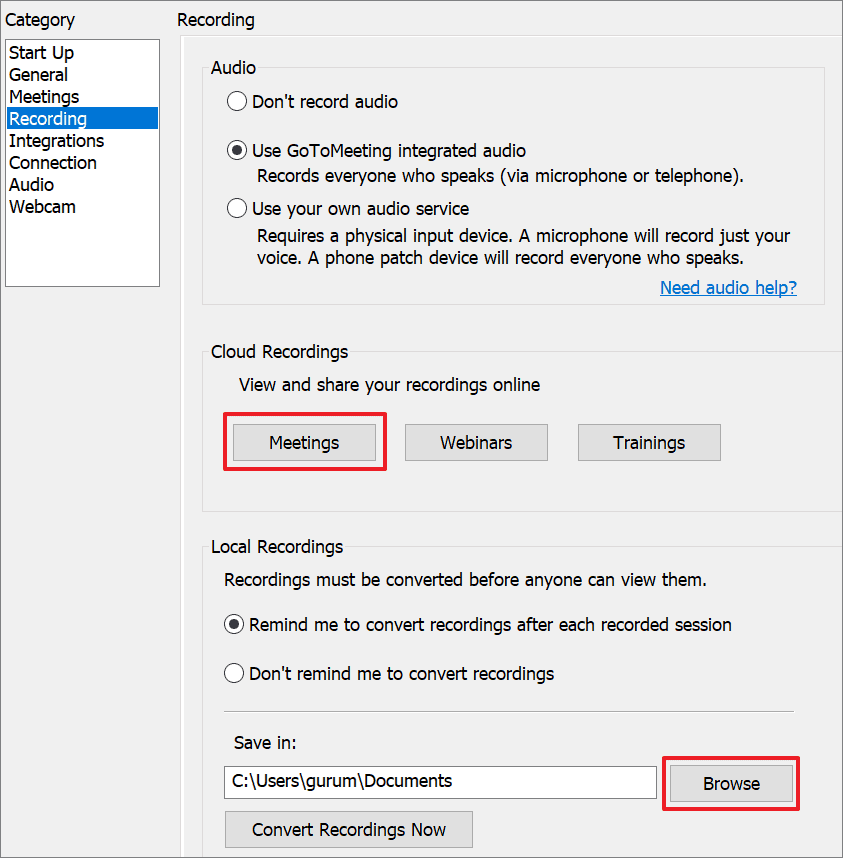
From the GoToMeeting Preferences window, select ‘Recording’ option from the category section on the right panel.
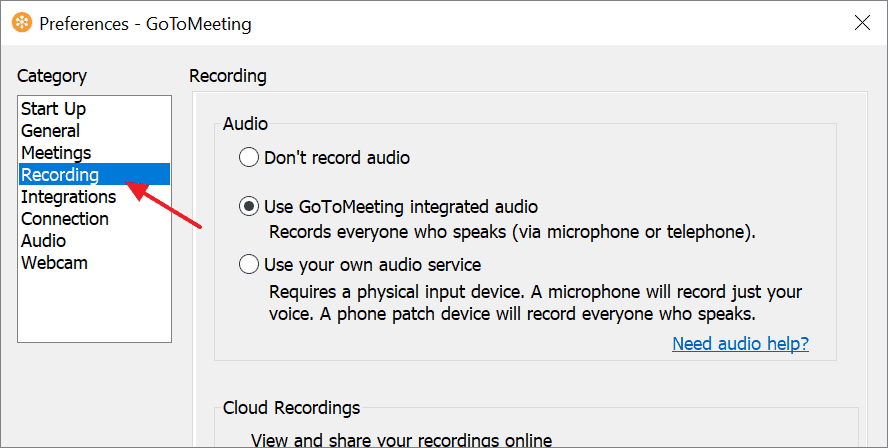
In the recording tab, you will find two sections dedicated to ‘Cloud Recordings’ and ‘Local Recordings’. Click on the ‘Meetings’ button in the ‘Cloud Recordings’ section if you have recorded the meetings on the cloud or click on the ‘Browse’ button in the ‘Local Recordings’ section if you saved them locally. You will find the files in the destination folder which you can view or share with anyone.
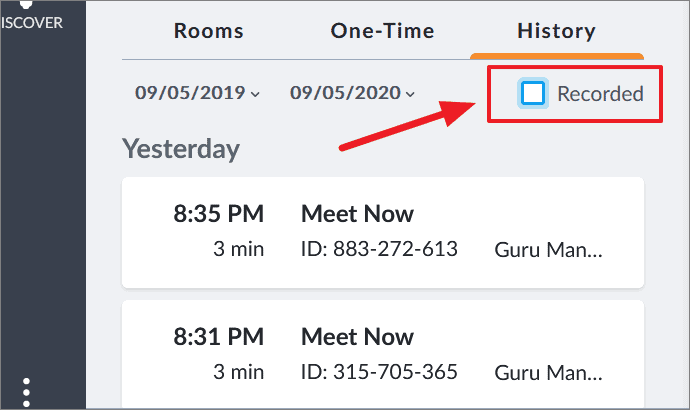
If you’ve clicked on the ‘Meetings’ button (to access cloud recording), it will directly take you to the webpage where you can find all the history of your meetings. To sort out the recorded meetings from the history, check on the ‘Recorded’ button.
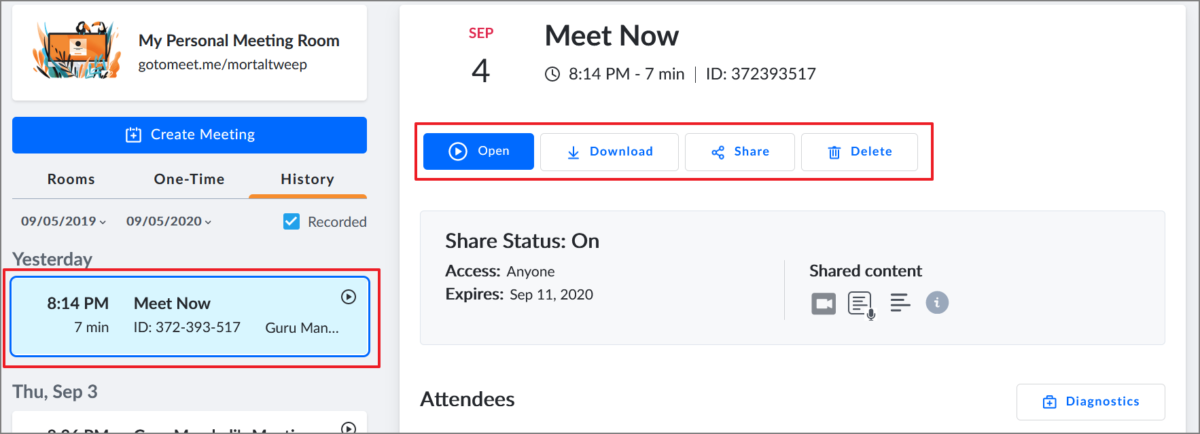
From the list of recorded meetings, select the meeting you want to view or share. You’ll get complete details along with the recorded file. You can open it or download it or share the link with anyone or even delete it if you don’t need it anymore.
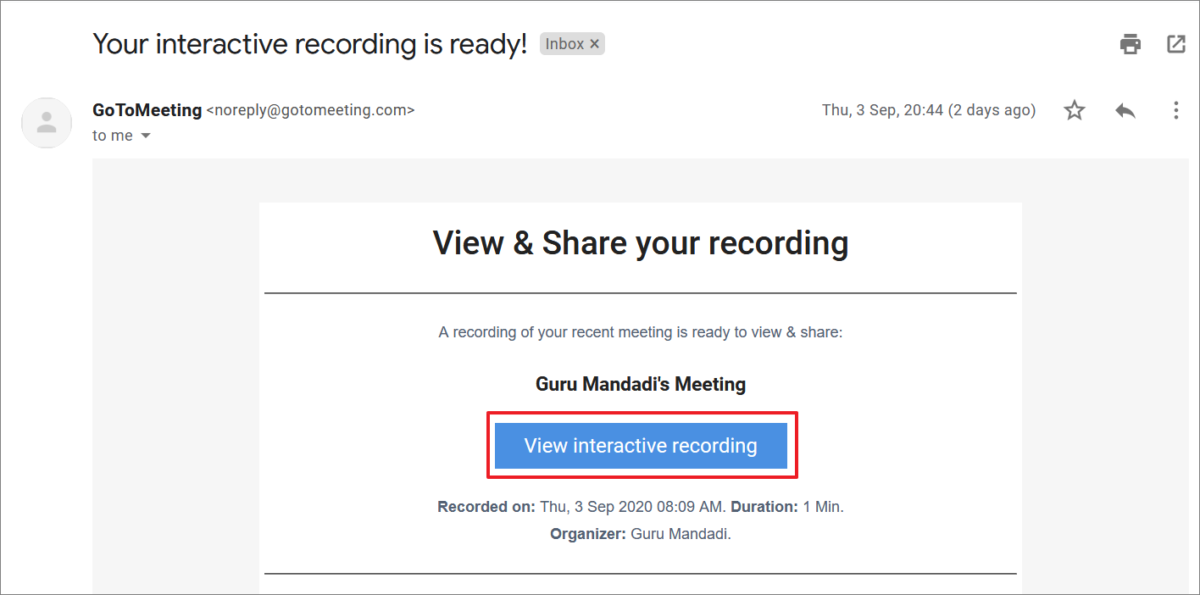
You will even be notified about the recording at your registered email after the processing of the file is completed. Following the link provided in the mail (View Interactive Meeting), you can access the recorded file.