
Public computers, shared spaces, or even a home office can sometimes expose your email address on the Windows 11 login screen, potentially revealing personal information to anyone nearby. Disabling this display not only improves privacy but also reduces the risk of your email being seen or misused. Several approaches exist to remove or hide your email address from the Windows 11 login screen, ranging from simple settings adjustments to more advanced system changes. Here’s how to do it.
Hide Email Address Using Windows 11 Settings
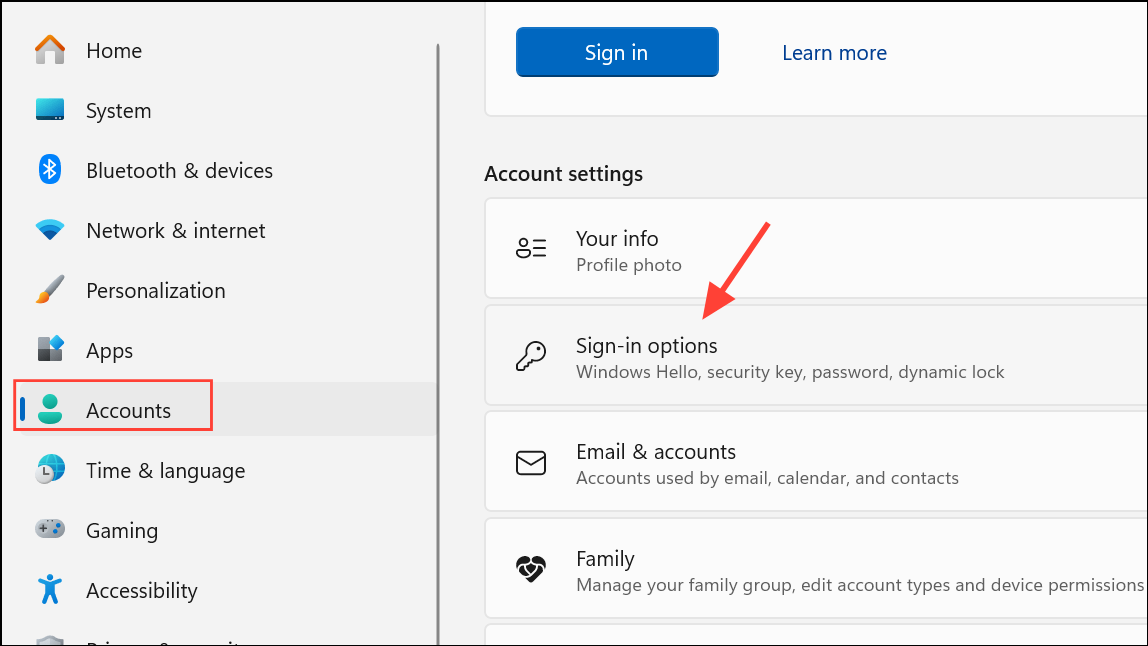
Step 1: Open the Windows Settings app by pressing Win + I. This shortcut launches the Settings window immediately.
Step 2: In the sidebar, select Accounts, then click Sign-in options on the right panel. This section manages various sign-in and privacy settings for your device.
Step 3: Scroll down to the Additional settings section. Find the toggle labeled Show account details such as my email address on the sign-in screen.
Step 4: Switch this toggle to Off. This action instructs Windows to hide your email address (and other account details) from the sign-in screen.
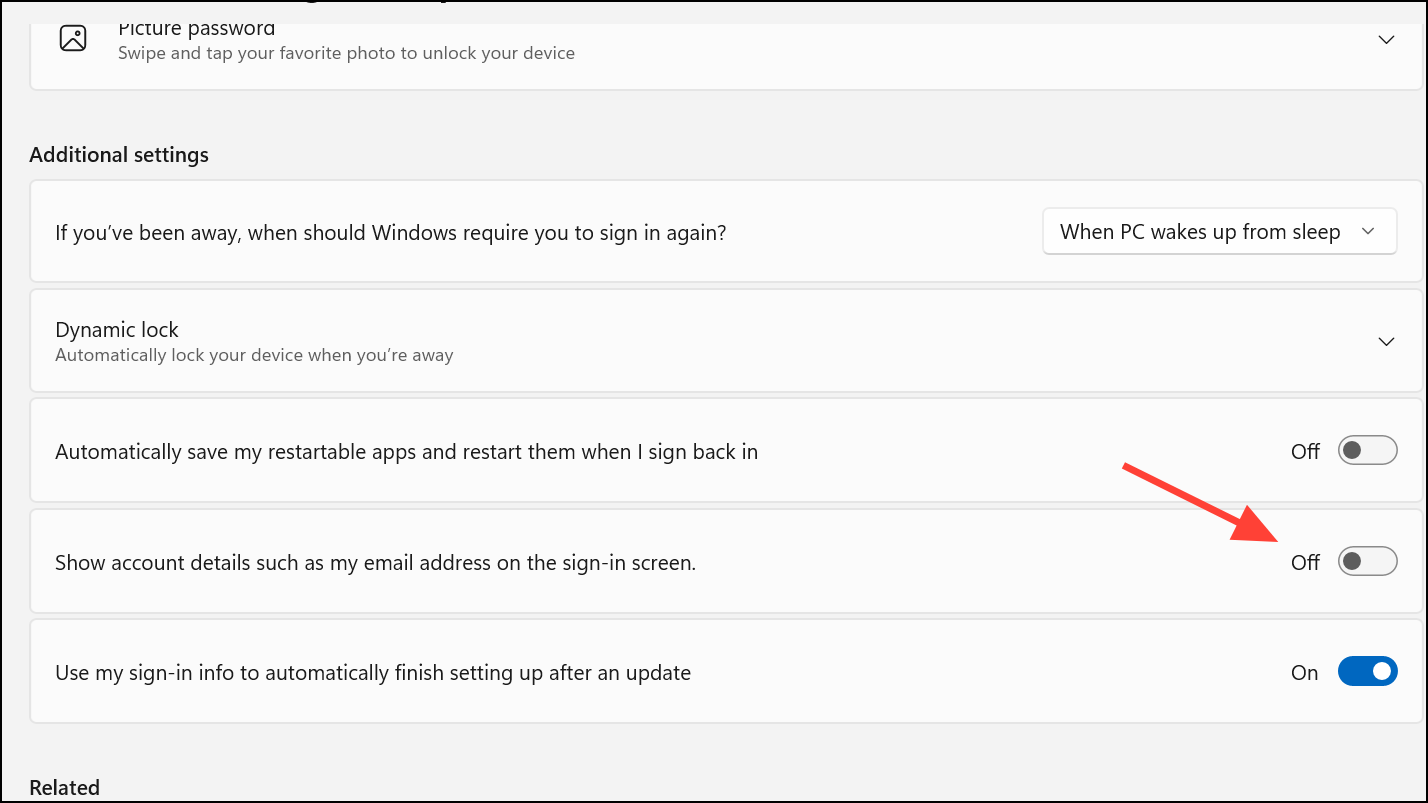
Step 5: Close the Settings app. The change takes effect immediately, but restarting your computer will confirm the update.
Hide Email Address Using Local Group Policy Editor
For users running Windows 11 Pro, Enterprise, or Education, the Local Group Policy Editor provides a way to enforce this setting across all user accounts. This approach is especially useful in business or multi-user environments.
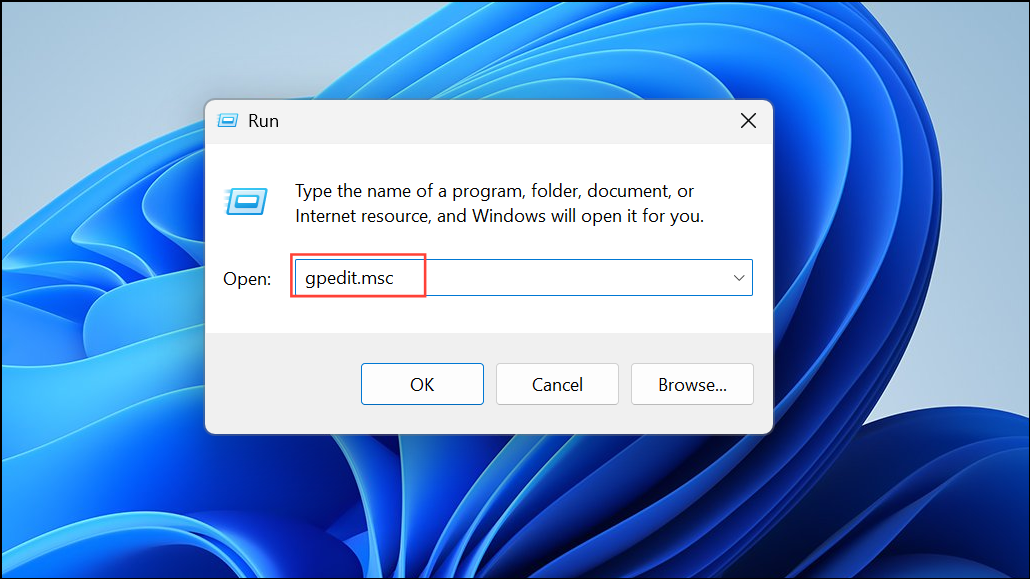
Step 1: Press Win + S and type gpedit.msc. Select the Local Group Policy Editor from the search results.
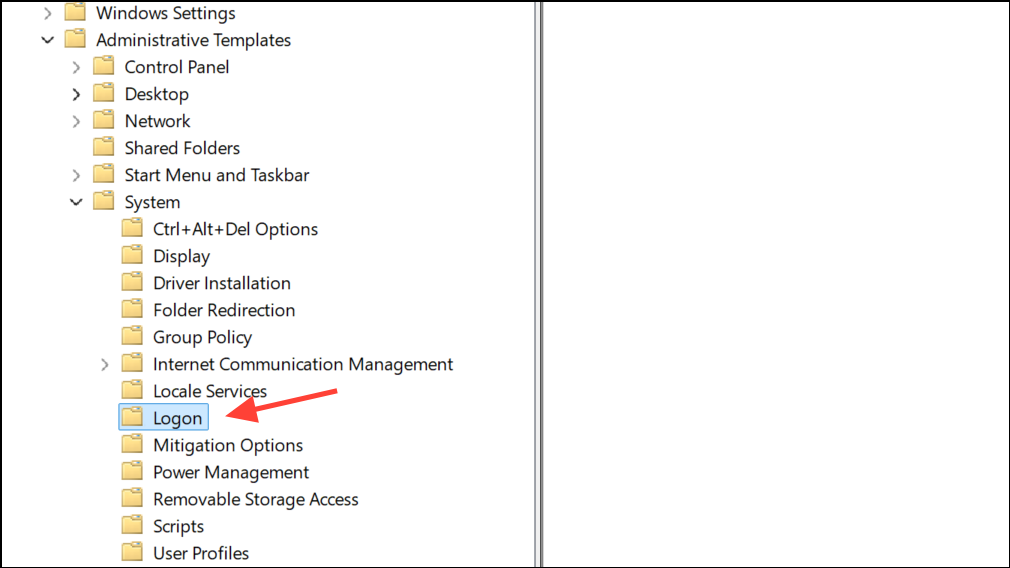
Step 2: In the left pane, navigate to Computer Configuration > Administrative Templates > System > Logon.
Step 3: Find the policy named Block user from showing account details on sign-in in the right pane. Double-click to open it.
Step 4: Set the policy to Enabled. This selection blocks all users from displaying account details, including email addresses, on the sign-in screen.
Step 5: Click OK to apply the policy. Close the Group Policy Editor and restart your computer to activate the changes.
This method overrides user-level settings and is ideal for system administrators or anyone managing multiple user profiles.
Hide Email Address Using Registry Editor
For advanced users or those on Windows 11 Home (which lacks Group Policy Editor by default), the Registry Editor offers a direct way to control this privacy setting. Editing the registry can affect system stability, so create a backup or restore point before proceeding.
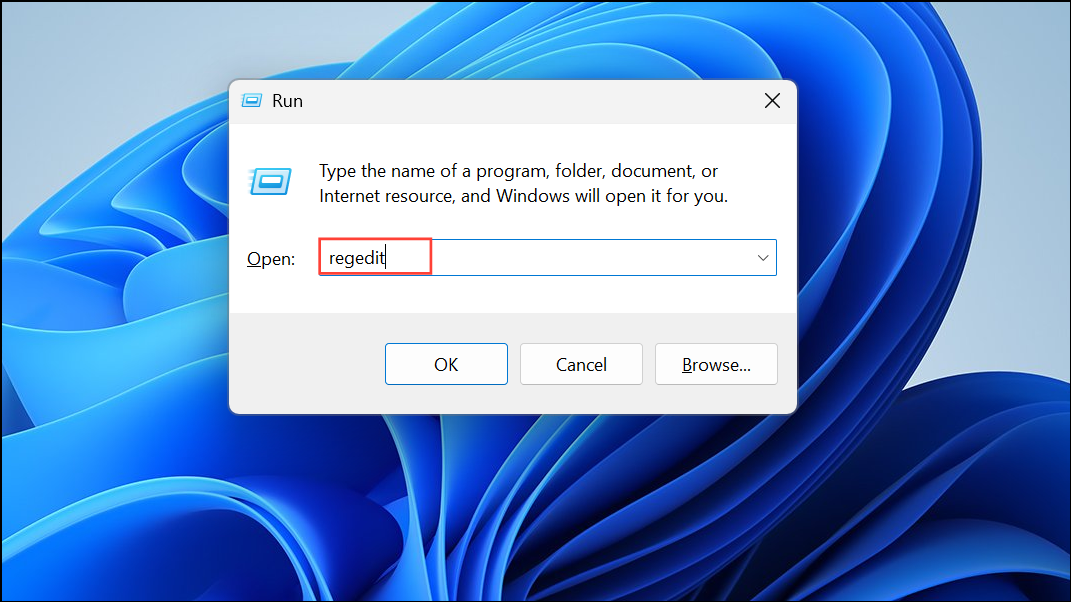
Step 1: Press Win + X and select Run. Type regedit and press Enter to open Registry Editor. Approve the UAC prompt if it appears.
Step 2: In the Registry Editor, navigate to:
HKEY_LOCAL_MACHINE\SOFTWARE\Policies\Microsoft\Windows\System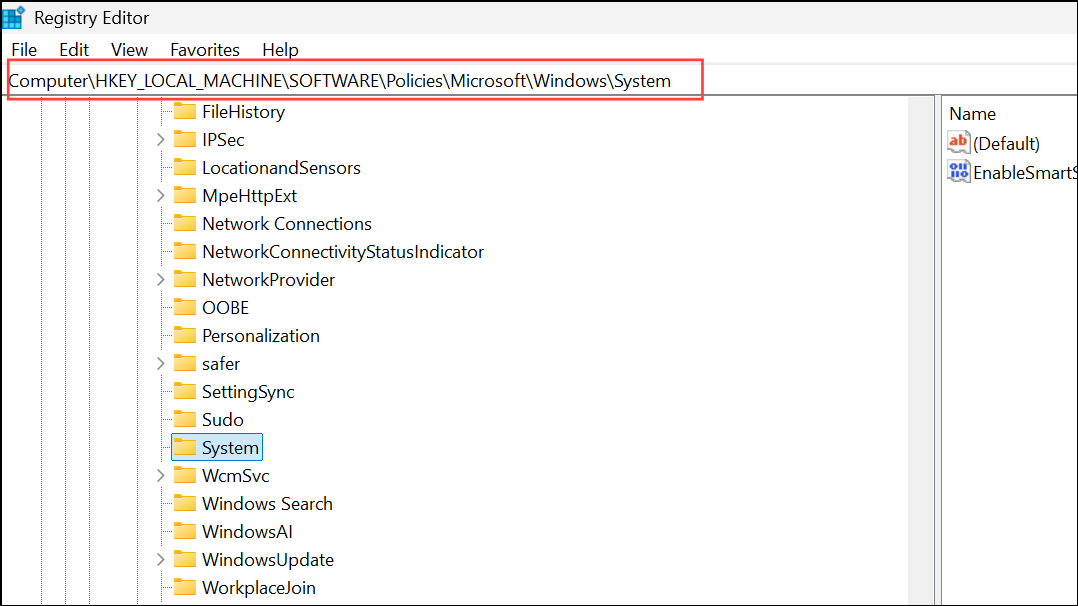
Step 3: Right-click on the System key in the left pane. Choose New > DWORD (32-bit) Value.
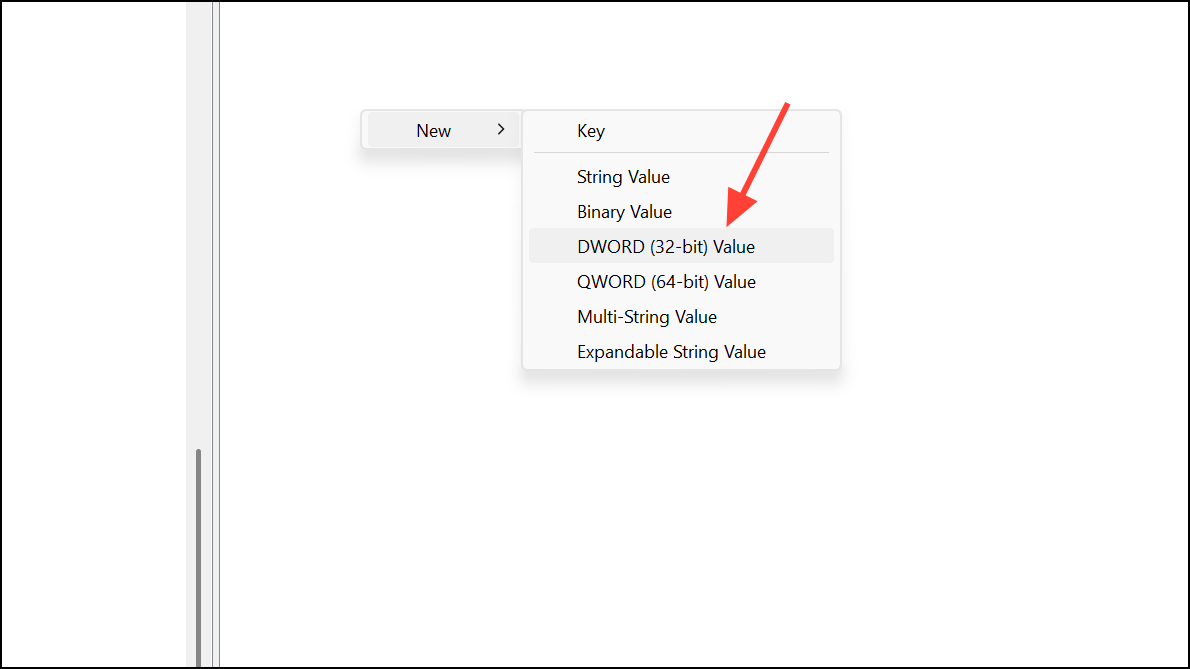
Step 4: Name the new value BlockUserFromShowingAccountDetailsOnSignin.
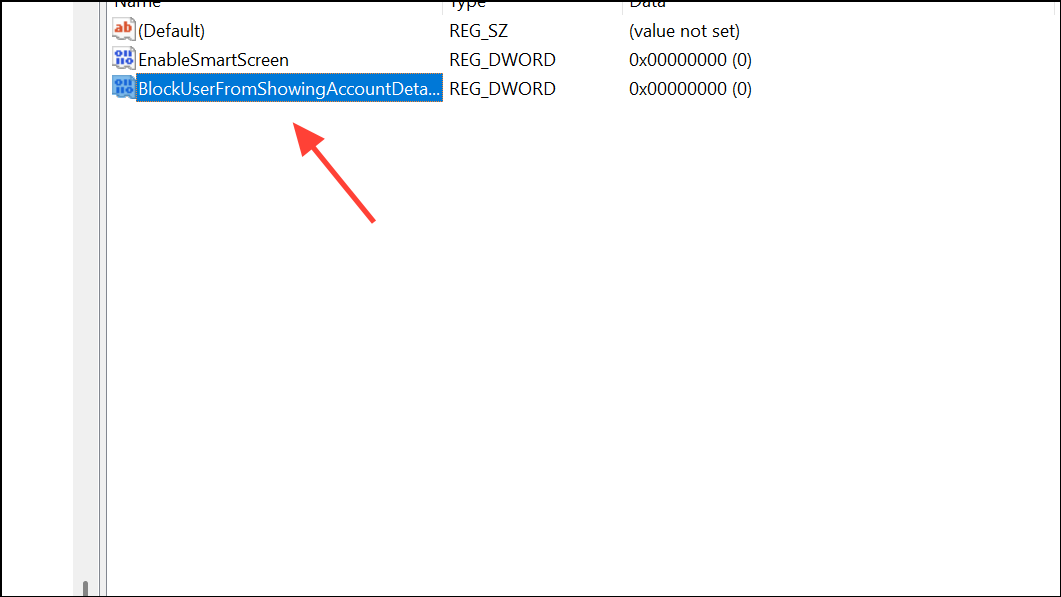
Step 5: Double-click the new DWORD and set its value to 1. Click OK to save.

Step 6: Close Registry Editor and restart your computer. The sign-in screen will now hide your email address and other account details.
Switch to a Local Account to Remove Email Address Entirely
If you want to remove all traces of your Microsoft account—including your email address—from the login experience, switching to a local account is the most direct approach. This method severs the link between your device and your Microsoft account, which means you won’t be able to use features that require a Microsoft account (such as OneDrive sync or Microsoft Store purchases).
Step 1: Open Settings with Win + I. Go to Accounts > Your info.
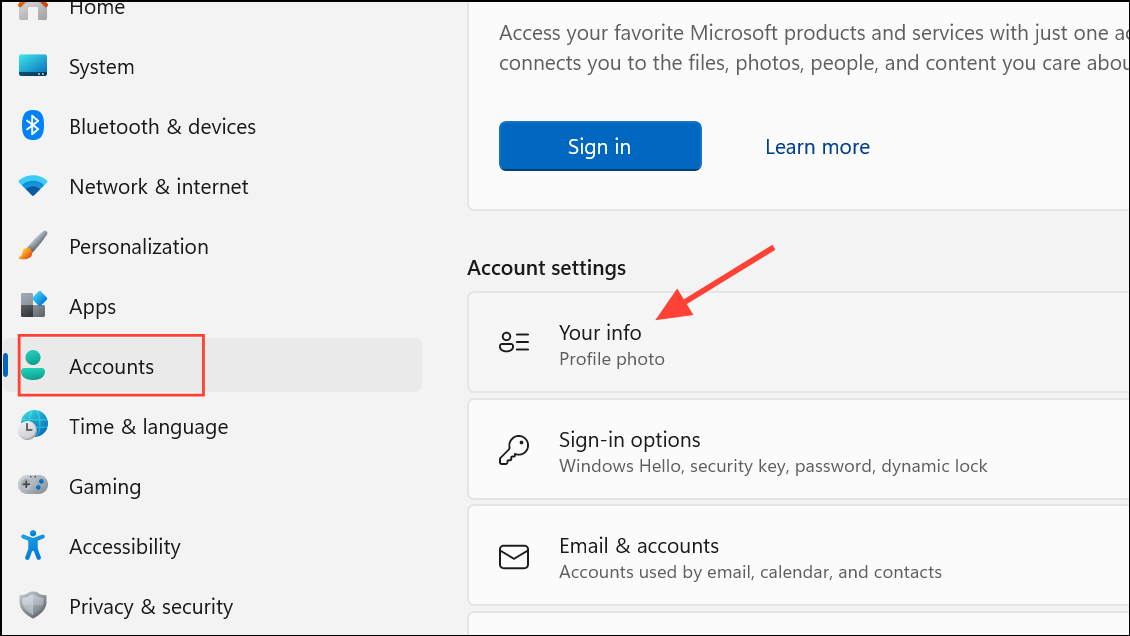
Step 2: Click Sign in with a local account instead. Follow the on-screen prompts to create a username and password for your local account.
Step 3: Complete the process and sign out. When you sign back in, your email address will no longer appear anywhere on the login screen, as your account is now local-only.
This method is especially effective if you want to maximize privacy and minimize Microsoft’s access to your usage data. However, you’ll lose access to Microsoft-specific services tied to account syncing.
Remove Connected Email Accounts From Windows 11
Sometimes, even after removing your Microsoft account, other email accounts may remain connected to Windows 11 (such as work or school accounts). Disconnecting these prevents sign-in prompts and further exposure of your email information.
Step 1: Open Settings (Win + I), then go to Accounts > Email & accounts.
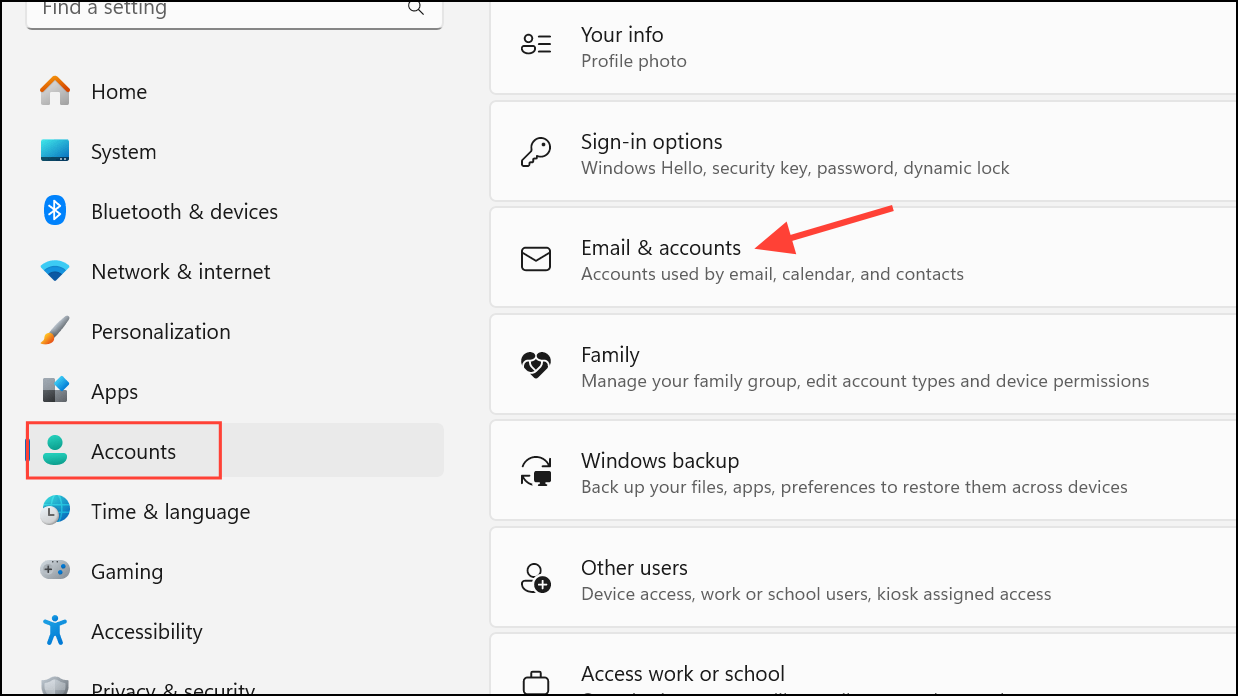
Step 2: Under Accounts used by other apps or Accounts used by email, calendar, and contacts, locate the account you wish to remove.

Step 3: Click the account, then select Remove or Manage, followed by Remove in the dialog box.

Step 4: Confirm the removal. The account and its email address will be disconnected from Windows and no longer appear in login prompts.
Adjusting these settings shields your email address from public view on the Windows 11 login screen and streamlines your sign-in experience. For ongoing privacy, periodically review your account and login configurations, especially after major updates or device changes.