
Windows 11 often displays the "You need permission to perform this action" message when you try to delete, move, or modify certain files or folders, even if your account has administrator rights. This error can prevent software updates, block file management tasks, and slow down your workflow. Several factors can trigger this issue, including ownership conflicts, running processes, or security software restrictions. Addressing these causes directly restores your ability to manage files without unnecessary interruptions.
Change File or Folder Ownership and Permissions
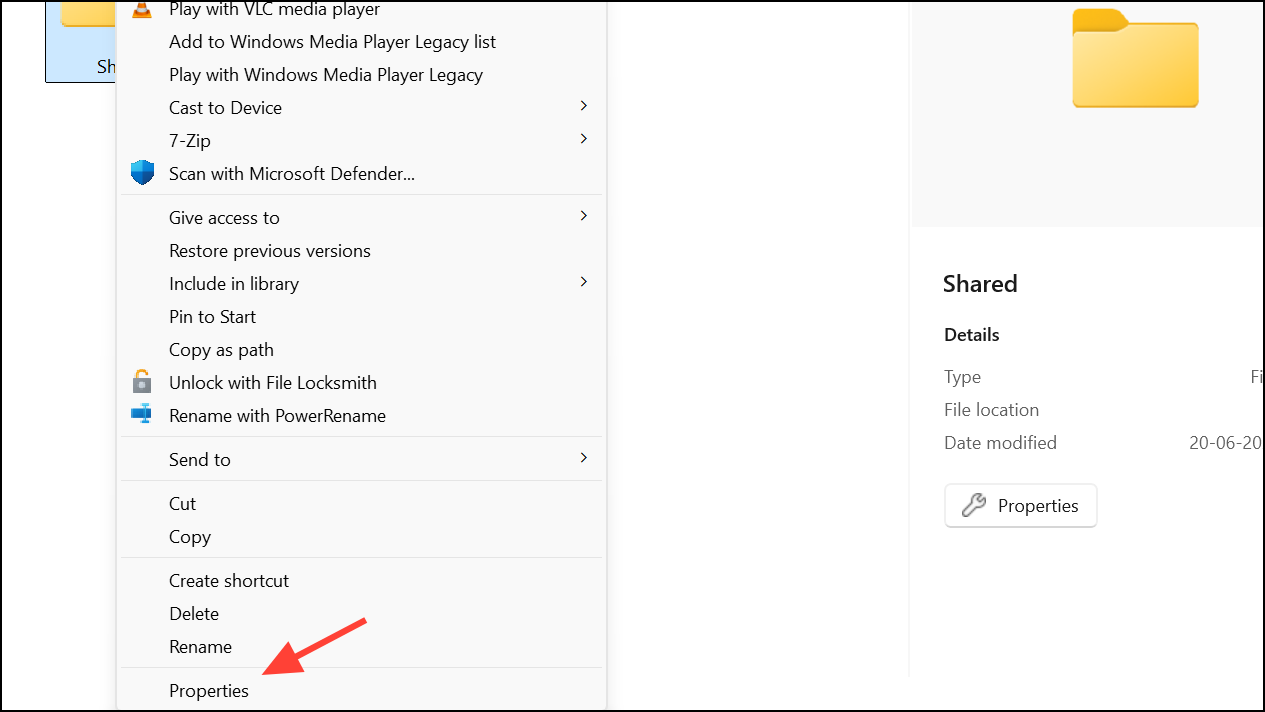
Step 1: Right-click the file or folder causing the error and select Properties from the context menu. This opens the properties dialog for the selected item.
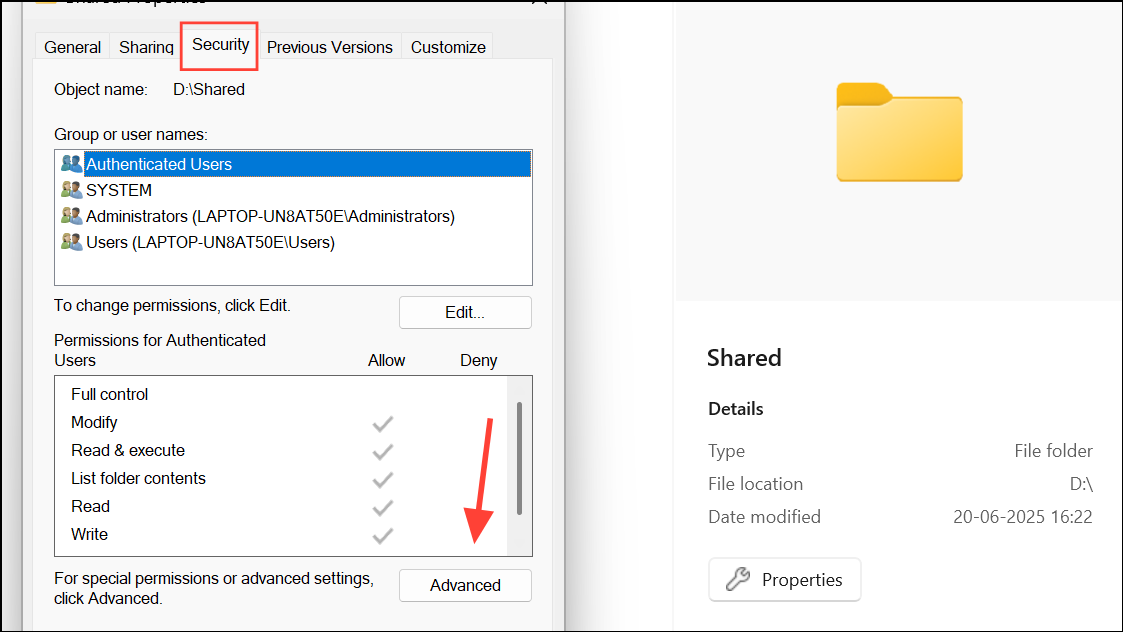
Step 2: Go to the Security tab, then click the Advanced button near the bottom. The advanced security settings window allows you to manage ownership and permissions in detail.
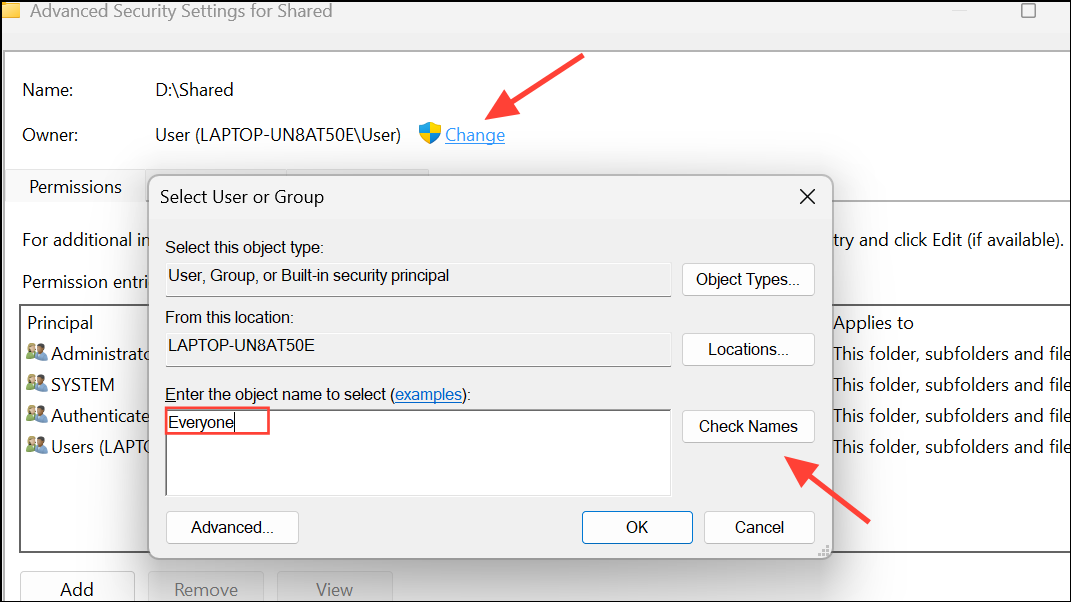
Step 3: At the top of the advanced window, locate the Owner field and click Change. In the prompt, enter your Windows username or type Everyone (without quotes) if you want to grant universal access. Click Check Names to verify, then click OK.
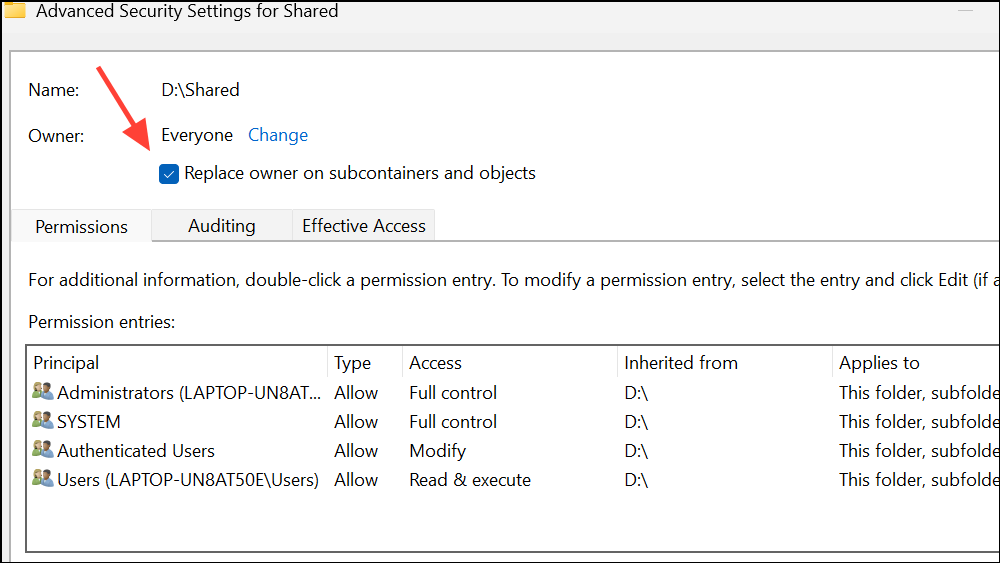
Step 4: If you're working with a folder, check the box labeled Replace owner on subcontainers and objects to apply ownership changes to all files and subfolders inside. Click Apply to update the ownership.
Step 5: Back in the advanced security settings, click Add to create a new permission entry. Click Select a principal, enter your username or Everyone, and click OK.
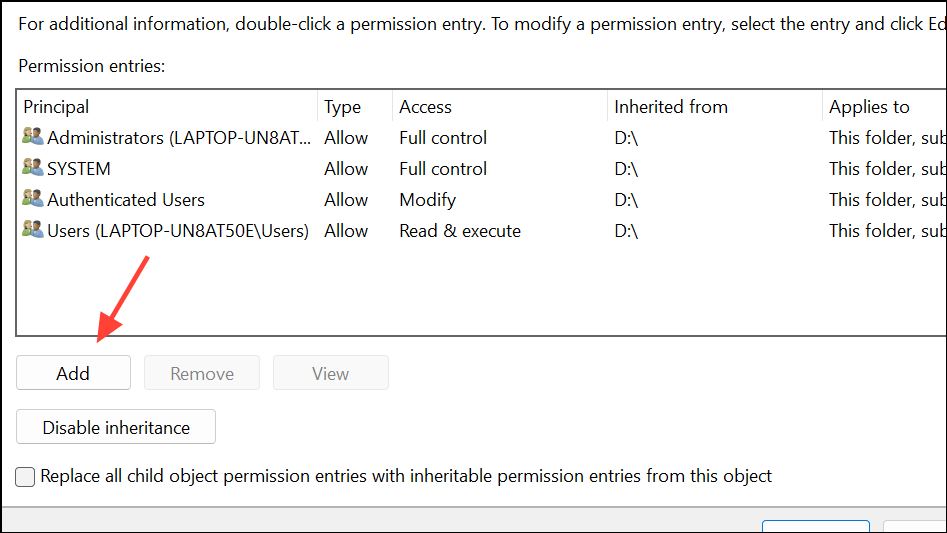
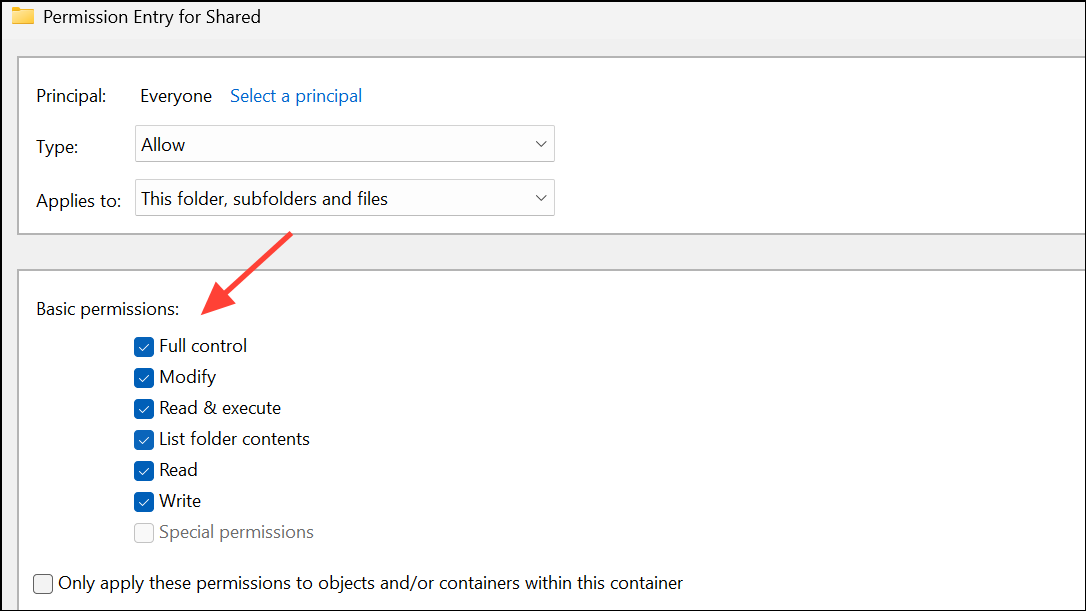
Step 6: In the permissions window, check Full control to grant all permissions. For folders, you can also check Only apply to subcontainers and objects if you want to restrict changes to contents only. Click OK to confirm.
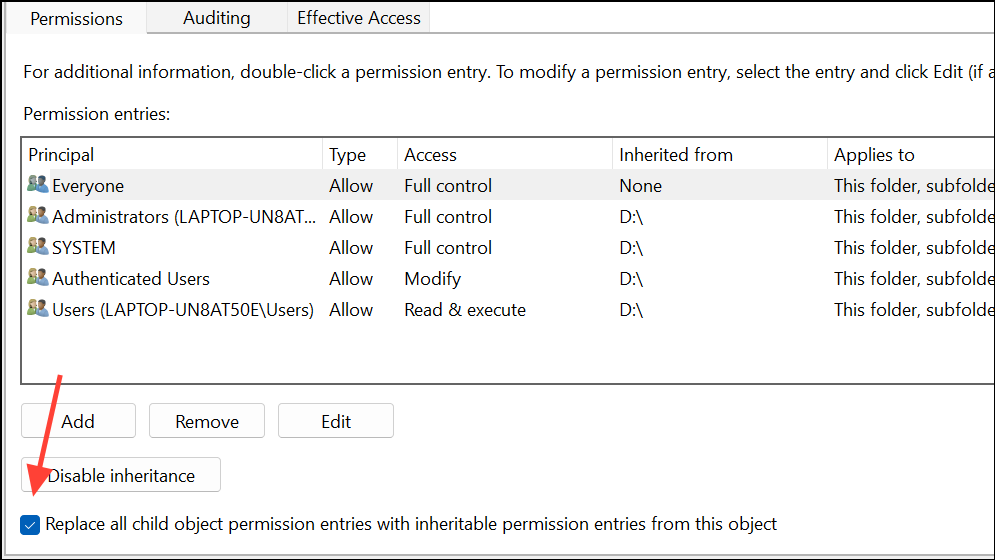
Step 7: To ensure all nested files and folders inherit the new permissions, check Replace all child object permission entries with inheritable permission entries from this object. Click Apply and then OK to finalize changes.
After these steps, retry your action. If the error persists, check individual files within the folder, as some may not inherit permissions correctly. Repeat the process for any problematic files.
Run the Application or File Manager as Administrator
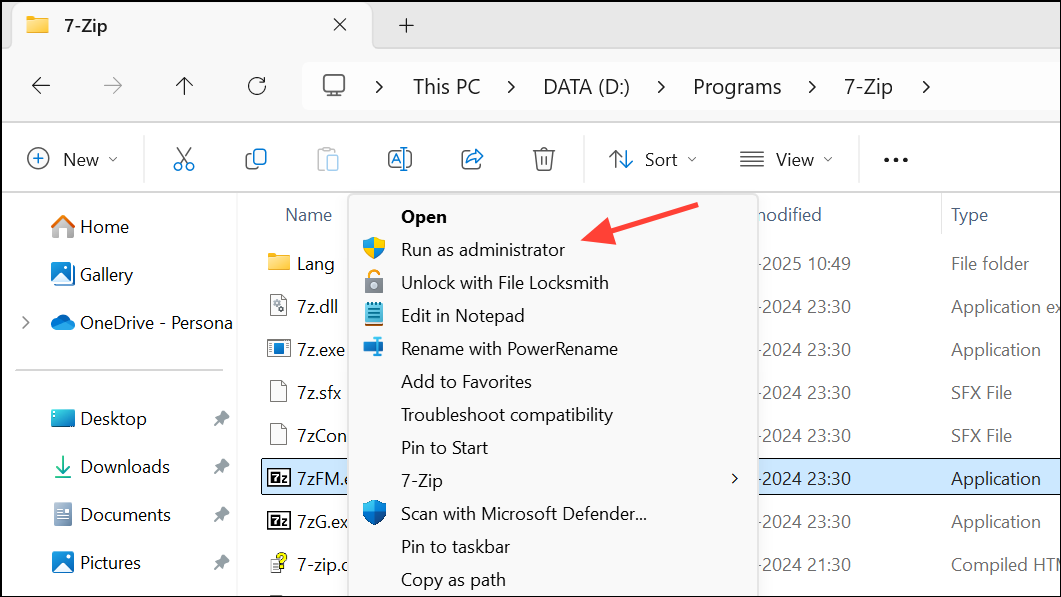
Step 1: If you are using a third-party tool like WinRAR or File Explorer to manage files, right-click its shortcut or executable and select Run as administrator. This temporarily elevates your access level, bypassing some security restrictions.
Step 2: Perform the desired file operation—such as extracting, moving, or deleting—while the application is running with elevated rights. Administrative privileges often resolve permission issues that standard user mode cannot.
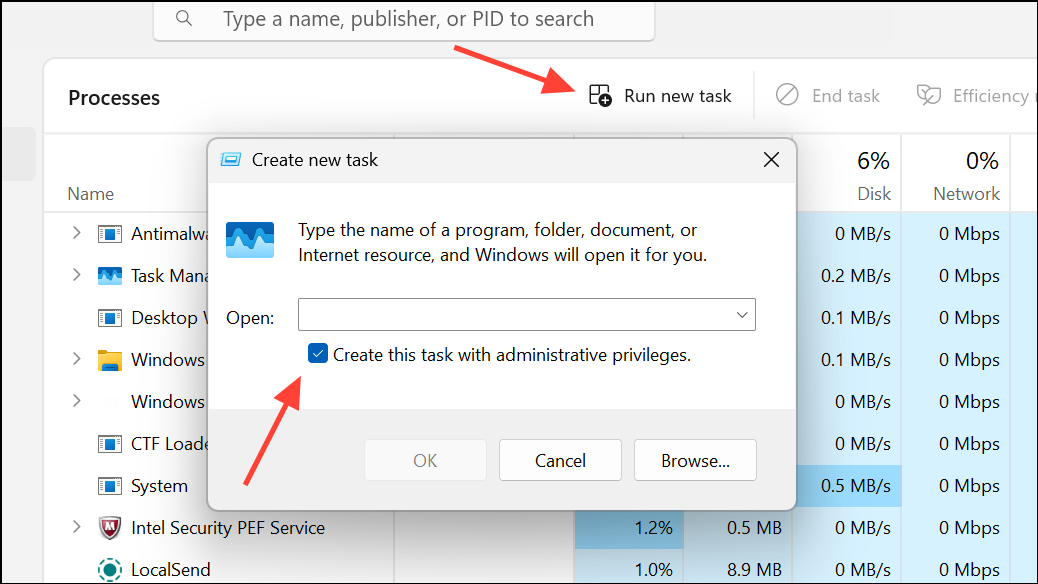
If you need to run File Explorer as administrator, open Task Manager (Ctrl+Shift+Esc), end the Windows Explorer process, then use File > Run new task, type explorer.exe, and check Create this task with administrative privileges before clicking OK.
Terminate Background Processes Using the File
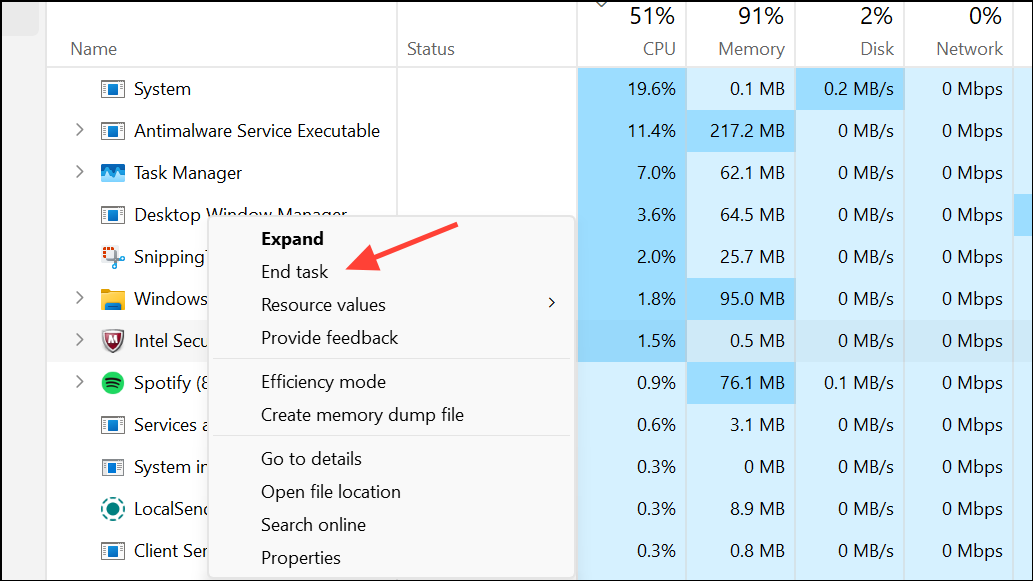
Step 1: If a file or folder is in use, Windows will block changes to it. Open Task Manager (Ctrl+Shift+Esc), review the list of running processes, and look for any that might be using the file in question.
Step 2: Right-click the process and select End task to stop it. Once the file is no longer in use, attempt your operation again.
This method is especially useful for executable files, installers, or files used by background services.
Disable Antivirus or Security Software Temporarily
Step 1: Security software may lock files for scanning or protection, causing permission errors. Temporarily disable your antivirus or Windows Defender by accessing the application settings or Windows Security Center.
Step 2: After disabling, try the file operation again. If it succeeds, re-enable your security software immediately to maintain system protection.
Uninstalling third-party antivirus (like Bitdefender) has resolved persistent permission issues for some users, but only do this if you're confident in your system's safety during troubleshooting.
Use Command Prompt or PowerShell as Administrator
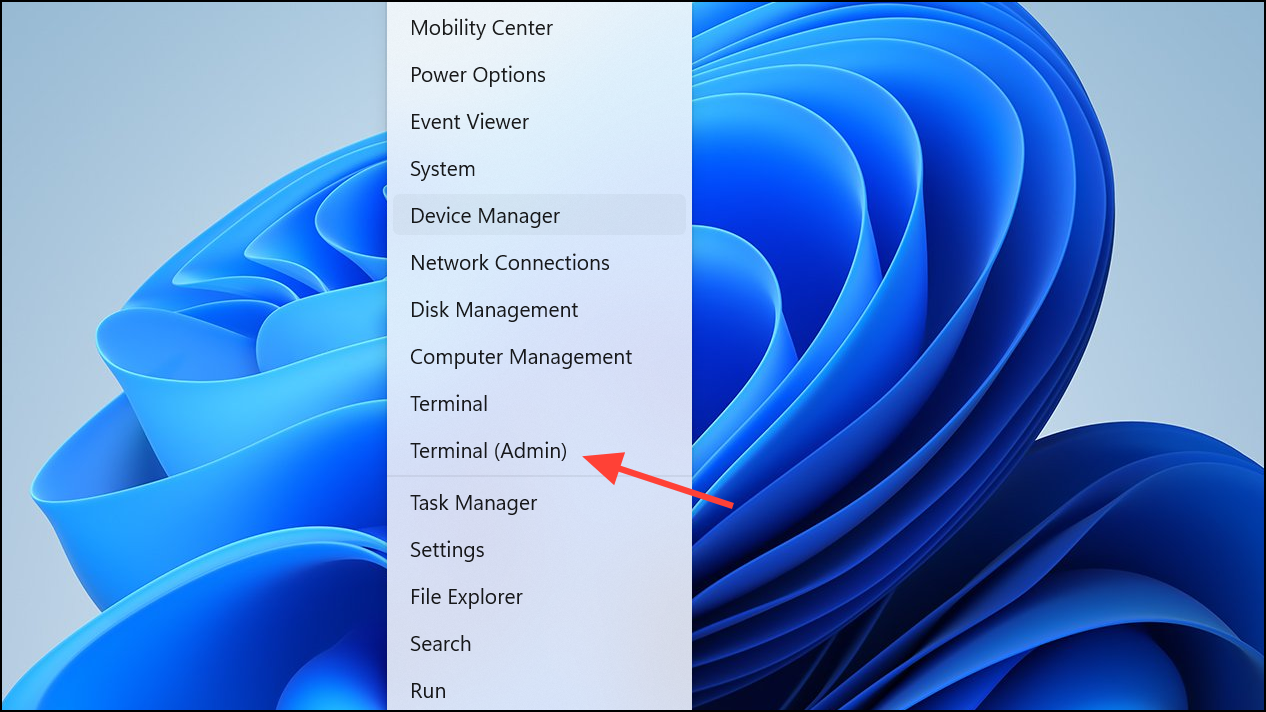
Step 1: Open Command Prompt or PowerShell with administrative rights. Press Windows Key + X and select Windows Terminal (Admin) or Command Prompt (Admin).
Step 2: Navigate to the file's directory using cd command. To delete a file, type:
del "filename.ext"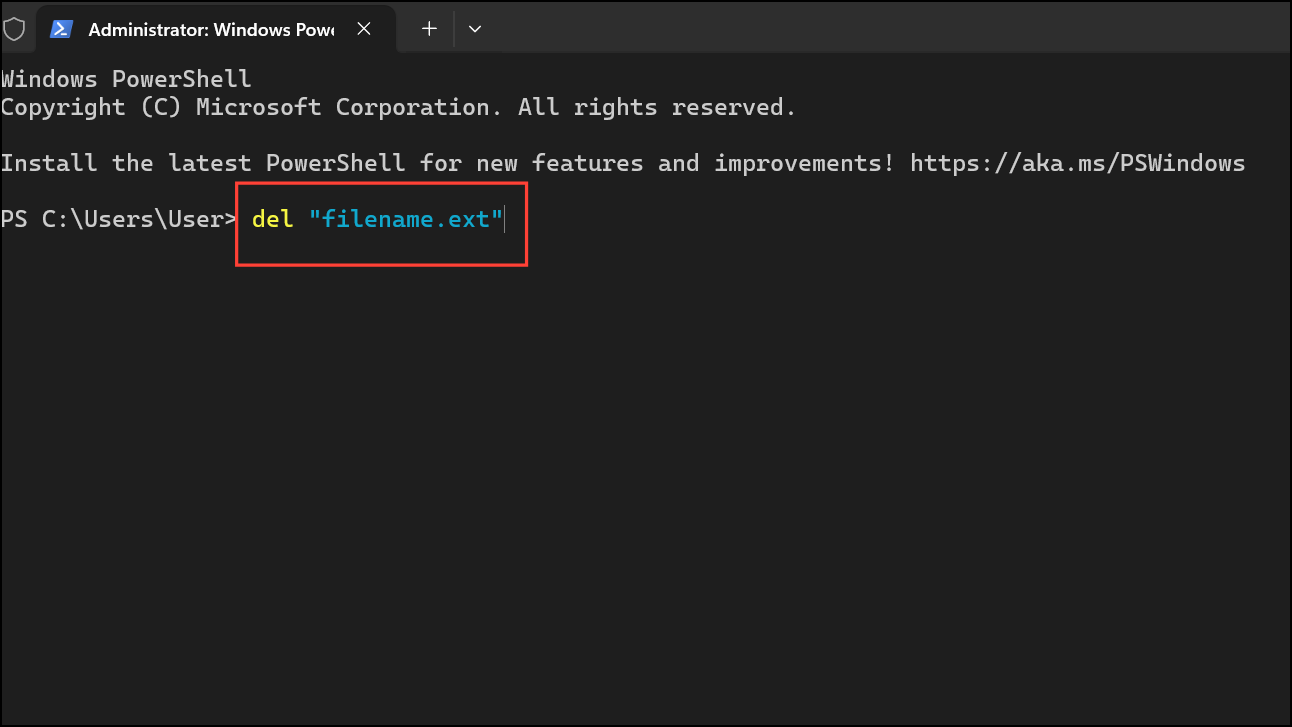
Or use PowerShell to remove a folder and its contents:
Remove-Item "C:\path\to\folder" -Recurse -Force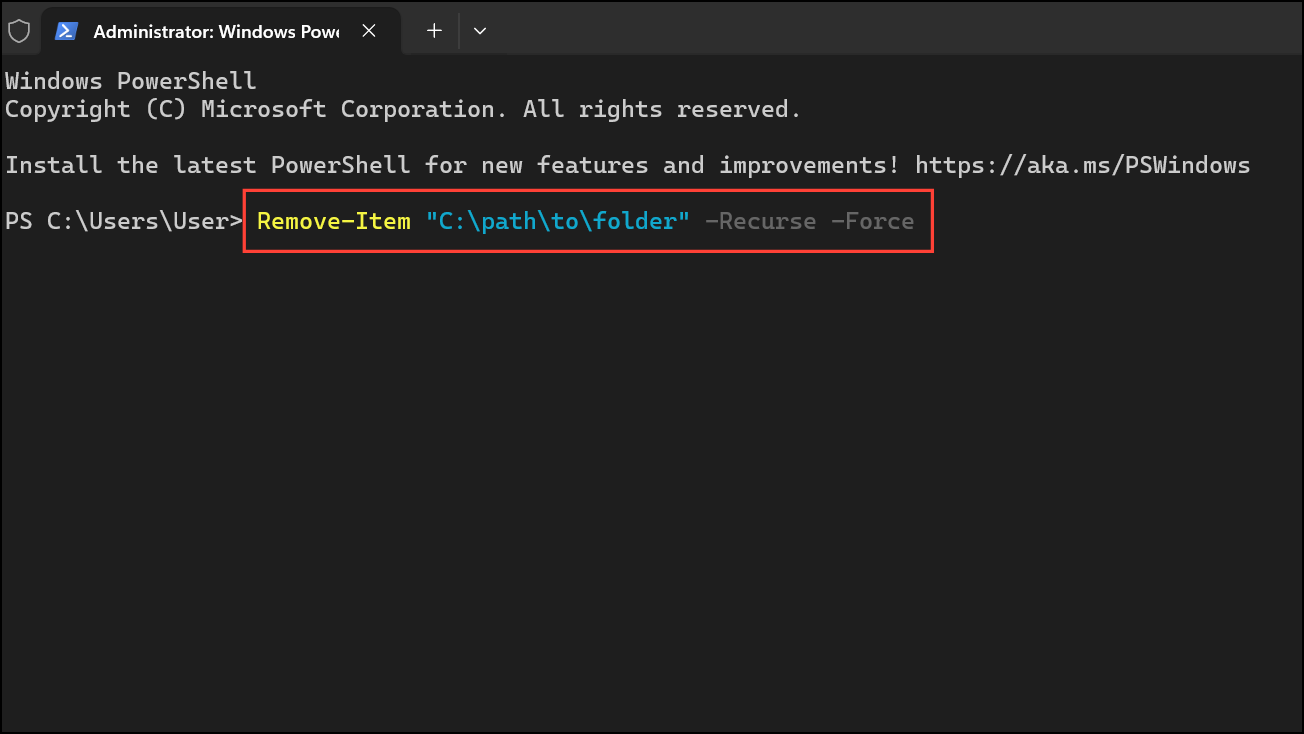
Running these commands as administrator bypasses some permission blocks, but access may still be denied if another process is using the file or if system-level protections are in place.
Additional Tips and Troubleshooting
- Restart your PC after making permission changes to ensure settings take effect.
- If a file remains locked, boot into Safe Mode and repeat the steps above. Safe Mode loads only essential services, reducing interference from background applications.
- Always back up important data before changing permissions or deleting files.
For persistent system file issues, use the DISM command to repair Windows components. Open an elevated Command Prompt and run:
DISM /Online /Cleanup-Image /RestoreHealthResolving "You need permission to perform this action" in Windows 11 restores control over your files and streamlines daily tasks. If one method doesn't work, try the next—most permission problems can be fixed with a bit of persistence.