Despite the hardware requirements like TPM 2.0 and Secure Boot that Microsoft has implemented for Windows 11, preventing installation on many devices—including Macs—there is still a way for Mac users to run Windows 11. The Parallels app bypasses these requirements, allowing you to install and use Windows 11 on your macOS device.
What is the Parallels app?
Parallels is a third-party application for macOS that enables you to create virtual machines for running various operating systems, including Windows. Unlike Boot Camp, which requires you to boot into either macOS or Windows, Parallels lets you run both operating systems simultaneously. This means you can drag and drop files between macOS and Windows and even run Windows applications directly from your Mac’s dock or home screen, providing a seamless integration for users transitioning from Windows to macOS or those who need both systems for their workflow.
Downloading and installing Parallels 17 on your Mac
To get started with running Windows on your Mac, you’ll first need to download and install Parallels 17.
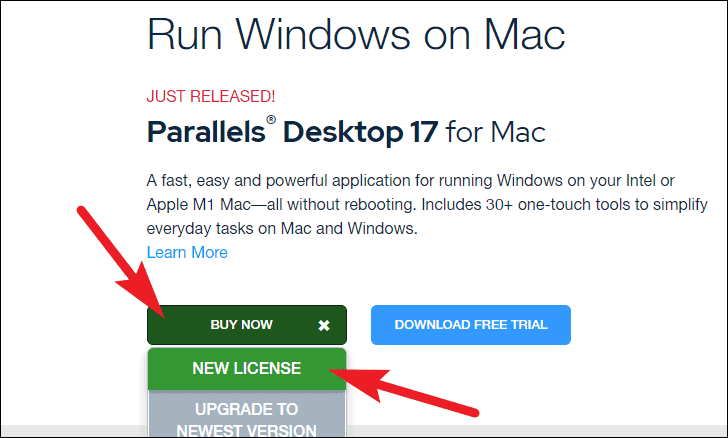
- Open your preferred web browser and navigate to www.parallels.com. If you want to purchase the full version, click on the ‘BUY NOW’ button and select ‘NEW LICENSE.’ Alternatively, to try it out first, click on the ‘Download Free Trial’ option available on the page.
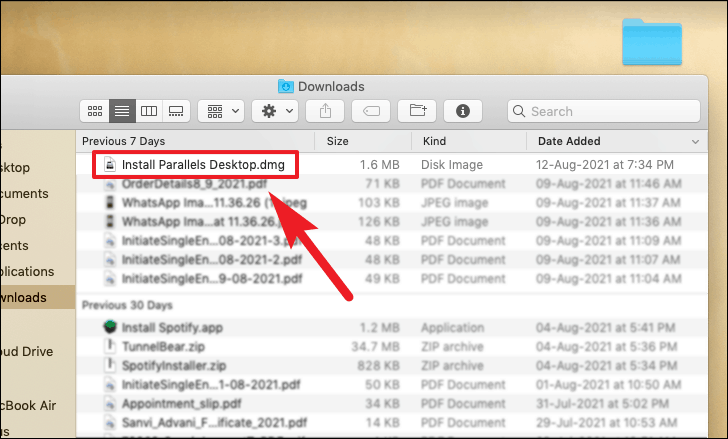
- Once the download is complete, go to your ‘Downloads’ folder and double-click on the
Install Parallels Desktop.dmgfile. This will open a new window on your screen.
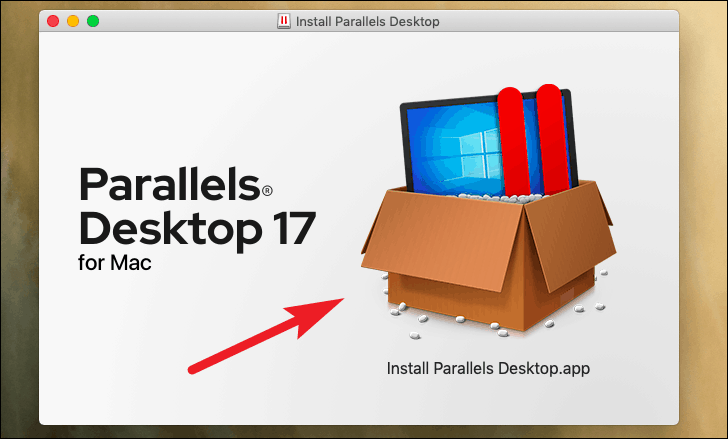
- In the new window, double-click on the ‘Install Parallels Desktop.app’ icon to begin the installation process.
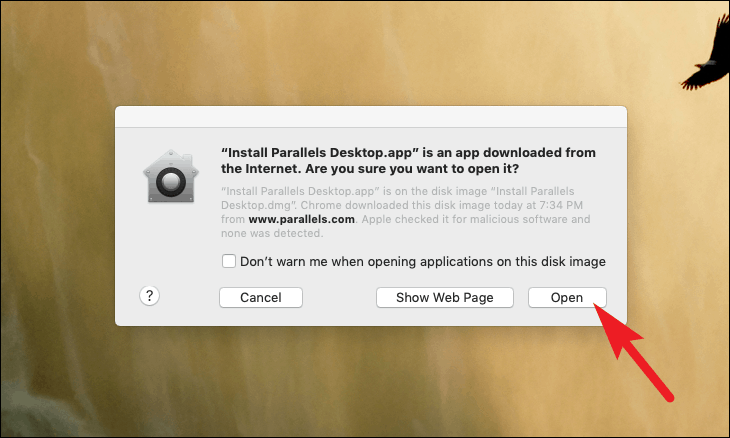
- If a security alert appears, read it carefully and then click the ‘Open’ button to proceed.
- The installer will now download the complete Parallels application onto your system. Wait for the download to finish.

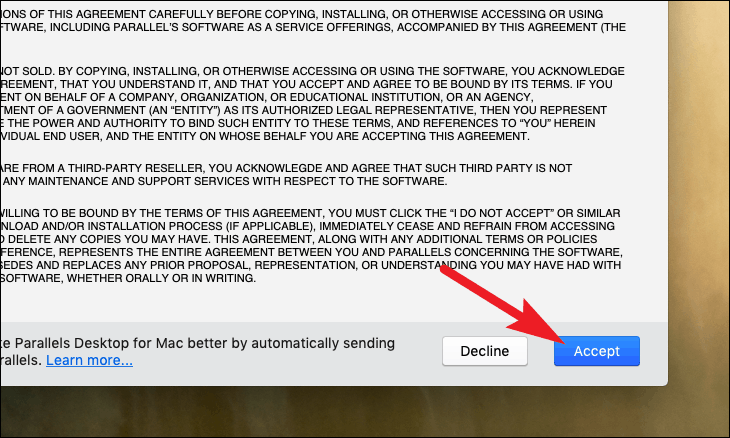
- After the download, the installation window will appear. Click the ‘Accept’ button at the bottom right corner to continue.
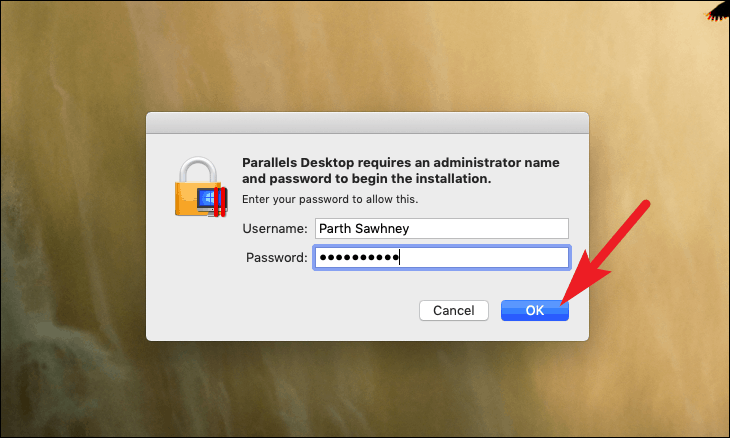
- When prompted, enter your user account password or use Touch ID to proceed with the installation.
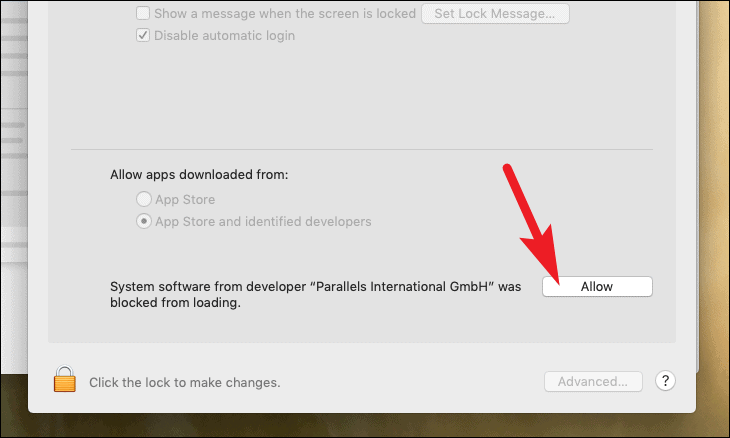
- If a system extension alert appears, click on the ‘Open Security Preferences’ button. Parallels requires permission to load system extensions.
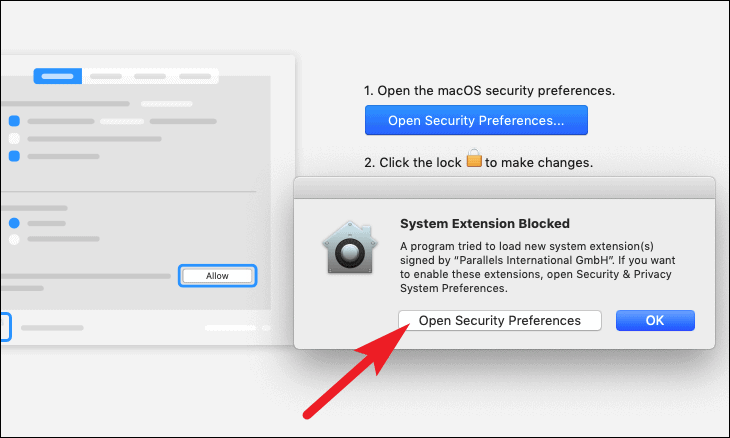
- In the ‘Security & Privacy’ window that opens, click the ‘Allow’ button next to ‘Parallels International GmbH’ to grant the necessary permissions.
With these steps completed, Parallels is now installed on your Mac, and you should see its home screen ready for use.
Installing Windows 11 using a bootable disk, ISO file, or optical drive
Parallels allows you to install Windows using different methods such as a bootable USB drive, an ISO file, or an optical drive. Below is how you can install Windows 11 using a bootable disk:
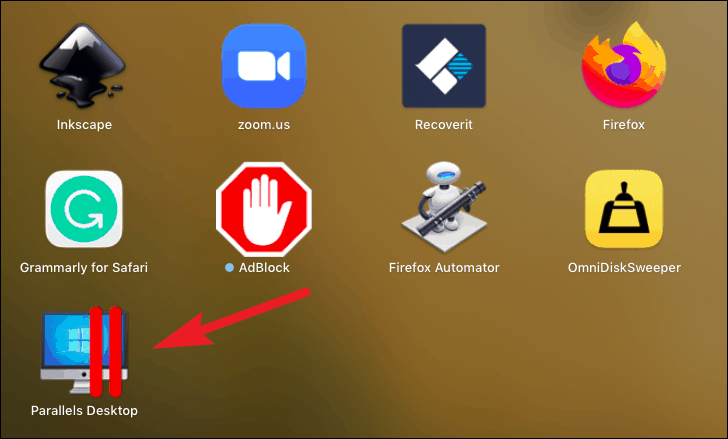
- Launch the Parallels app from your dock or Launchpad.
Note: If you’re using a bootable USB drive for the installation, make sure it’s inserted into your Mac before proceeding.
- Click on ‘Install Windows or another OS from a DVD or image file’ and then click ‘Continue.’

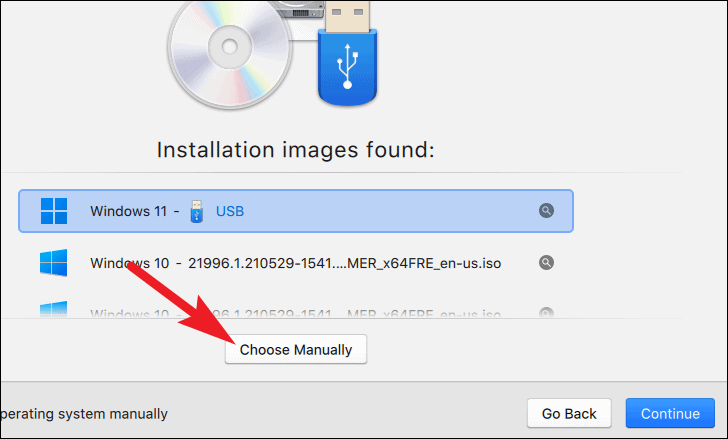
- Parallels will automatically detect available installation sources. Select your bootable drive or ISO file from the list and click ‘Continue.’

- If your source isn’t listed, click ‘Choose Manually’ to locate it using Finder.
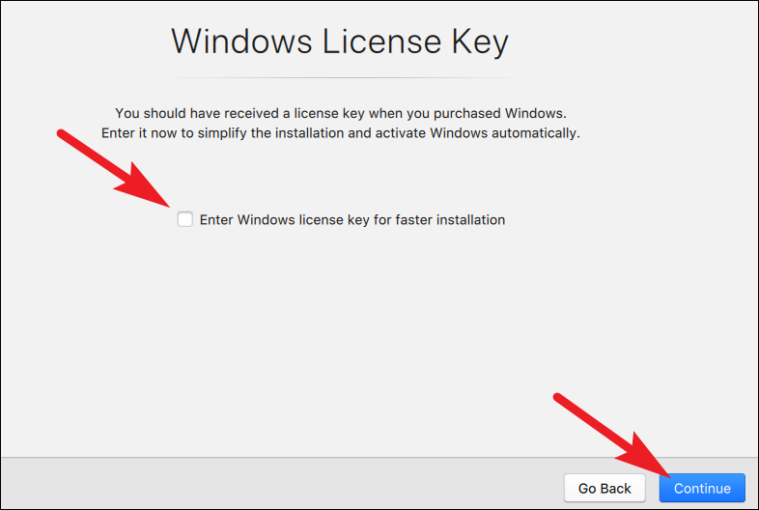
- You may be prompted to enter a Windows license key. You can input it now or uncheck ‘Enter Windows license key for faster installation’ to enter it later. Click ‘Continue’ to proceed.
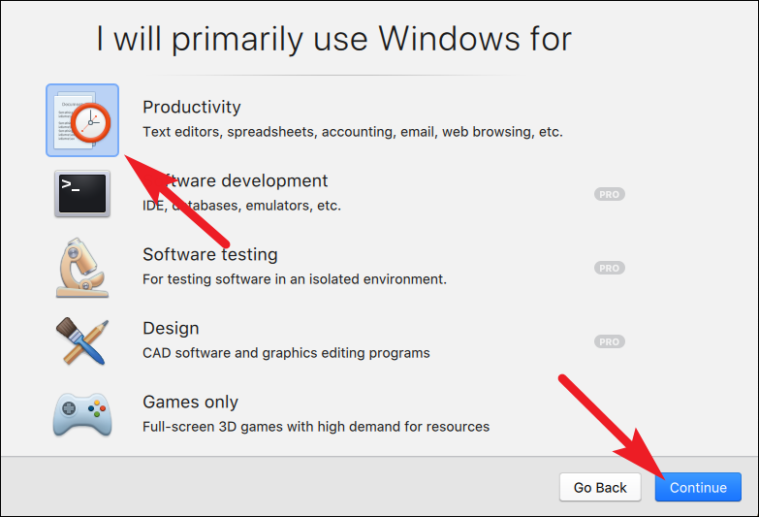
- Choose how you plan to use Windows—options include productivity or gaming—and then click ‘Continue.’
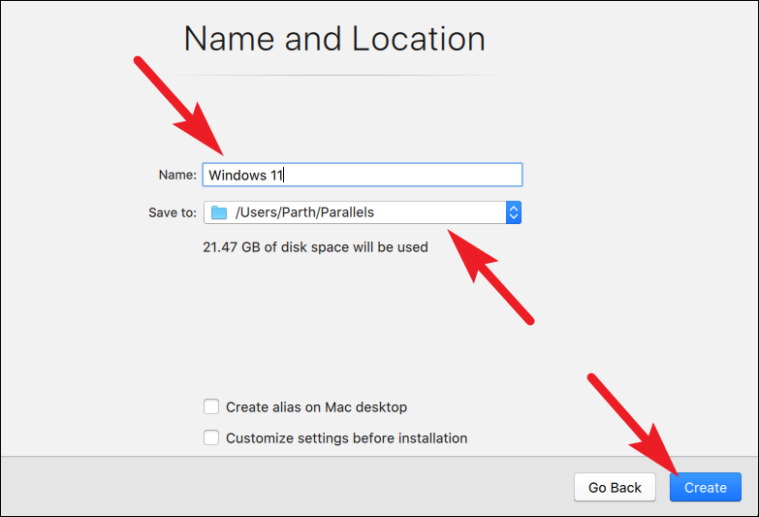
- Specify a name and location for your virtual machine. If you wish to change the default installation directory, click the dropdown menu to select a different folder. After configuring your preferences, click ‘Create.’
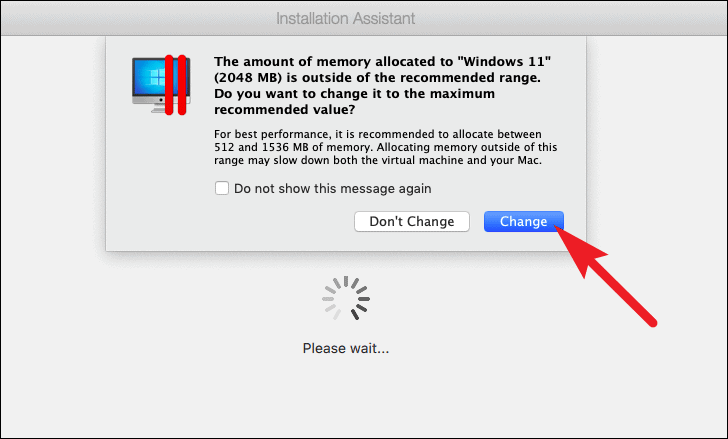
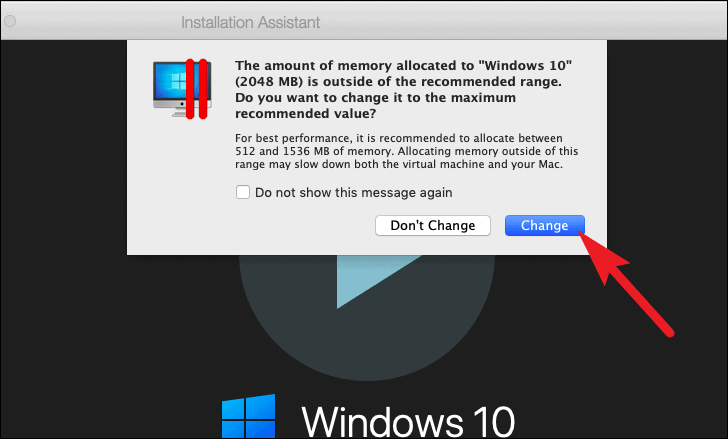
- If a memory allocation alert appears, read it carefully and click ‘Change’ to adjust the settings for optimal performance.
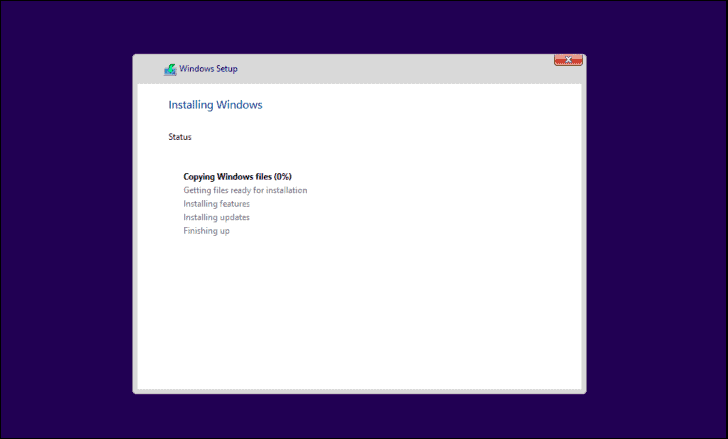
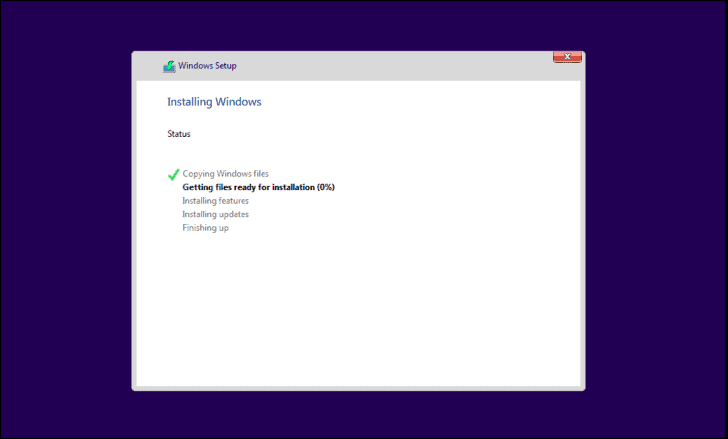
- Parallels will now begin installing Windows 11. Wait for the installation process to complete.
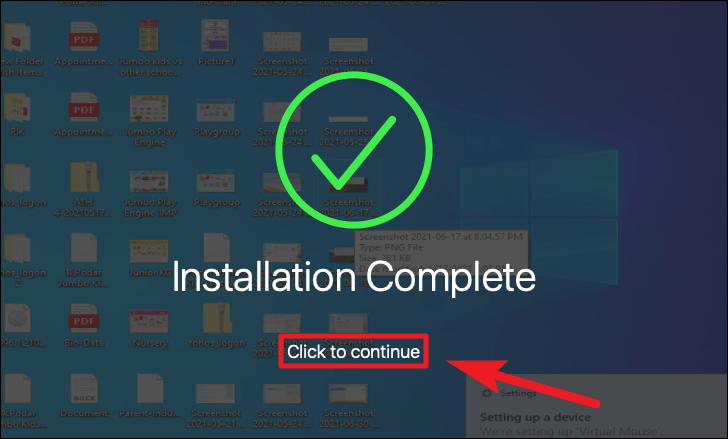
- Once the installation is finished, click on ‘Click to continue’ to access the Windows 11 home screen.
Installing Windows 11 on your Intel Mac without a bootable disk or ISO file
If you don’t have a bootable disk or ISO file, you can still install Windows 11 on your Intel Mac by first installing Windows 10 and then upgrading to Windows 11 through the Windows Insider Program.
- Launch the Parallels app from your dock or Launchpad.

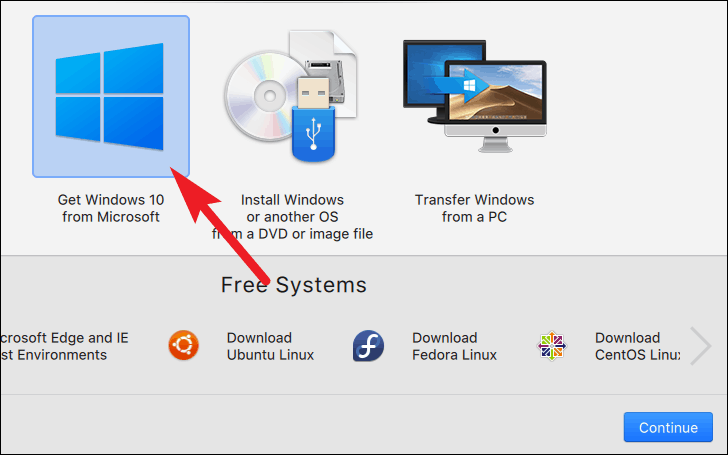
- Select ‘Get Windows 10 from Microsoft’ and click ‘Continue.’
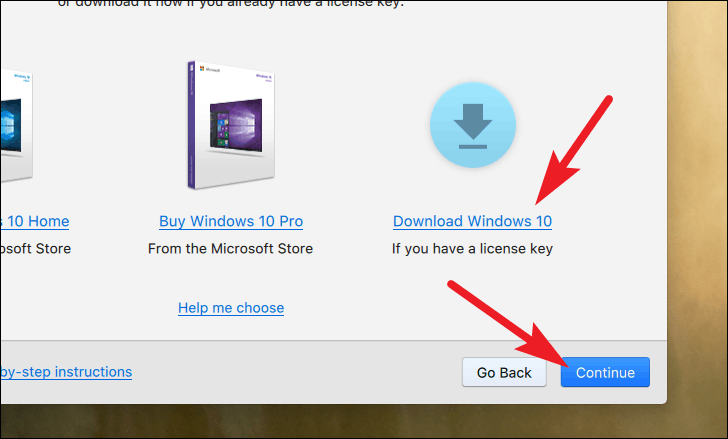
- Click on ‘Download Windows 10’ and then click ‘Continue.’
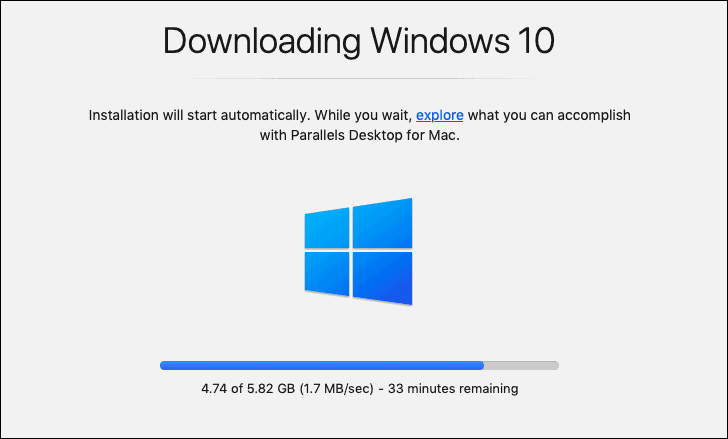
- Wait for Parallels to download Windows 10. This may take some time depending on your internet speed.
- After the download, Parallels will automatically begin installing Windows 10. If a memory allocation alert appears, click ‘Change’ to adjust the settings for optimal performance.
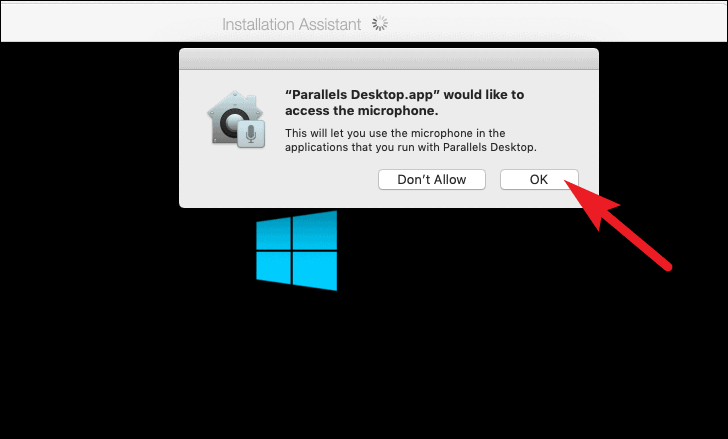
- Parallels may request access to your camera. Click ‘OK’ to allow or ‘Don’t Allow’ if you prefer. This permission lets Windows apps use your Mac’s camera.

- Similarly, Parallels will request access to your microphone. Grant permission based on your preference.
- Wait for Windows 10 to finish installing. The virtual machine will restart during the installation process.
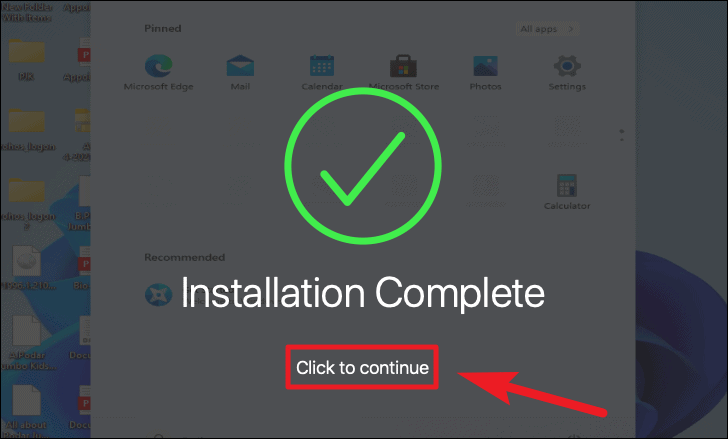
- Once the installation is complete, click on ‘Click to continue’ to proceed.
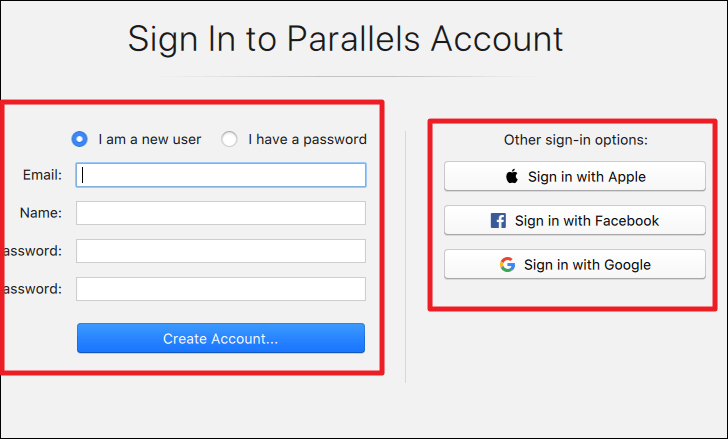
- Sign in to your Parallels account or create a new one. You can also sign in using Apple, Facebook, or Google.
With Windows 10 running, you’re now ready to upgrade to Windows 11 via the Windows Insider Program.
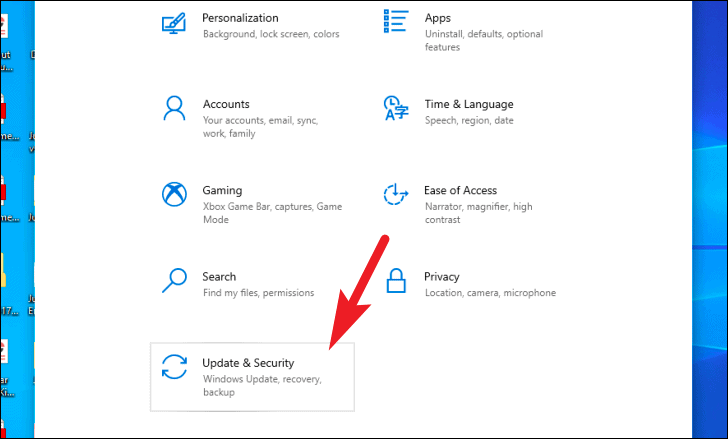
- Click on the ‘Start Menu’ and then on the ‘Settings’ icon (represented by a gear).

- In the Settings window, navigate to ‘Update & Security.’
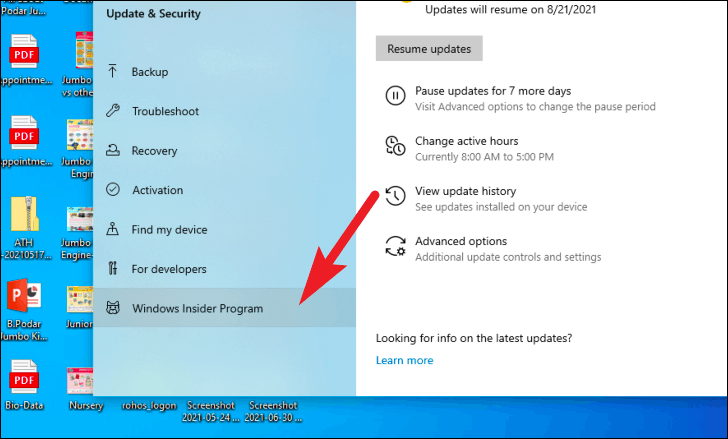
- From the left sidebar, select ‘Windows Insider Program’ and click ‘Get started.’
- Click ‘Register’ to join the Windows Insider Program. Follow the prompts to sign up and agree to the terms.
- After registering, link your Microsoft account when prompted.
- Select the ‘Dev Channel’ to receive the latest Windows 11 updates and click ‘Confirm.’
Note: If the ‘Dev Channel’ option isn’t available, select any channel and complete the enrollment. You can force the system into the ‘Dev Channel’ later using the Registry Editor.
- Restart your virtual machine when prompted to apply the changes.
After the restart, your virtual machine will begin receiving Windows 11 updates through the Windows Insider Program.
Force enrolling in the Dev Channel to receive Windows 11 updates
If you couldn’t select the ‘Dev Channel’ during the Windows Insider Program setup, you can force enroll your virtual machine using the Registry Editor:
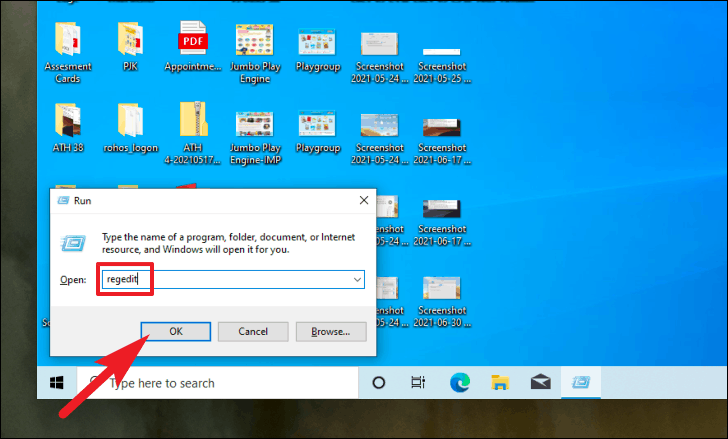
- Press
Command+Rto open the ‘Run’ dialog in your Windows virtual machine. - Type
regeditand click ‘OK’ to open the Registry Editor.
Navigate to the following path:
HKEY_LOCAL_MACHINE\SOFTWARE\Microsoft\WindowsSelfHost\ApplicabilityNote: If you don’t see any entries under ‘Applicability,’ ensure you’re enrolled in the Windows Insider Program.
- Double-click on ‘BranchName’ and set its value to
Dev, then click ‘OK.’ - Double-click on ‘ContentType’ and set its value to
Mainline, then click ‘OK.’ - Double-click on ‘Ring’ and set its value to
External, then click ‘OK.’ - Close the Registry Editor and restart your virtual machine.
- After restarting, go to ‘Settings’ > ‘Update & Security’ > ‘Windows Insider Program’ to confirm that you’re now enrolled in the ‘Dev Channel.’
With these steps, your virtual machine is set to receive Windows 11 updates through the Dev Channel of the Windows Insider Program.
By following this guide, you can successfully run Windows 11 on your Mac using Parallels, whether you have an Intel or M1 chip. Enjoy the flexibility of both macOS and Windows on a single device.


