
Accessing the MAC address of your Windows 11 device is crucial for network configuration, security, or troubleshooting purposes. A MAC (Media Access Control) address is a unique hexadecimal identifier assigned to your network interface card (NIC), distinguishing your device on a local network. This comprehensive guide will walk you through various methods to locate your MAC address on Windows 11.
Find MAC Address Using Command Prompt
The Command Prompt provides a quick and straightforward way to discover your MAC address, offering detailed information about all your network adapters.
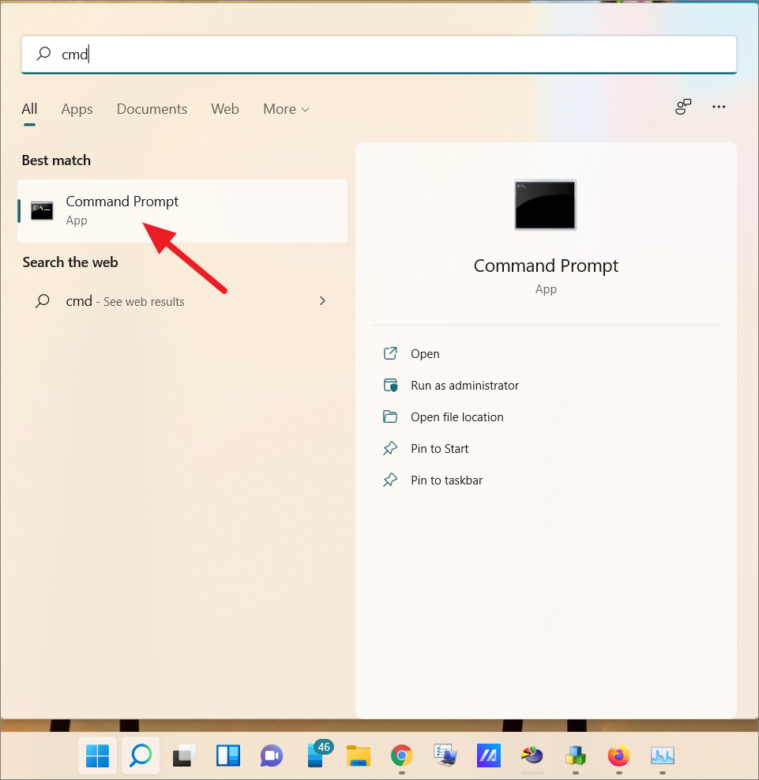
- Open the Start menu and type
cmdin the search bar. Click on the Command Prompt application to launch it.
- In the Command Prompt window, type
ipconfig /alland pressEnter.
ipconfig /allThis command will display detailed configuration information for all network adapters, including their MAC addresses.
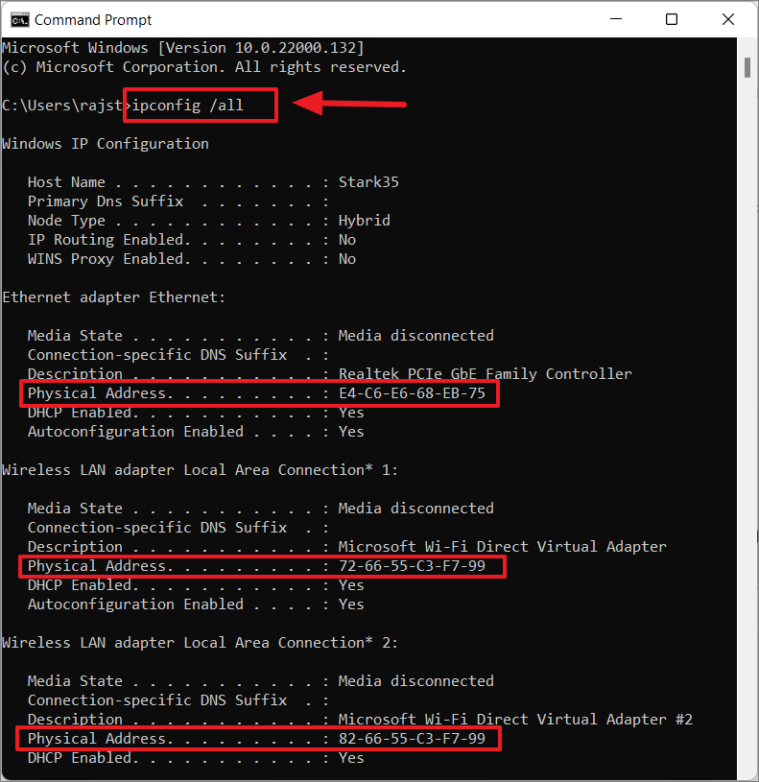
Scroll through the list to find the network adapter you’re interested in. The MAC address is listed as the Physical Address.
Alternatively, you can use the getmac command to quickly view the MAC addresses of all active network adapters:
getmac /v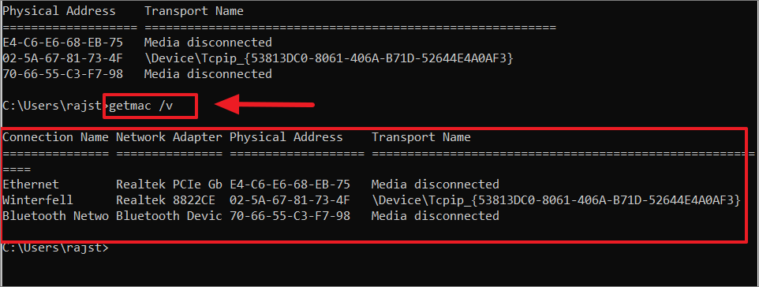
Find MAC Address Using Settings
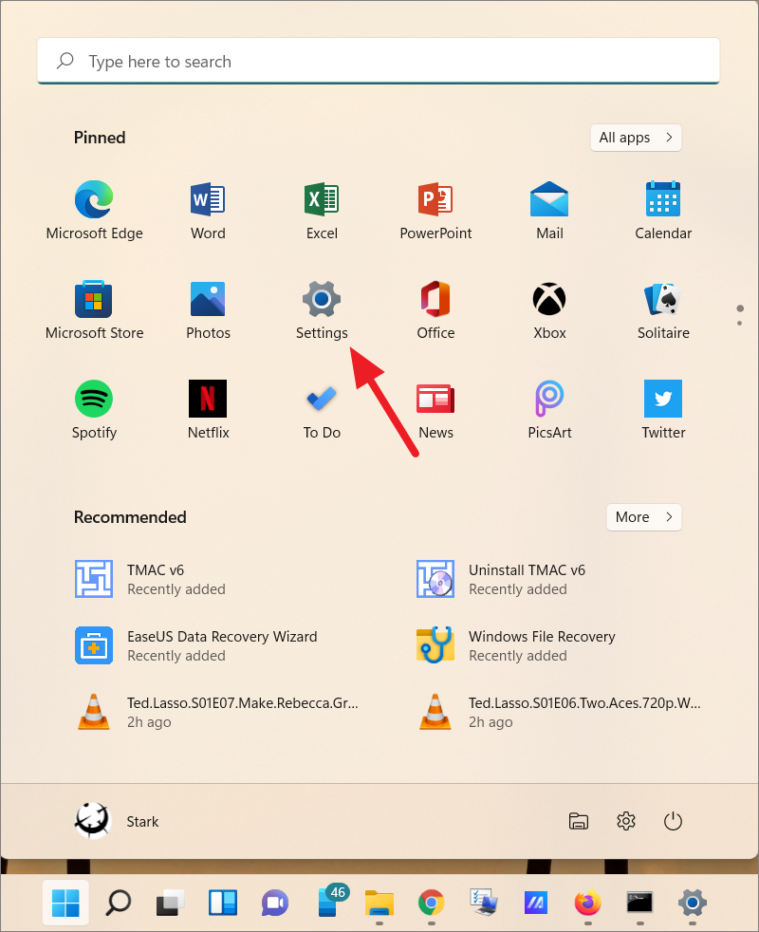
You can also locate your MAC address through the Windows 11 Settings app.
- Open Settings by clicking the Start menu and selecting the gear icon, or by pressing
Win+Ion your keyboard.
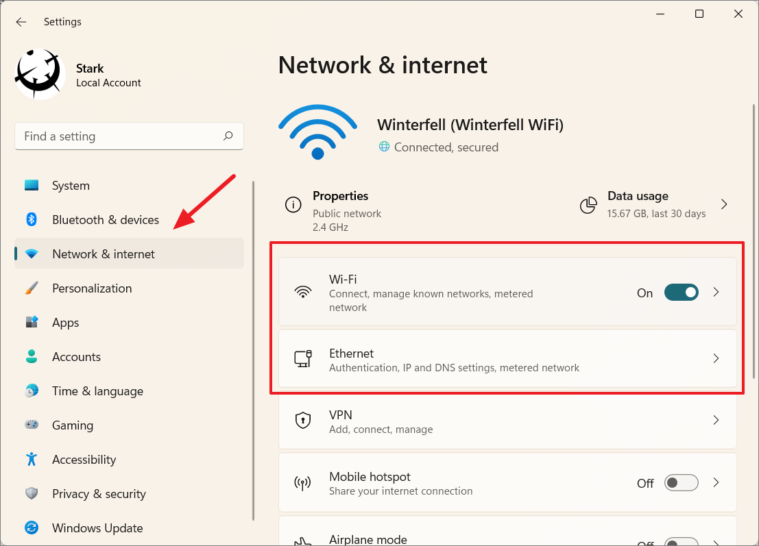
- In the Settings window, navigate to Network & internet from the left sidebar.
- Select either Wi-Fi or Ethernet, depending on which network adapter’s MAC address you want to find. For this example, we’ll select Wi-Fi.
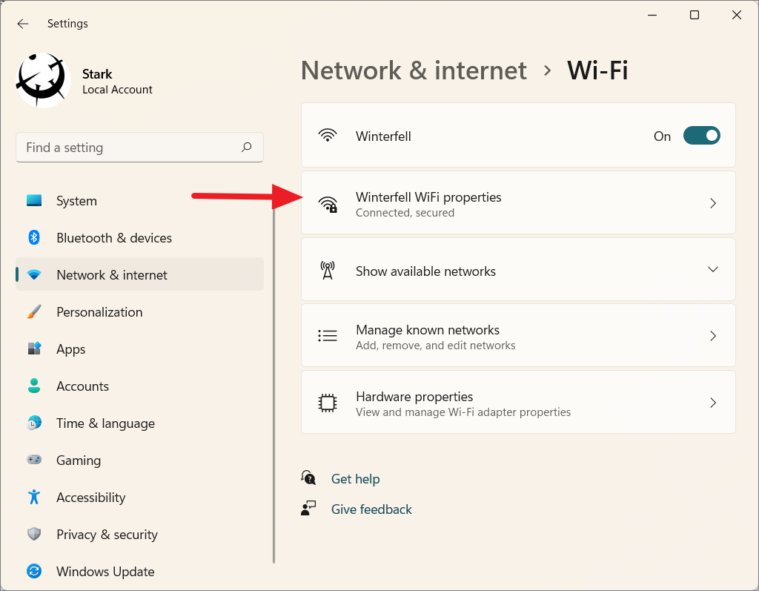
- Click on Hardware properties.
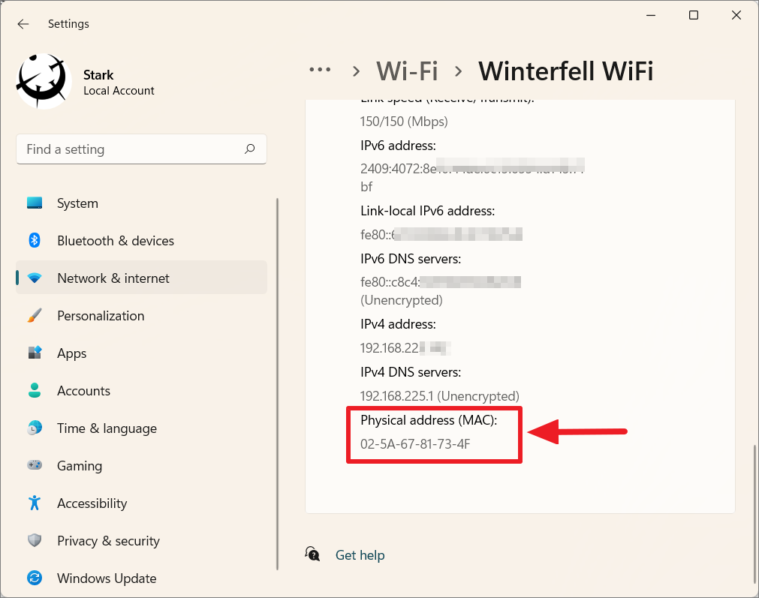
- Under the hardware properties, scroll down to find the Physical address (MAC). This is your MAC address displayed in six pairs of hexadecimal digits separated by colons.
Find MAC Address Using Control Panel
The Control Panel offers another method to view your MAC address.
- Open the Start menu, type
Control Panel, and select it from the search results.
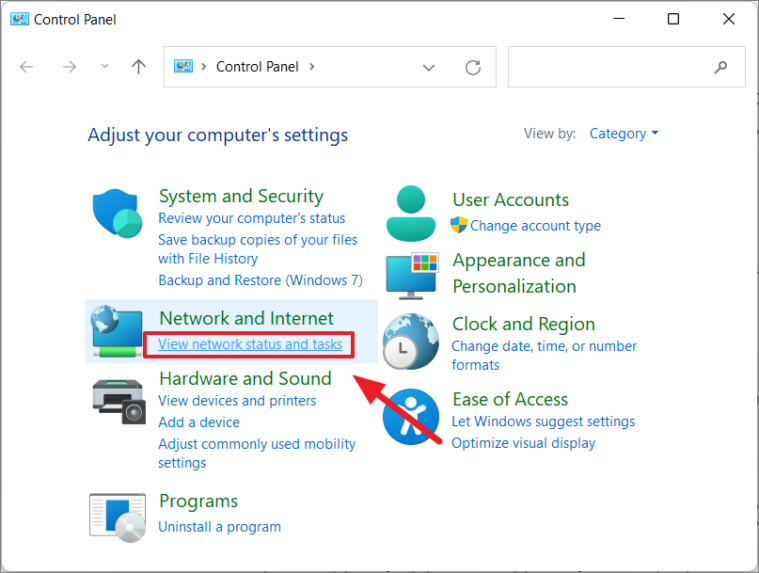
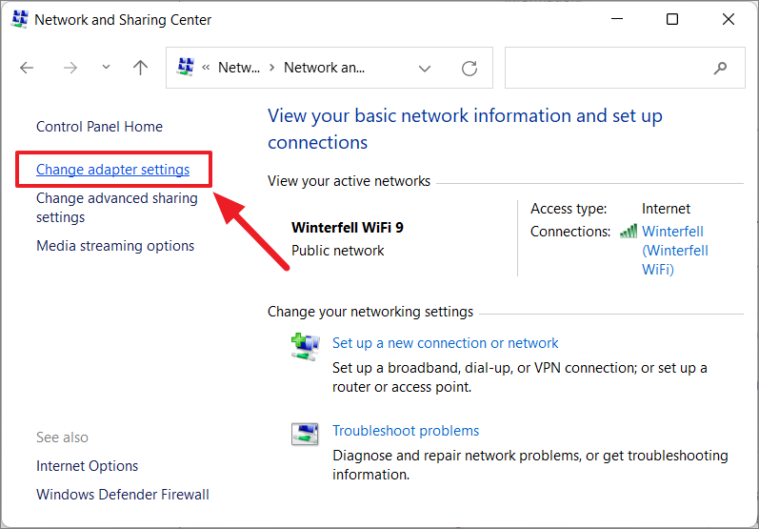
- In the Control Panel, click on Network and Internet, then select Network and Sharing Center.
- On the left-hand side, click on Change adapter settings.
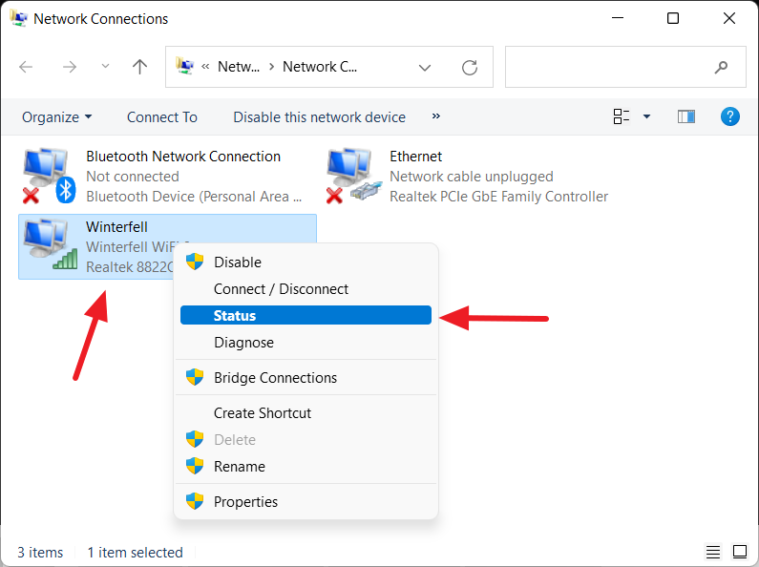
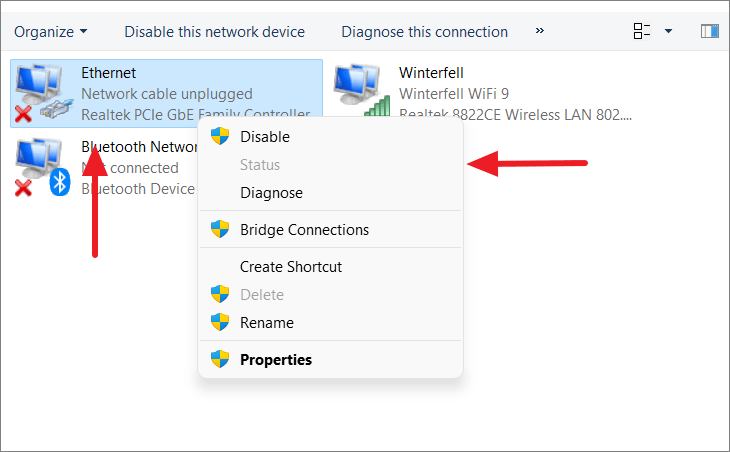
- Right-click on the network adapter you wish to inspect (e.g., Wi-Fi) and select Status.
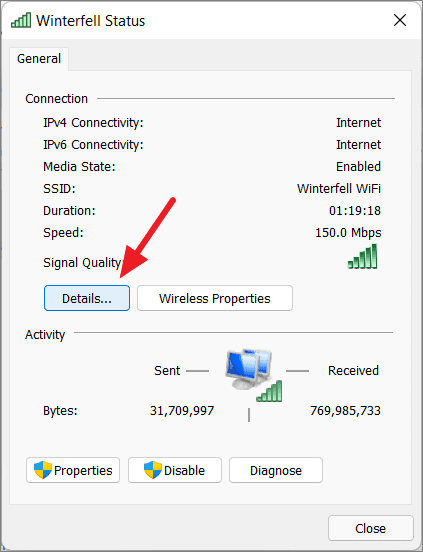
- In the Status window, click on Details.
The Network Connection Details window will display various information, including the Physical Address, which is your MAC address.
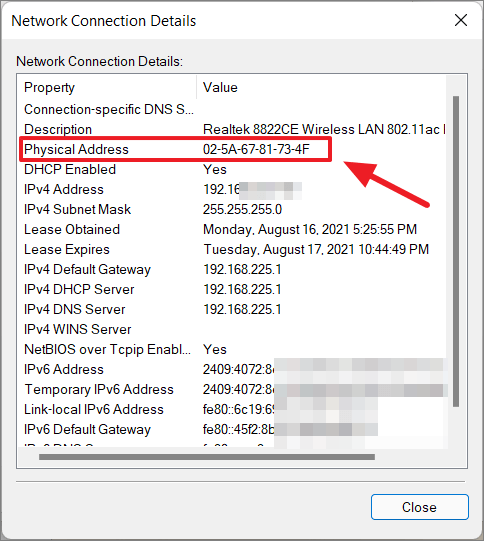
Note: This method only works if the network adapter is currently connected. If it’s disconnected, the Status option will be unavailable.
Find MAC Address Using PowerShell
Windows PowerShell is another command-line tool that can help you find your MAC address.
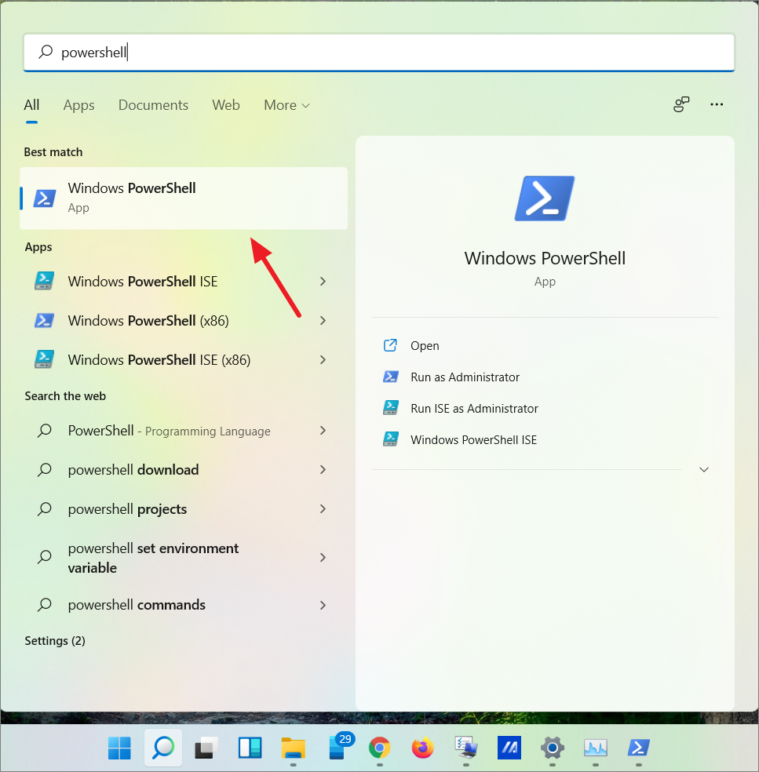
- Open the Start menu, type
PowerShell, and click on the Windows PowerShell app.
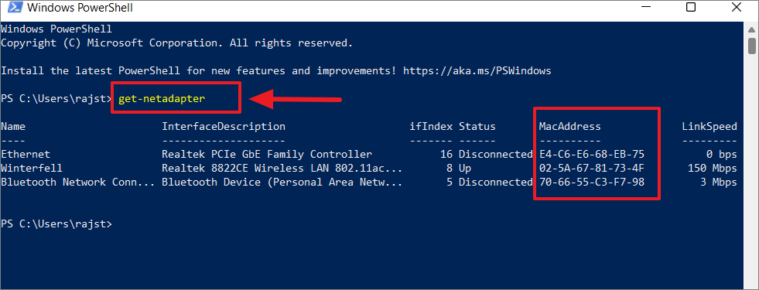
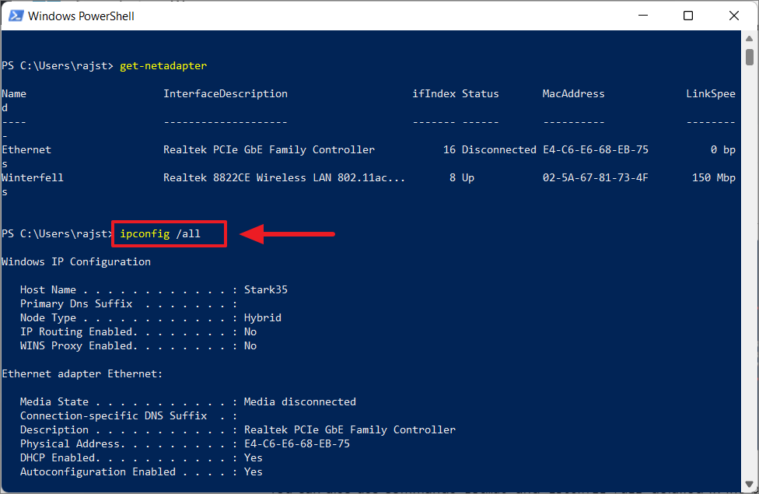
- In the PowerShell window, type
get-netadapterand pressEnter.
This command lists all network adapters and their MAC addresses.
You can also use the getmac and ipconfig /all commands within PowerShell for similar results.
Find MAC Address Using System Information
The System Information tool provides detailed information about your system hardware and software, including MAC addresses.
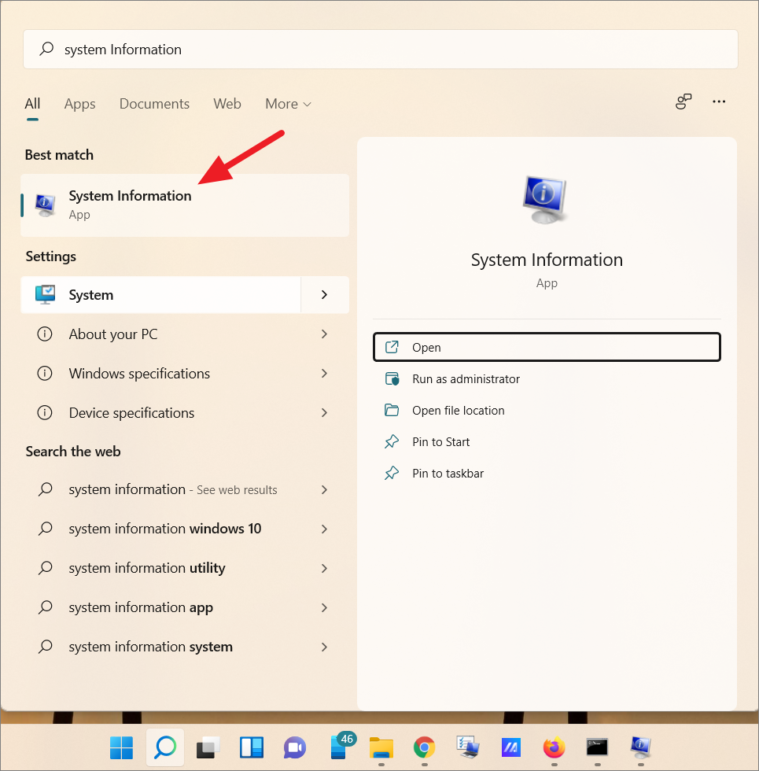
- Press
Win+Rto open the Run dialog box. Typemsinfo32and pressEnter.
- In the System Information window, expand the Components section on the left.
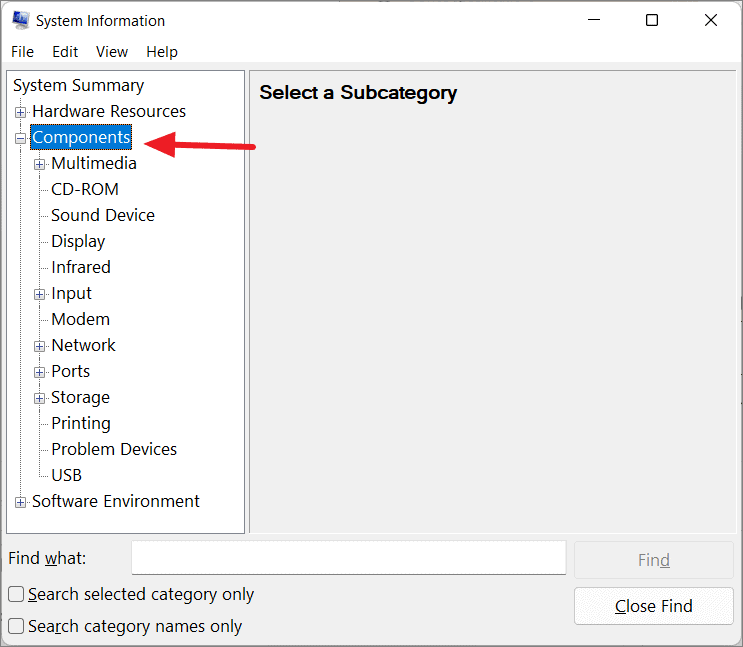
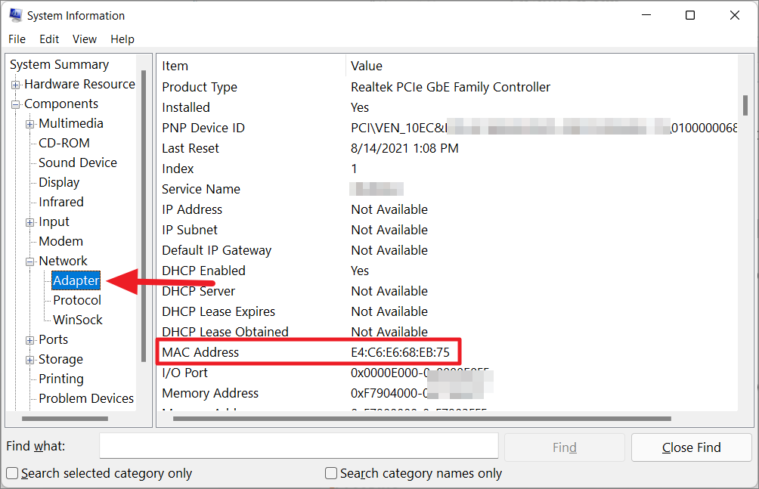
- Expand Network under Components, then select Adapter.
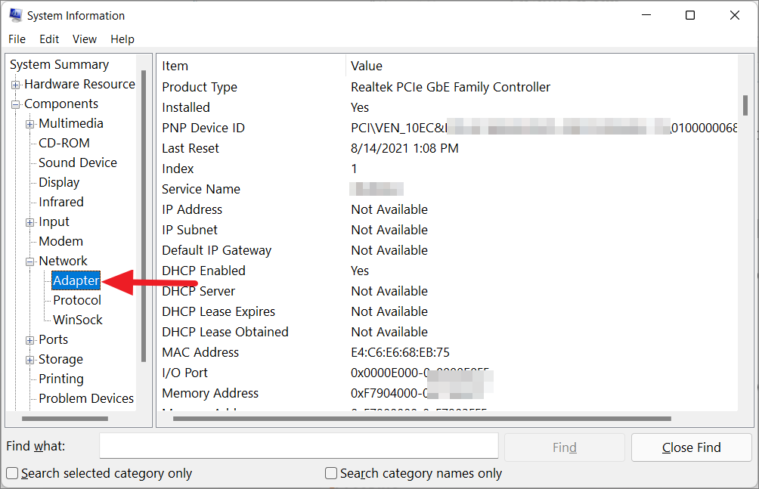
On the right pane, scroll to the network adapter of interest. The MAC address is listed as the MAC Address.
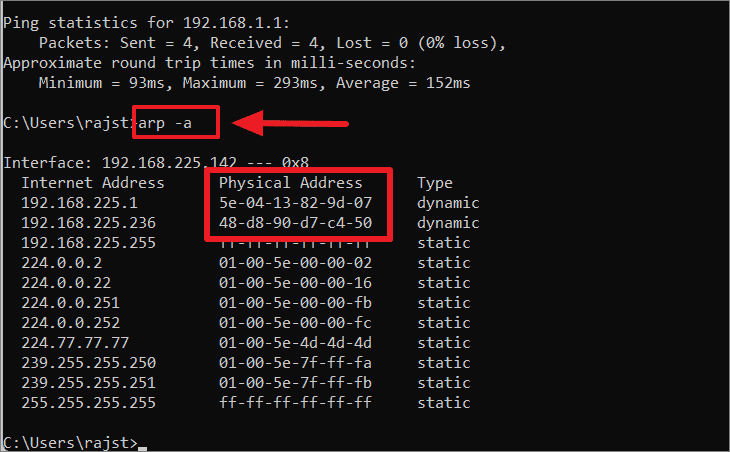
Find MAC Addresses of All Devices on Your Network
If you need to find the MAC addresses of other devices on your local network, you can use the Address Resolution Protocol (ARP).
- Open the Command Prompt by searching for
cmdin the Start menu. - Type
arp -aand pressEnter.
arp -aThis command displays a list of all IP addresses and their associated MAC addresses connected to your network.
By following these methods, you can easily find the MAC address of your Windows 11 device or other devices on your network. Knowing your MAC address can be invaluable for network management and security purposes.


