The new Files app in iOS 13 has a handful of hidden features that replace the need for installing a third-party app from the App Store. You can zip and unzip files, connect to an SMB server, and even Scan Documents with the updated app.
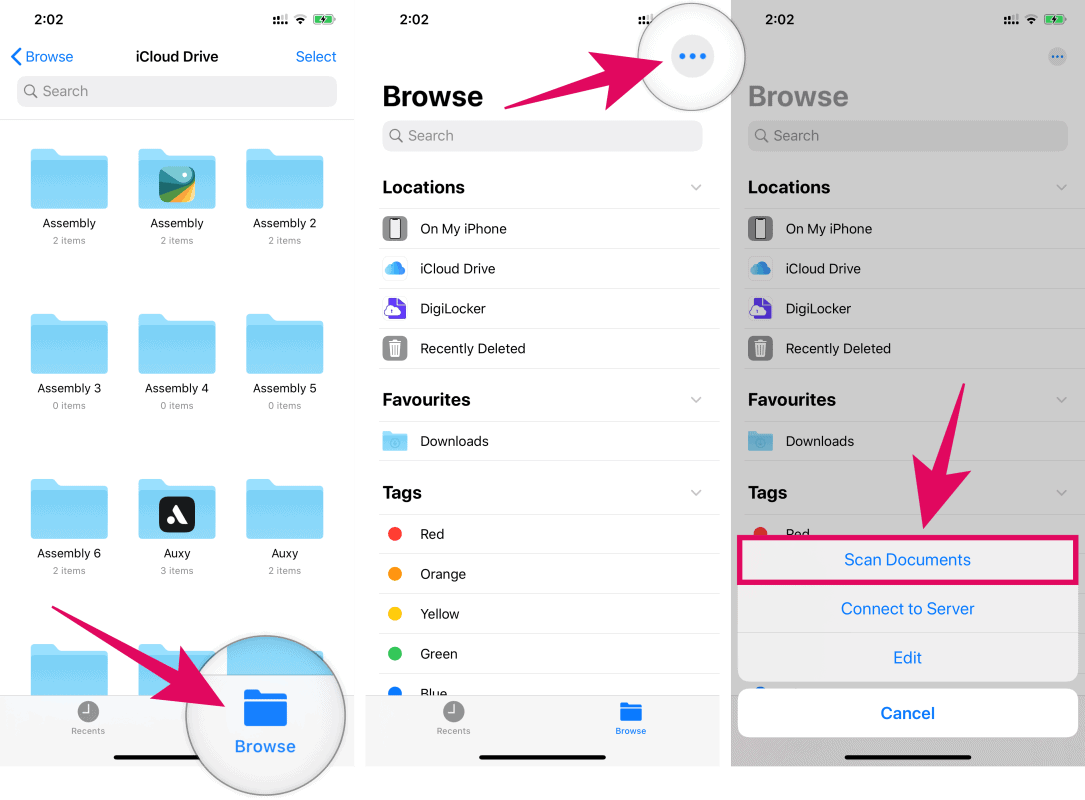
The option to Scan Documents is hidden inside the three-dot menu in Files app, which itself isn’t directly visible when you open the app.
To access the Scan Documents option in the Files app, tap the “Browse” button on the bottom bar to go to the main screen of the app, then tap the three-dot menu at the top-right corner and select “Scan Documents” from the available options.
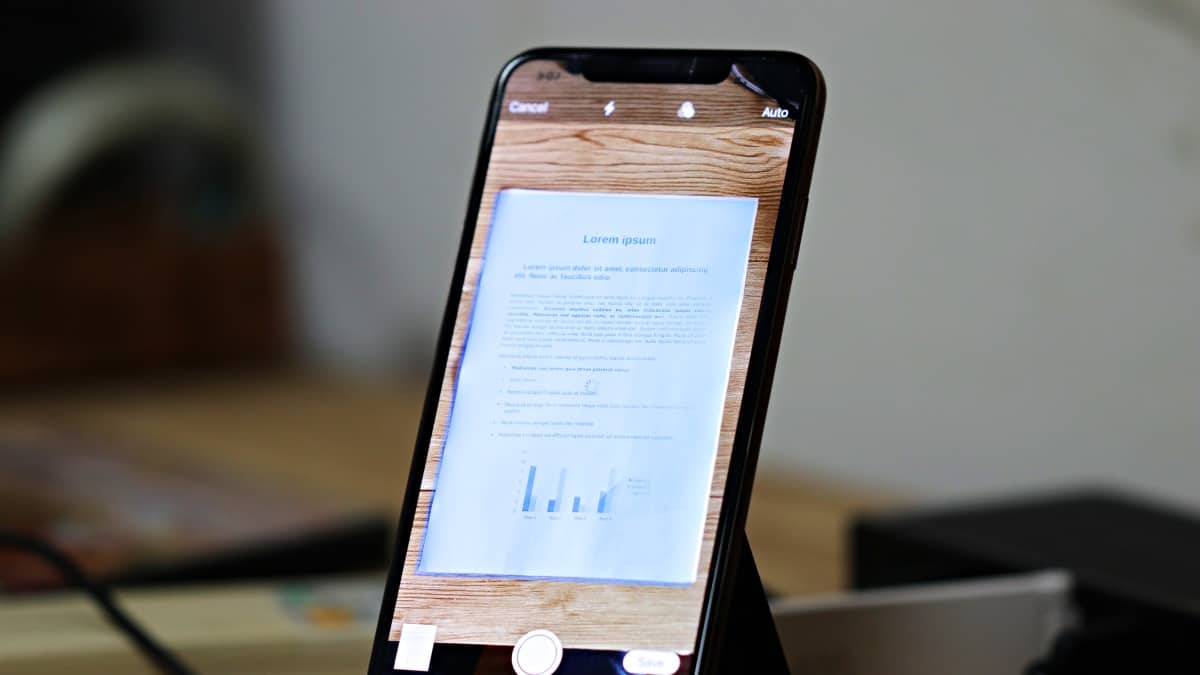
By default, the document scanner in Files app is set to Auto mode. Meaning you only need to hover the phone over a document, fit it into the viewfinder and it will automatically take a scan of the document.
💡 Tip
In auto mode, let the borders of a document visible in the scanner’s viewfinder to let your iPhone quickly and properly scan it.
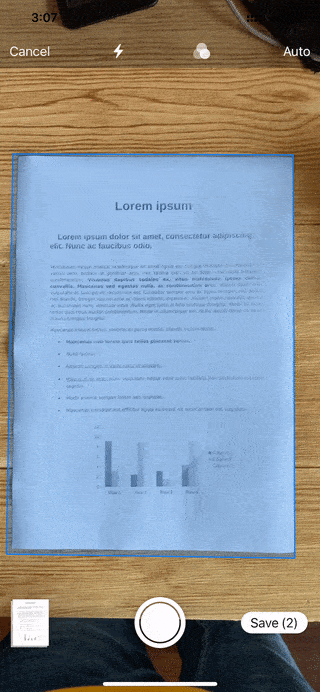
The auto mode is useful when you want to scan multiple documents. However, if you want to switch to manual mode, tap “Auto” on top right corner to switch to Manual mode.
In the manual mode, you have to press the shutter button to save a scanned copy of the document.
Applying filters
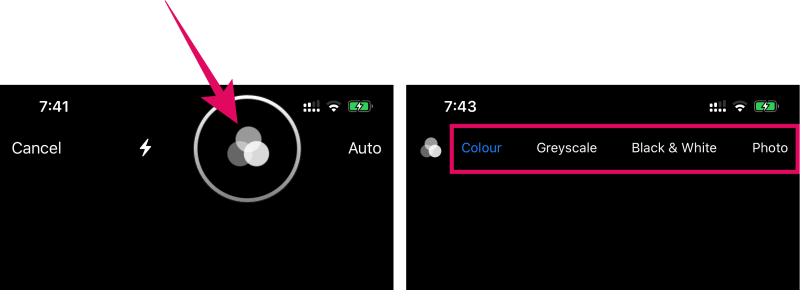
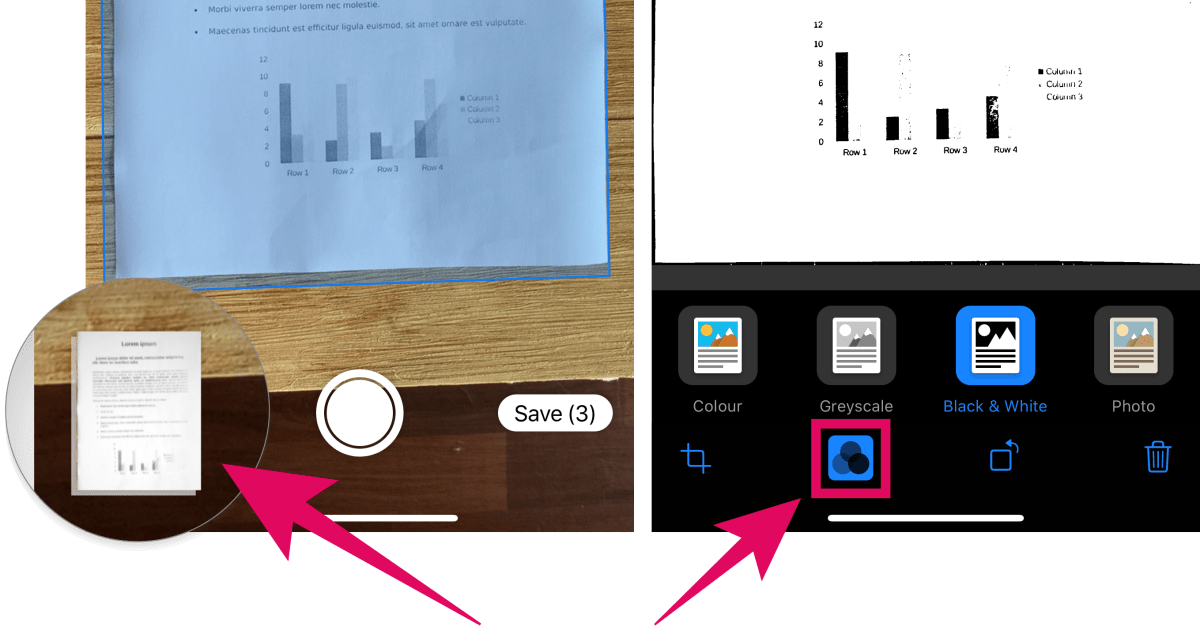
The document scanner in Files app can scan and save a document with Colour, Greyscale, Black & White filters.
The scanner uses Colour mode as the default filter. To change it, tap the filter icon in the top row, and select a different filter.
You can also change the filter after taking a picture of the document. Tap the preview of the scan in the bottom left side of screen, then tap the filter icon in the bottom row and select a filter.
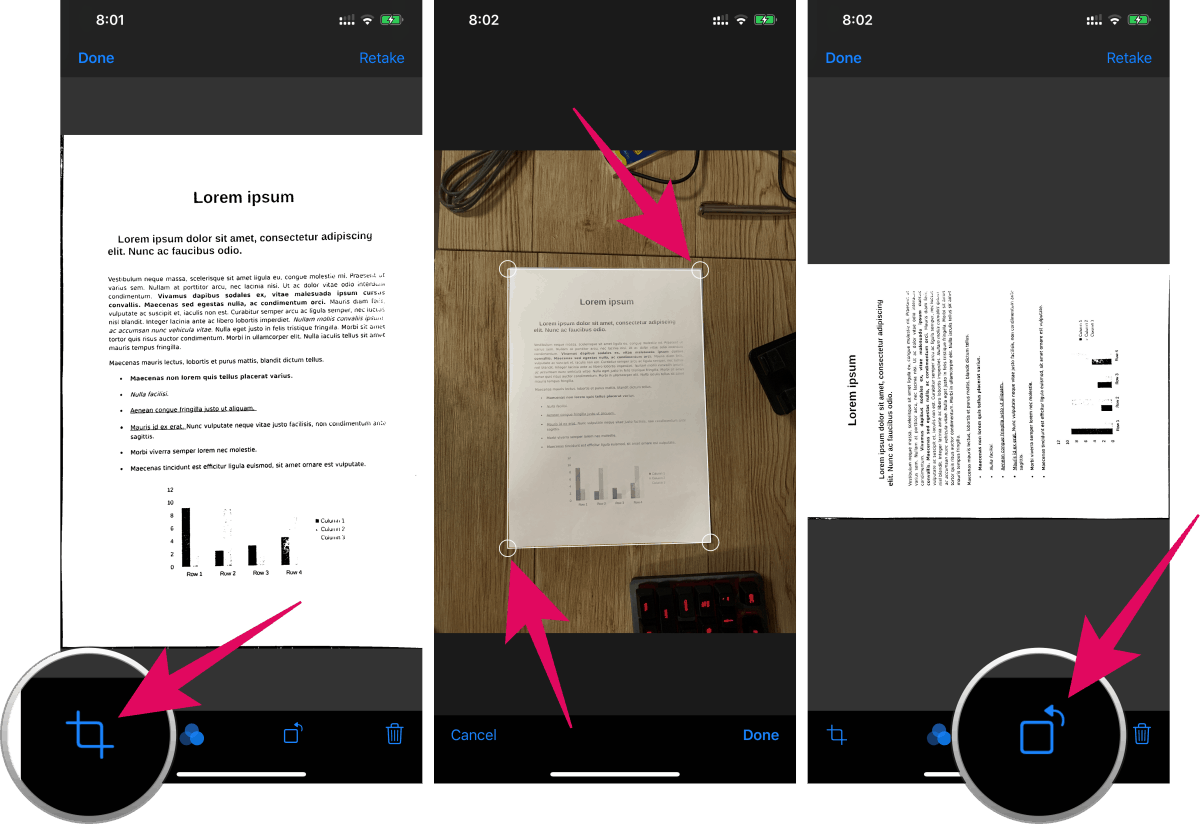
Crop and Rotate a scanned document
You can crop and rotate a document after taking its picture in the Files app. Tap on the preview in the bottom left side of a scanned document, and use the “Crop” and “Rotate” buttons at the bottom bar to adjust the scan to your liking.
Save the document scan
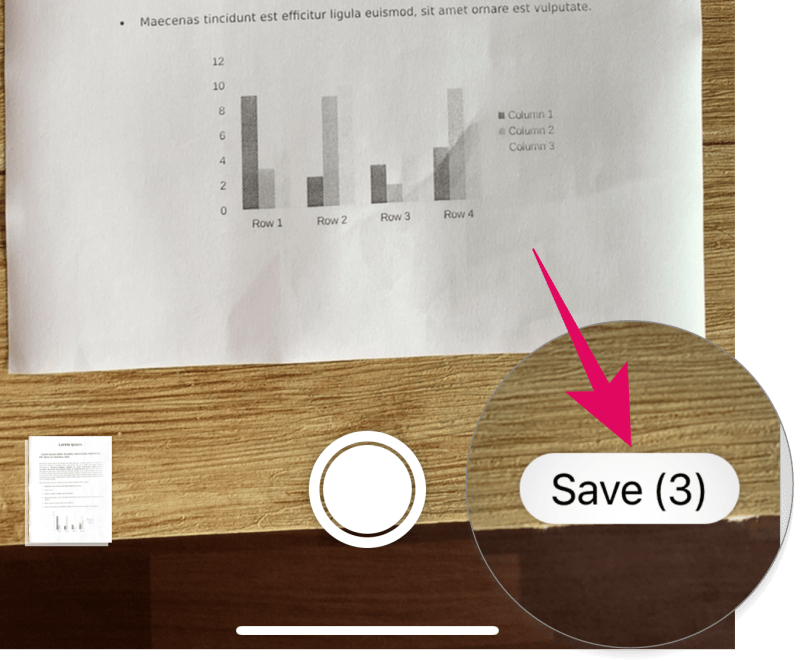
After scanning all documents, and making the necessary adjustments such as filters, crop, and rotate, tap the “Save” button at the bottom left corner of the screen.
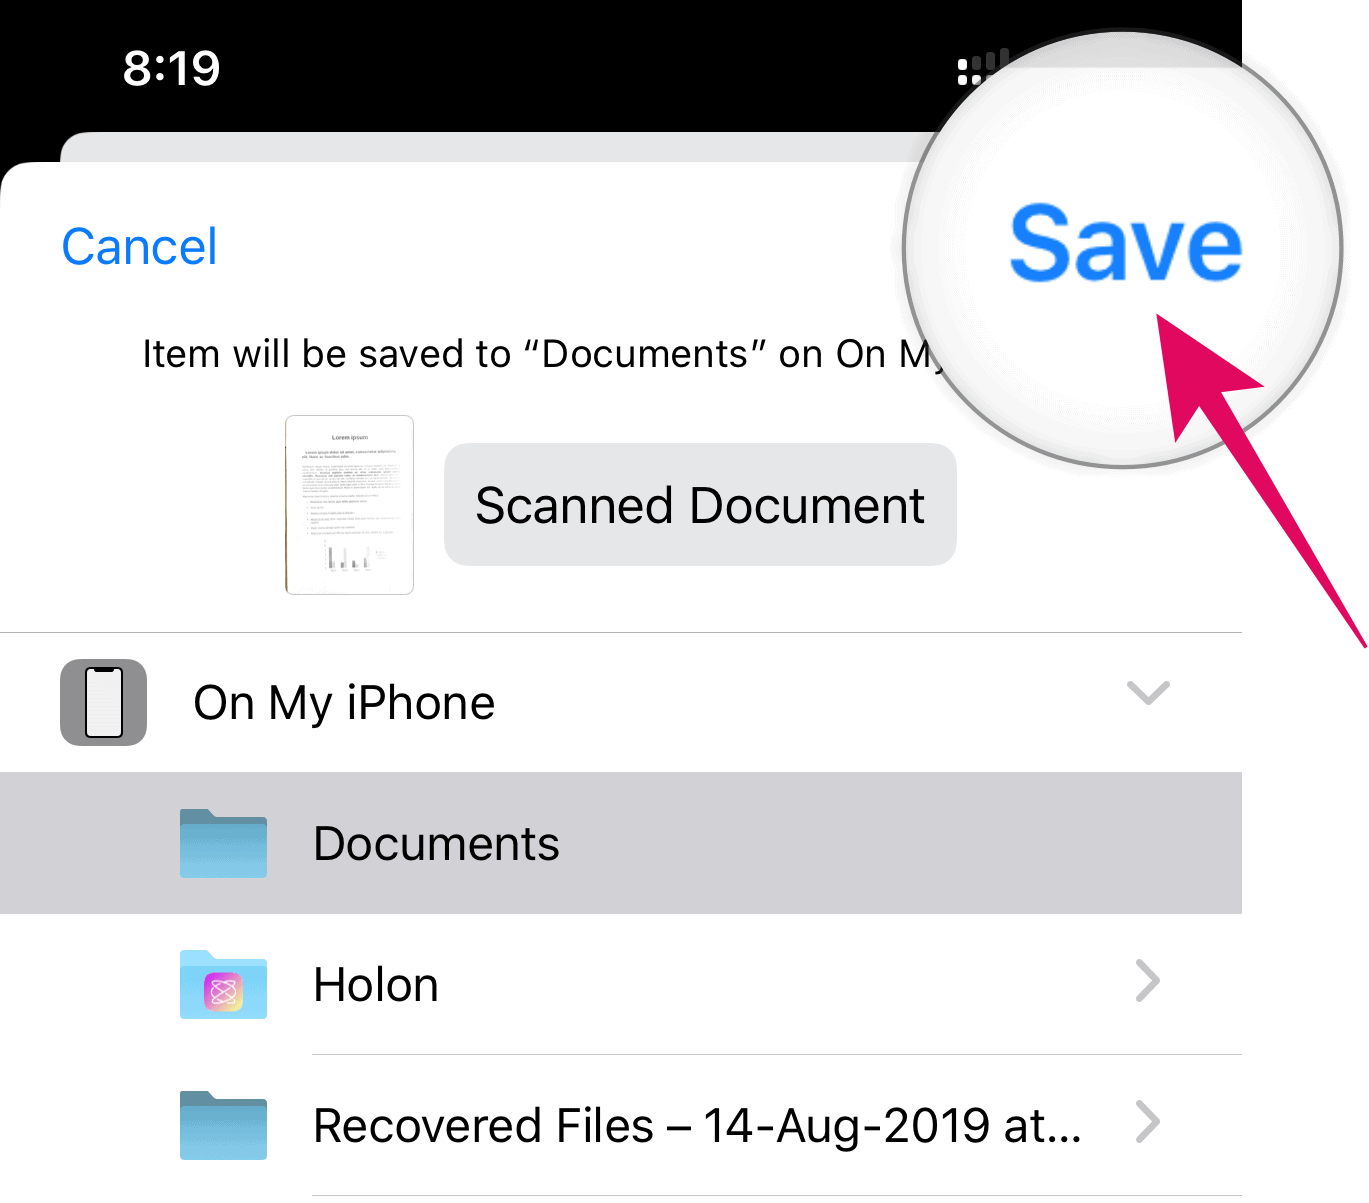
Select a folder where you want to save the documents, or tap the “Create New” folder icon at the top right side of screen to create a new folder to save the scanned documents.

Hit the “Save” button on the top right corner of the screen once you have selected a folder.
Please give this article a like and share it on twitter if you found the instructions above helpful.


