iOS 13 brought along a bunch of new and useful features to the Files app on iPhone and iPad devices. You can now connect an external drive, an SMB server, create folders, scan documents, and even zip and unzip compressed files.
In this post, we are going to show how to compress and uncompress files on iPhone without installing any third-party app from the App Store. To get started, open the “Files” app on your iPhone.
👐 How to Unzip Files on iPhone
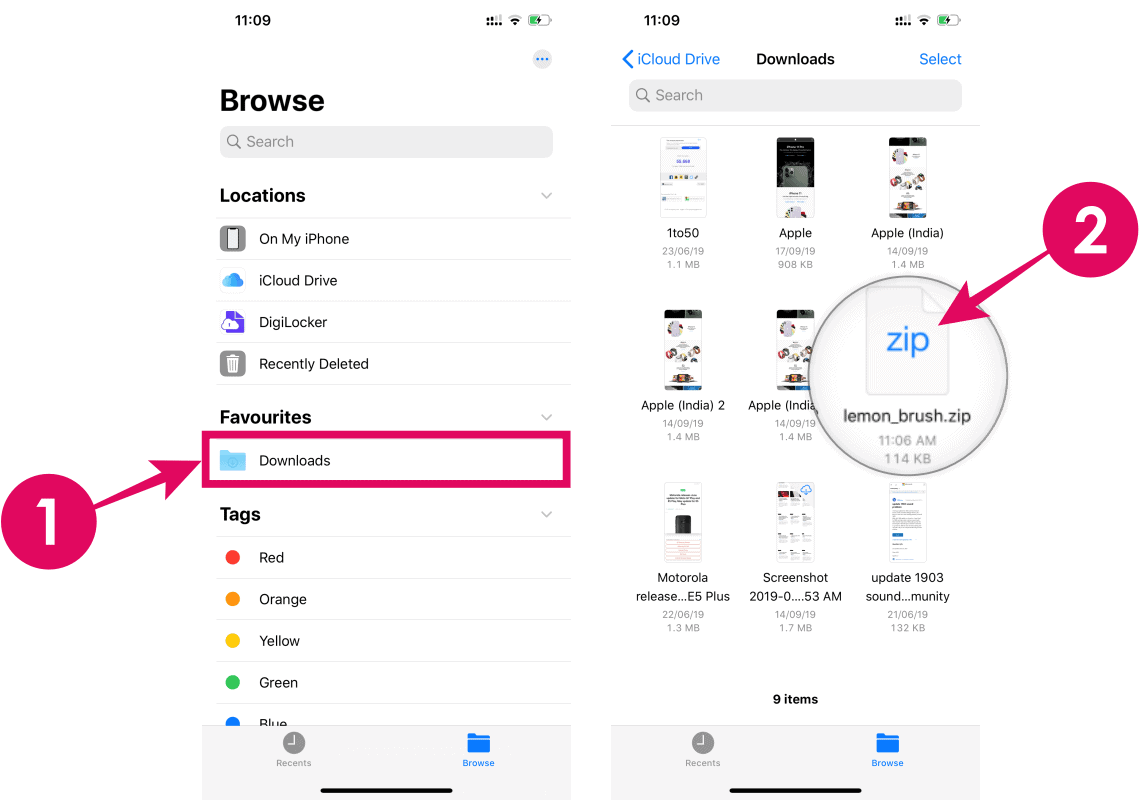
Access the folder where you saved a zip file on your iPhone. If you downloaded it from Safari, it’ll be saved to the “Downloads” folder in iCloud Drive. If not, you should be able to find the file in “Recents” tab if you just downloaded it.
Zip files are easy to spot on iPhone as they are labelled with an icon that clearly reads “ZIP”.
To unzip the file, simply tap once on it. Your iPhone will automatically create a folder with the same name as the ZIP file and extract all its content to the newly created folder.
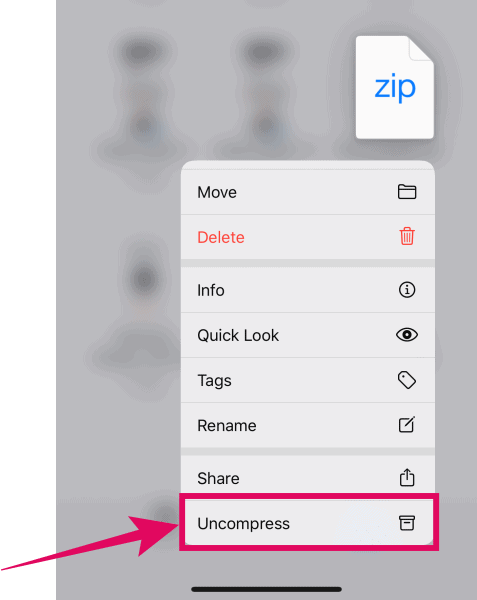
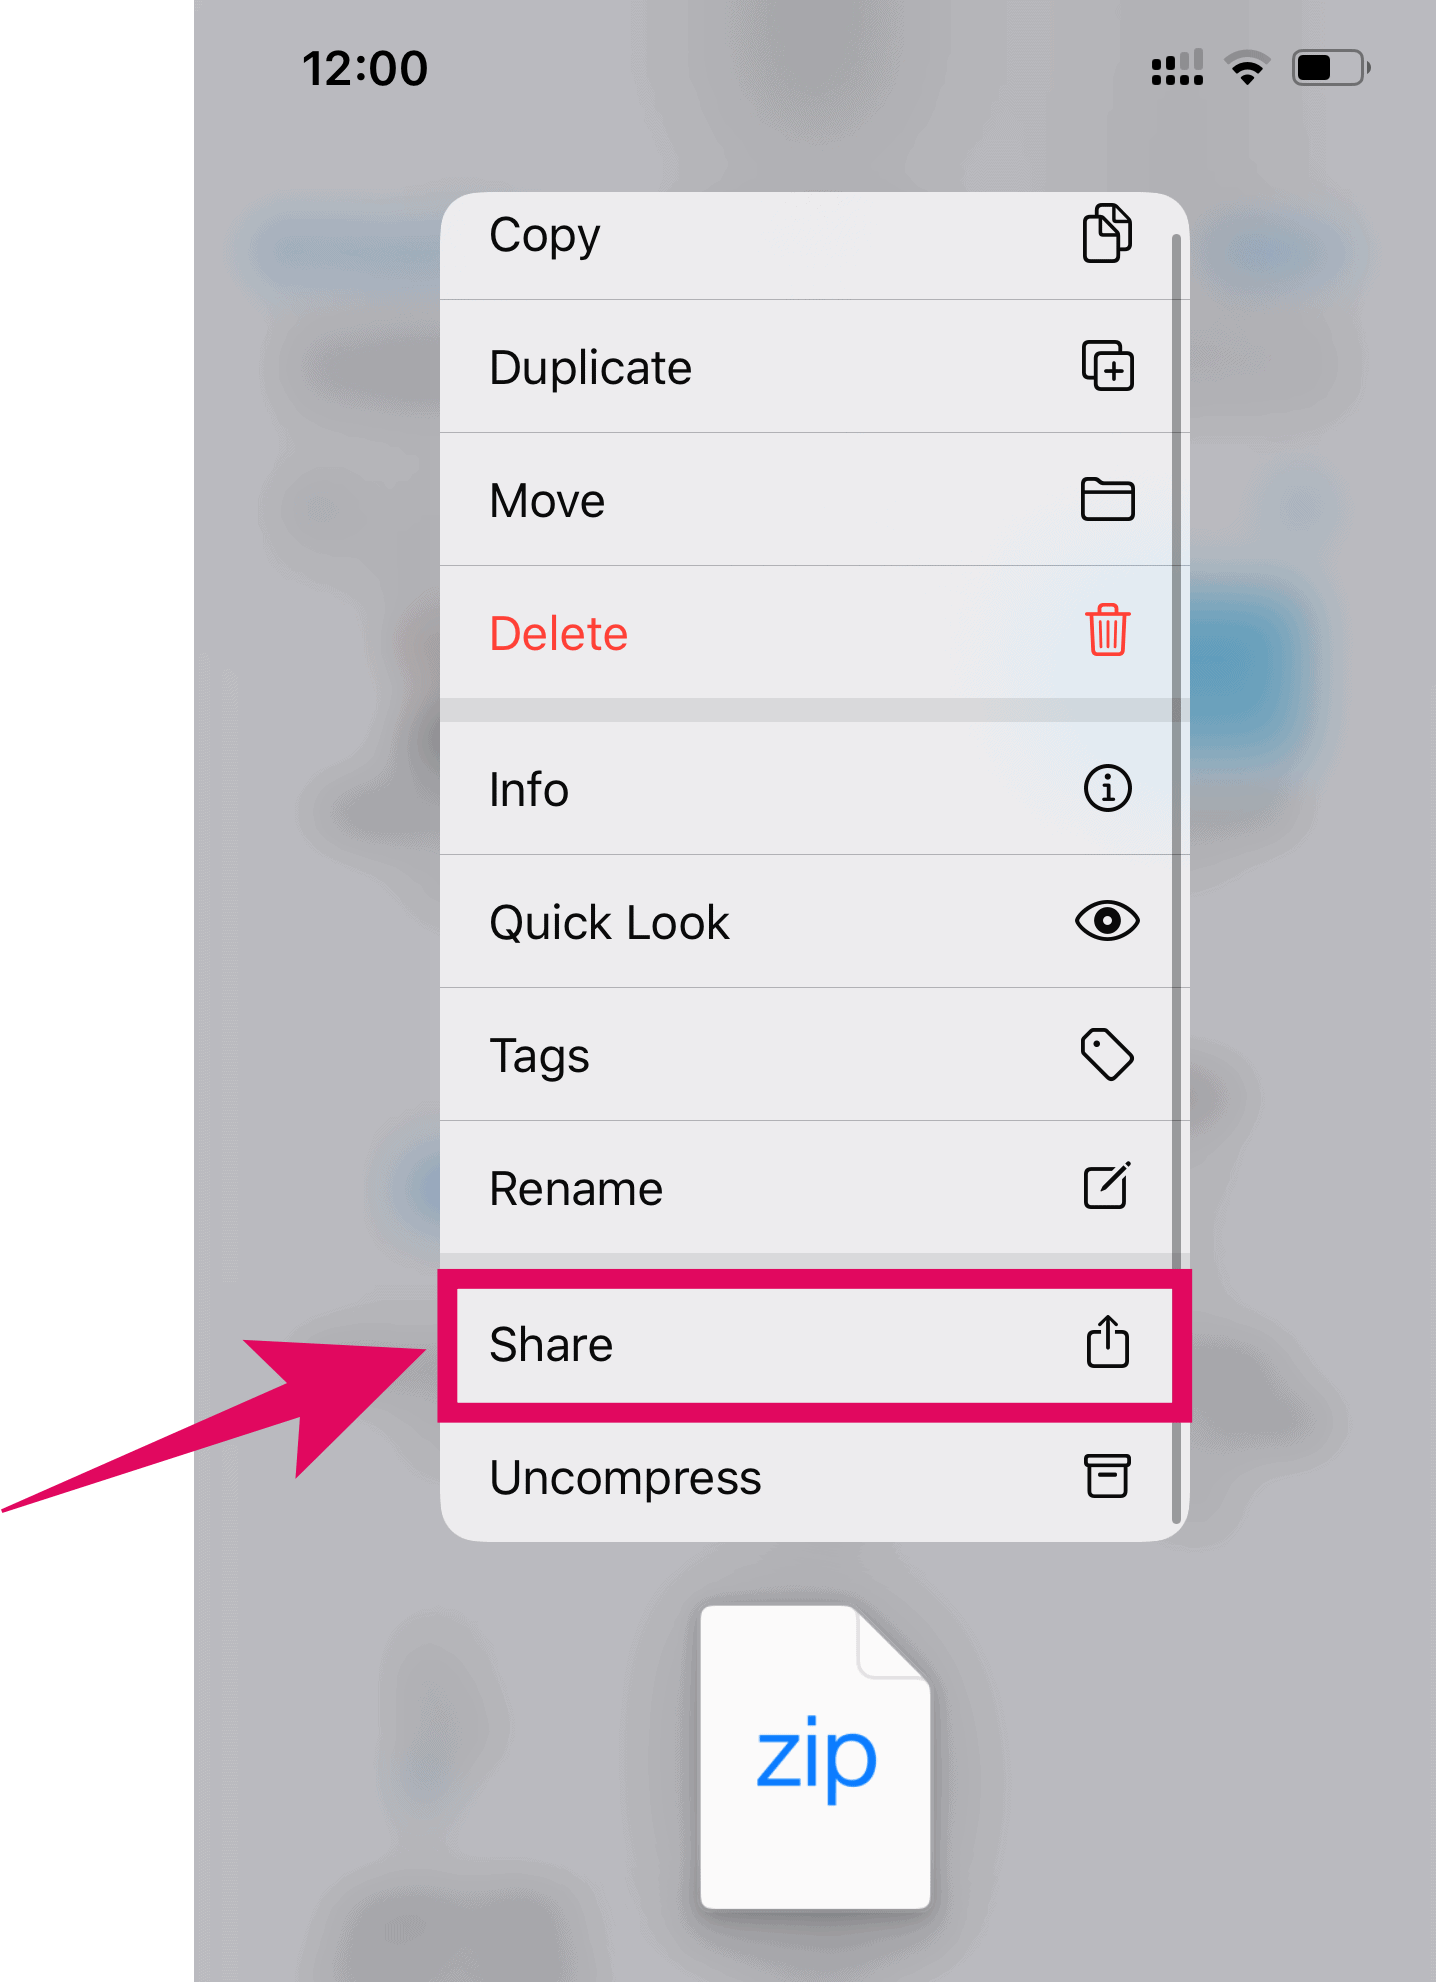
You can also use the Quick Actions menu to Uncompress a ZIP file. Simply touch and hold the ZIP file, then scroll to the bottom of the Quick Actions menu and select “Uncompress”.
🤐 How to ZIP Files on iPhone
You can compress multiple files or an entire folder to a single ZIP file on your iPhone using the Files app.
📁 Compressing a folder
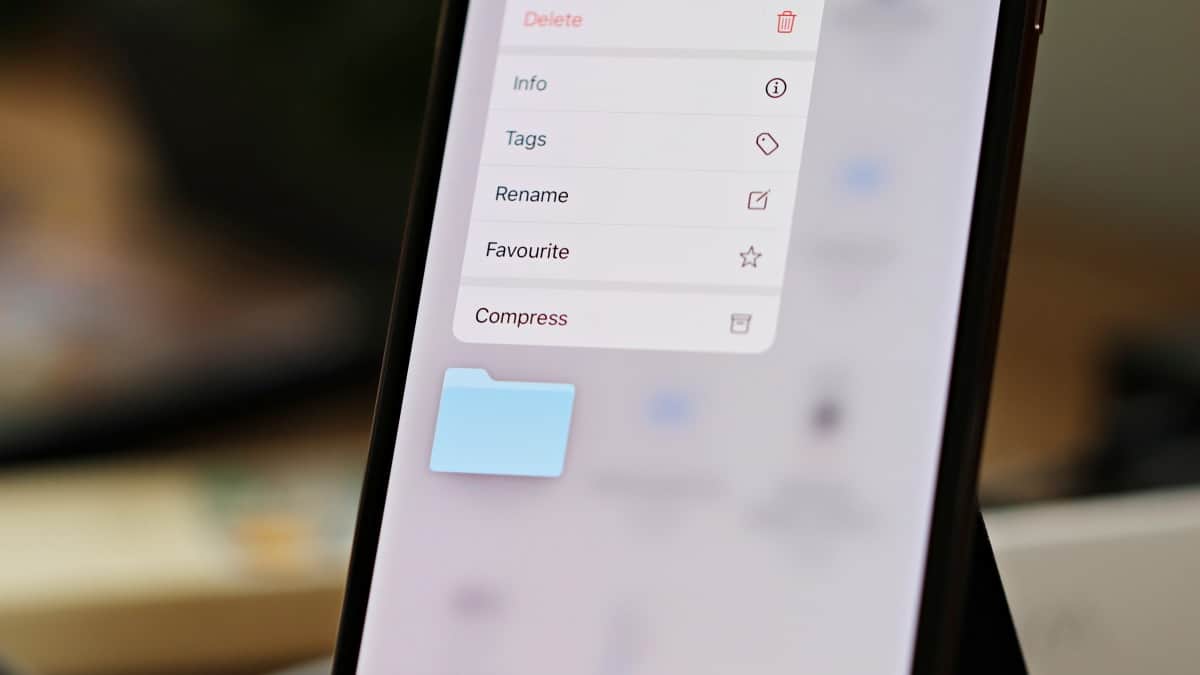
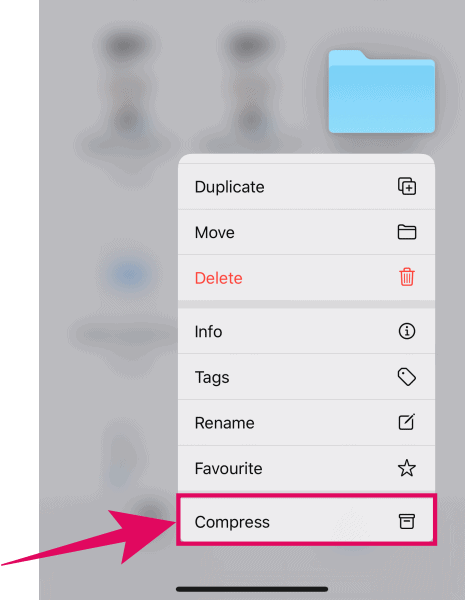
To compress a folder, touch and hold a folder icon in the Files app, then select “Compress” from the bottom of the Quick Actions menu. Scroll the quick actions menu if need be.
This will create a ZIP file of the entire folder and save it in the same directory where the folder was saved.
🗃 Compressing multiple files and folders
To compress multiple files and folders into a single ZIP file, access the directory where all files and folders that you wish to compress are saved. Tap “Select” at the top right corner of the screen, then tap on each file and folder that you wish to compress to a ZIP file.
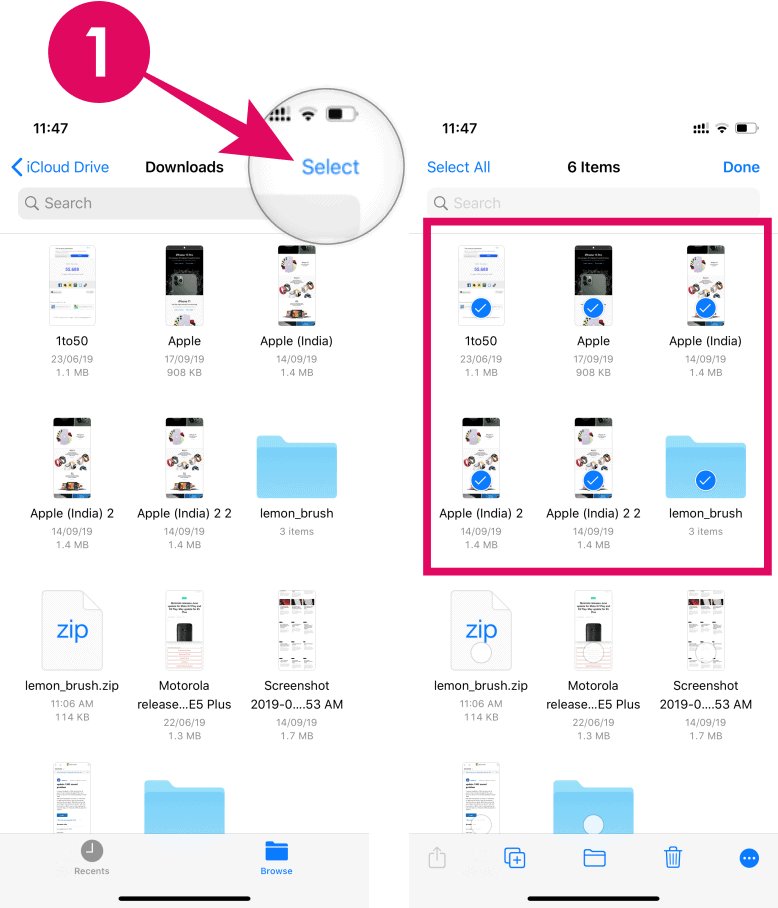
Once you have selected the files and folders to be compressed, tap the “three-dot” blue button at the bottom right corner of the screen, and select “Compress” from the pop-up menu.
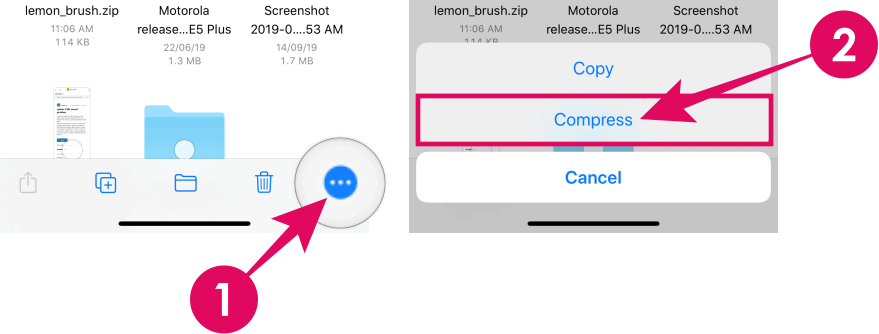
This will compress all selected files and folders into an “Archive.zip” file and save it within the same directory.
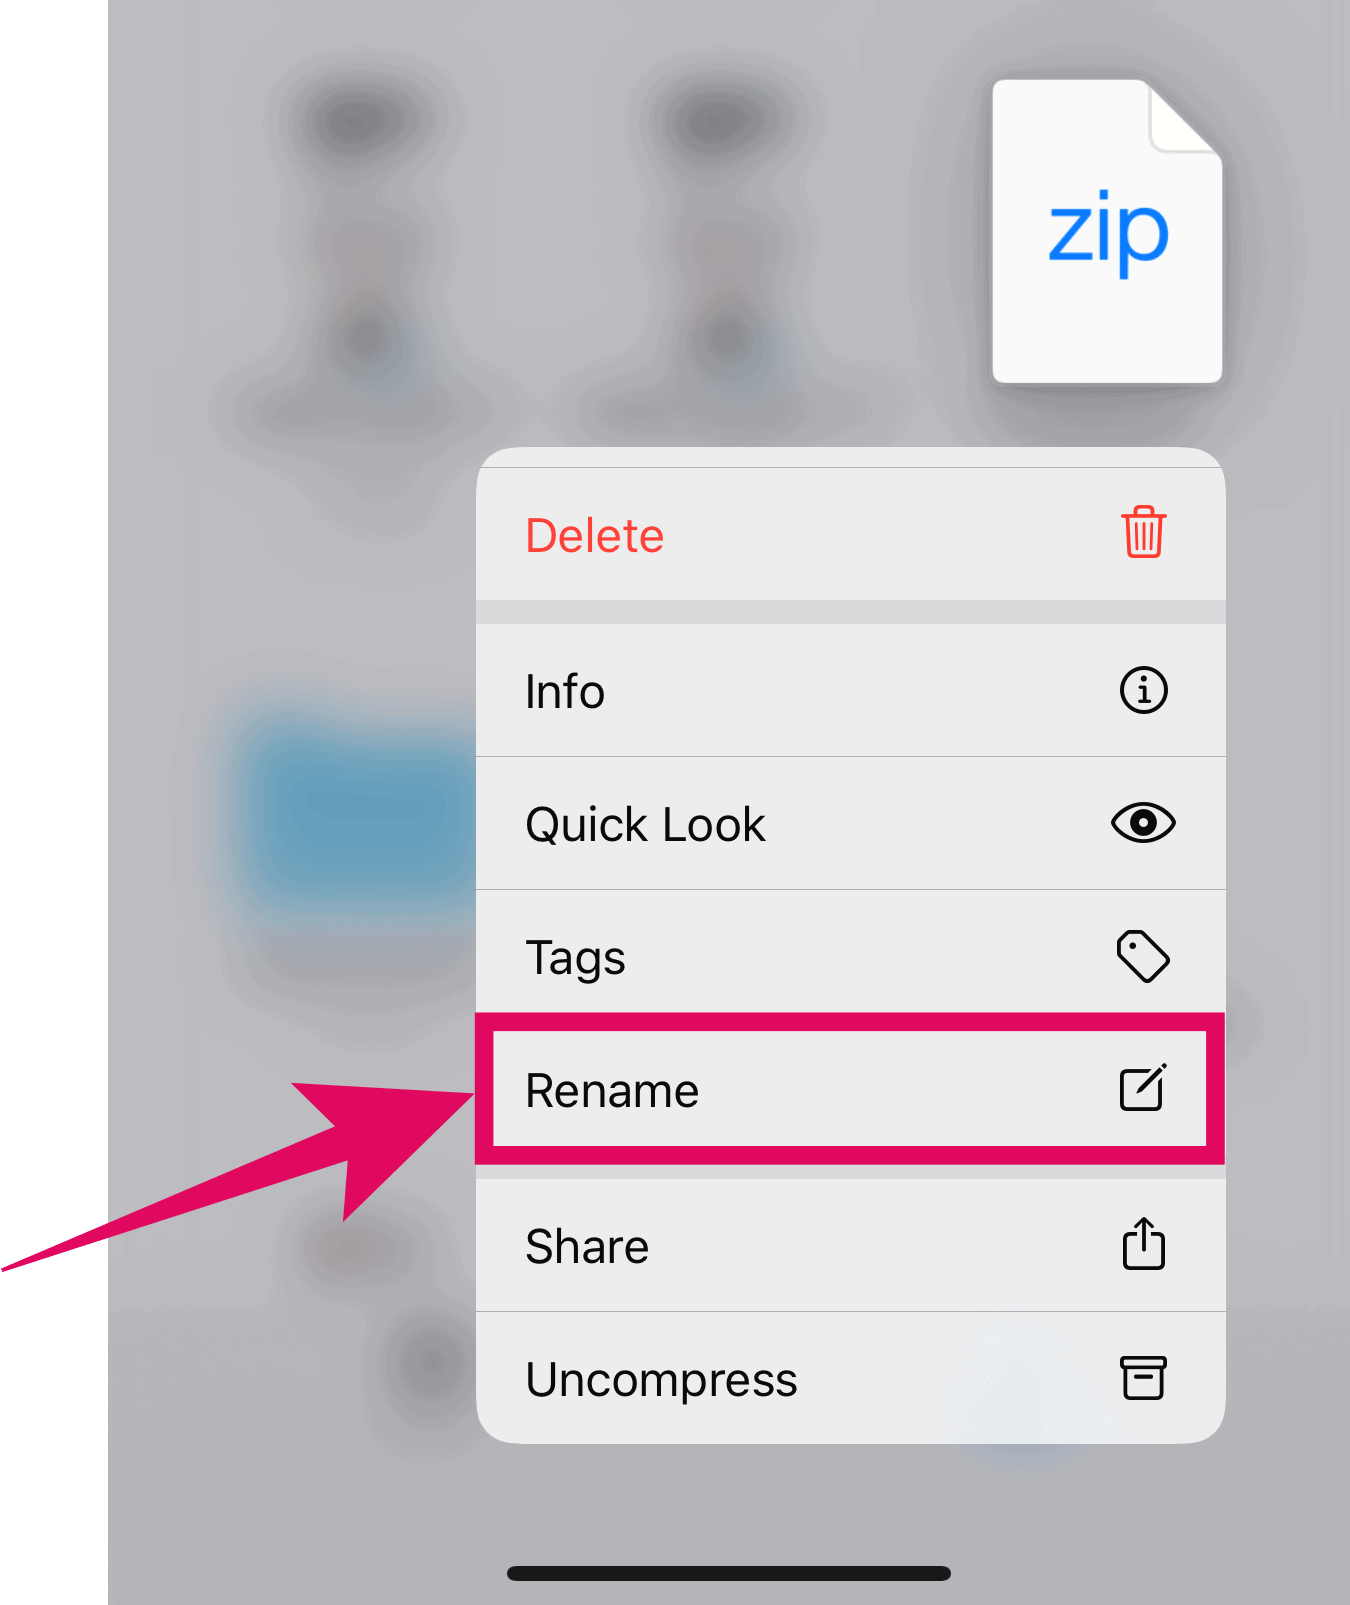
To rename the zip file, touch and hold the newly created “Archive.zip” file, and select “Rename” option from the quick actions menu. Scroll a bit in the quick actions menu if need be.
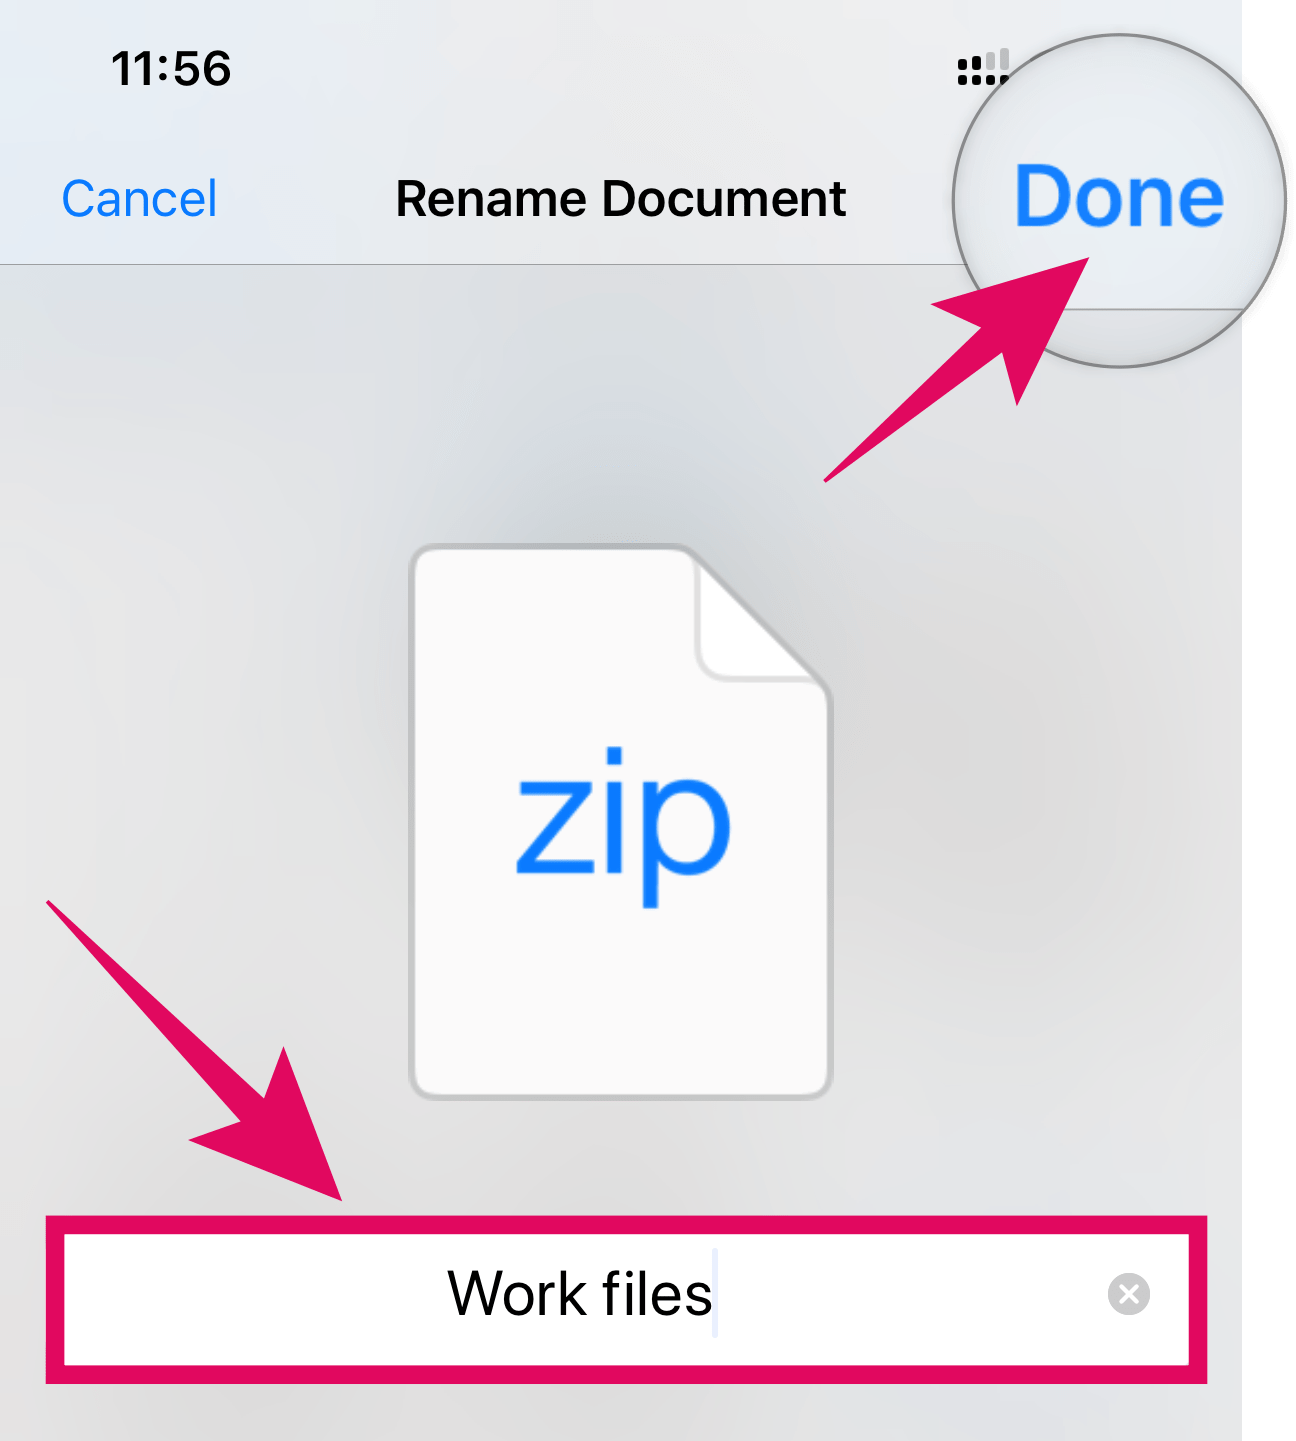
Backspace the previous name, then type a new name for the file and tap “Done” at the top right corner of the screen to save the file with a new name.
If you need to share the ZIP file, touch and hold the zip file and select “Share” option from the Quick Actions menu. Then select the app you’d like to use to share the zip file from the iOS share sheet.
That’s it. If you need further help with zipping and unzipping files on iPhone, drop us a comment below.


