Google Chrome is the go-to browser for most people for a reason. It’s full of features and functionalities that make elevate the entire experience of browsing the internet. And there are so many features, with more being added constantly, that we can bet that even the most seasoned users aren’t aware of all of them.
Google Lens integration in Chrome is one such feature. Although many users must know what Google Lens is and might’ve even used it in apps on their phone, most are unaware that it is now completely integrated within the Chrome browser on the desktop. But even if you haven’t ever heard of Google Lens, don’t worry, we’ve got you covered.
What is Google Lens?
Google Lens is an AI-driven tool that can help you find something using an image. You can search for the image itself to find its source on the internet. Or you can use Google Lens to search for text within the image and even translate the text.
It can even help you identify any plants or animals in the image, or find that jacket or shoes online you saw someone wearing in a photo.
You mostly would have encountered Google Lens in apps such as Google Photos, Google Search, etc., or on Android devices, like its integration in the camera app on Google Pixel. But now it enjoys a deep integration with the Google Chrome browser on the desktop.
So, the next time you come across an image while reading an article on your computer and would like to find its source or identify the plant type, you don’t have to take your phone out. And it’s extremely easy to use it.
Using Google Lens to Search an Image in Chrome
There are two ways you can use Google Lens to search for an image on Chrome.
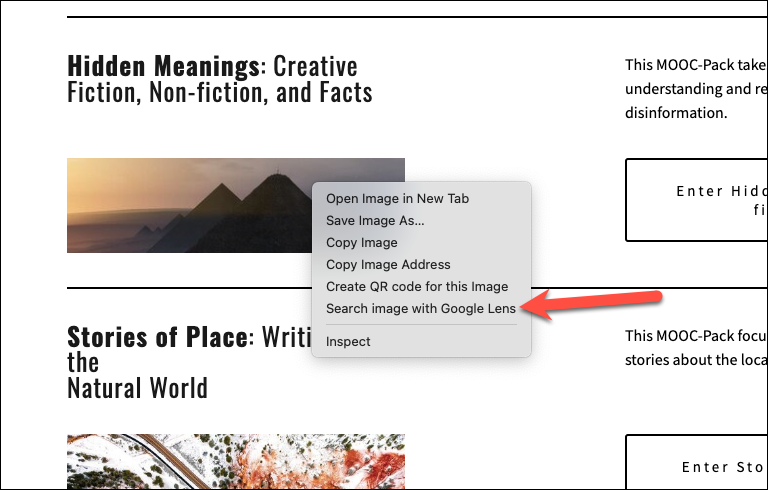
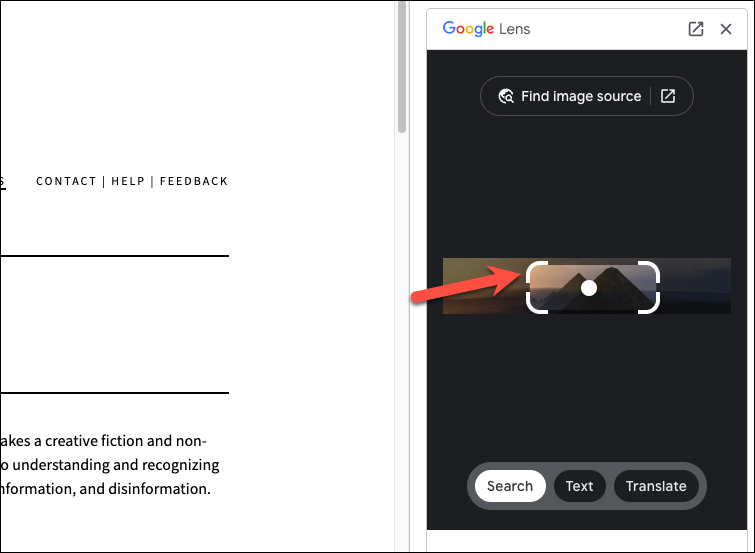
When you come across an image you either want to search for on the internet or want to copy/ translate the text, right-click on it. Then, click ‘Search image with Google Lens’ from the menu.
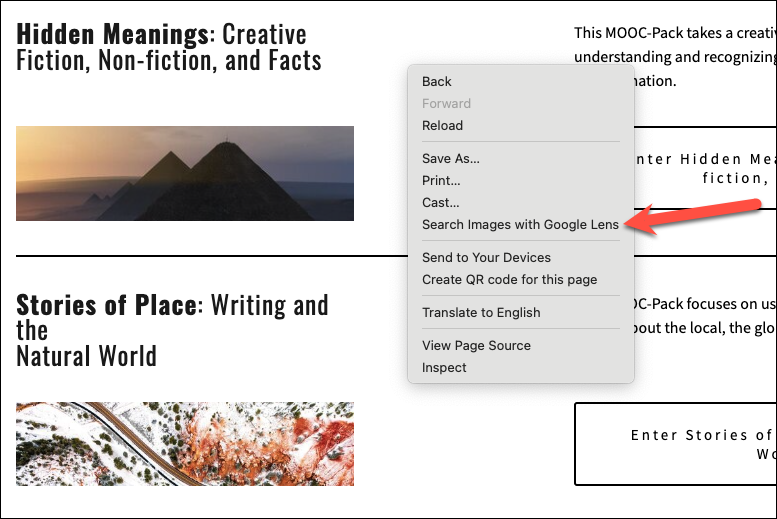
You can also right-click anywhere on the page and then select ‘Search Images with Google Lens’. This way, you can even select multiple images from the webpage or even include the text on the webpage itself. It essentially works like a screenshot, so you can capture any area on the screen.
Then, drag your mouse across the image/ images you want to search for.

Navigating the Google Lens Panel
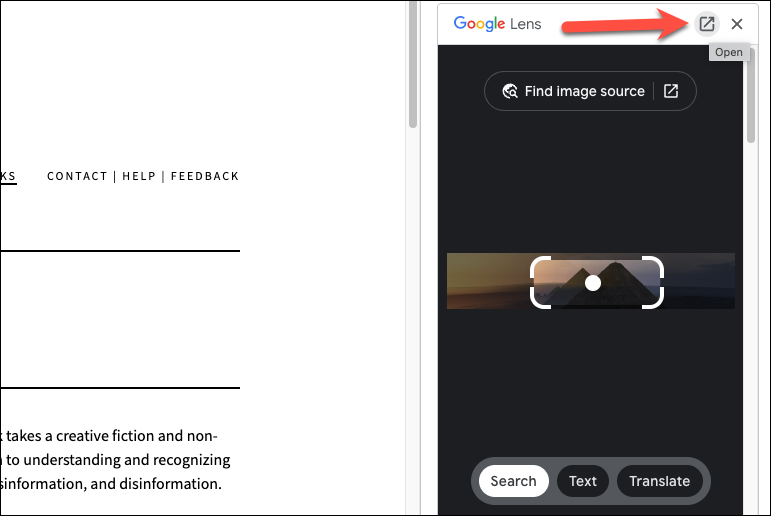
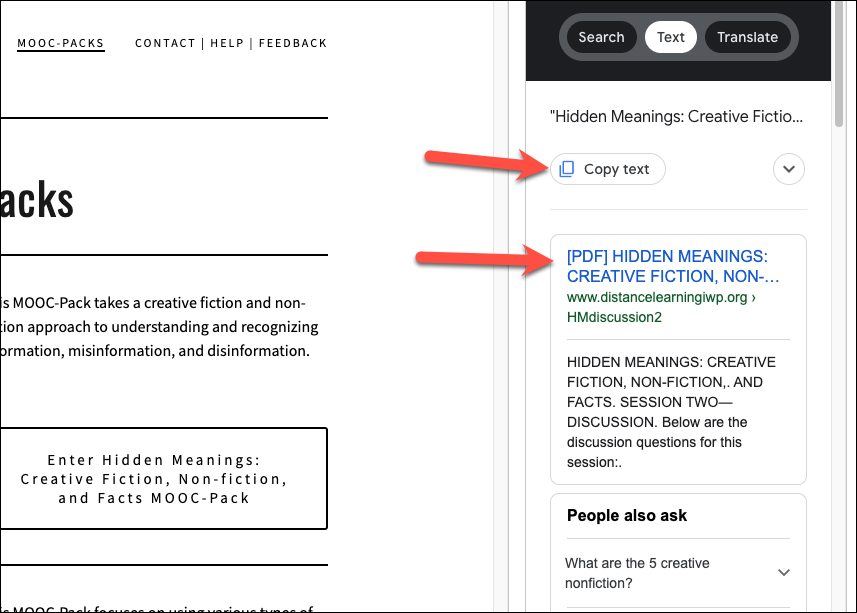
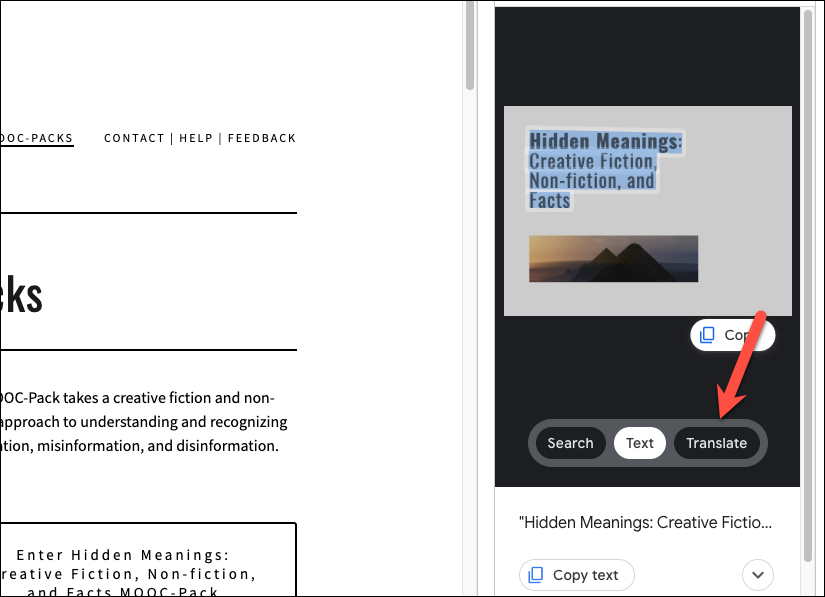
Either way, the search panel for Google Lens will open on the right side of the screen. You can either use it in the side panel itself or click the ‘Open’ button to view it in a separate tab.
If you only want to focus on a particular part of the image, you can adjust the selection area over the image using your mouse.
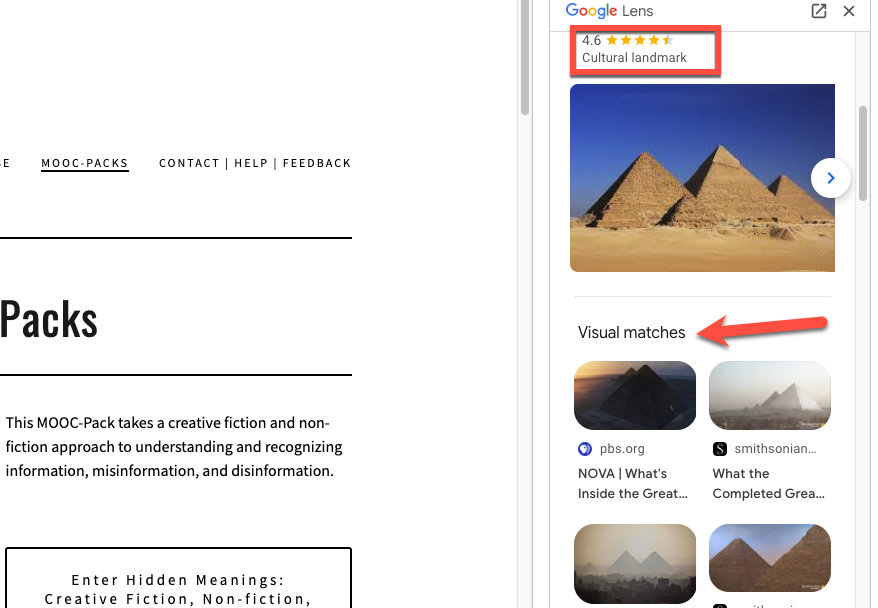
You’ll find the visual matches and any relevant results for the content in the image on the side panel itself. These could include any landmarks or websites that have similar clothes (in the case of clothes). Clicking a search result will open it in a new tab.
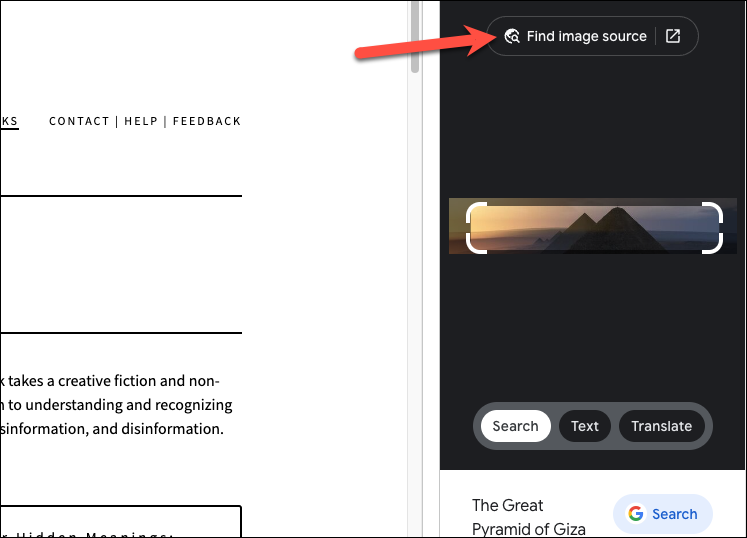
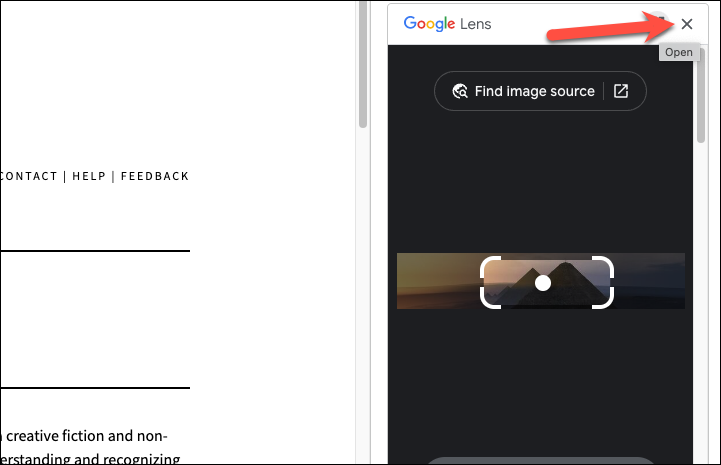
But if you want to search the webpages that have that exact image to find the source, click the ‘Find Image Source’ option on the panel.
To detect the text from the image, switch to the ‘Text’ tab.
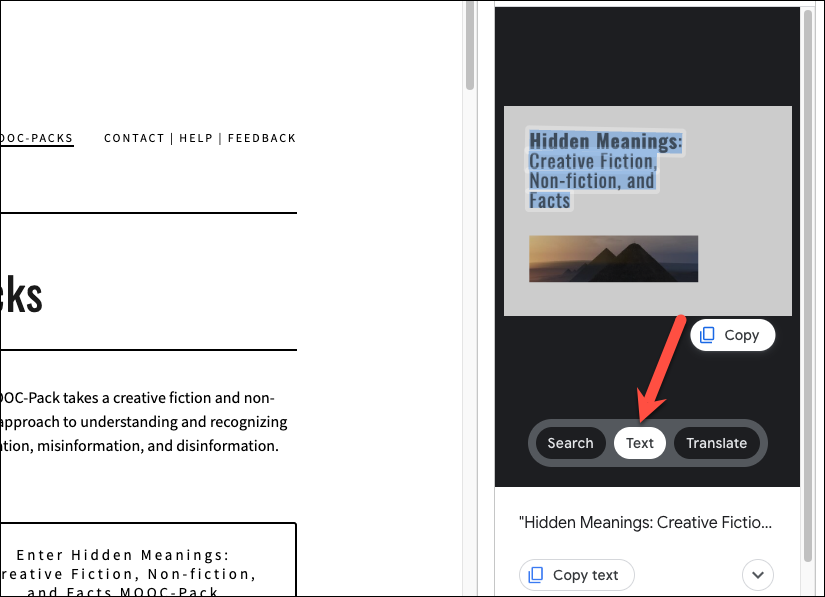
Then, select the text from the image. You can then either copy the text or navigate the search results for your text selection.
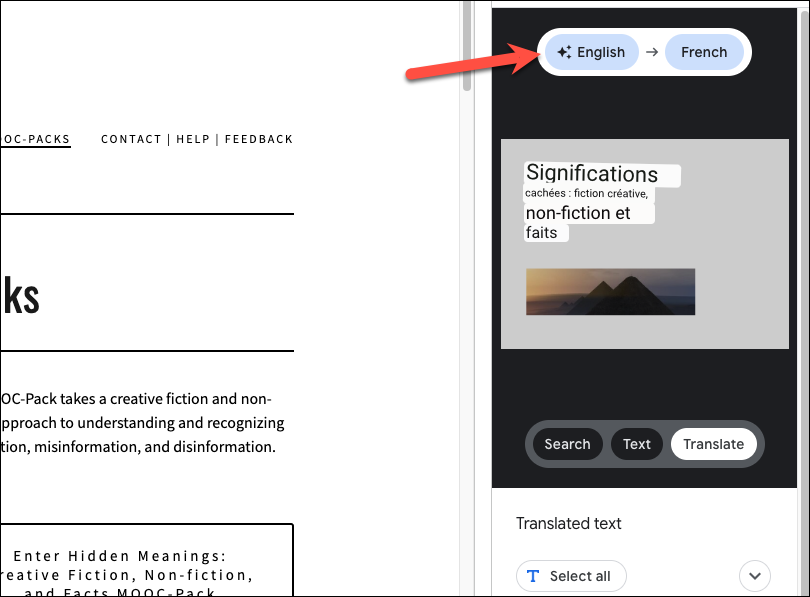
Switch to the ‘Translate’ tab to translate any text in the image.
Then, select the source and final language from the top. You can also let Google translate auto-detect the source language if you’re not sure which language it is, which it does by default, and only select the final language to which you want to translate it to.
To close the Google Lens panel, click the ‘Close (X)’ button.
Google Lens is a rather underrated feature in Chrome that, when utilized properly, can enhance your overall browsing experience. And even though it’s already gotten a lot better for the desktop recently, if reports are any indications, it’s only uphill from here on out.