
Windows 11 has introduced several new features aimed at enhancing the productivity of developers. One such feature is the Dev Drive, a specialized storage solution designed to optimize development processes and boost performance.
What is a Dev Drive? A Dev Drive is a virtualized storage volume tailored specifically for development projects. Built on the Resilient File System (ReFS), it provides developers with improved control over security and storage, allowing them to focus more on coding rather than managing their environment. The Dev Drive reduces the impact of antivirus operations by deferring security scans until file operations are complete, resulting in enhanced performance.
Requirements for Setting Up a Dev Drive in Windows 11 Before creating a Dev Drive, ensure your system meets the following prerequisites: at least 8 GB of RAM (16 GB recommended), a minimum of 50 GB of free disk space, and Windows 11 Build 22621.2338 or later. The Dev Drive feature is available on all Windows SKU versions.
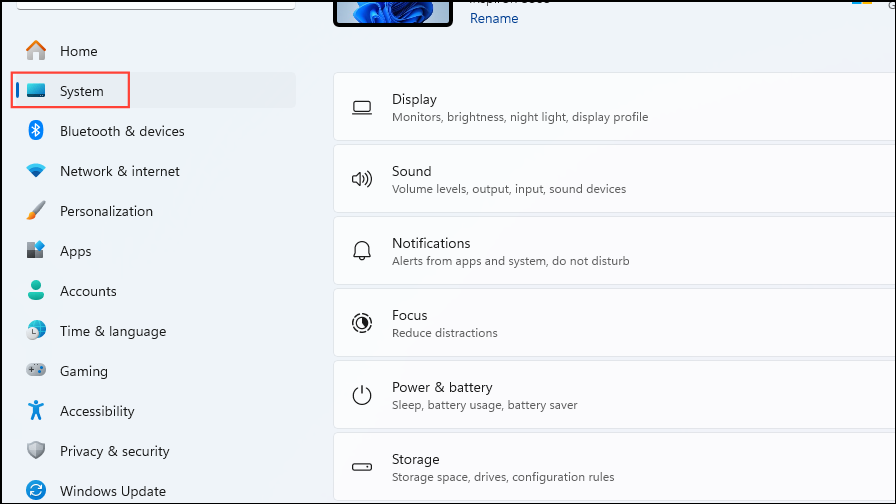
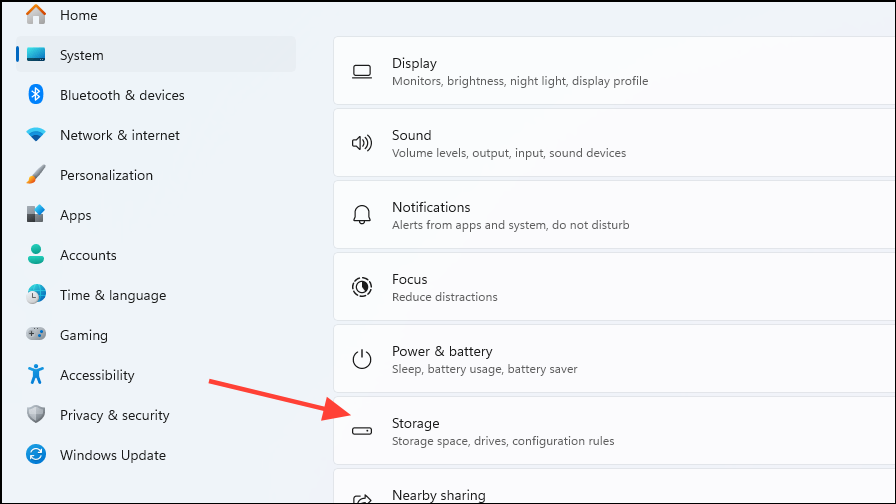
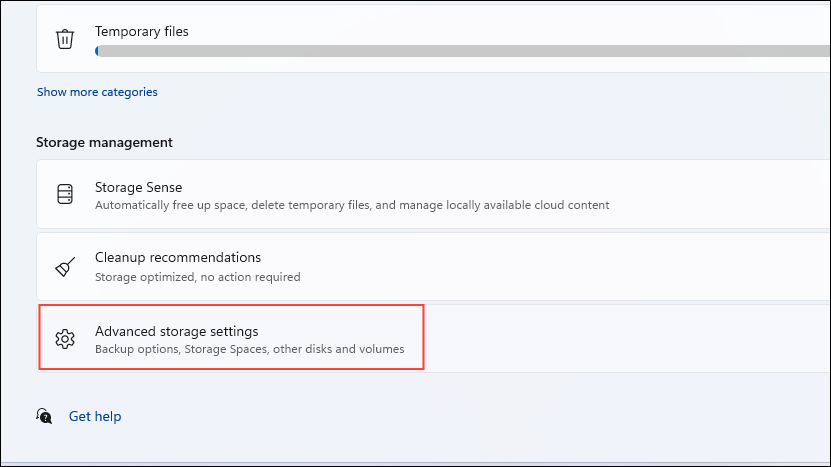
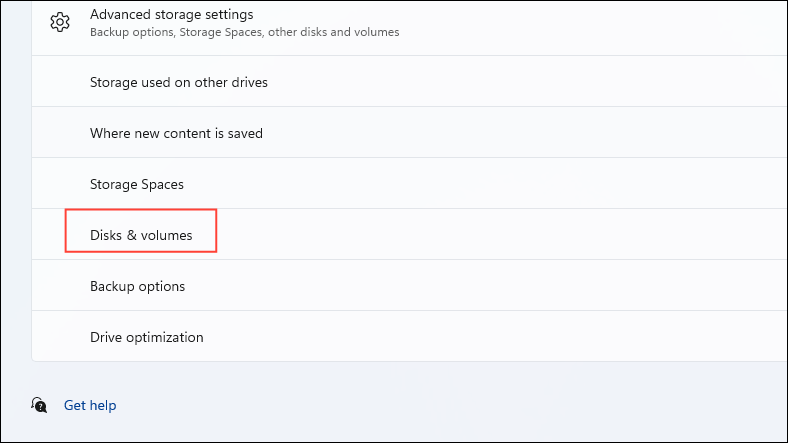
Setting Up a Dev Drive
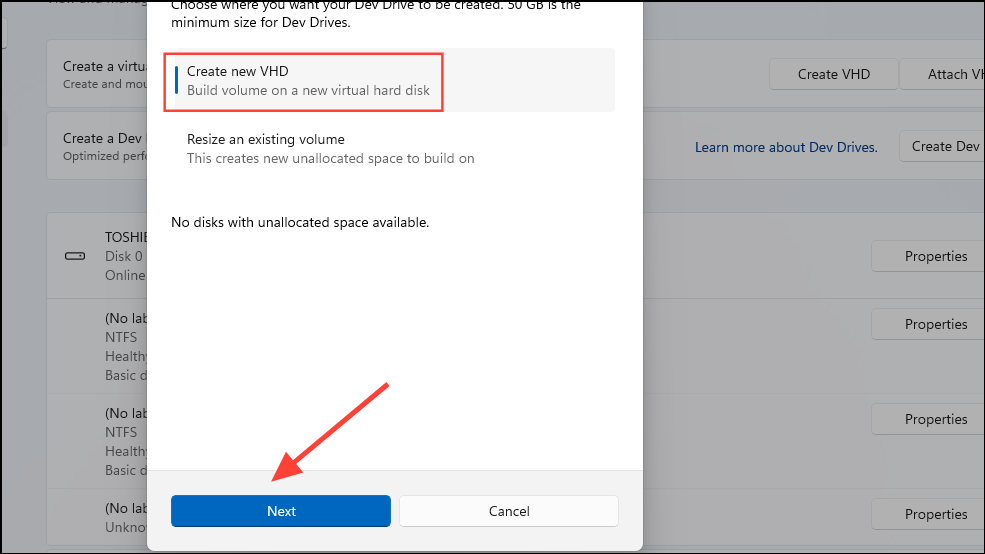
You can create a Dev Drive either by using a virtual hard disk (VHD) or by resizing an existing partition. Below are the detailed steps for both methods.
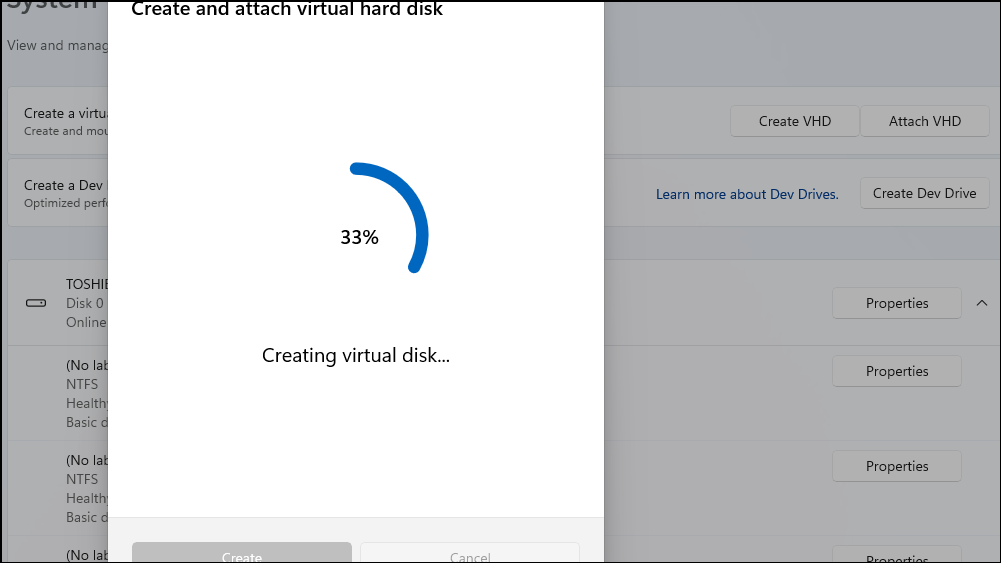
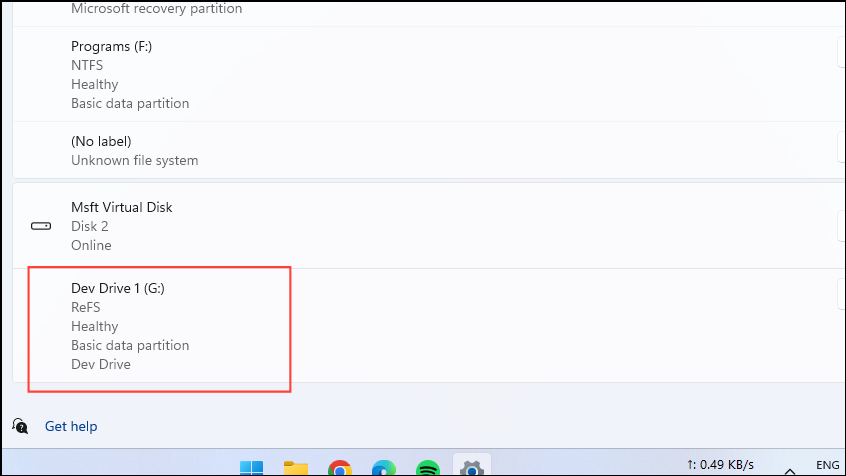
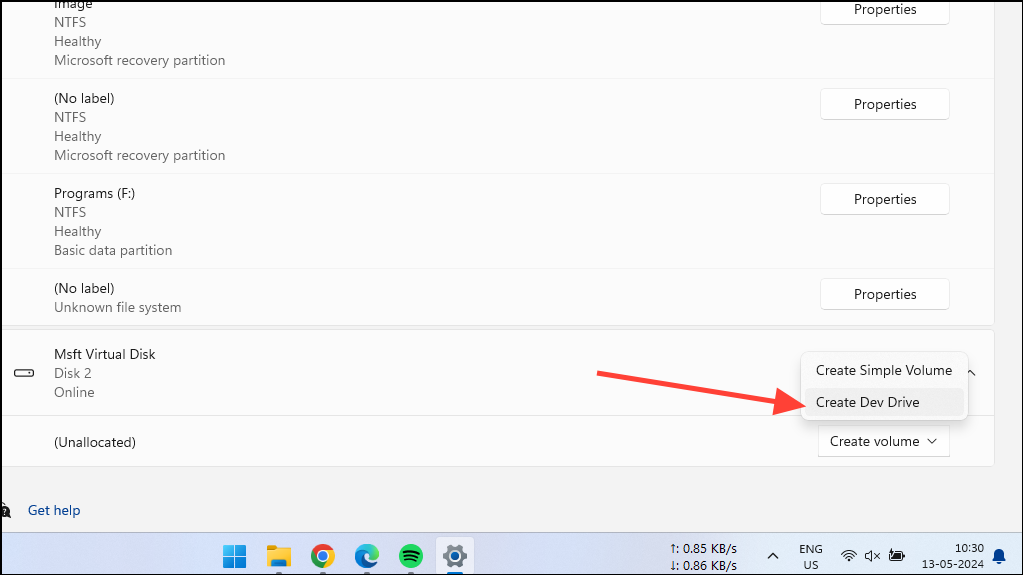
Creating a Dev Drive on a Virtual Hard Disk
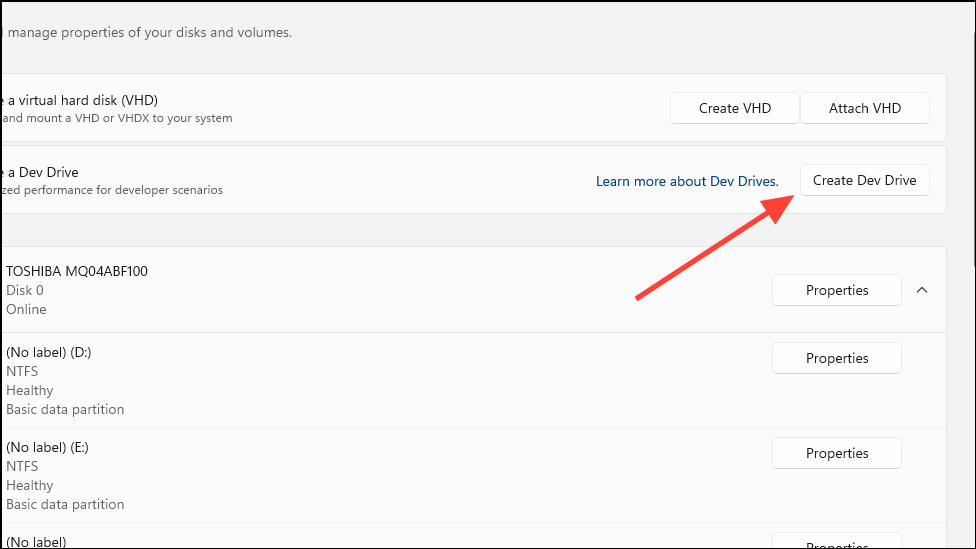
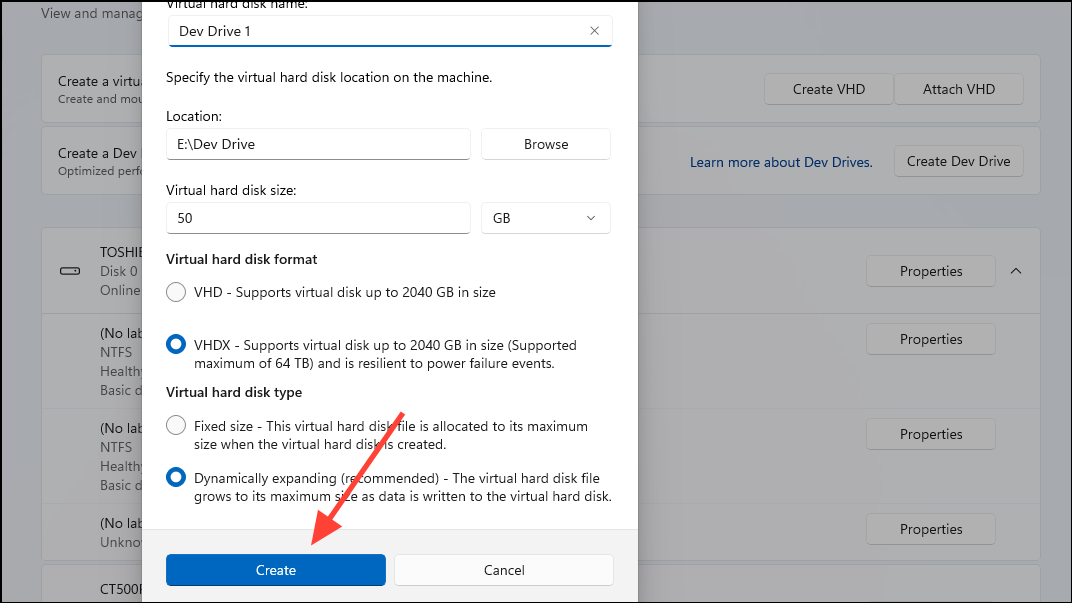
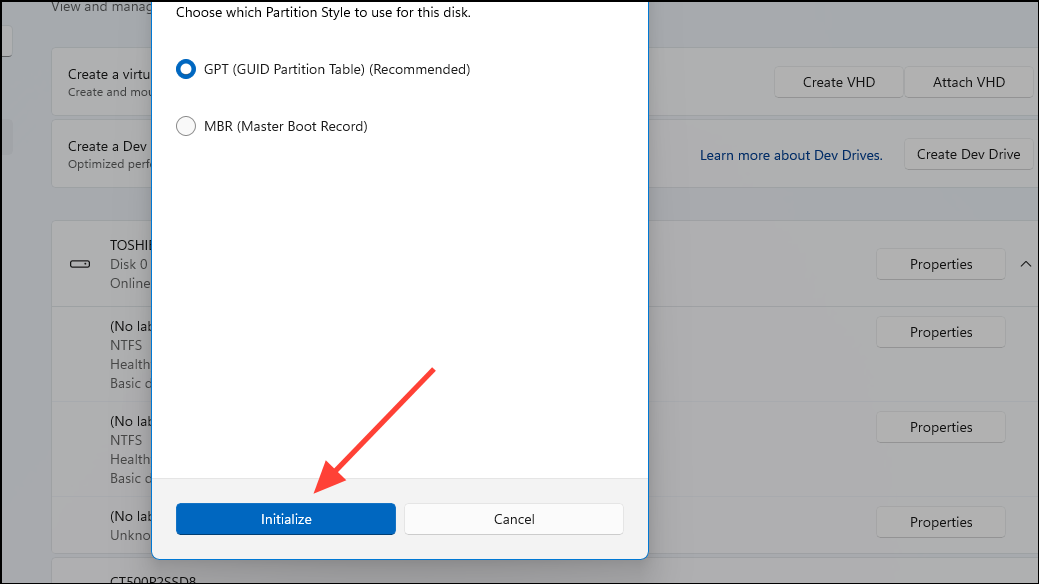
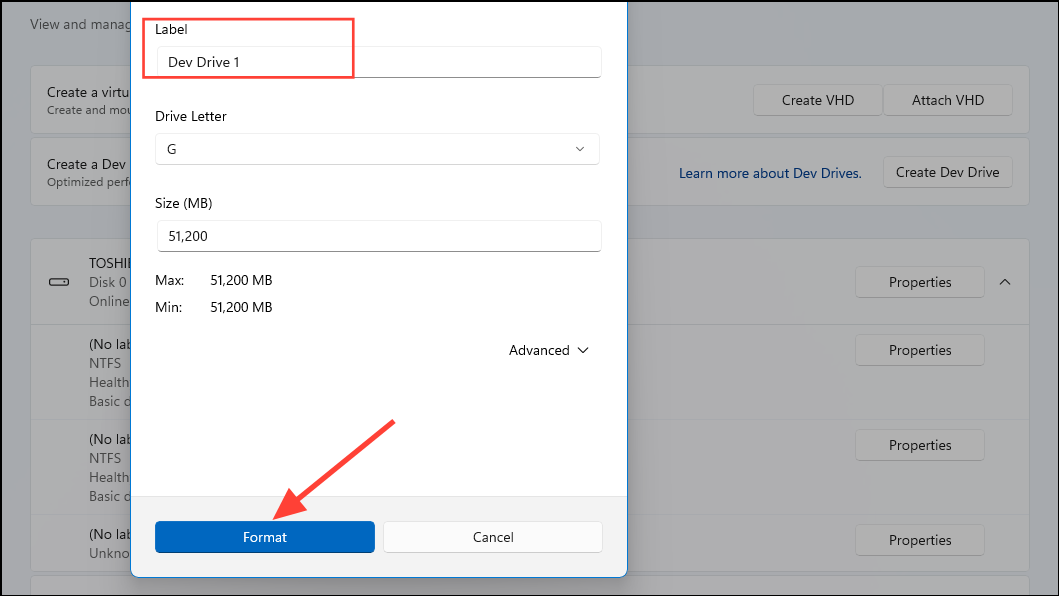
Note: The Dev Drive is intended for storing project files and packages, not for installing development tools like Visual Studio. Additionally, you cannot convert an existing drive into a Dev Drive.
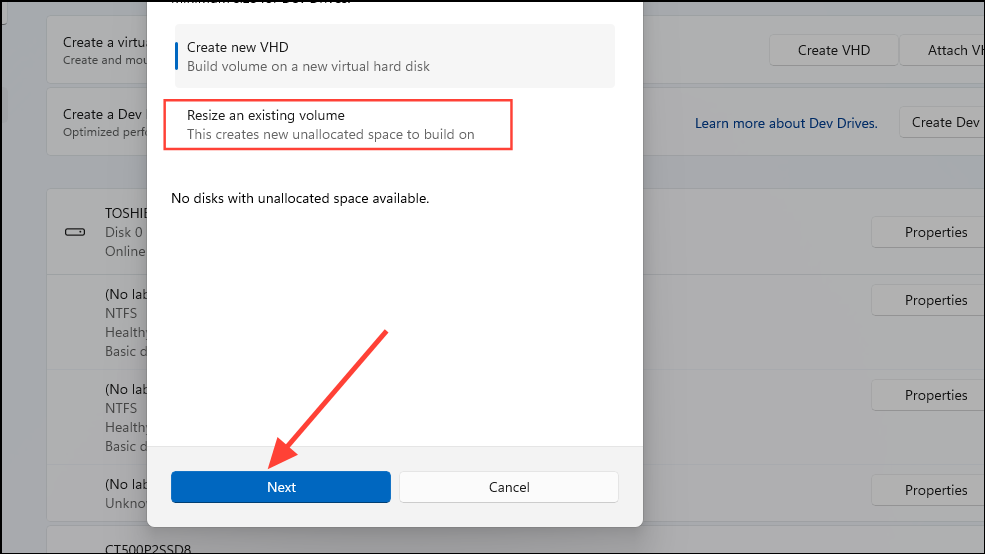
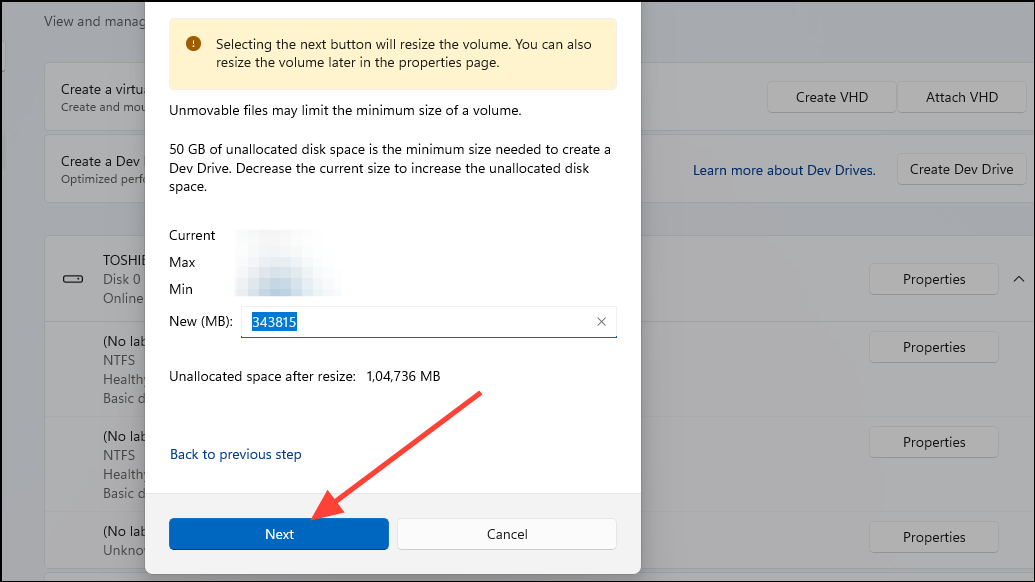
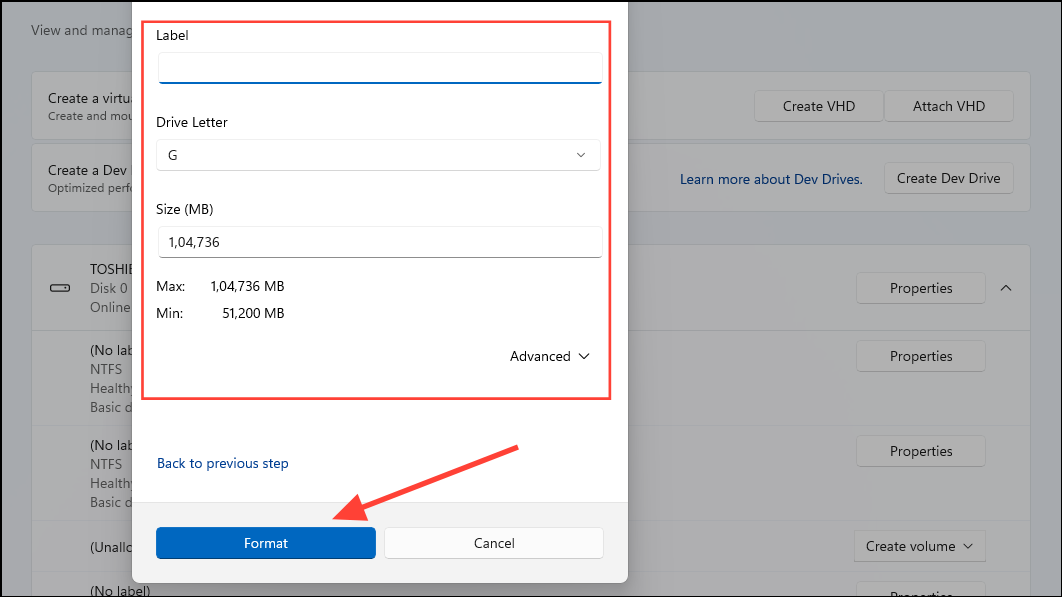
Resizing an Existing Partition
If you prefer to allocate space from an existing drive, you can resize a partition to create a Dev Drive. Ensure that the drive has at least 50 GB of free space.

Using the Command Line
Alternatively, you can create a Dev Drive using the Command Prompt or Windows PowerShell. Administrative privileges are required for this method.
cmd, and select Run as administrator to launch an elevated Command Prompt.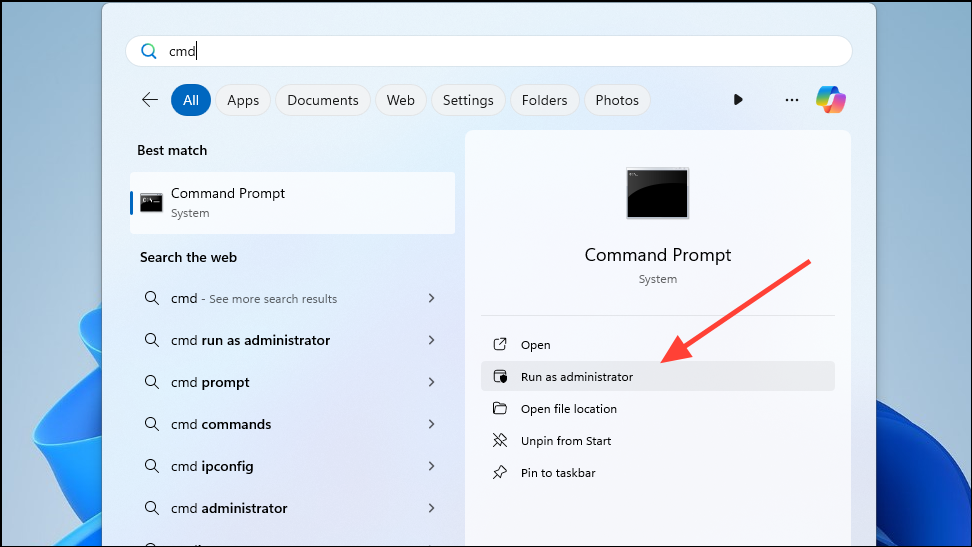
format D: /devdrv /q and press Enter. Replace D with the drive letter you intend to format as a Dev Drive.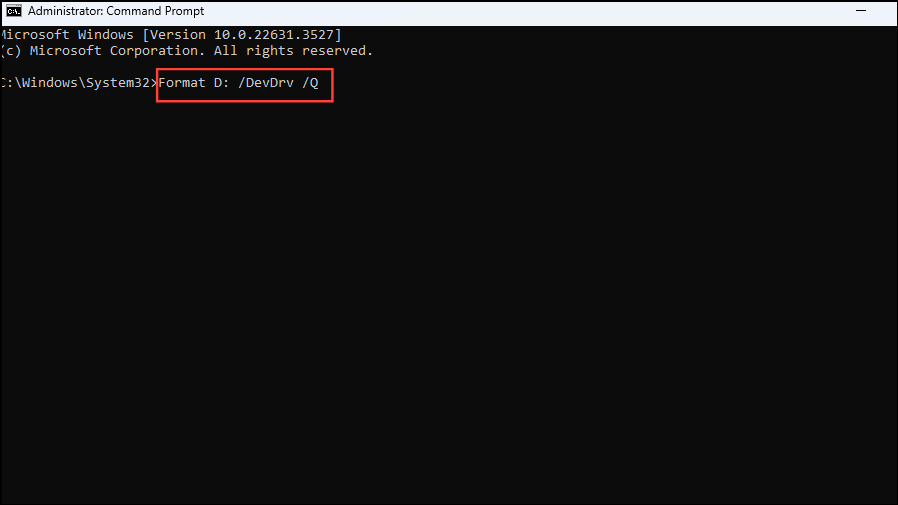
Note: You can also use Windows PowerShell with the command: Format-Volume -DriveLetter D -FileSystem ReFS -NewFileSystemLabel "DevDrive", replacing D with the appropriate drive letter.
Creating a Dev Drive in Windows 11 can significantly streamline your development workflow by providing a dedicated environment optimized for performance. Whether you choose to use a virtual hard disk or resize an existing partition, the Dev Drive offers improved efficiency and control for your development projects.
Remember that while the Dev Drive enhances performance by adjusting antivirus operations, upgrading your hardware may yield more substantial improvements for resource-intensive tasks.


