- Microsoft Lists is a versatile tool for managing data and work tasks.
- It offers a variety of features and customization options for creating and organizing lists.
- Microsoft Lists can be used for tracking tasks, managing inventory, planning events, maintaining contact lists, and more.
- It integrates with other Microsoft 365 products and is available on the web, mobile devices, and in Teams.
- Users can create lists from scratch, import data from CSV files, clone existing lists, or use pre-built templates.
Microsoft Lists is a data and task management tool that is built from SharePoint lists. It provides an enhanced way to organize and handle various types of information, such as ideas, to-do lists, tasks, inventory, FAQs, and more. With Microsoft Lists, you can effectively organize your work, collaborate with others, and improve productivity through customizable lists.
The application offers a range of features commonly found in to-do list apps. You can easily organize information, view timelines and calendars, import lists from spreadsheets, attach files to lists, and track activities. These features enable you to efficiently manage your tasks and stay on top of your work.
In this post, we will provide an overview of Microsoft Lists and offer guidance on how to get started with the app.
What is Microsoft Lists?
Microsoft Lists is a Microsoft 365 app that helps you track information and organize work. It is a flexible and easy-to-use tool that can be used to create lists for a variety of purposes, such as:
- Tracking tasks and projects
- Managing inventory
- Creating and tracking customer support tickets
- Planning events
- Organizing your Gift ideas
- Employee onboarding
- Maintaining contact lists
- Recipe tracking
- Content scheduling and much more!
The new lightweight version of the app is intended for both individual users and teams of all sizes. It is a great way to stay organized and on top of your work.
Microsoft Lists is available on the web, on mobile devices, and in Teams. You can start using it for free with a personal Microsoft account, or you can subscribe to a Microsoft 365 plan to get access to more features and functionality.
Microsoft Lists vs. Microsoft To-Do vs. SharePoint Lists vs. Microsoft Planner
Microsoft Lists, Microsoft To-Do, SharePoint Lists, and Microsoft Planner are all task management tools from Microsoft. However, each tool has its own strengths and weaknesses and is better suited for different types of tasks and users.
| Feature | Microsoft Lists | Microsoft To Do | SharePoint Lists | Microsoft Planner |
|---|---|---|---|---|
| List types | Supports a variety of list types, including custom lists | Supports basic lists | Supports basic lists | Supports Kanban boards |
| Data types | Supports a variety of data types, such as text, numbers, dates, and attachments | Supports basic data types, such as text and dates | Supports basic data types, such as text and dates | Supports basic data types, such as text and dates |
| Views | Allows you to create custom views of your lists | Supports basic views, such as lists and boards | Supports basic views, such as lists and boards | Supports Kanban boards |
| Collaboration | Allows you to share lists with others and collaborate on tasks | Allows you to share lists with others and collaborate on tasks | Allows you to share lists with others and collaborate on tasks | Allows you to share Kanban boards with others and collaborate on tasks |
| Integrations | Integrates with other Microsoft 365 products, such as Teams and SharePoint | Integrates with other Microsoft 365 products, such as Outlook and Planner | Integrates with other Microsoft 365 products, such as Teams and SharePoint | Integrates with other Microsoft 365 products, such as Teams and SharePoint |
How to Use Microsoft Lists
Now that we know what Microsoft Lists is, how it differs from other Microsoft task management apps, and its use cases, let’s dive into a few essential things you’ll need to know as you get started with the app.
You can open the Microsoft Lists app in two ways: from the Microsoft 365 app launcher or the Microsoft Lists website at lists.live.com. To launch the Microsoft web app, click the ‘App launcher’ icon (the grid of nine dots) and select ‘Lists’ or visit the official website.
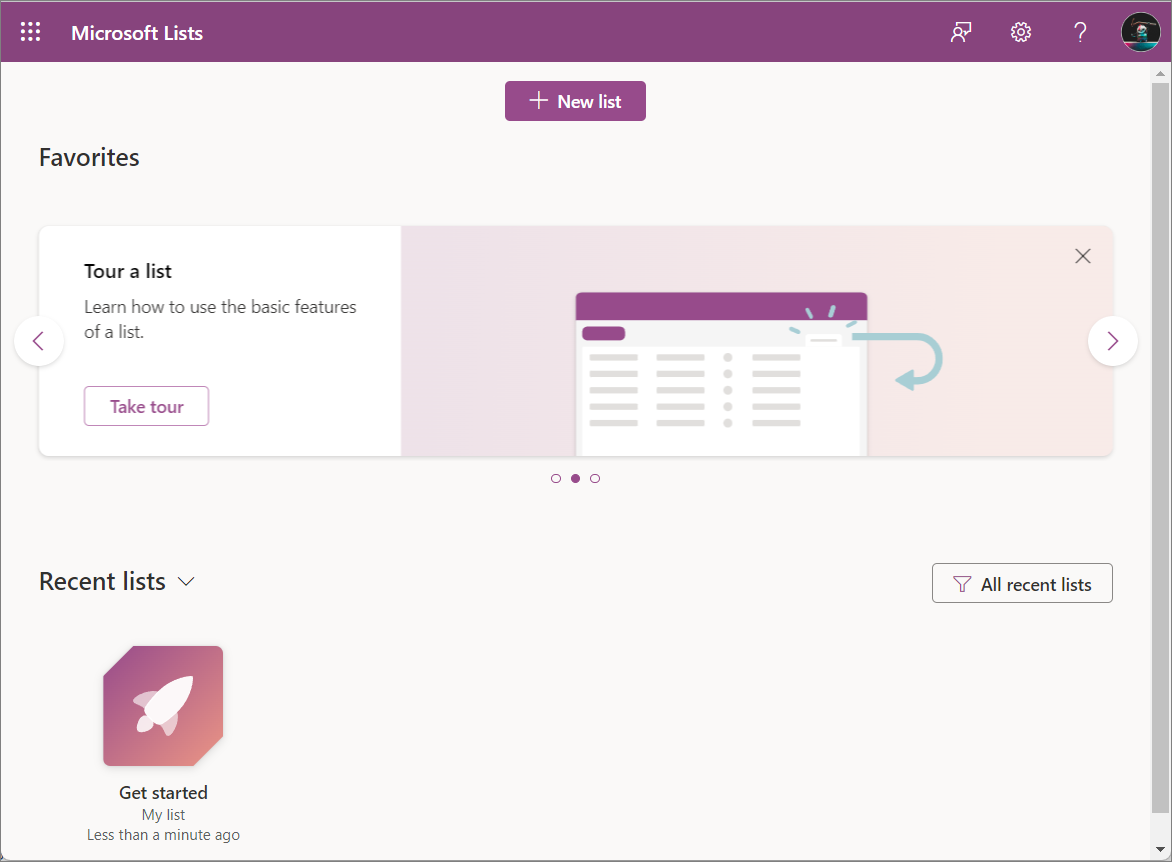
Once you’re logged in, you’ll be greeted with this page, divided into two sections: Favorites and Recent list.
Creating a List in Microsoft Lists
Before you create your first list, it’s helpful to learn about the different ways to do it.
On the Microsoft Lists home page, click the ‘+ New list’ button.
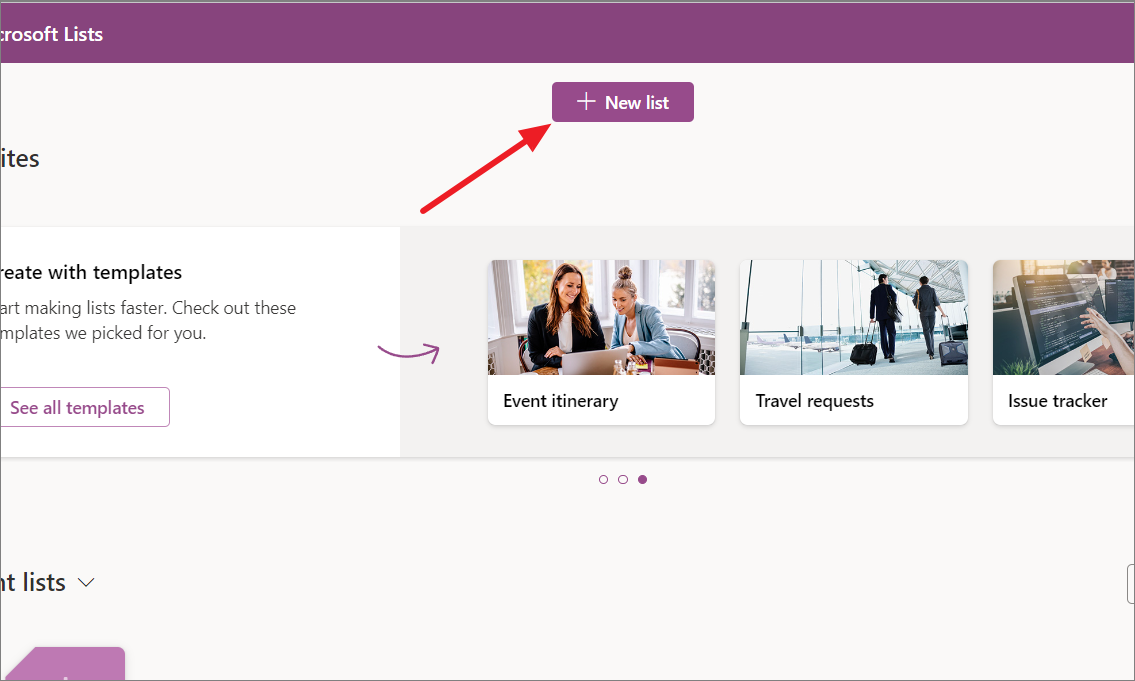
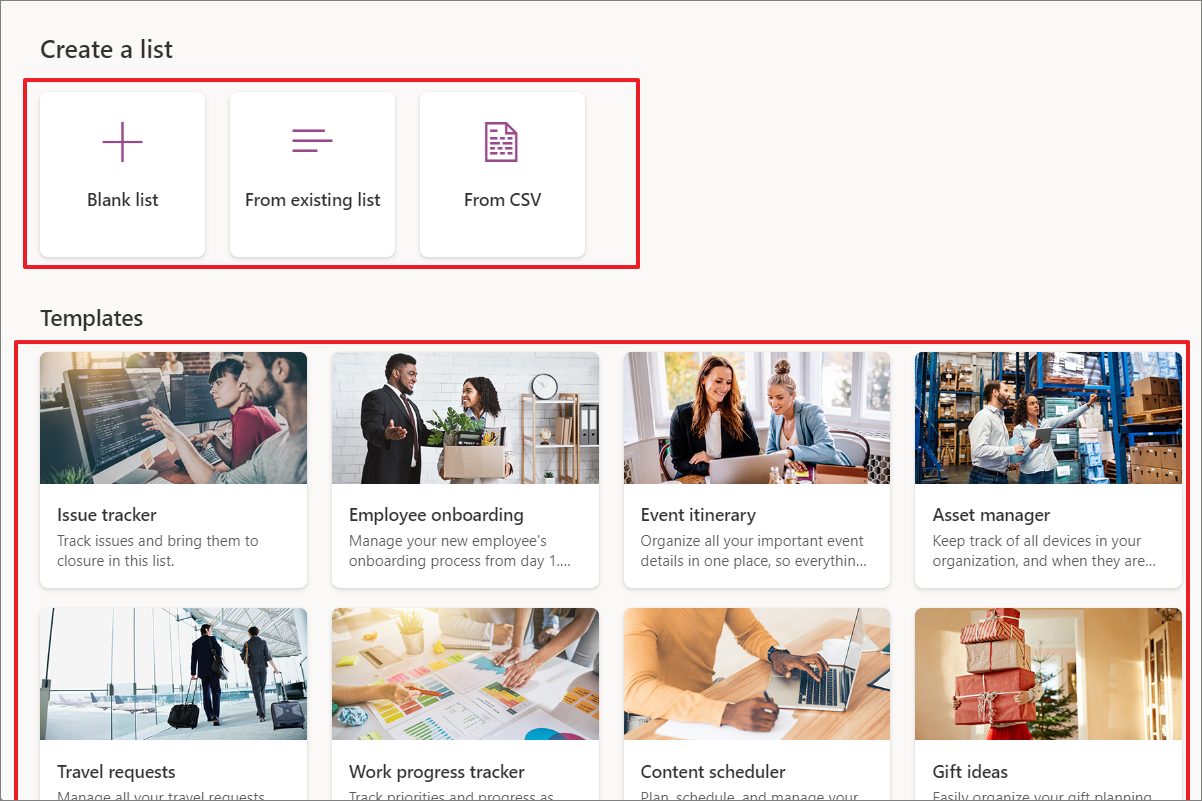
Then, choose one of the following options to create lists.
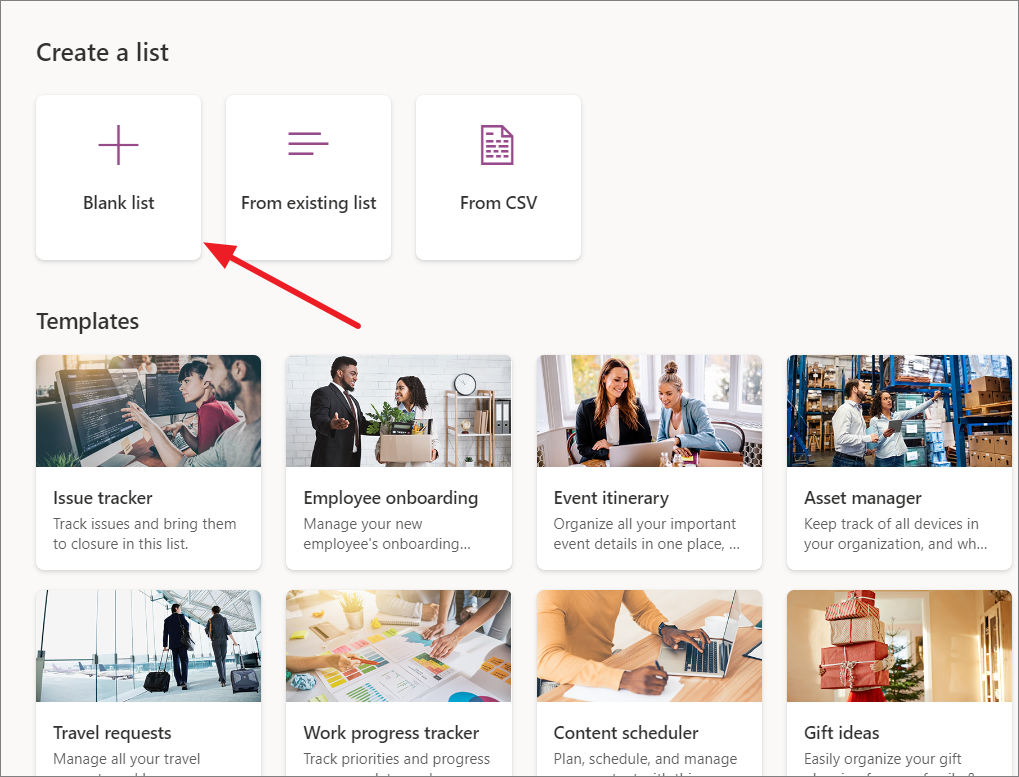
- Blank list: Choose this if you want to start from scratch.
- From CSV: Import table data from a CSV file.
- From existing list: Create a new list based on an existing list.
- From templates: Use a pre-made list template.
Creating a Blank list:
Creating a blank list allows you to start from scratch and create a custom list with the columns and data types that you need.
- Just, click the ‘Blank list’ button to get started.
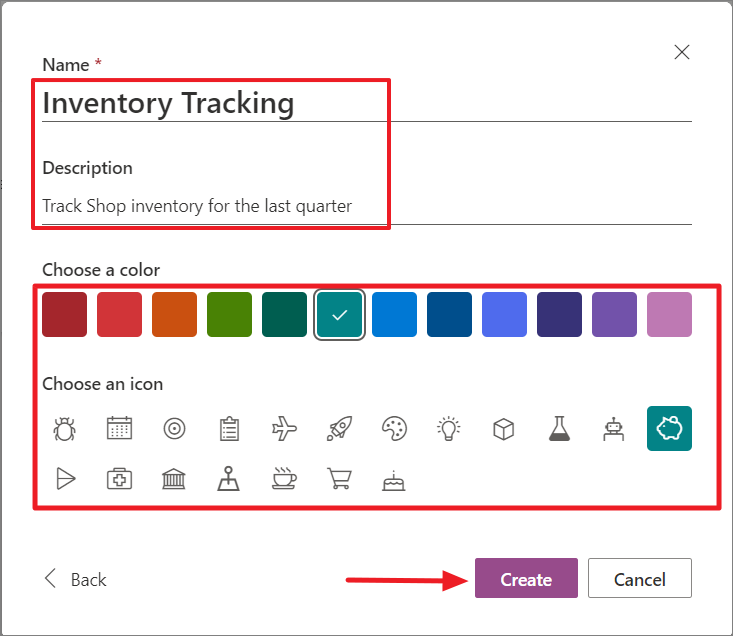
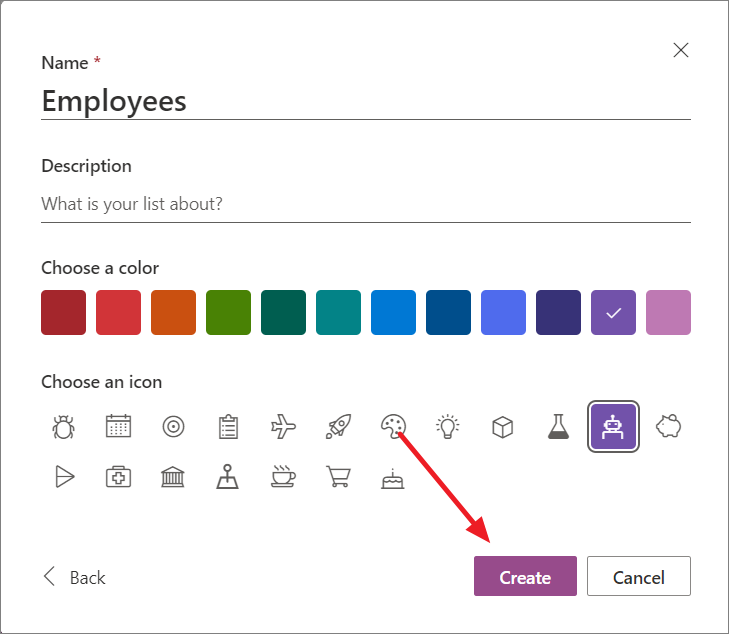
- On the pop-up window, provide a name and description for your list. Then, pick a color and an icon to help you distinguish the list. After that, click ‘Create’ to make a new list.
If you manage dozens of lists in Microsoft Lists, it’s important to personalize them so that you can easily find the one you’re looking for.
Creating a List from CSV:
This option in Microsoft Lists allows you to import table data straight from a CSV file into a new list. This is a usefull option if you have your data organized in a CSV file, or if you want to import data from another application that exports data in CSV format.
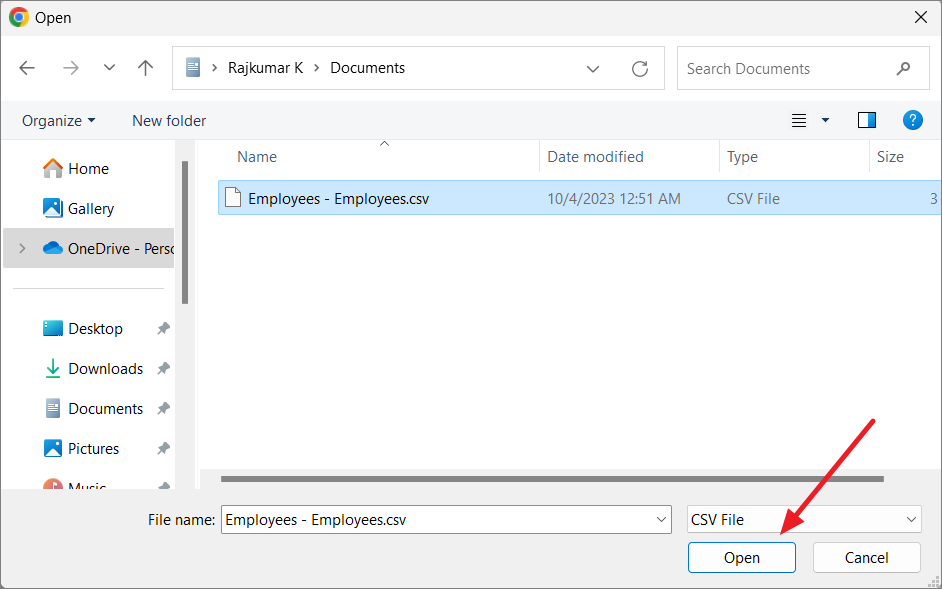
- Under Create a list, click the ‘From CSV’ option, then find and select the .CSV file you want to import. Then, click ‘Open’.
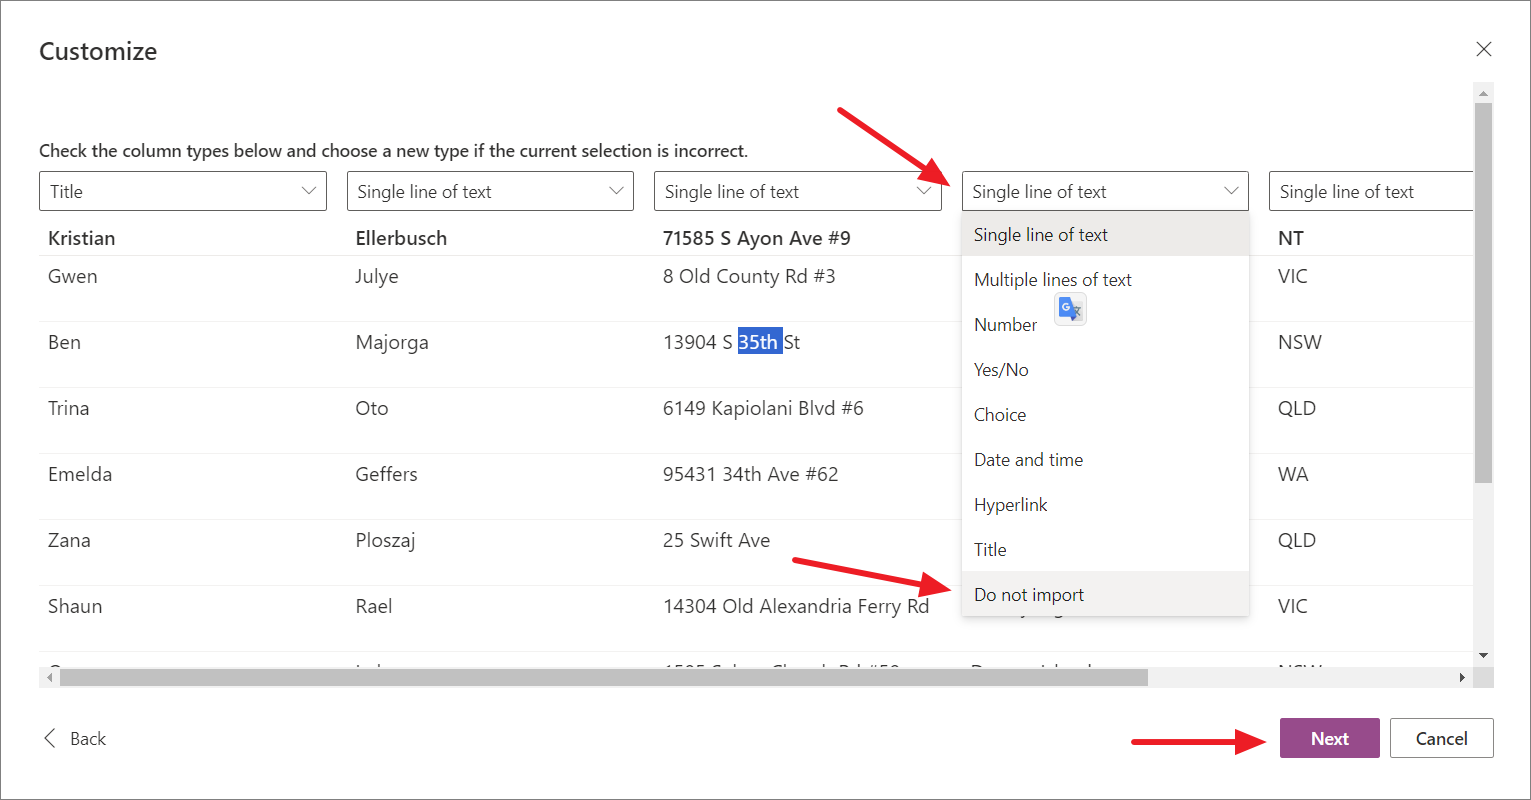
Microsoft Lists will import the data in the CSV file into a Customize window.
- Here, you can check the column data type and if it’s incorrect, select a different type from the drop-down menu above each column. You can also choose not to import a particular column by selecting the ‘Do not import’ option. Once you’re done, click ‘Next’.
- Next, edit the name, provide a description, and personalize the list. Then, click ‘Create’.
You can then start adding new items to the list, editing existing items, and deleting items as needed.
Clone from an existing list:
Creating the same type of list, such as an inventory list, multiple times can be time-consuming, especially if you have to set up all the configurations and formatting each time. A better approach is to use the ‘From existing list’ option to clone an existing list. This will copy the formatting, columns, list structure, and views of the existing list, saving you time and effort.
This is a good option if you want to create a new list that is similar to an existing list but with some changes.
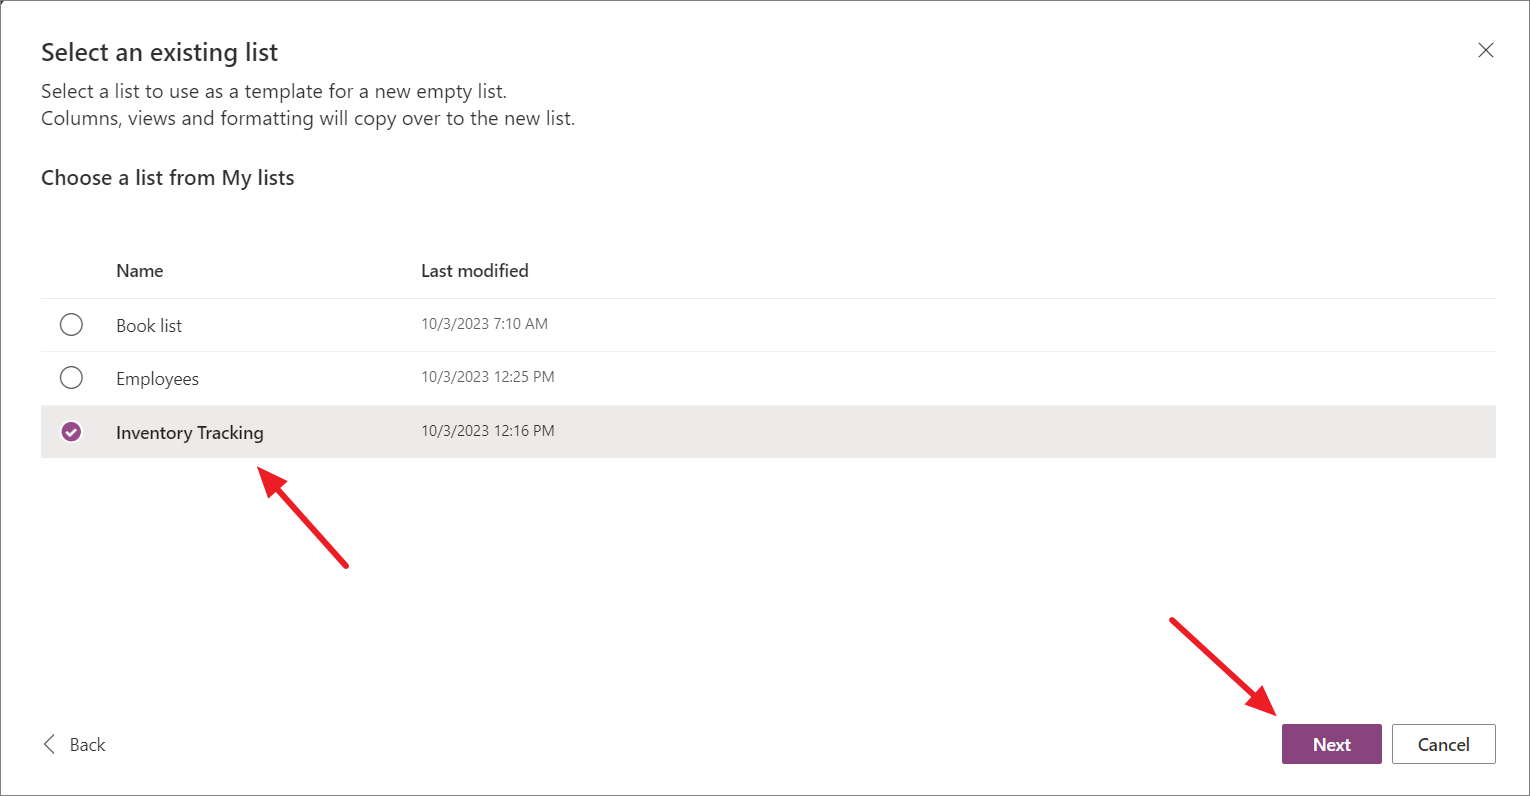
- In the Create list window, select the ‘From existing list’ option. Then, choose a list from your lists and click ‘Next’.
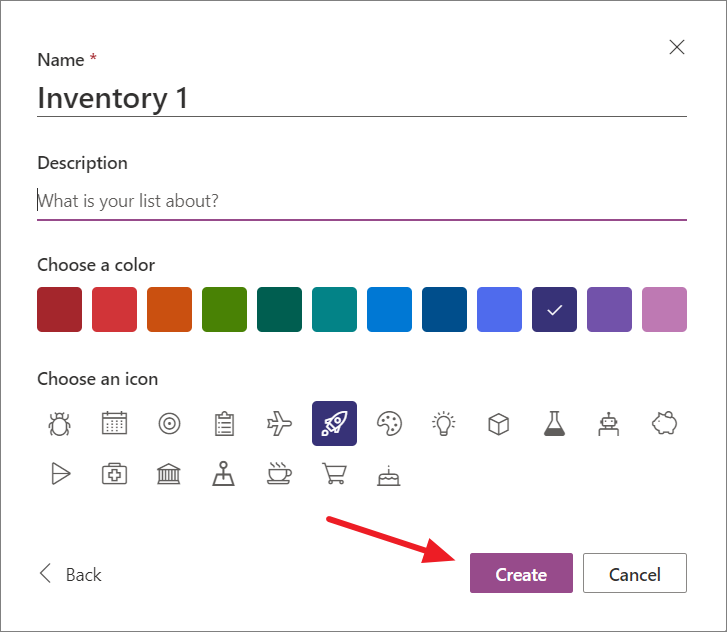
- After that, rename the list, provide a description if needed, pick a color and icon, then click ‘Create’.
Creating Lists from Templates:
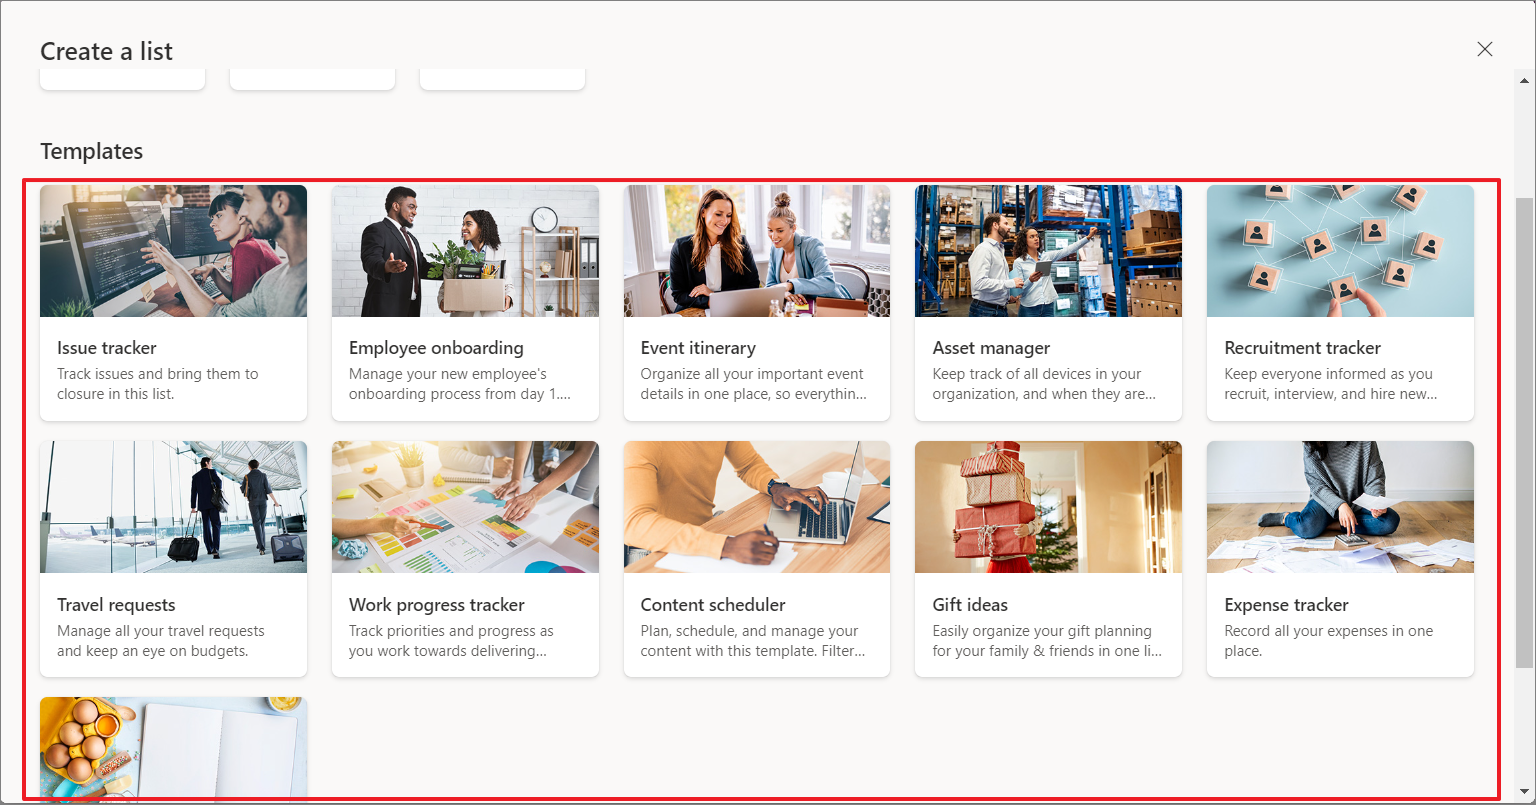
Another best way to create lists is through pre-built temples. As of now, Microsoft lists offers 11 different templates, such as issues tracker, employee onboarding, travel requests, etc.
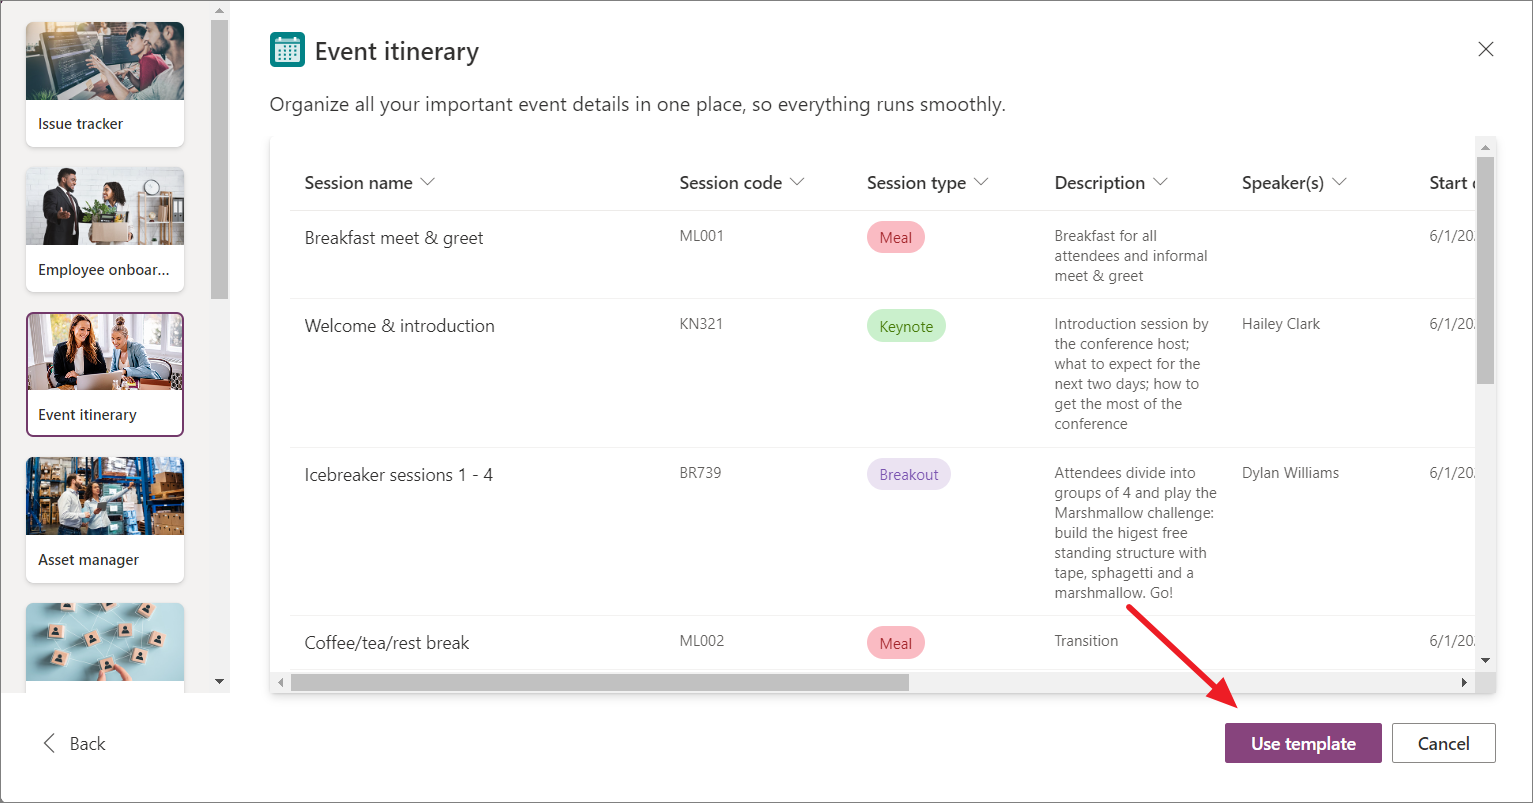
- Based on your usage or preference, you can select a template from the Create a list window.
- You will then see a preview of the template. Click the ‘Use template’ button to create a list with the selected template.
Unlike Notion, Microsoft Lists does not yet have a way to browse community-made templates.
Adding a New Column in Microsoft Lists
Once you have created a list, it’s time to add some columns to it. These columns can be used to add more details to the list. If you create the list from an existing list, template, or CSV file, it will come with the necessary columns. However, a blank list will only have a title column (which you can rename).
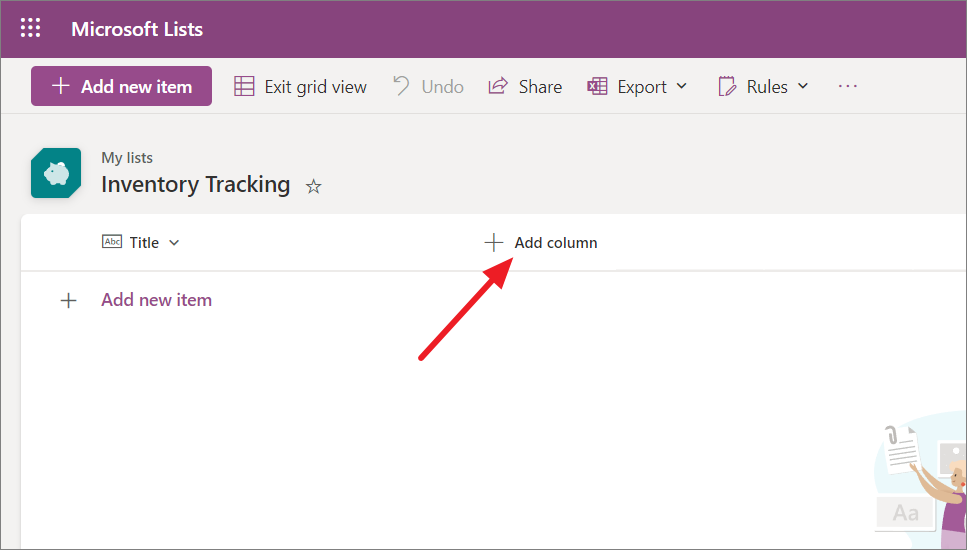
- To add a new column, click the Add column button at the top of the list.
- Select the type of column you want to create and click ‘Next’ to continue.
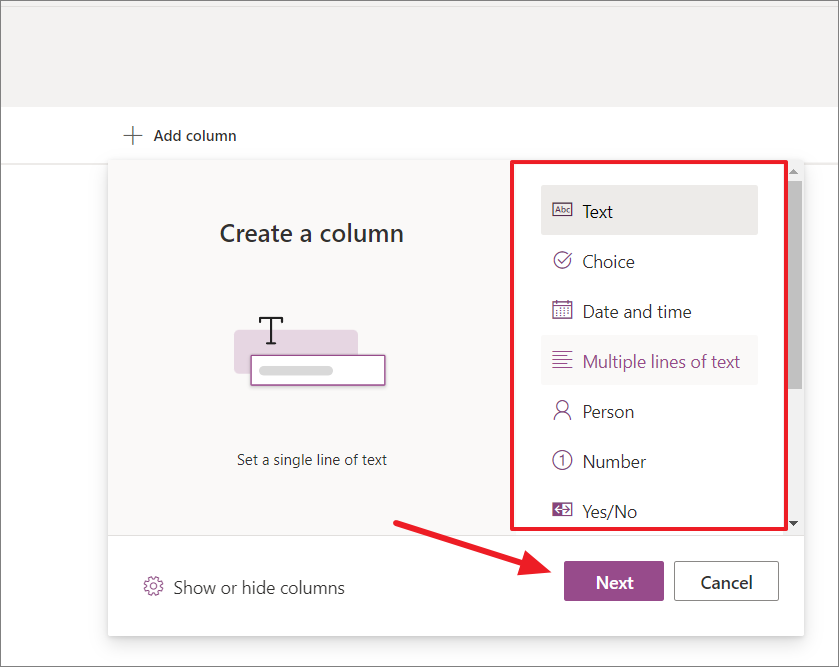
These column types can be used to store a variety of information in your Microsoft Lists lists, depending on your specific needs:
- Text: Use this for storing short amounts of text, such as names, addresses, or product names.
- Choice: Add a single value from a list of predefined values, such as product categories, order statuses, or employee roles.
- Date and Time: Store dates and times.
- Multiple lines of text: Add longer amounts of text, such as descriptions or notes.
- Person: Store people or groups, such as team members.
- Number: Store numeric values, such as quantities, prices, or phone numbers.
- Yes/No: Add a single value of Yes or No.
- Hyperlink: Include links to websites or other resources.
- Image: Store images.
- Lookup: Include values from another list or library.
- Average Rating: Display the average rating of an item based on ratings entered in other columns.

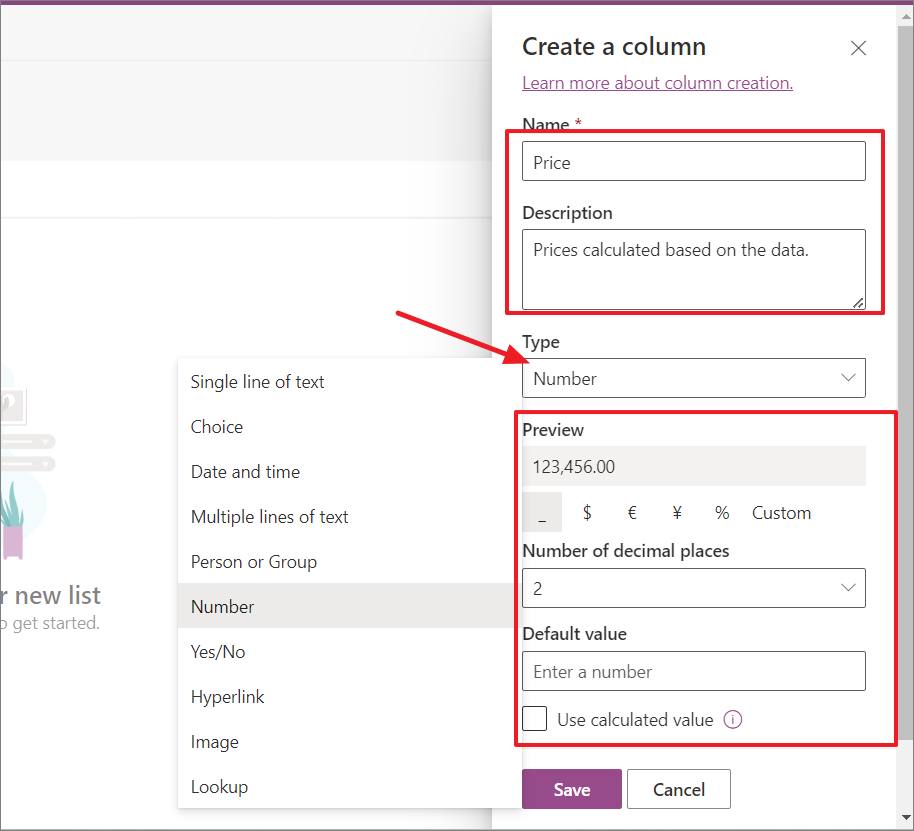
- You’ll then see a sidebar (Create a column) on the right to add more details about the column. Here, provide details to the following fields:
- Name
- Description
- Type
- Default value (only for specific column types)
- More options (additional options for the column)
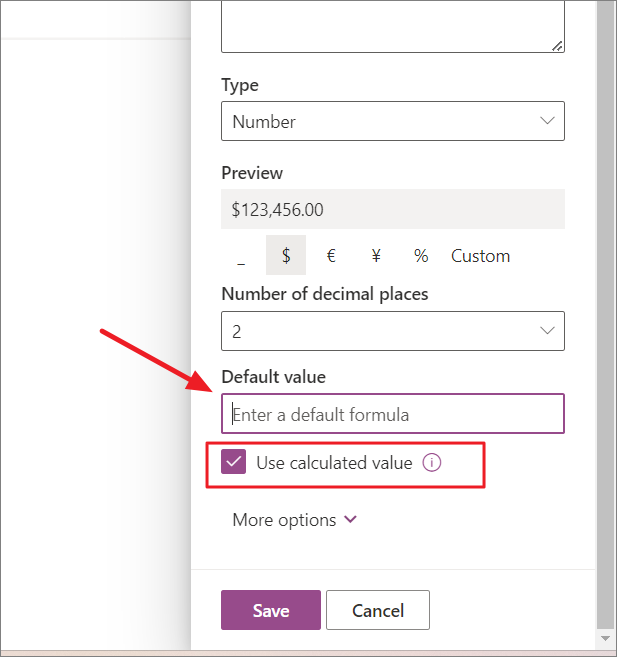
You can also change the column type in this sidebar. All column types have ‘Name’, ‘Description’, and ‘Type’ fields, but depending on the column type you select, you’ll also have additional options for the column. For example, if you select the ‘Number’ type, you’ll have options to specify the number of decimal places, default value, currency symbol, etc.
- Column types including Single line of text, Choice, Date and time, Multiple lines of text, and Number have the option to use a calculated value as the default value. To check this option, select the column type and then look for the ‘Use calculated value’ checkbox. If you enable this checkbox, you can then enter the formula you want to use to calculate the default value.
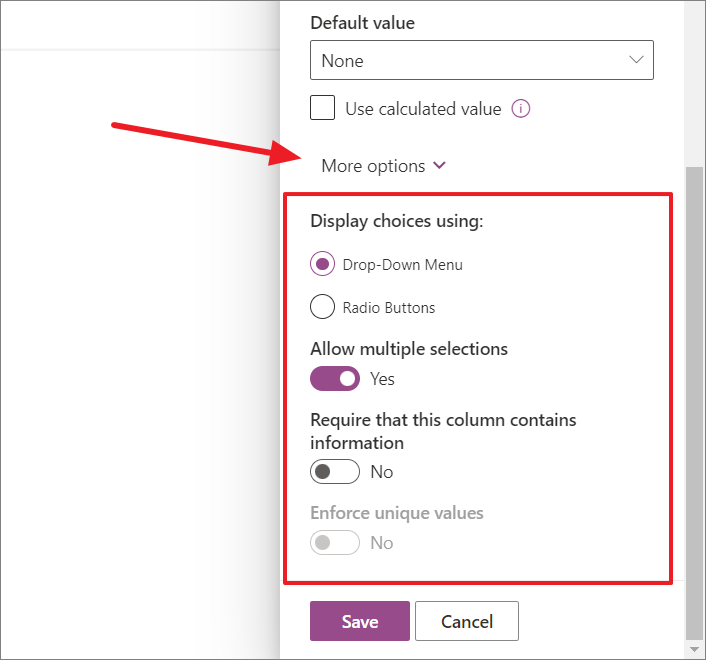
- Then, click the ‘More options’ menu at the bottom to see more options for defining the values that can be entered in the column, how it’s displayed, etc. For example, when the column type is set to ‘Choices’, under More options, you can choose whether to display choices using a drop-down menu or radio buttons, allow multiple selections, and more.
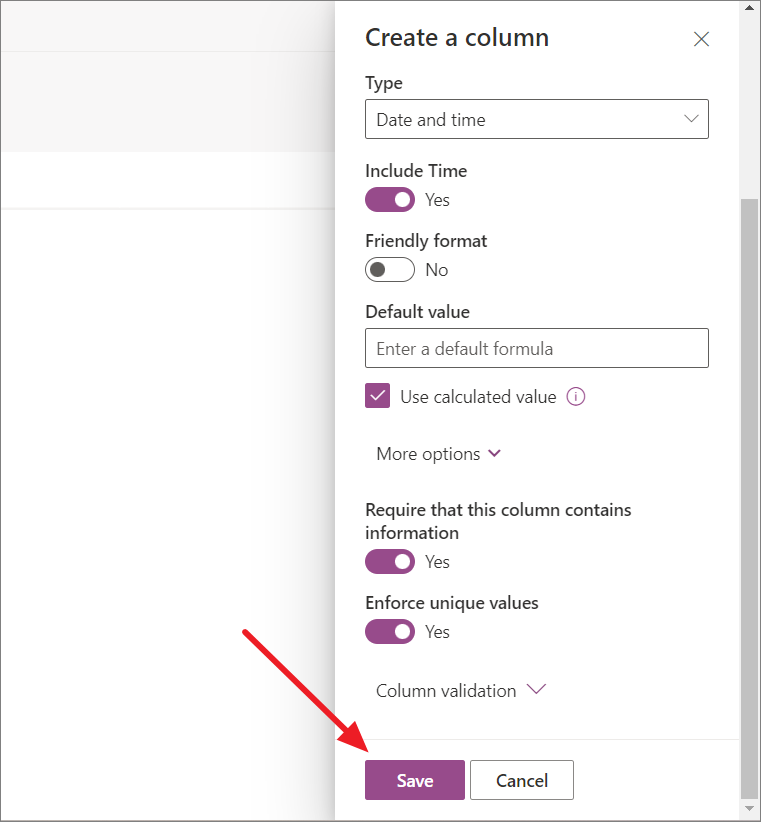
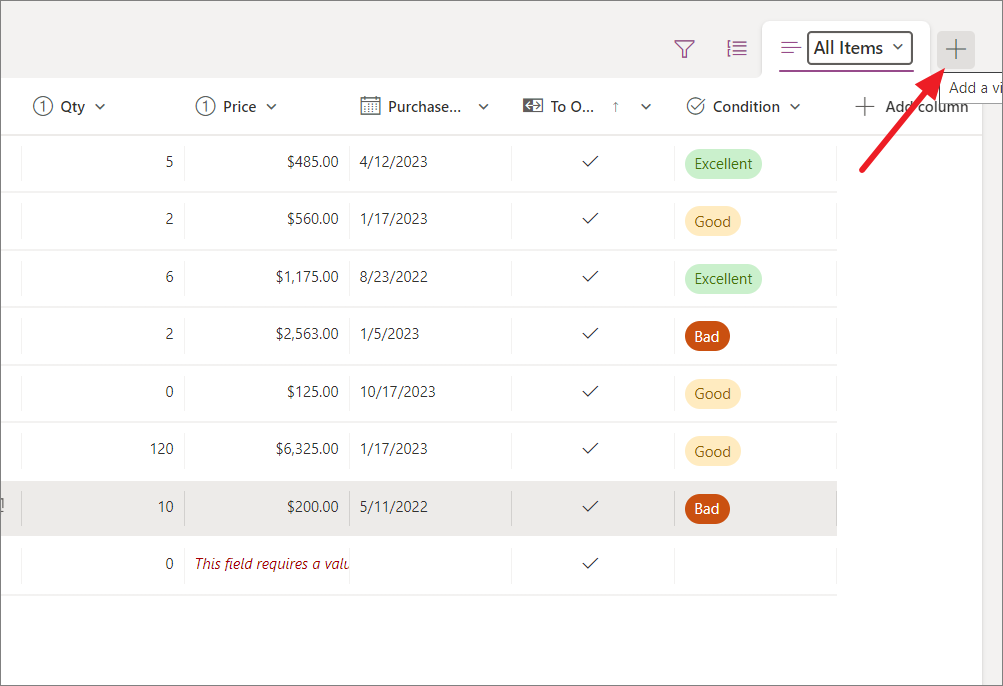
- Although the options under ‘More options’ differ for each column type, all column types have one common option: ‘Require that this column contains information’. If you want to make this column a required field, turn on the ‘Require that this column contains information toggle (Yes). This means if the field is left blank, it will show a message – “This field requires a value”.

Under the Content Validation option, specify the formula that you want to use to validate the data in this column when new items are saved to this list. The formula must be evaluated to TRUE for validation to work.
- Once you added column details, click ‘Save’ to add the column to the list.
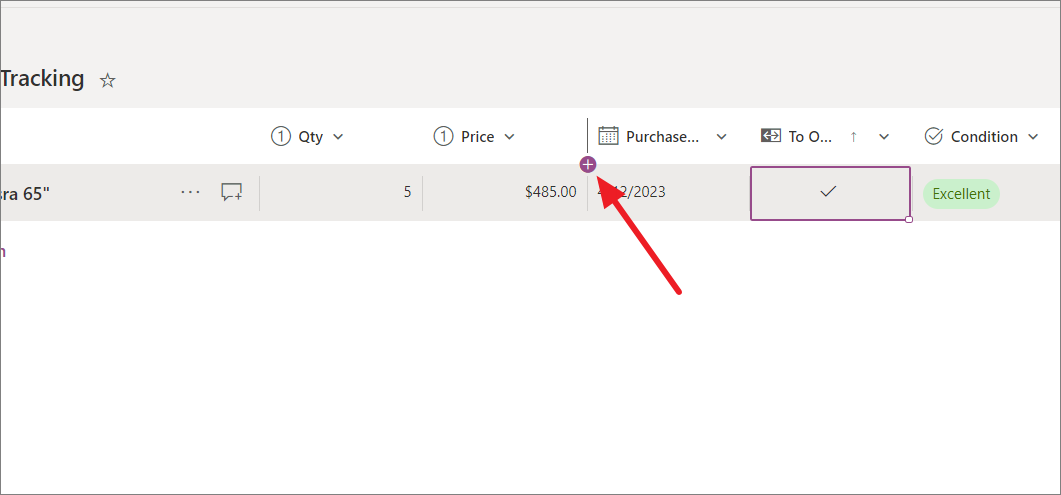
- You can also add a column between columns by hovering over the column border and clicking the ‘+’ button.
Adding New Items to Lists
To a new entry to the list, simply click anywhere below the bottom row at the end of the list. A new row will be added to the bottom of the list.
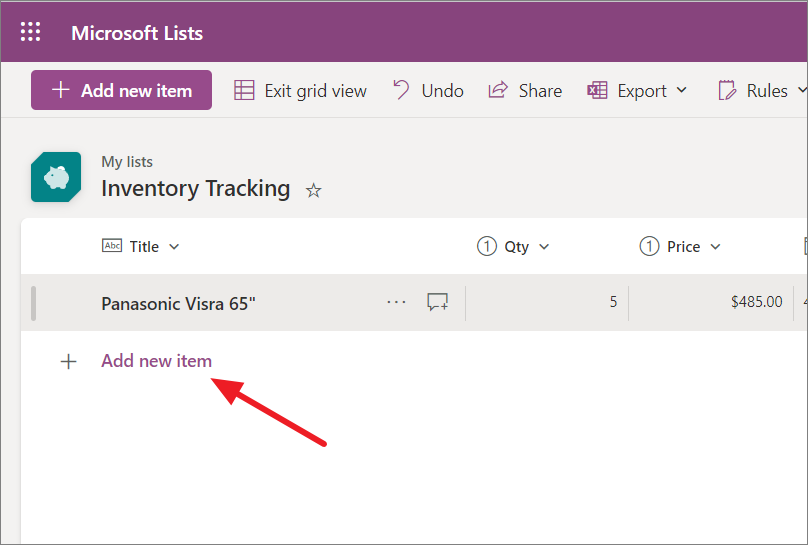
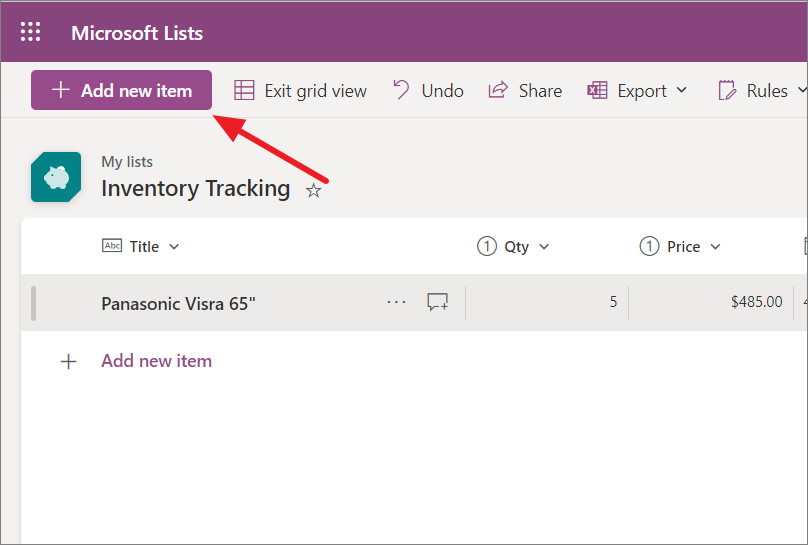
Alternatively, you can click on the ‘+ Add a new item’ button at the top.
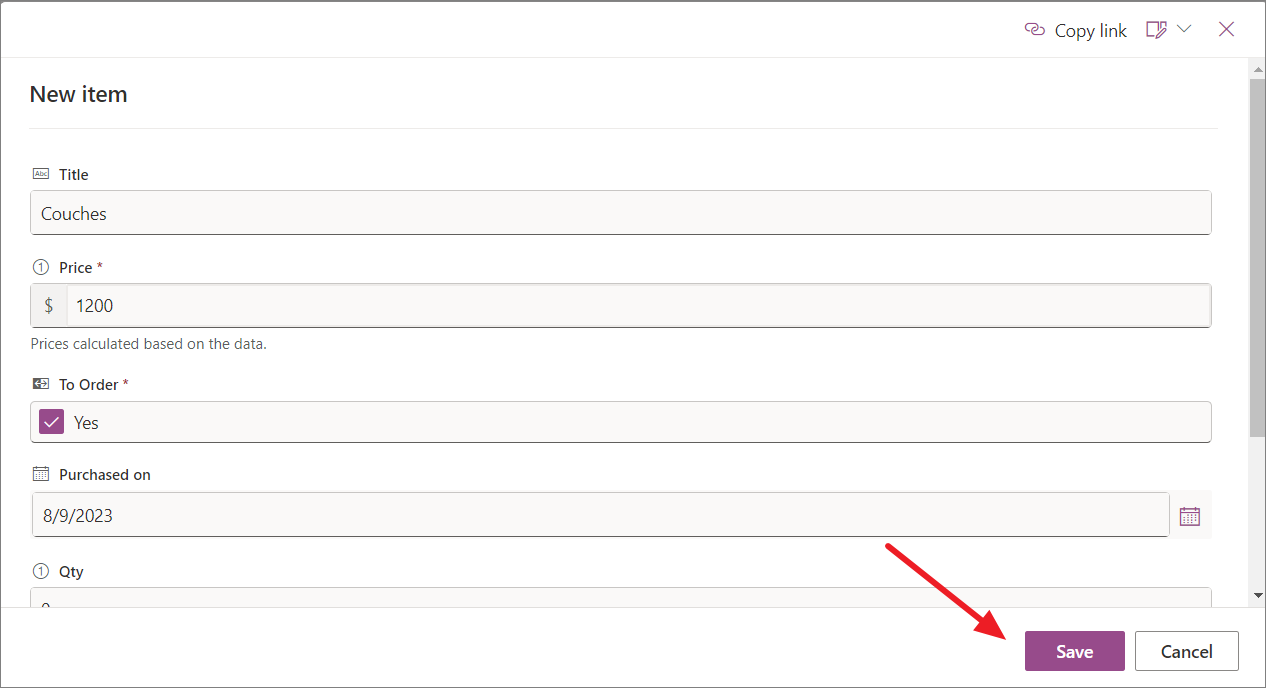
On the New item window, enter details to the fields like name, price, qty, and click ‘Save’.
Creating and Using Different Views
Views allow you to see and organize the list items in different ways. You can create custom views of libraries and lists to see the information that matters most to you. For example, you can choose which columns to show, add filters and sorting, or change the look and feel of the view.
By default, your data will be displayed in a table format, similar to how it would appear in Excel.
To create a view in Microsoft Lists, follow these steps:
- Go to the list where you want to create the view.
- Click on the ‘+’ button (Add a view) at the top-right corner of the list, and it will open the Create view menu.
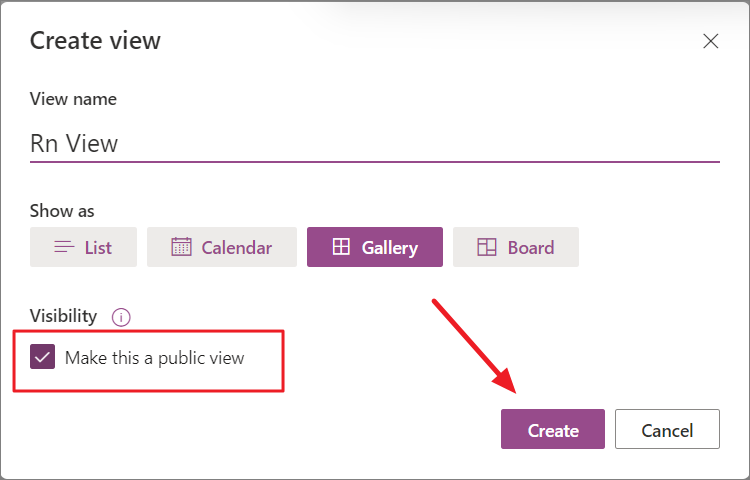
- In the Create view window, give a name to the view, select one of the four view type Show as menu.
- Calendar view: See your data in a calendar format, making it easy to visualize upcoming events and deadlines.
- Board view: Track the progress of projects and tasks by seeing items in different columns based on their status, such as ‘To Do’, ‘In Progress’, and ‘Done’.
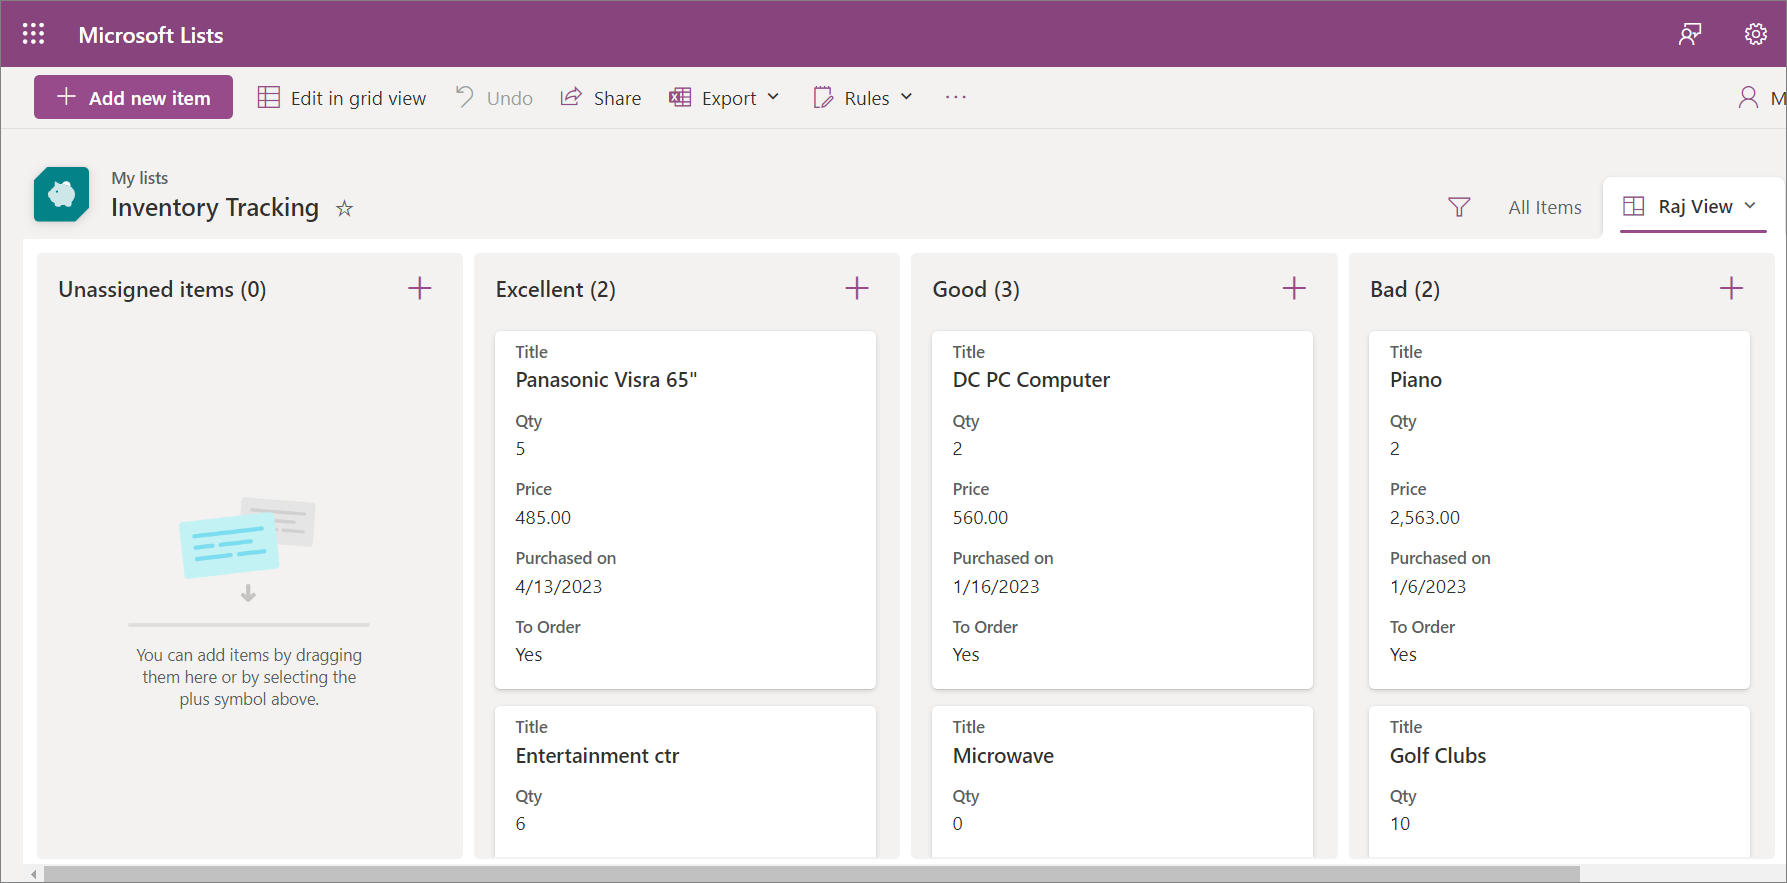
- Gallery view: Display your data in a card format, with the option to highlight picture columns. This is a great way to showcase products, inventory, or other visual content.
- List view: See your data in a table format, similar to a spreadsheet. This is the default view for lists and libraries, and it is the most familiar view for existing SharePoint users.
You will see additional options depending on the type of view you’ve chosen. For example, in a list view, you can choose which columns to show and in what order. In a calendar view, you can choose which date field to use and the start and end dates for the calendar.

- Check the ‘Make this a public view’ checkbox under Visibility if you want anyone with access to the list to see the view.
- Then, click ‘Create’ to make the new view.
Managing Lists Views
Most lists have other views besides the default view that you see when you first open them.
- To see other views, click the three dots button in the upper right corner of the command bar, and then select the view you want.
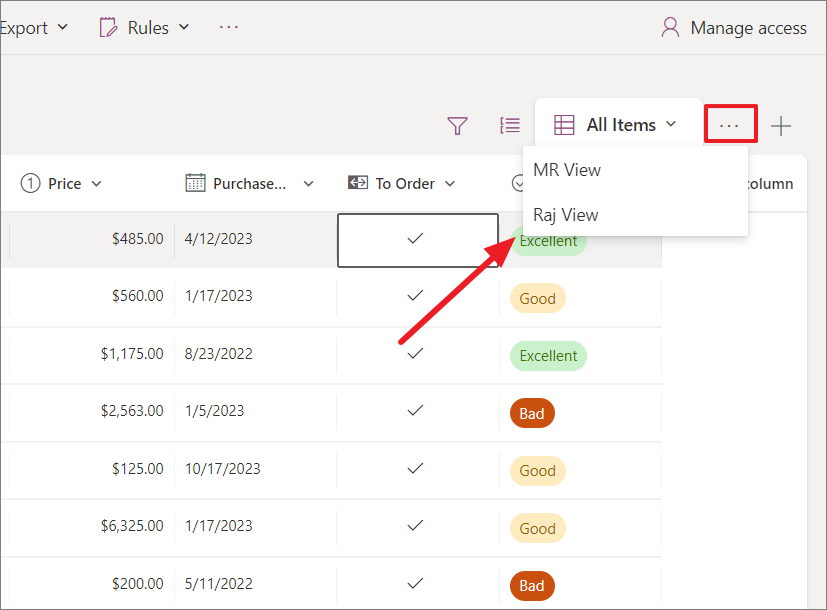
The list will be displayed in the selected view as shown below.
- To edit the current view settings, click the view name and select ‘Edit current View’. Then, change the view option and click ‘Save’.
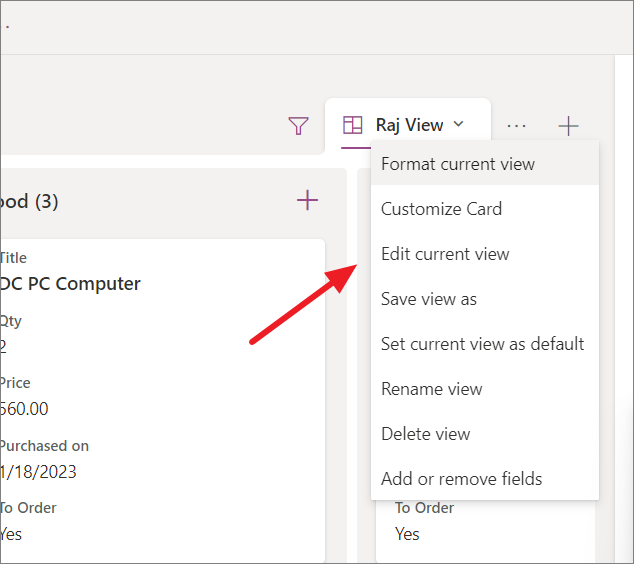
- To make the current view as default, click the view name and select ‘Set current view as default’.
- To delete the current view from the list, click the view name, and select ‘Delete view’.
Editing View Columns in Microsoft Lists
You can add or remove columns, and change the order in which they are displayed in the list.
- Click the column name, and select the ‘Add or remove fields’ option.

- In the Edit View Columns panel, check or uncheck the columns you want to display or hide in the list view. To change the order of columns, drag and drop them, or use the up and down arrows next to each column.
- Then, click ‘Apply’.

Formatting Views
Microsoft makes it easy to format views to meet your specific visualization needs.
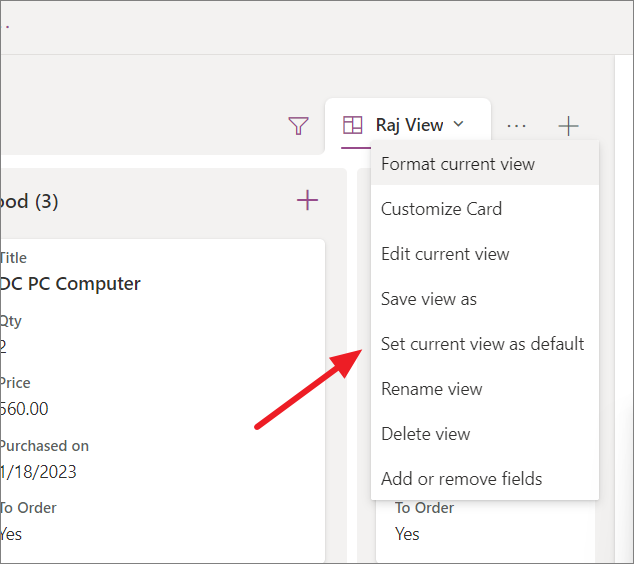
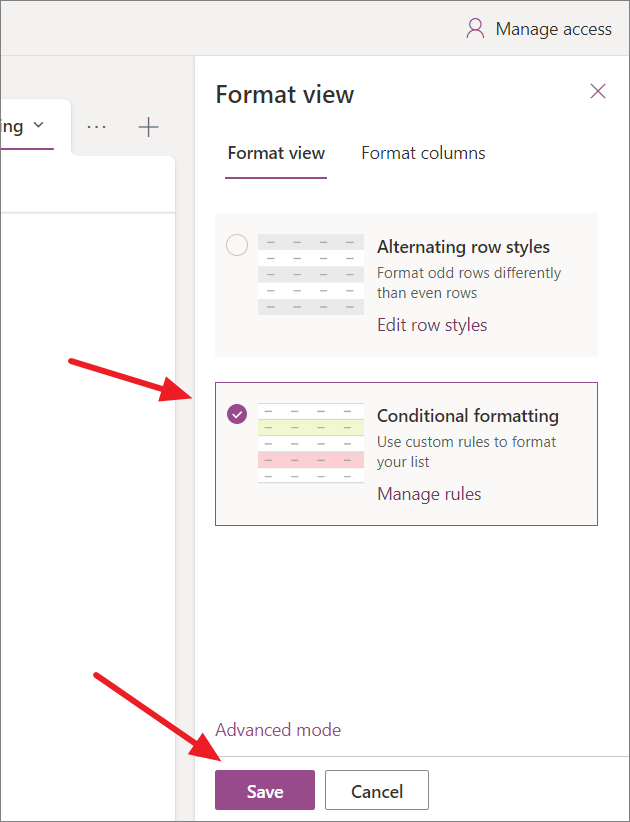
- To format the view, click on the view’s name and select ‘Format current view’.

- Format the view with available options.
- You can also use conditional formatting to change the way information appears in these views. For example, you can set the background color, font color, and icons to change automatically when certain conditions are met.
- After formatting the view, click ‘Save’.
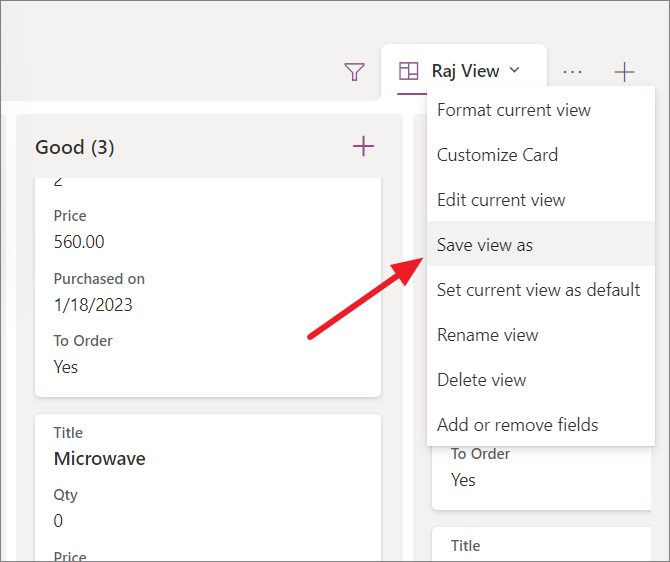
After making changes to the view, click the view name and select ‘Save view as’. Then, save the current view, or give it a different name and save it as a new view.
Editing Items in Microsoft Lists
By default, when you open a new list, it opens in grid view, which makes it easy to directly edit the items.
All you have to do is click on an item or select the row and then click the ‘Edit’ button above.
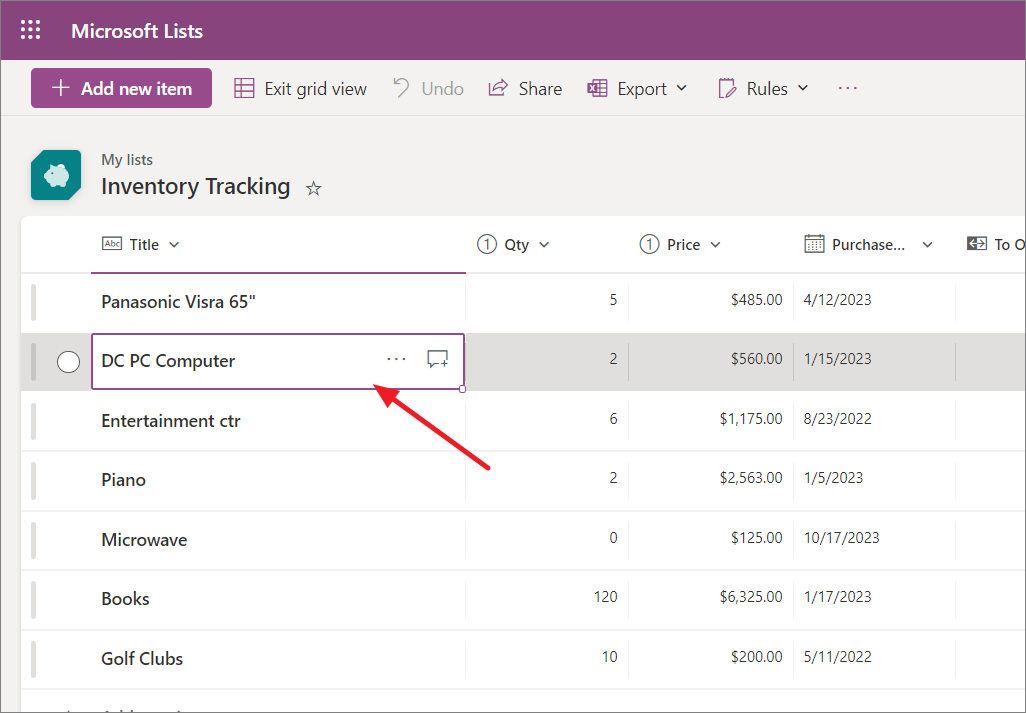
However, this can lead to accidental changes to the list. To avoid this, you can click the ‘Exit grid view’ option in the menu bar.
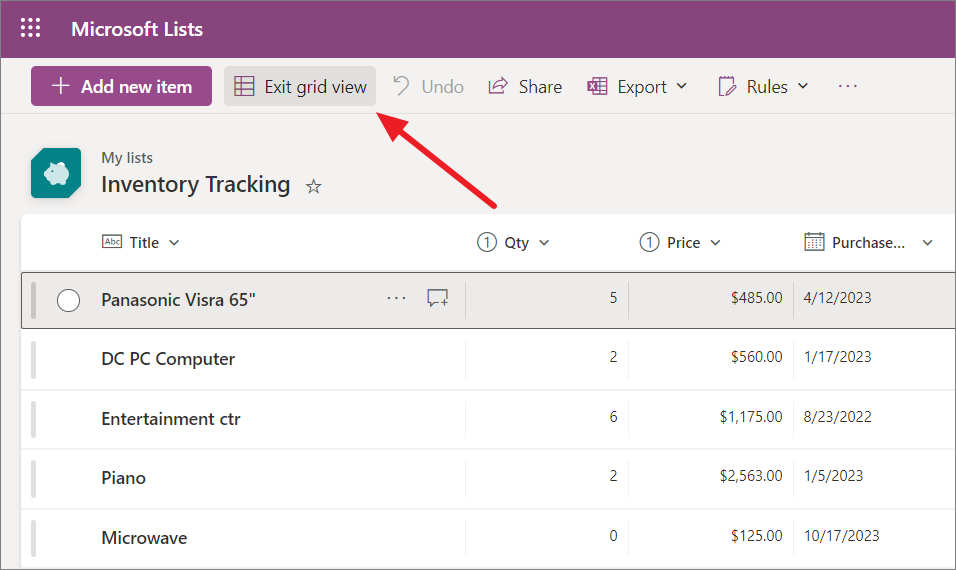
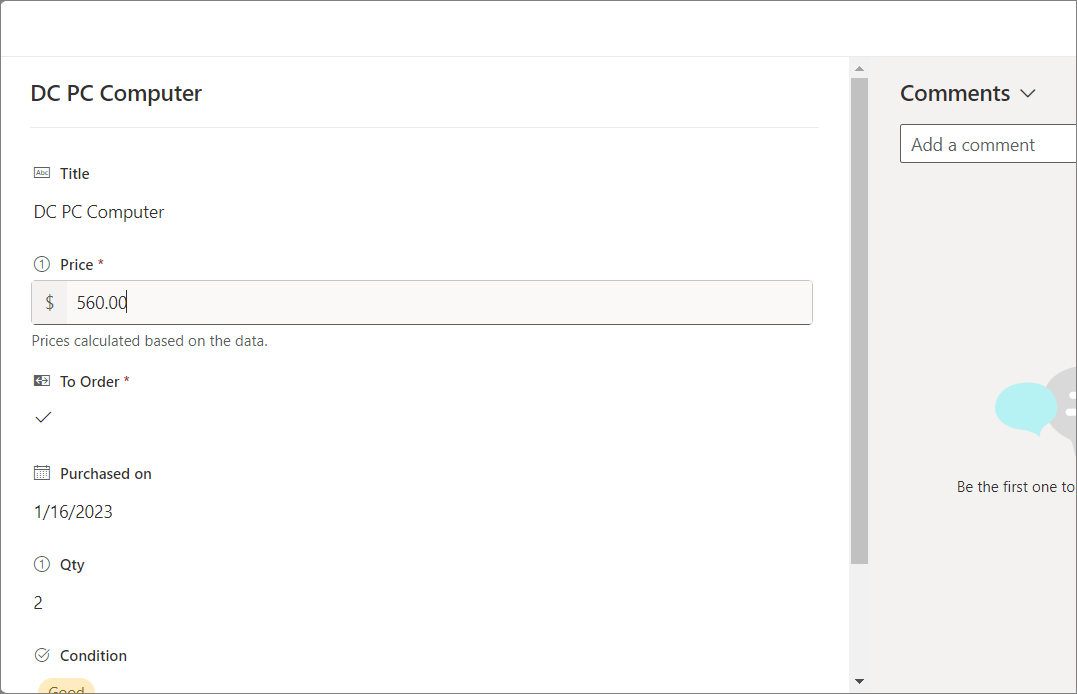
Then, if you want to edit an item, double-click on the row or click the ‘Edit’ button above to edit the values in the edit window.
To delete a particular row or item from the list, select the item and click the ‘Delete’ button on the menu bar. Alternatively, click the three dots button next to the item title and click ‘Delete’.

When you have many items to manage, it can be difficult to edit them all individually. With grid view, you can easily edit multiple list items at once by selecting the items. However, if you need to edit each list item individually, you can do that too.
Making a List Fovorite in Microsoft Lists
It can be hard to find the list you’re looking for when you’re working with multiple projects, issue trackers, and other databases.
To make it easier, you can add a list to your favorites by clicking the star icon (Favorite this list) on the list icon on the Microsoft Lists home page or next to the list name on the List page.
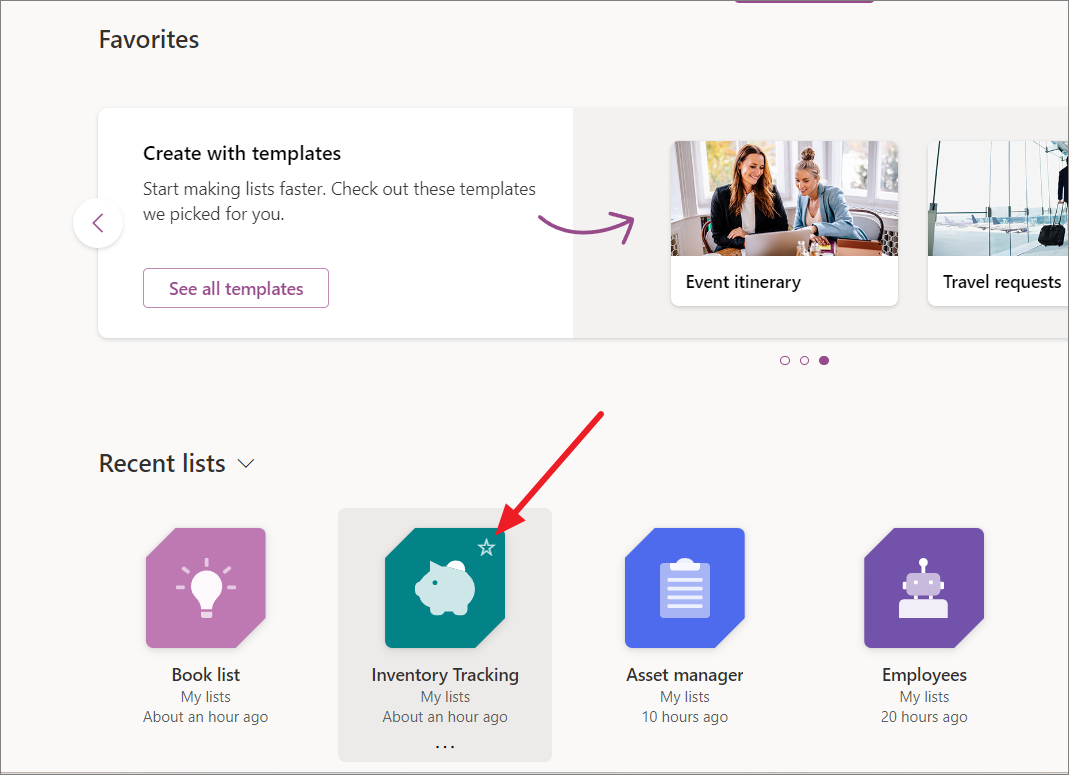
You can then easily access your favorite lists from the separate Favorites menu.
Changing Column Settings in Microsoft Lists
Even after creating and adding values to a column, you can still change its settings, such as its type, formatting, visibility, and options.
To make changes to column settings, click the column header and select ‘Column settings’.
Now, you’ll see a list of options in the sub-menu. Here, you will have the option to edit, hide, format, show/hide multiple columns, widen column width, narrow column width, and pin the column to the filters pane.
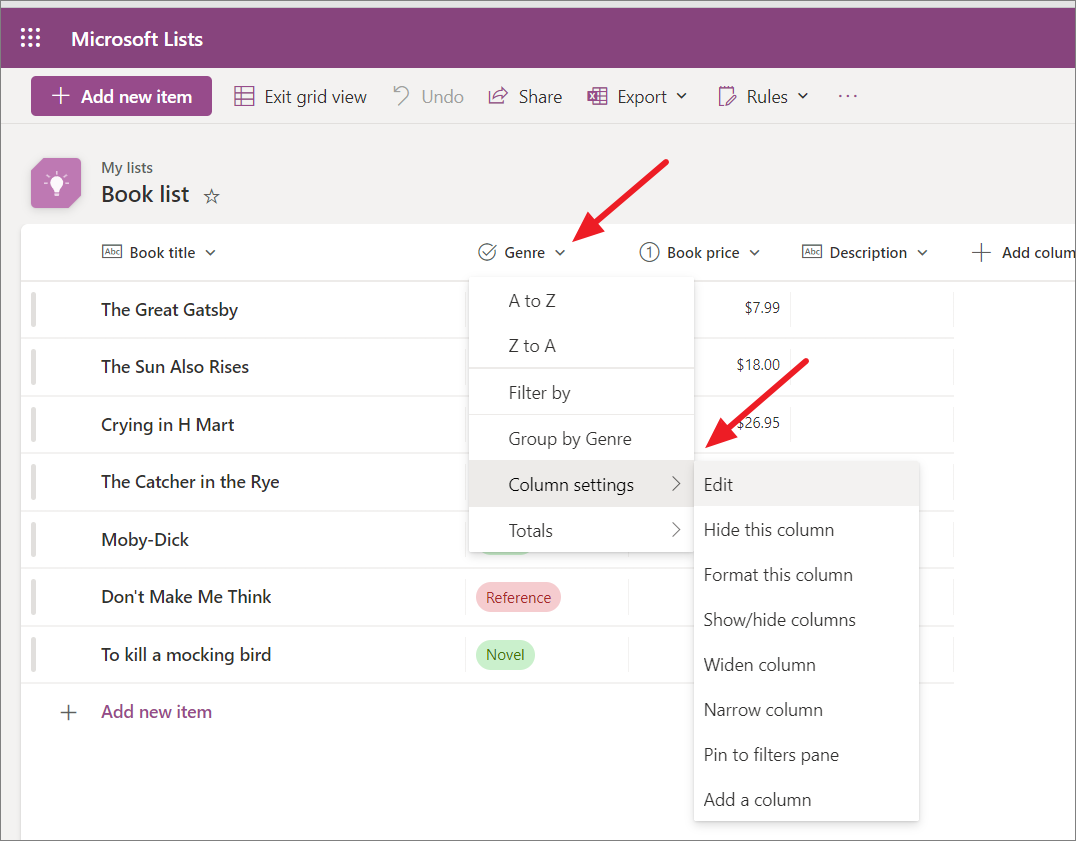
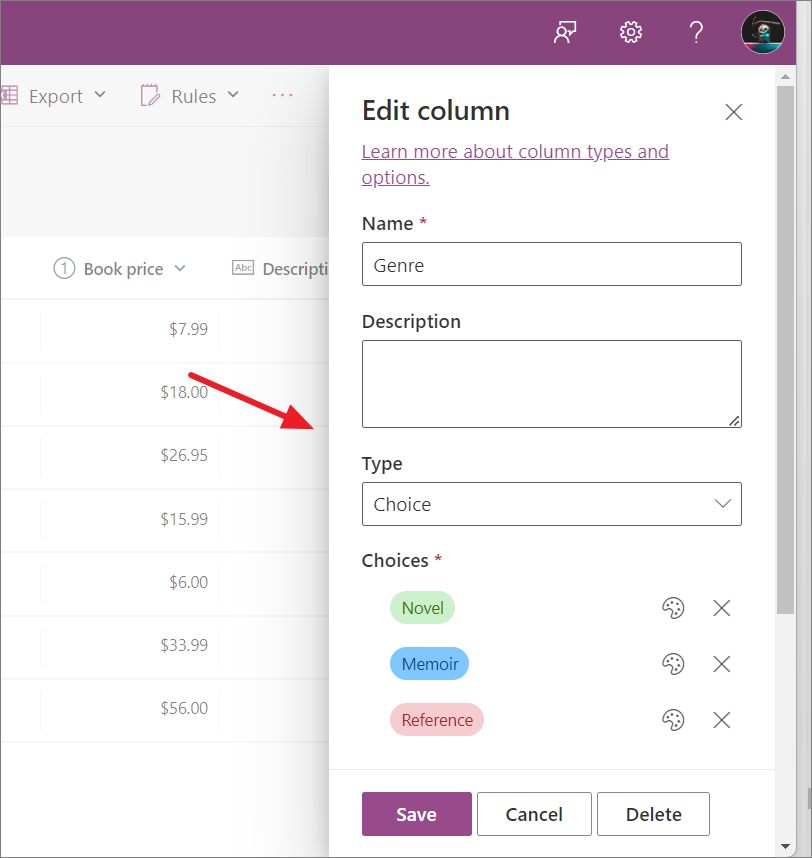
For example, if you want to change column type or other settings, select the ‘Edit’ option from the sub-menu. Then, change the column type or other settings in the Edit column pane on the right.
Formatting a Column
You can format your column data with preset formatting options or with custom conditional rules.
- To format the column, click the column label or header, go to ‘Column settings’, and select ‘Format this column’.
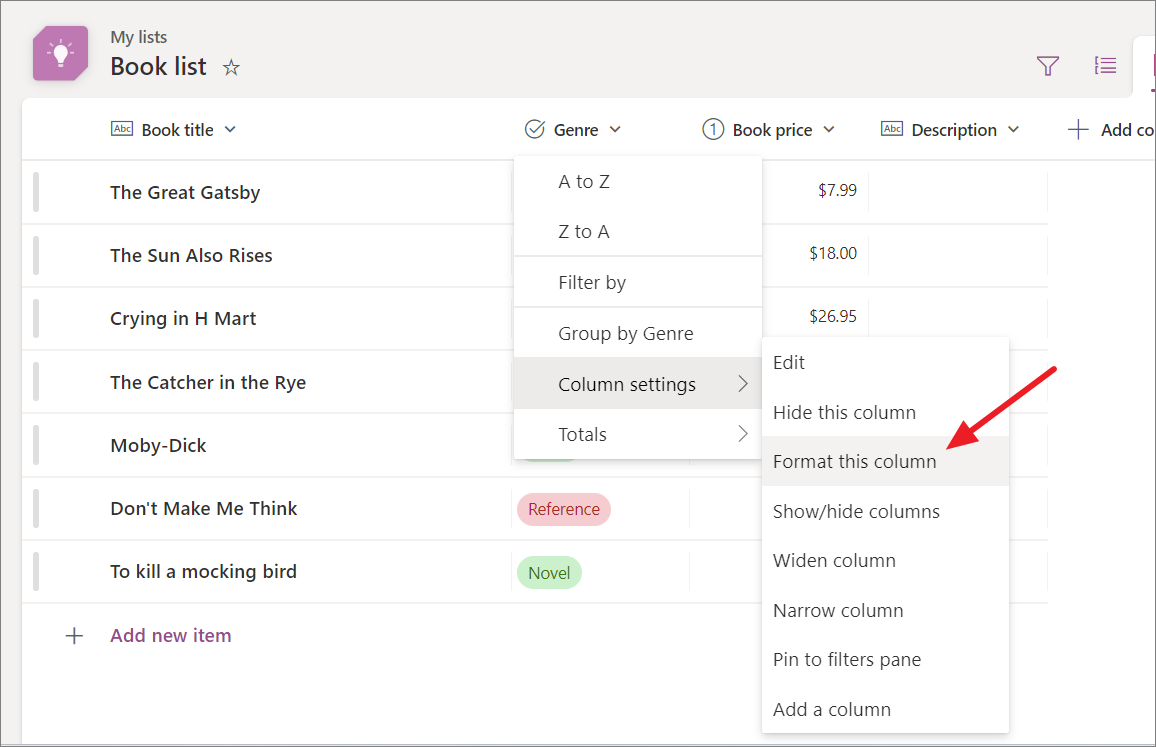
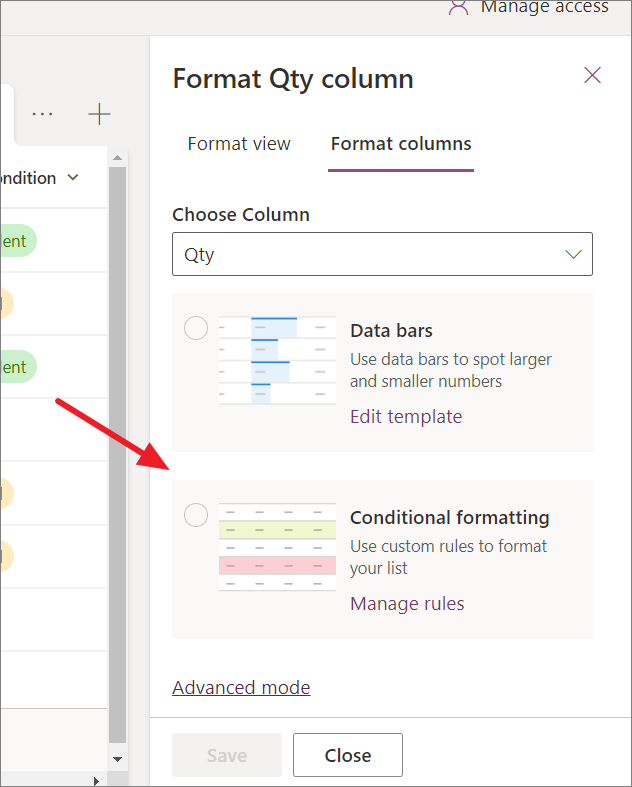
- Then, select the formatting option. Select ‘Conditional formatting’ if you wish to use custom rules to format your list.
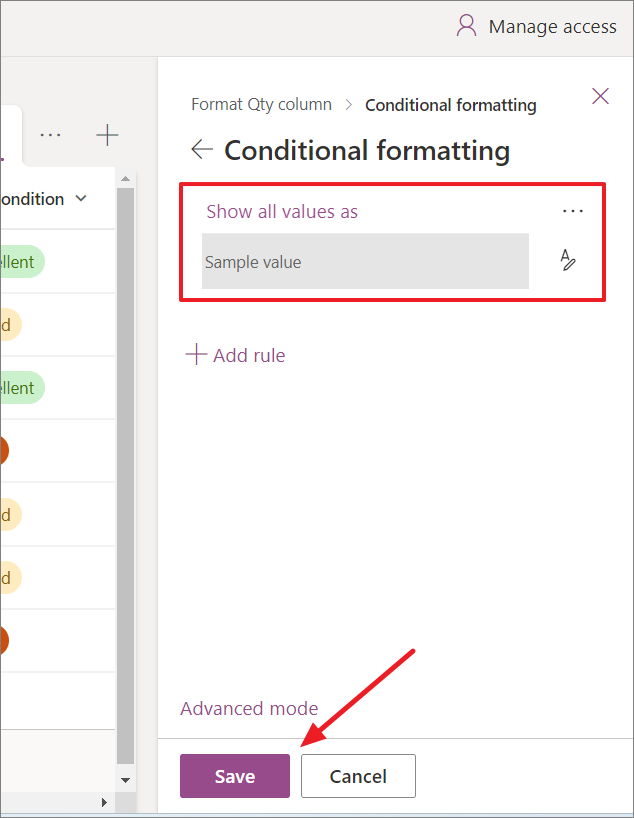
- Then, enter the custom rule and choose the formatting for the values. Click ‘Save’ to save the changes.
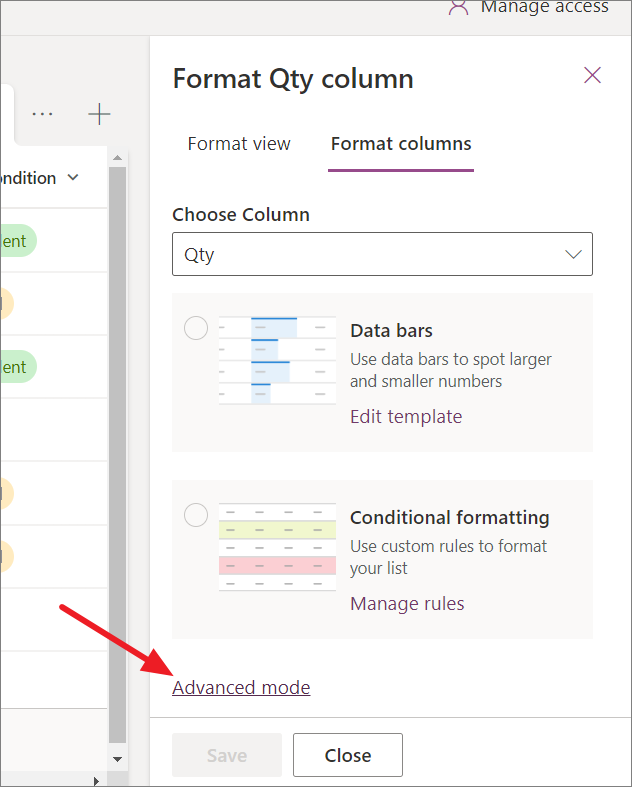
You can use JSON to format columns or views in Microsoft Lists. This allows you to customize the appearance columns in ways that are not possible using the built-in formatting options.
- To do this, click the ‘Advanced mode’ in the Format column pane.
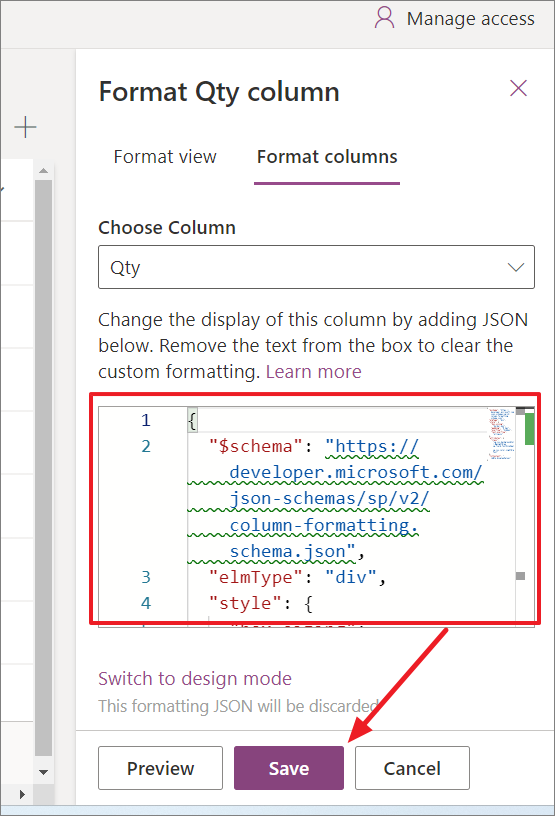
- In the JSON formatting box, enter the JSON code that you want to use to format the column.
- Click ‘Preview’ to see how the formatting will look.
- Click ‘Save’ to apply the formatting.
Sharing a List in Microsoft Lists
Microsoft Lists is a great tool for both personal and team use. You can use it to track issues, assets, routines, contacts, inventory, and more, with the help of others.
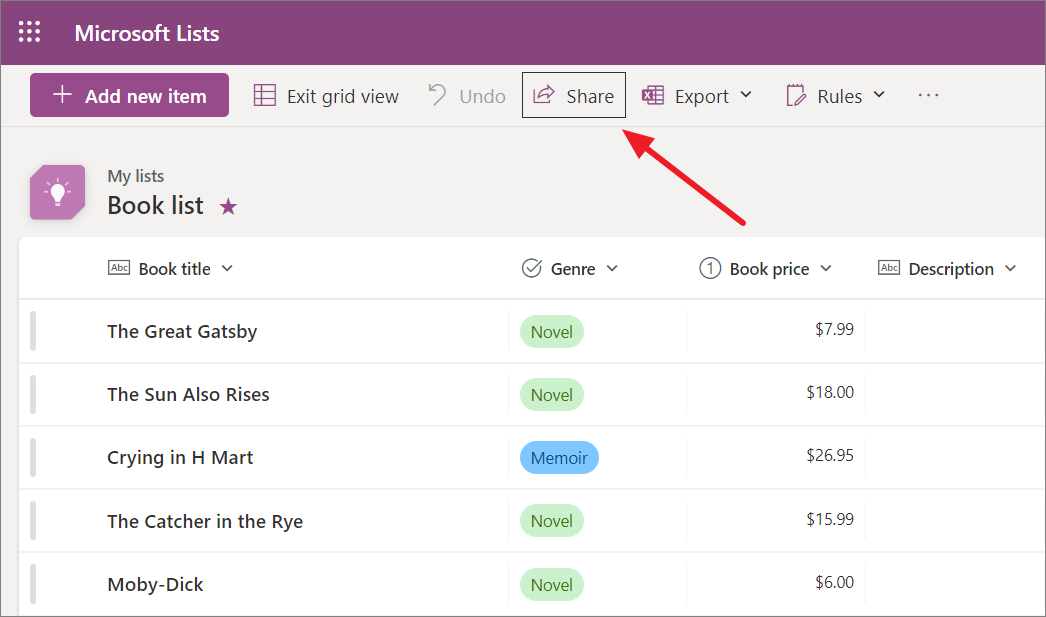
- To share a list with others, click the ‘Share’ button at the top of the list page. Alternatively, click the three-dot menu on the Lists home page and select ‘Share’.
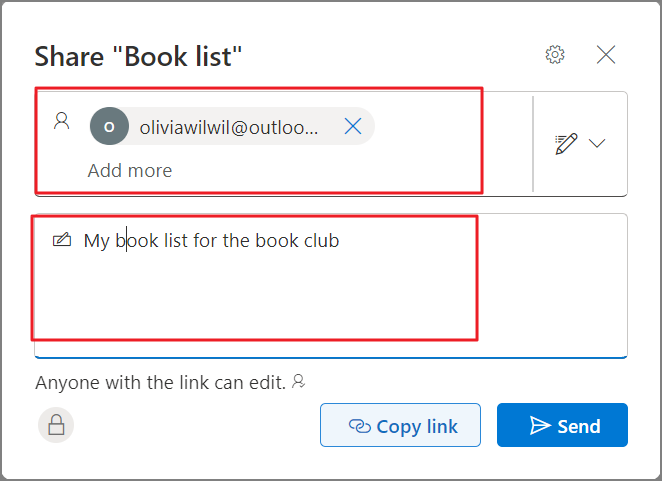
- In the Share window, enter the name, group, or email address of the people you want to share the list with. You can also add a message or description of the list.
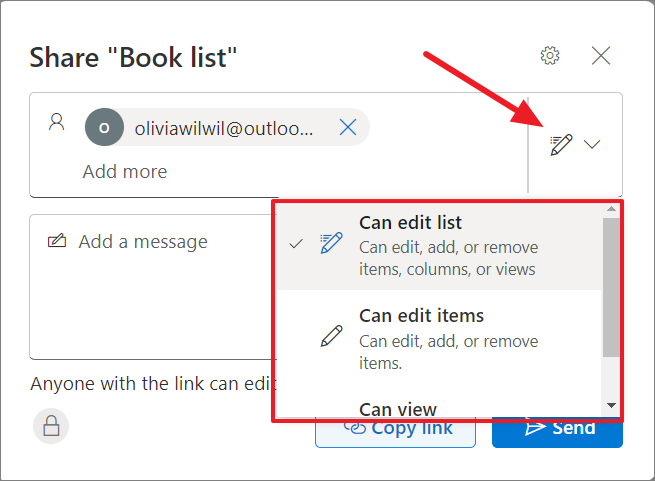
- Next, click the ‘Edit Pencil’ button and the permission level you want to give to the people you are sharing the list with. You can choose from the following options
- Can edit list: Users with this permission can read, edit, and remove items, columns, and views. However, this is not full control.
- Can edit, add, or remove items: Users with this permission can edit the values of items in the list, but they cannot make changes to the columns, or views.
- Can view: Users with this permission can only read the list and cannot edit the items, columns, or the view.
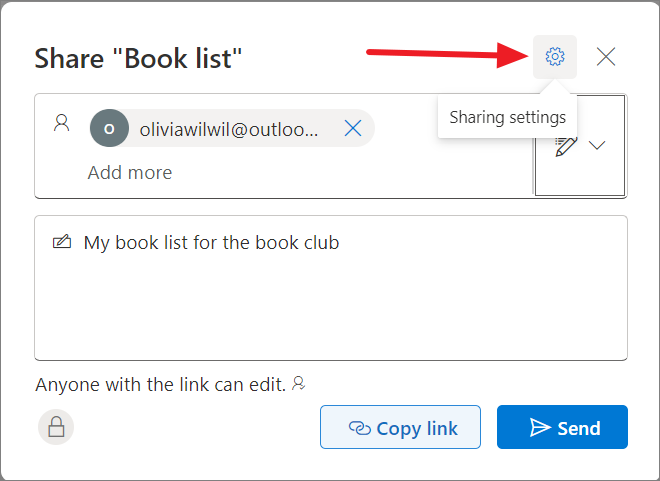
- To access more settings, click the Settings icon (Sharing Settings).
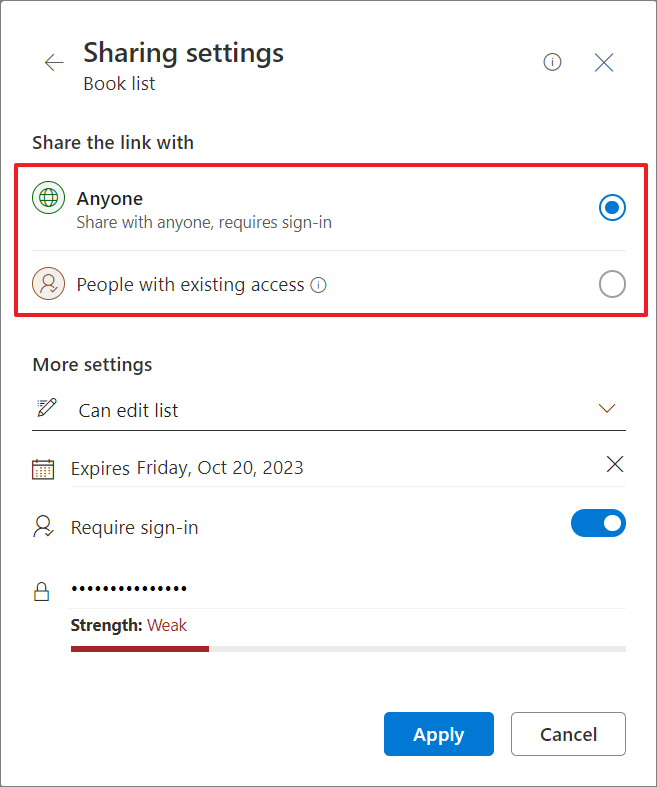
- If you are sharing the list with a person for the first time, select ‘Anyone’. If you are re-sharing the list with someone who already has access to the list, select the ‘People with existing access’ option.
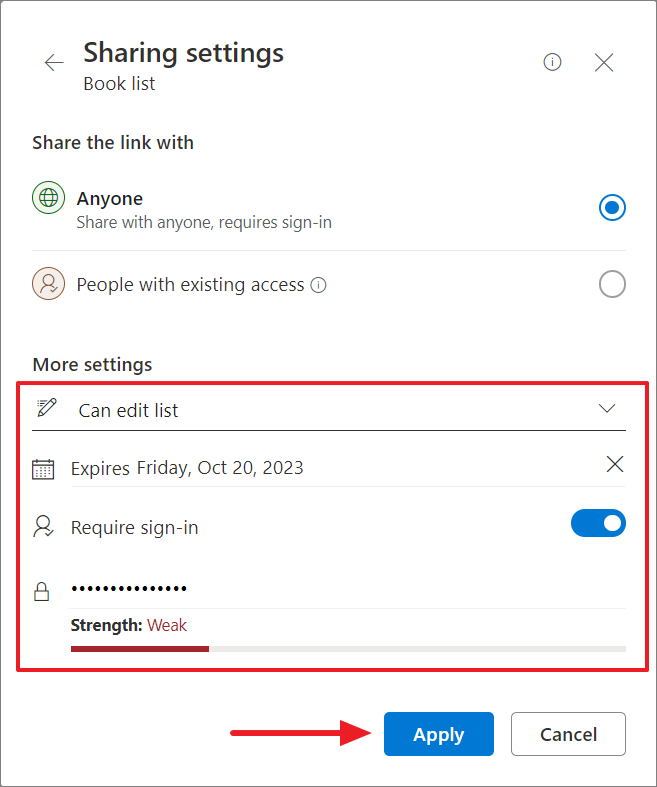
- Change the permission level from the permission drop-down list.
- You can also set an expiration date for the link to expire. After the expiry date, the link won’t work and you’ll need to create a new link or reshare with people so they can continue to access the list.
- If the list requires login, turn on the ‘Require sign-in’ toggle and enter a password in the password field.
- After that, click ‘Apply’ to save the sharing settings. If you select ‘People with existing access’, you don’t need to reconfigure any other settings, you can just, click ‘Apply’ to continue.
- Finally, click ‘Send’. You also copy the link and share it with others through email or message. Selecting ‘Copy link’ will automatically copy the link to your clipboard with the sharing settings selected.
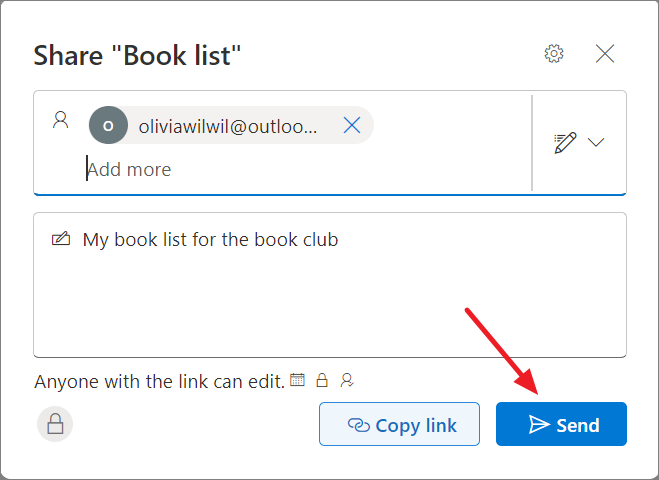
Once you have shared the list, the people you shared it with will receive a link to the list in their email inbox. They can then click the link to open the list and start using it.
Order, Group, Filter, and Total list items in Microsoft Lists
Ordering, grouping, and filtering items works the same as any other task management app like SharePoint or Microsoft To-do.
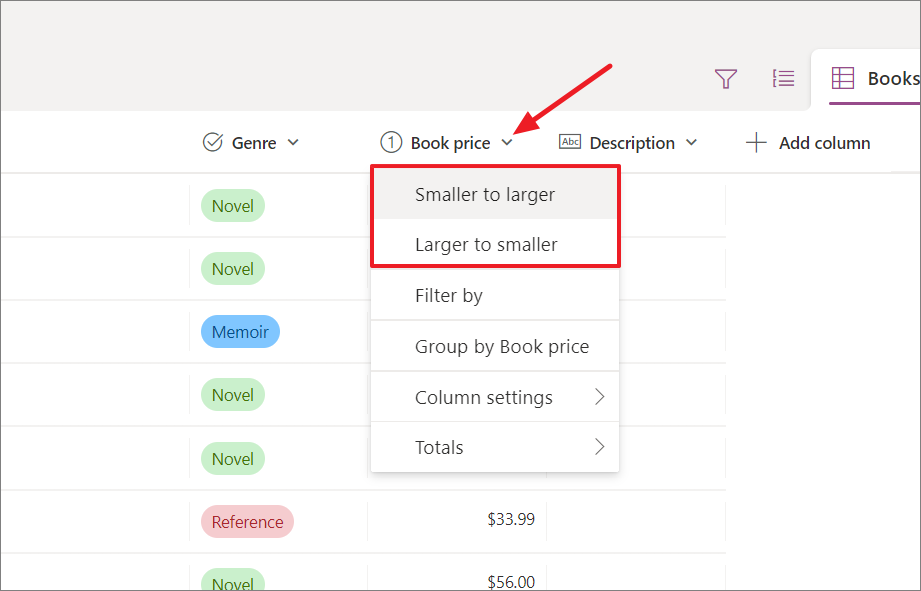
To rearrange items in the list, click the column header and select an order, such as Ascending/Descending, Smaller/Larger, or Older/Newer.
To filter the list by a value or item, click the ‘Filter’ icon at the command bar and select the item.

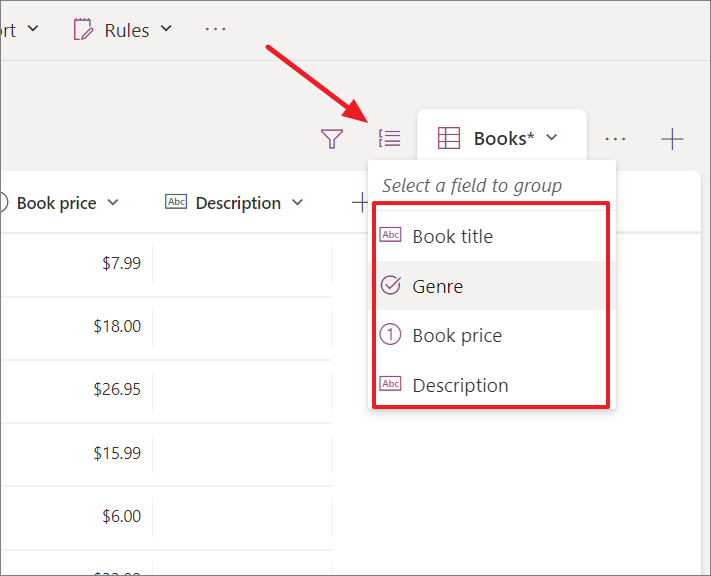
To group the list by a column, click the ‘Group by‘ icon and select the field to group by.
You can also find various totals for the column in the list, such as count, average, variance, sum, maximum, minimum, and standard deviation.
To do this, simply click the column label, go to ‘Totals’, and select a calculation option.
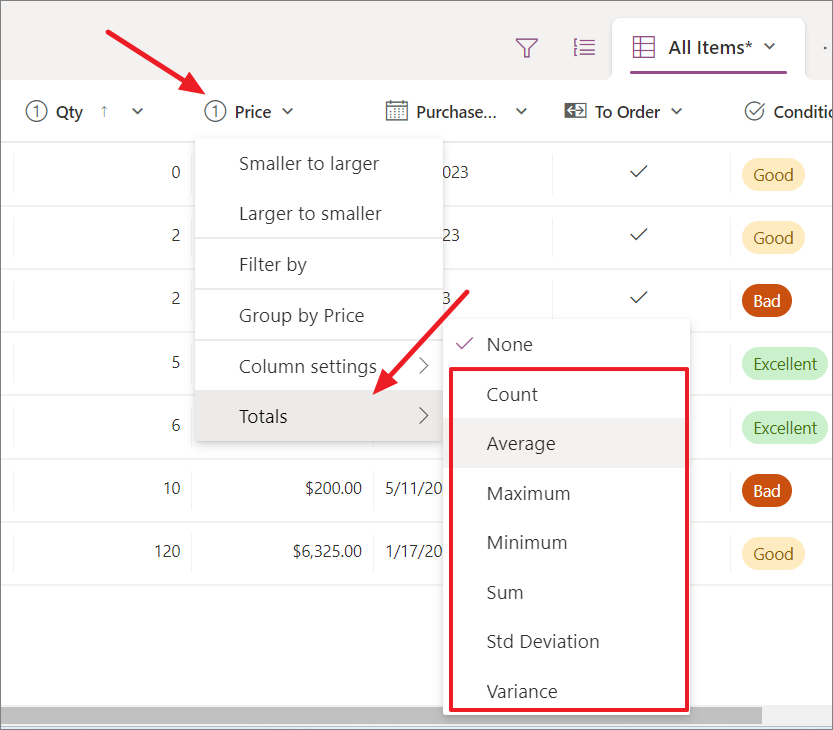
The total calculation will be displayed at the bottom of the list.

Managing Access to Lists in Microsoft Lists
Once a list is shared with a colleague, family member, or friend, you can change the permission level for the shared list or stop sharing it at any time.
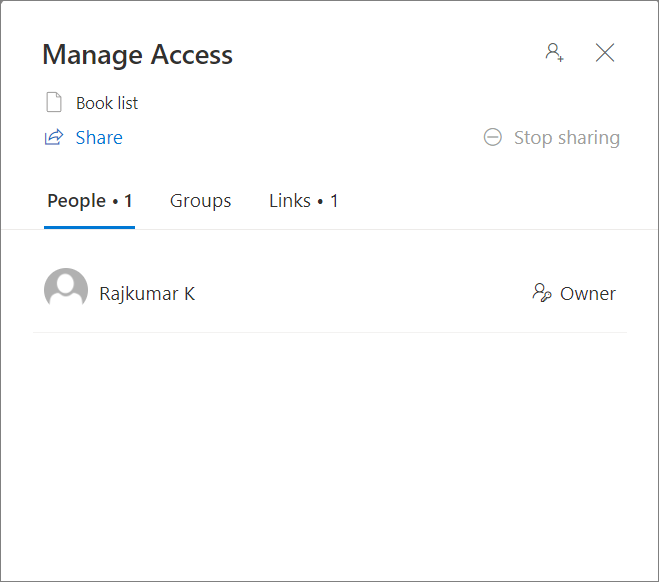
- To manage access to the shared list, click the ‘Manage access’ button at the top right corner.

- The shared user won’t appear in the Manage access window until they open the list. To change the permission level for a shared user, simply select the user or group and adjust the permission.
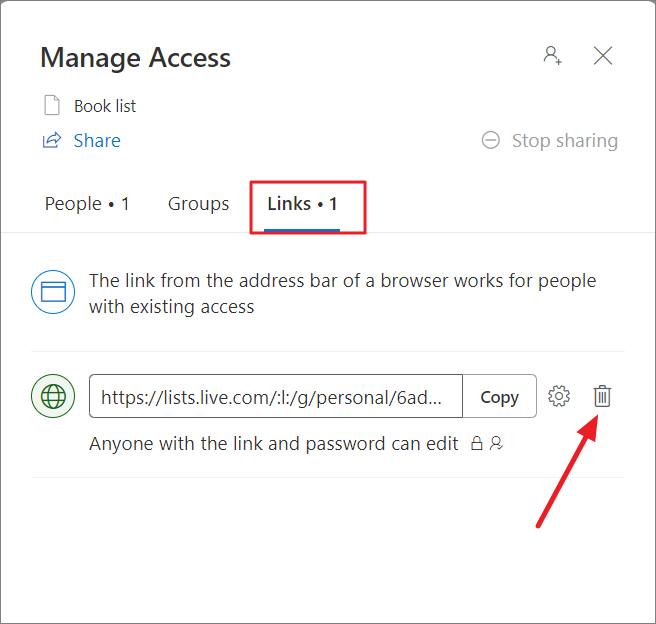
- To stop sharing a list, go to the ‘Links’ section and delete the link that you want to stop sharing. If you want to stop sharing a list with a particular user, go to the ‘People’ section and stop sharing with the user who has direct access.
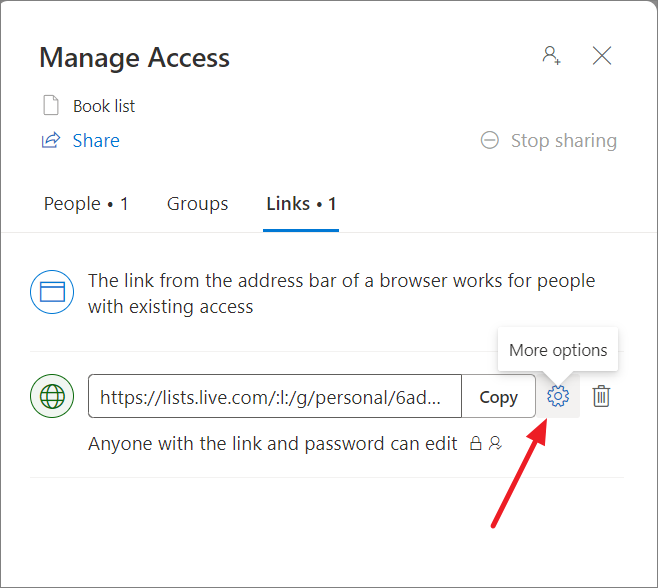
- To extend the expiration date or change password for the shared link, click the ‘More options’ icon.
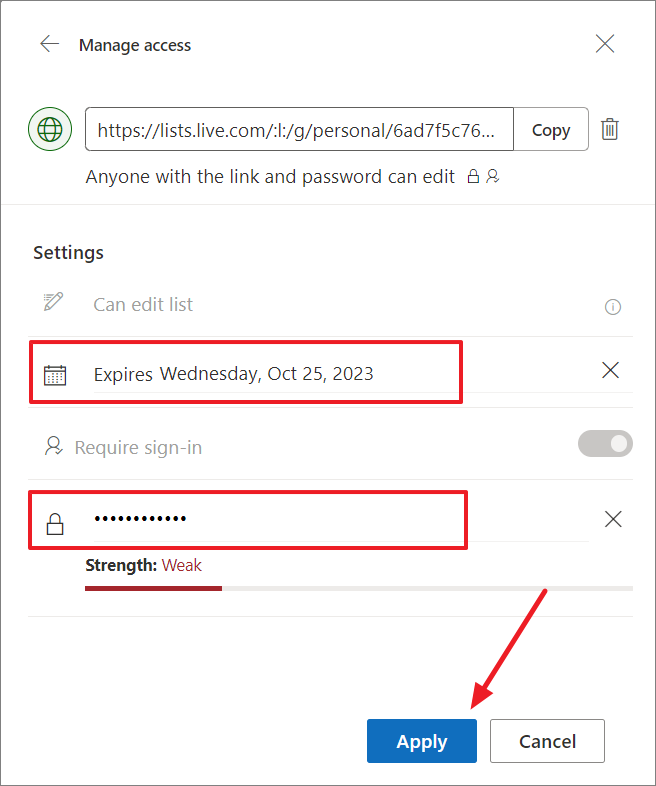
- Then, change the link expiry date or password (if necessary) and click ‘Apply’.
Granting Access to Others in Microsoft Lists
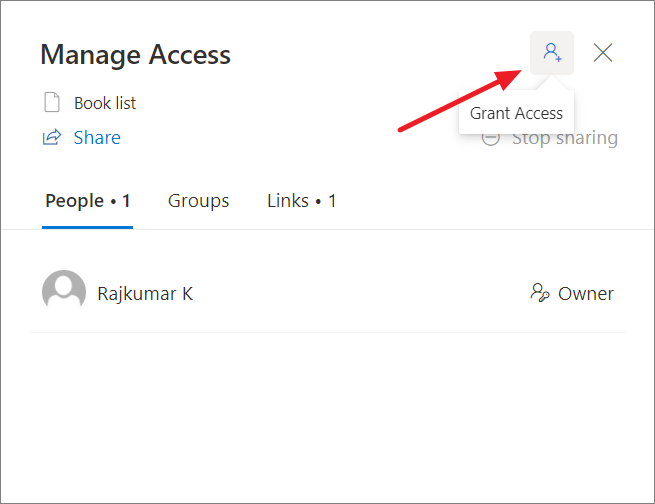
Granting direct access to a list is a simple way to share it with someone without having to create a link or mess with sharing settings. Once someone has direct access, you can easily manage their permission level or remove their access entirely. To grant access to a list in Microsoft Lists:
- In the top right corner of the Manage Access window, click the ‘Grant access’ icon (a circle with three dots inside).
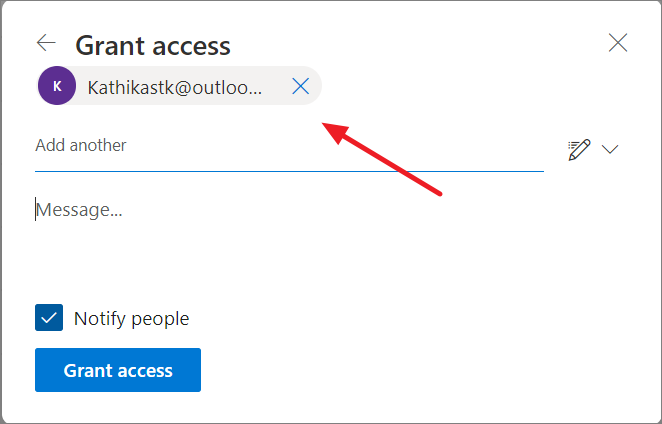
- Then, add a name, group, or email address in the ‘Name, group, or email’ field.
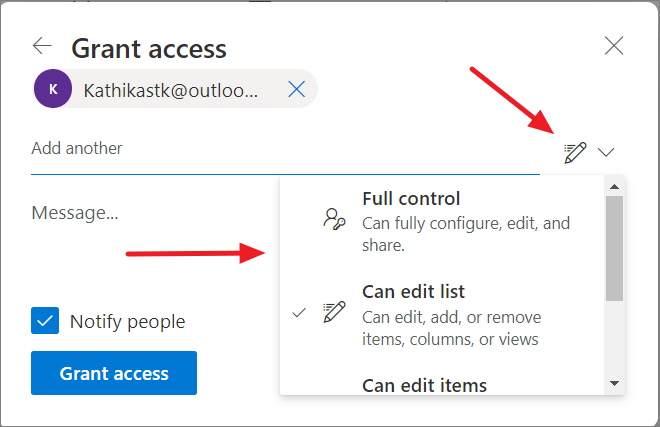
- To the right, click the pencil icon and change the person’s permission level from the drop-down menu. Unlike with a share link, you can also give others full control over the list, including the ability to fully configure, edit, and share the list.
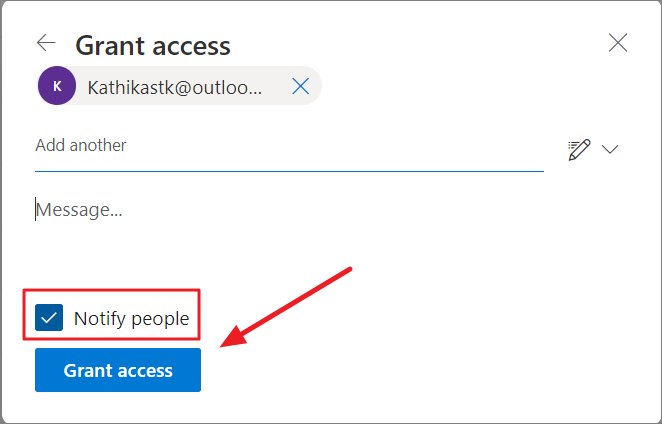
- (Optional) To notify the person that you are sharing the item with, select the ‘Notify people’ checkbox.
- Finally, click ‘Grant access’.
Getting Alerts for List Changes in Microsoft Lists
Microsoft Lists allows you to receive notifications about changes to lists and list items. You can set up alerts to be sent to your email address or text message.
To set up an alert, go to the list you want to receive alerts for, click the three dots button, and select the ‘Alert me’ option.
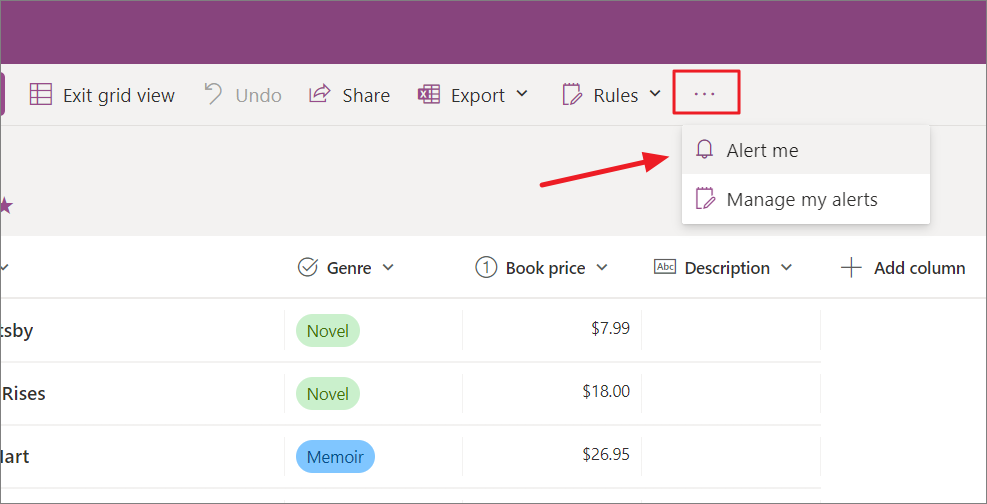
In the dialog box, select the type of alerts you want to receive and how often you want to receive them. You can also choose to receive alerts for all changes to the list or list item, or only for certain types of changes.
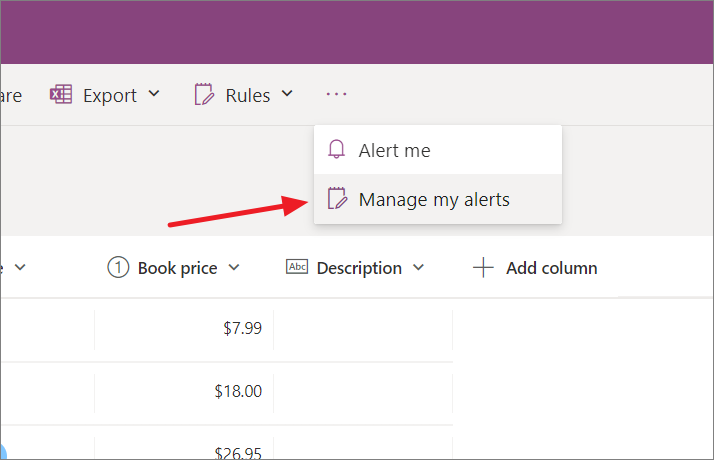
To manage your alerts, click the three dots and select ‘Manage my alerts’. On this Manage my alerts page, you can view all of the alerts you have set up and edit or delete them.
Creating and Managinf Rules in Microsoft Lists
One of the important features of the Microsoft List is the Rules. Rules allow you to automate tasks based on changes to list items. This means that you can create a rule to do something, like send an email or change the status of an item, whenever a certain condition is met.
As of now, you only have the option to send notifications when data changes, but in the future you may have to perform various actions when conditions are met. To create a rule, simply choose a condition that triggers the rule and the action that the rule will take.
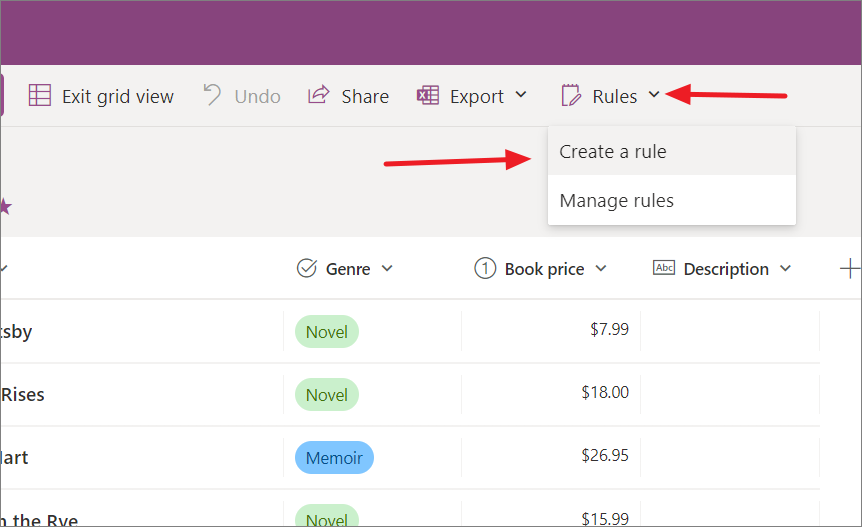
- Open the Lists where you want to set up rules, click the Rules menu at the top, and select ‘Create a rule’.
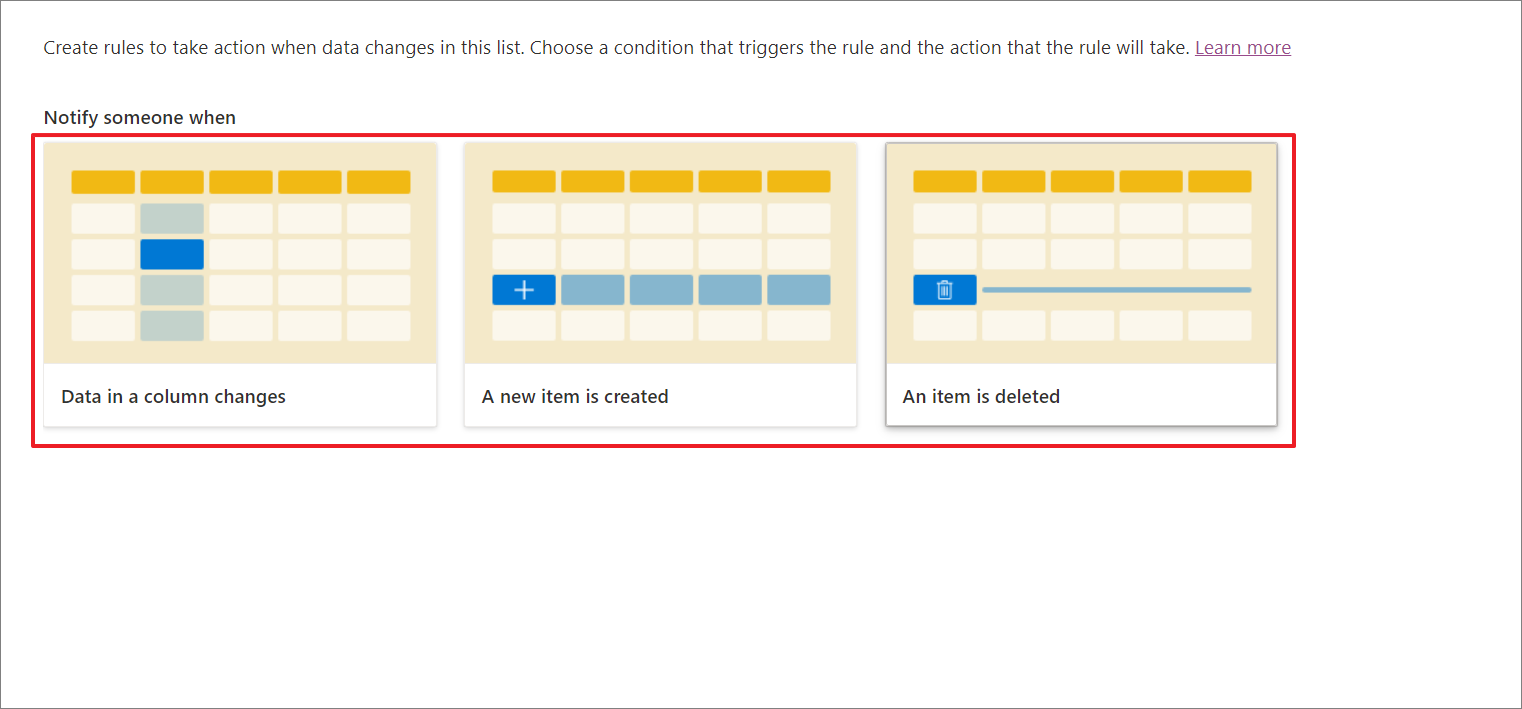
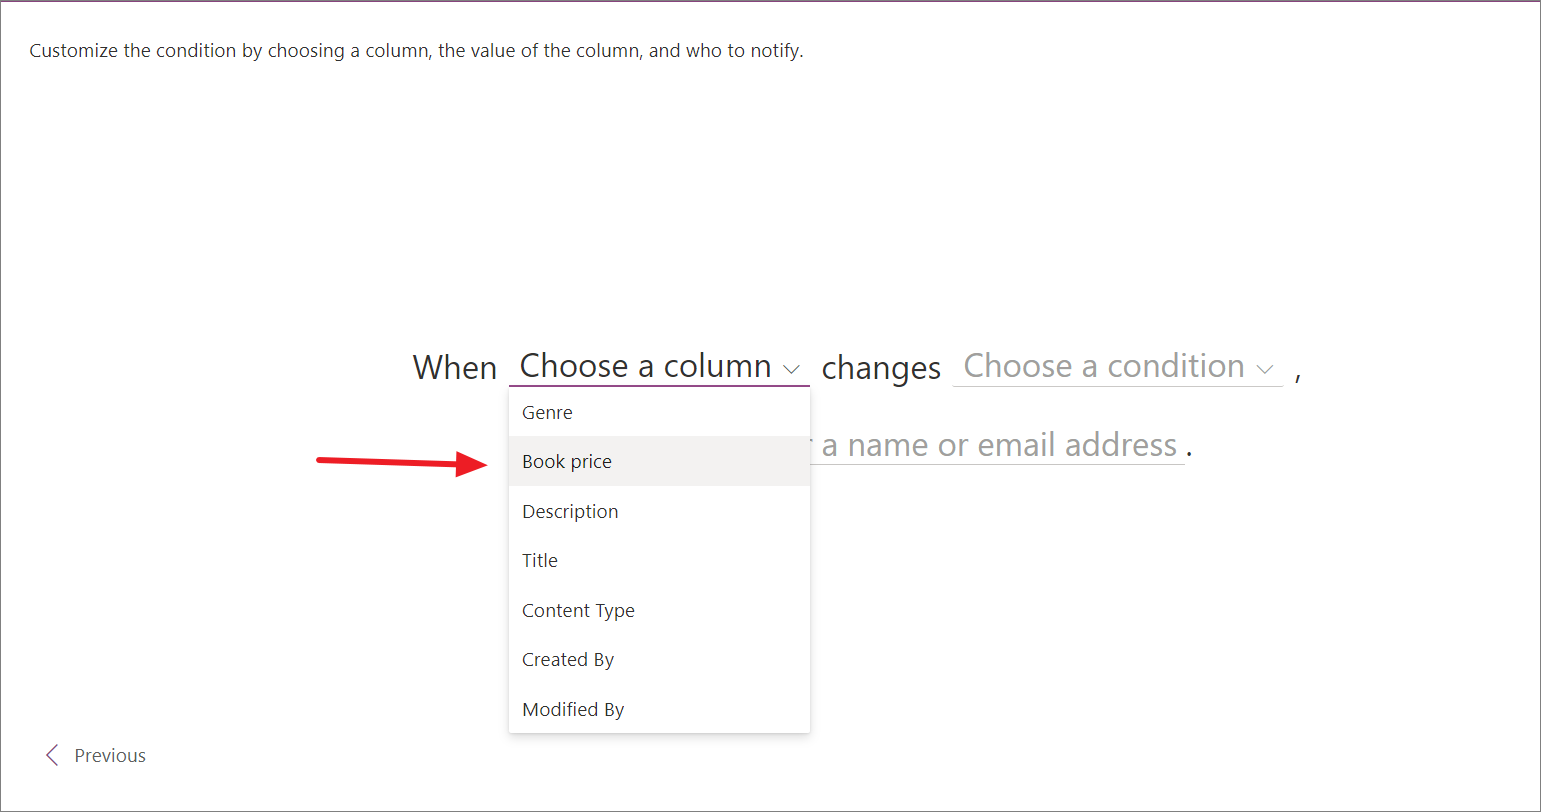
- In the window that appears, choose the condition that triggers the rule, such as when data changes in the column, an item is added, or an item is removed.
- Now, choose the column where the data changes you want to send notifications about.
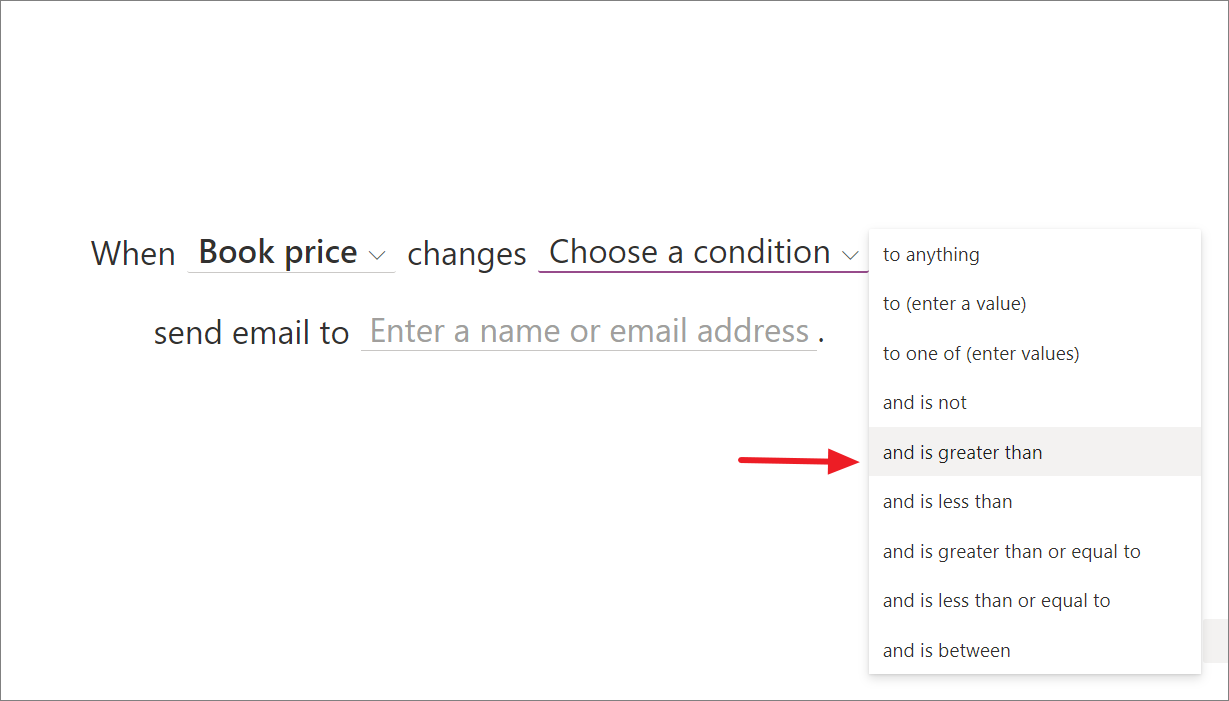
- Next, select the condition that triggers the rule from drop-down. For example, when the book price ‘is greater than’ and then specify the amount.
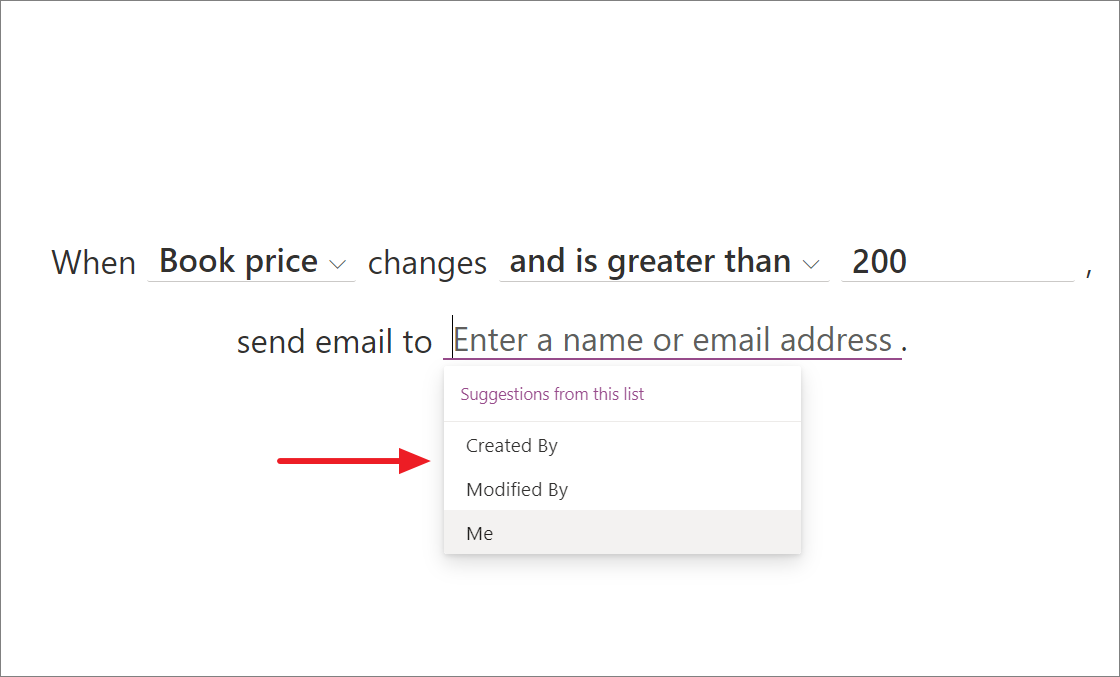
- Once you have selected the condition, you can specify who should receive the email notification: the person who created the list, the person who last modified the list item, or yourself (the person who created the rule). You could also notify someone else by typing their name or email address in the field.
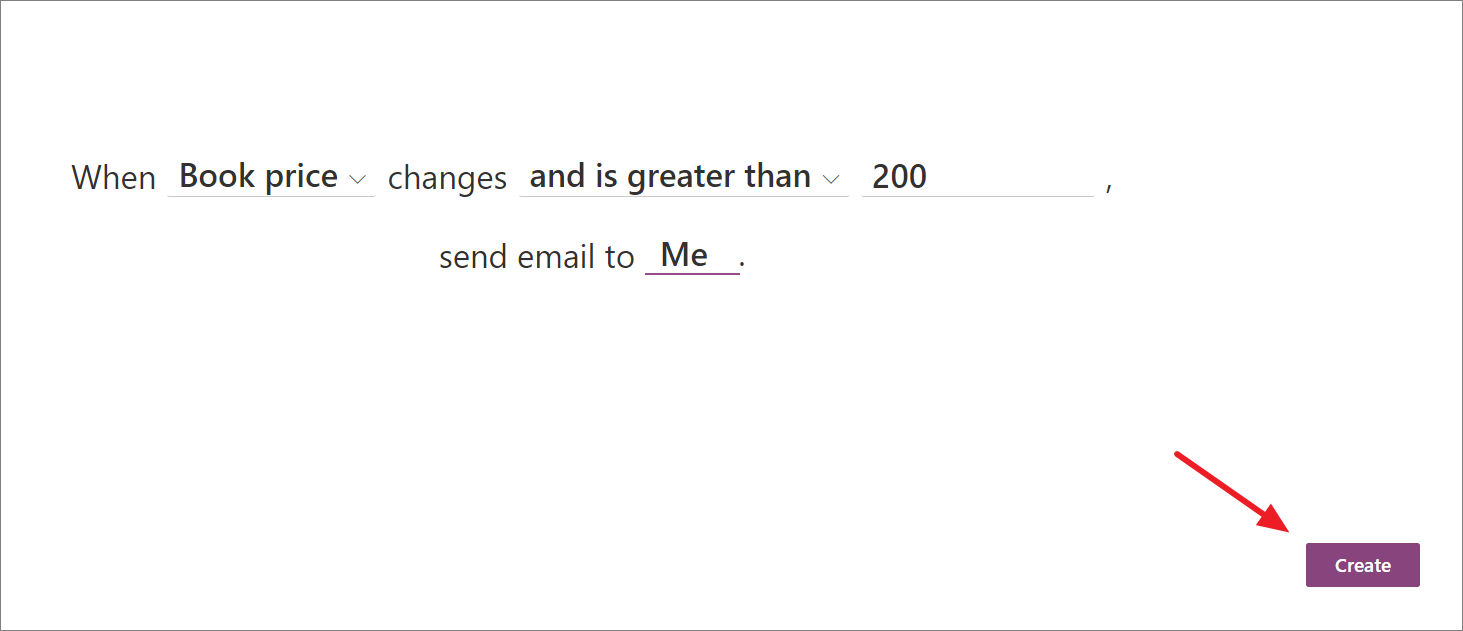
- After customizing the condition that triggers the rule and action, click ‘Create’ at the bottom right corner.
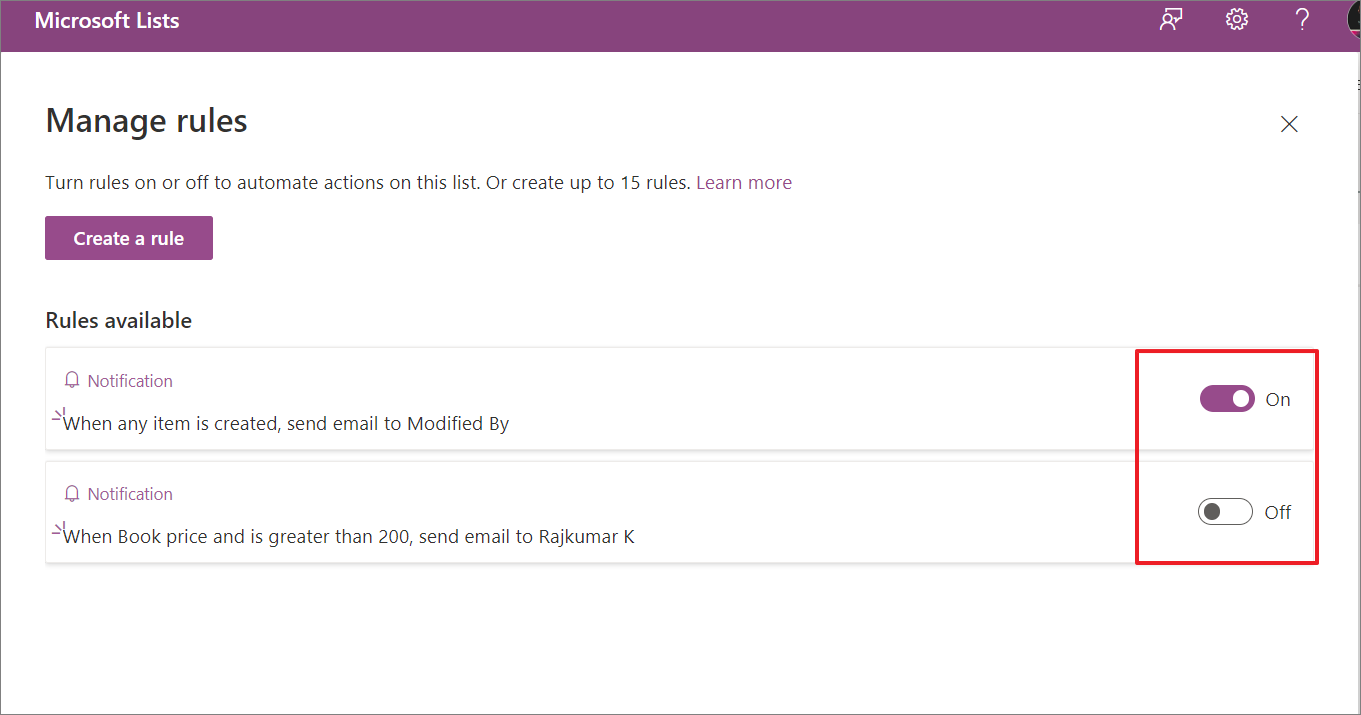
Managing Rules
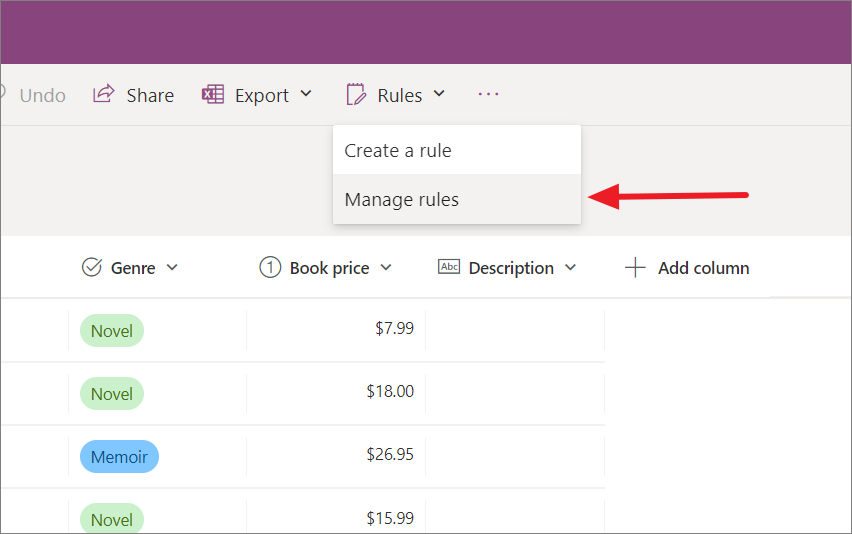
- To manage the rules, click the ‘Rules’ menu on the list page and select ‘Manage rules’.
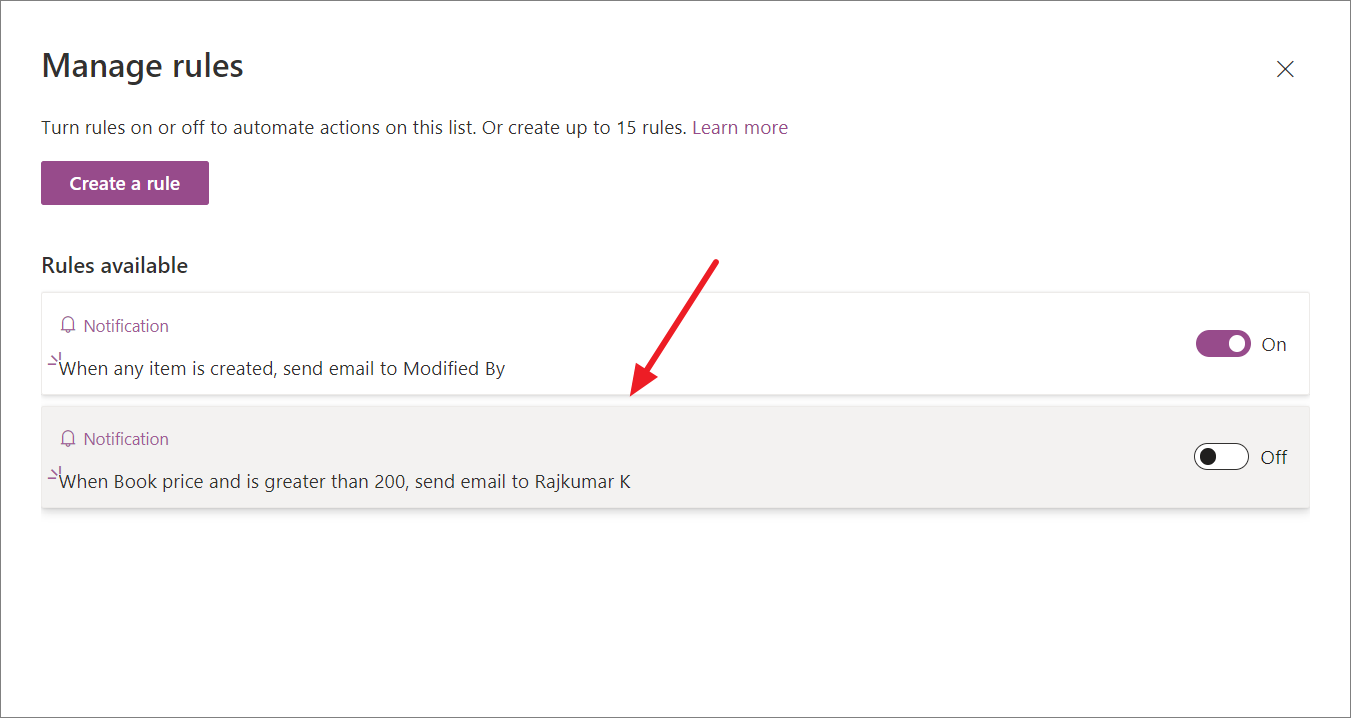
- Under the Manage rules window, you will see all the rules created for this list. To edit a particular rule, simply click on the rule.
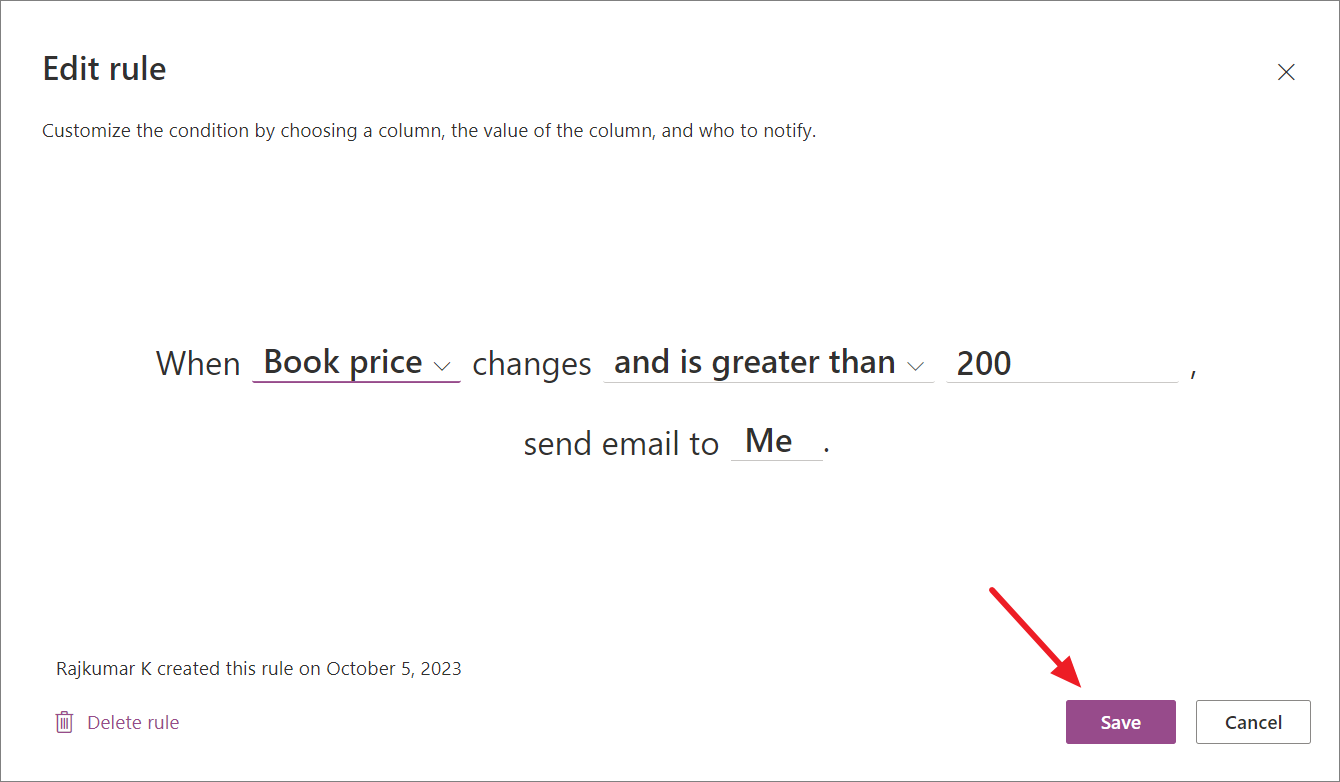
- Then, make your changes to the rule and click ‘Save’.
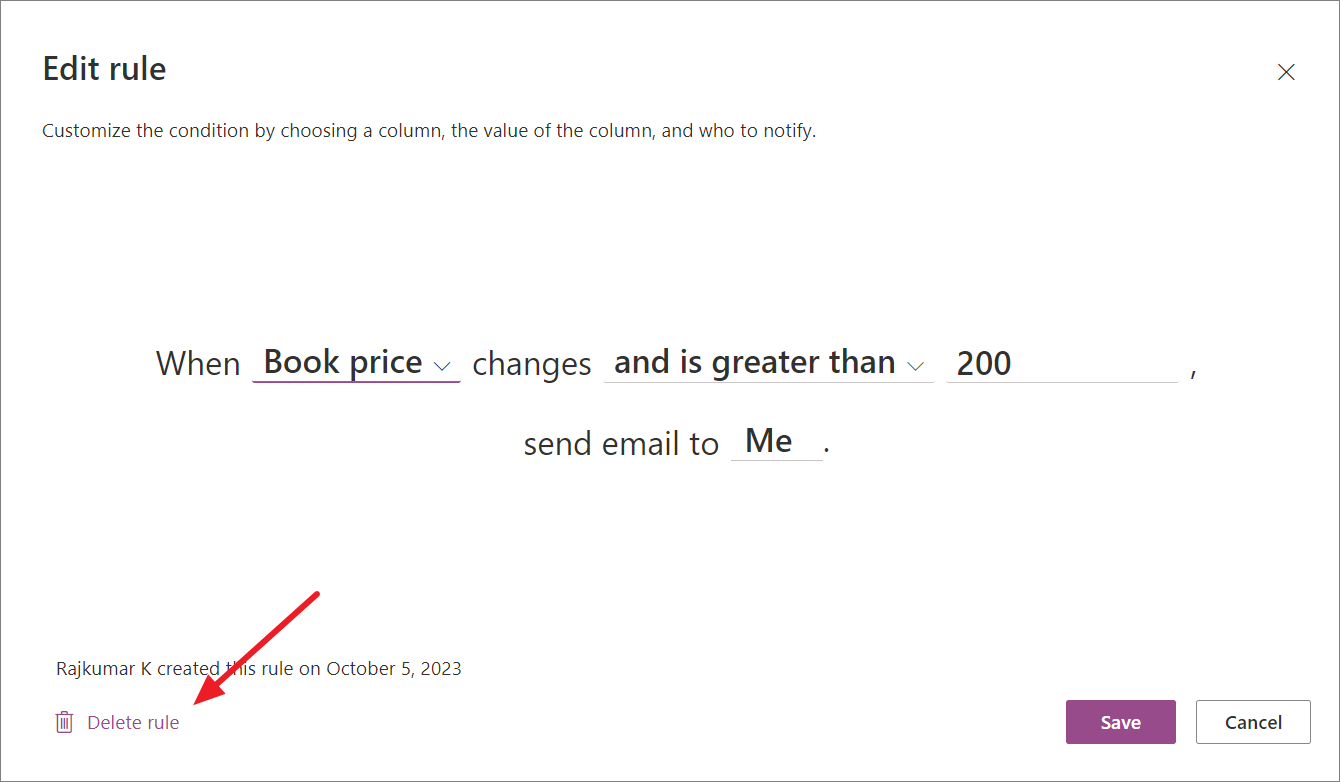
- To remove the rule, click the ‘Delete rule’ option at the bottom left corner of the Edit rule window.
- To disable a rule, turn off the toggle next to the rule.
Leaving Comments in Microsoft Lists
In addition to using statuses and alerts, you can also use comments to communicate and track your workflow.
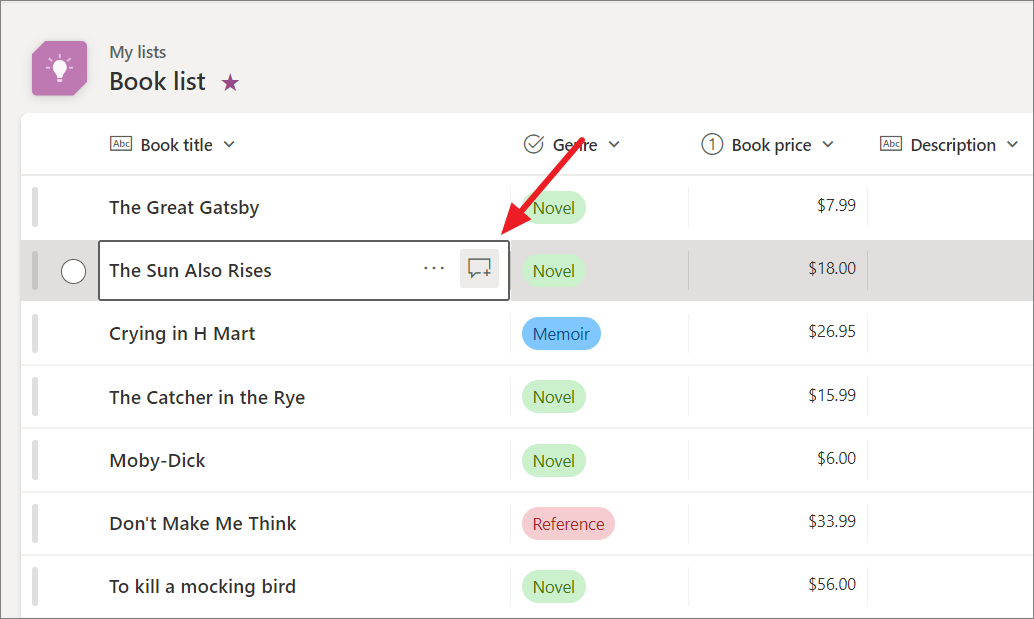
- Open the list you want to add a comment to.
- Hover over the item you want to comment on and click the ‘Comment’ icon. Or select the item and click the ‘Comment’ button on the menu bar.
- In the Comments pane, type your comment and click ‘Send’ (arrow button).
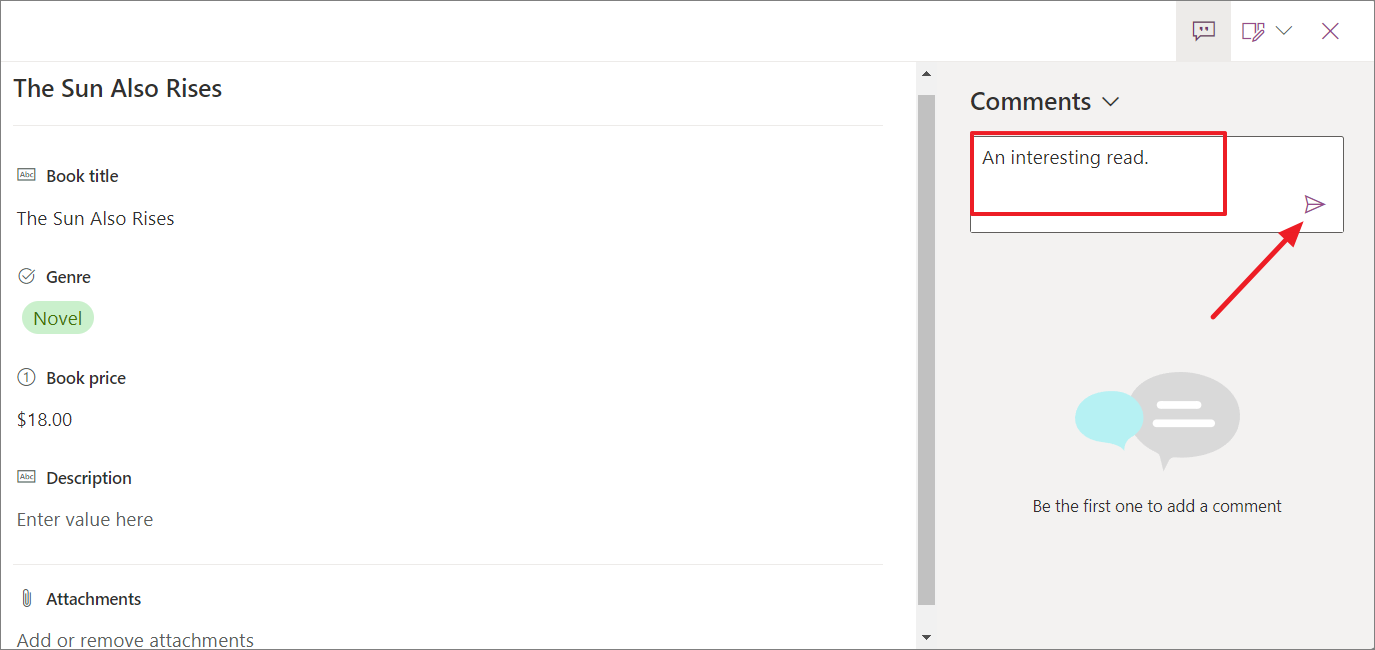
Your comment will be visible to everyone who has access to the list. Your team can reply to your comments or add their own comments.
You can also use ‘@’ mentions to tag people in your comments. This will send them a notification that they have been mentioned in a comment.
Exporting Lists in Microsoft Lists
To edit the existing list in a different application or share the entire list, you can export it in different formats, such as CSV or Power BI.
To export a Microsoft List to a CSV file:
- Open the list you want to export.
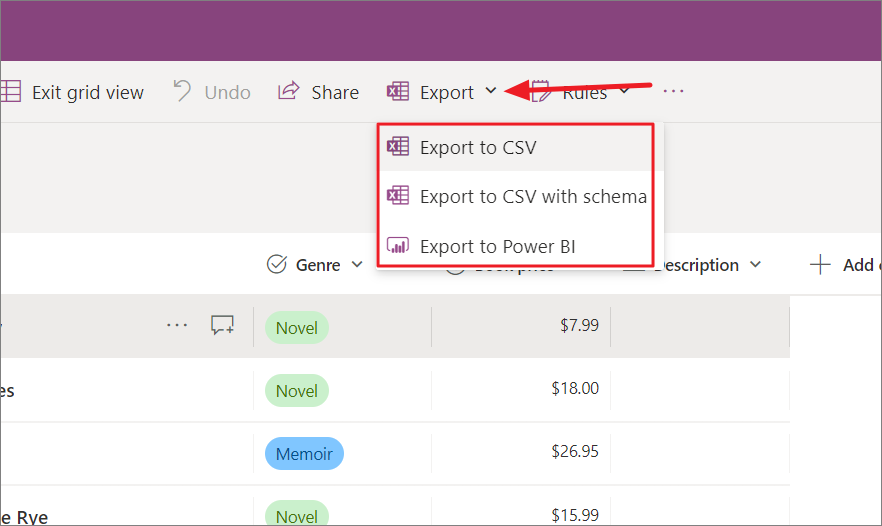
- Click the ‘Export’ button at the top and select the export option you want to use.
- Export to CSV: It lets you save your list data to a CSV file (a plain text file) that can be opened in any spreadsheet program, such as Microsoft Excel.
- Export CSV with schema: This option is similar to the Export to CSV option, but it also includes a schema file. The schema file contains information about the data in the CSV file, such as the column names and data types
- Export to Power BI: This option allows you to save your list data to a Power BI dataset. Power BI is a business intelligence tool that allows you to create interactive reports and dashboards from your data.
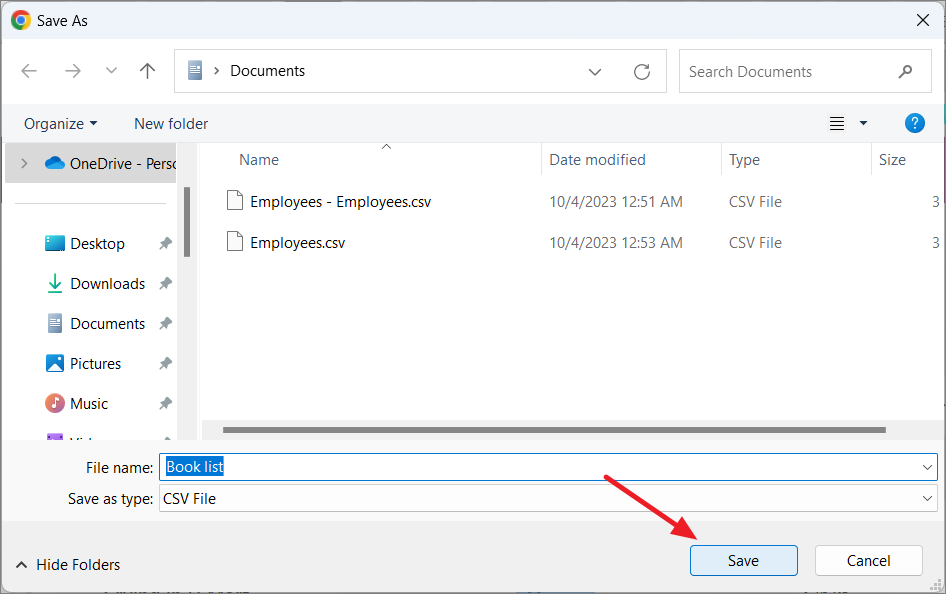
- If you select the ‘Export to CSV’ or ‘Export CSV with schema’ option, you will be prompted to save the file to your computer. If you select the ‘Export to Power BI’ option, you will be prompted to sign in to your Power BI account and choose a workspace to save the dataset to.
Conclusion
Microsoft Lists is a useful tool that helps manage data and work tasks effectively. It offers a variety of features and customization options, enabling users to create and organize lists for different purposes. Whether you need to track tasks, manage inventory, plan events, or maintain contact lists, Microsoft Lists provides the necessary flexibility and collaboration capabilities to help you stay organized and efficient.
It seamlessly integrates with other Microsoft 365 products and is available on multiple platforms, making it a versatile solution suitable for individuals and teams of any size.