
Microsoft Teams offers a comprehensive platform for teams to collaborate seamlessly, regardless of their physical locations. A standout feature is the ability to share your screen directly within a chat, enabling you to present information, demonstrate processes, or collaborate on documents without initiating a formal meeting or call. This guide will walk you through the steps to share your screen in a chat on the Microsoft Teams desktop application.
Sharing Your Screen in a Chat on Microsoft Teams
Chats icon from the navigation menu on the left side of the screen. Open an existing conversation or start a new chat with the individual or group you want to share your screen with.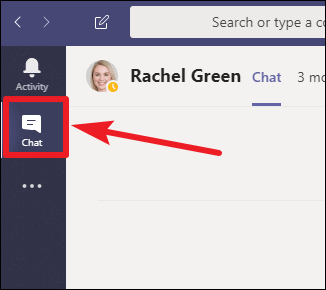
Screen Sharing button, which is found next to the audio and video call icons. This button resembles an icon of a screen with an arrow.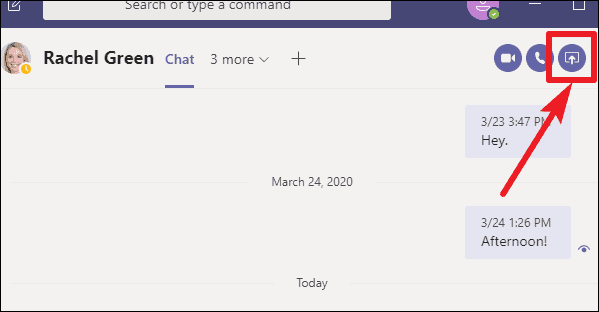
Desktop or a specific Window. Selecting Desktop will share everything visible on your screen, while choosing Window allows you to share only the contents of a particular application.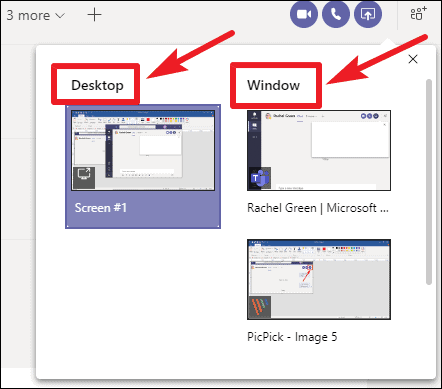
Your chat partner will receive a notification indicating that you wish to share your screen. Once they accept the request, your selected screen or window will be shared with them, and you can continue your conversation simultaneously in the chat.
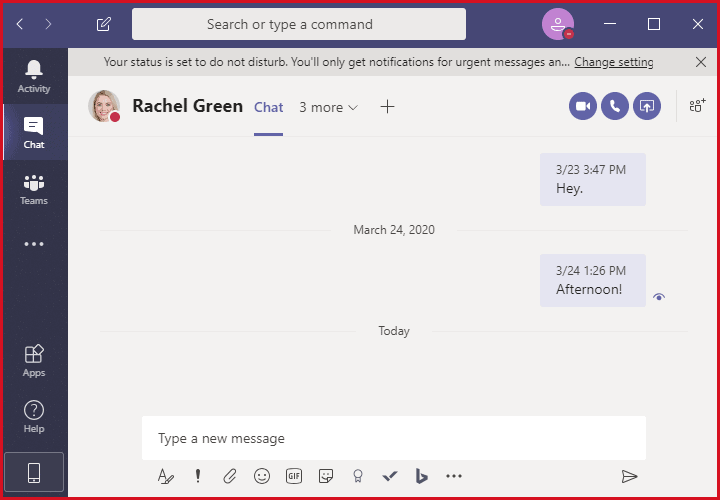
During the screen sharing session, a red border will outline the shared area on your screen, indicating that your screen content is visible to the other party. This visual cue helps you stay aware of what is being shared at all times. You can also elevate the session to an audio or video call without interrupting the screen sharing if a more direct conversation is needed.
Note: When you choose to share your Desktop, everything on your screen is visible to the other participants, including notifications and other open applications. If you prefer to keep certain information private, it’s advisable to share a specific Window instead. This ensures that only the content of that particular application is shared, safeguarding any sensitive information.
How to Stop Screen Sharing in Teams
Presenting toolbar that appears during sharing. If you’re still in the Teams app, click on the Screen Sharing button in the chat controls to bring up the call interface.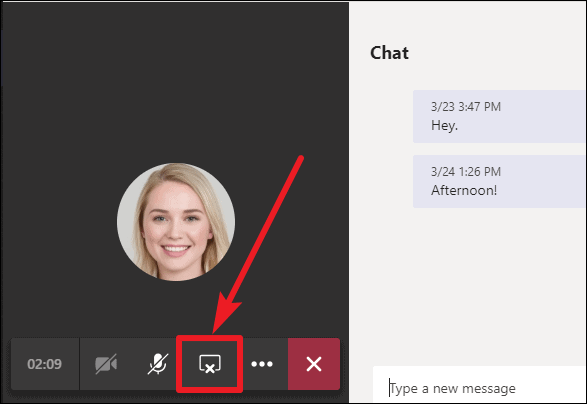
Stop Sharing button to cease sharing your screen but continue the chat or any ongoing call. Alternatively, if you wish to conclude both the screen sharing and the call, click the End Call button.Additionally, you can use the Presenting toolbar, which is typically pinned to the top of your screen during a sharing session. Simply click on the Stop Presenting button on this toolbar to end the screen share immediately.

If the Presenting toolbar isn’t visible, it might be unpinned. Hover your cursor at the top edge of your screen, and the toolbar should reappear, allowing you to access the controls as needed.
Screen sharing directly within a chat on Microsoft Teams enhances collaboration by enabling real-time sharing of information without the need for a formal meeting or call. It’s a straightforward process that can significantly improve communication and productivity among team members working remotely or from different locations.