
Most people know about Microsoft Word and Powerpoint’s spell-check and AutoCorrect features, but do you know MS Excel also facilitates the spell-checking functionality. It’s not as powerful and advanced as Word’s, but it does offer basic spell-checking functions. It allows you to check the spelling of words in the cells of worksheets and make sure your sheets are mistake-free.
Unlike Microsoft Word and PowerPoint, Excel doesn’t automatically check for grammar issues or check your spelling as you type (by underlining them in red). MS Excel will only notify you of spelling errors when you run the spellcheck functionality manually. Also, Excel doesn’t check grammar errors.
Most of the time, we ignore the spelling errors in Excel, because we often work with numbers and formulas. But sometimes, you need to check if you’ve made any spelling mistakes when creating some reports and datasets that may have texts such as column and row labels or in an entire worksheet. Let’s learn how to perform a spell check in a single cell, multiple cells, an entire worksheet, multiple worksheets at once, or the entire workbook.
How to Perform Spell Check in Excel
You can easily perform a spelling check within Microsoft Excel by following these steps:
There are two ways to run the spell-check feature in Excel: You can either access the tool from the Excel Ribbon or by using the keyboard shortcut.
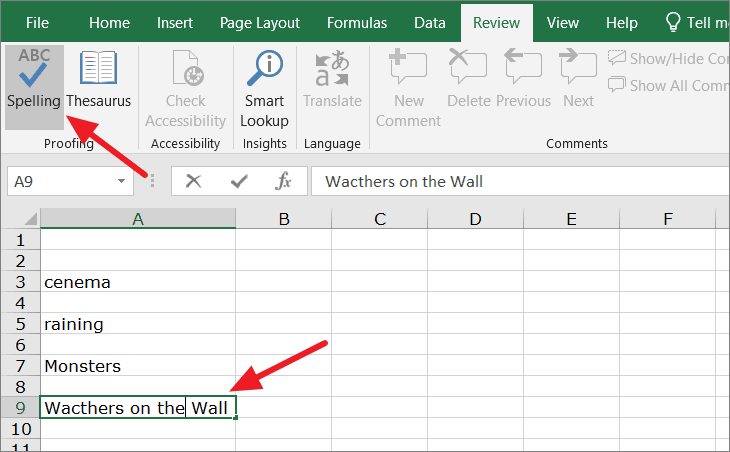
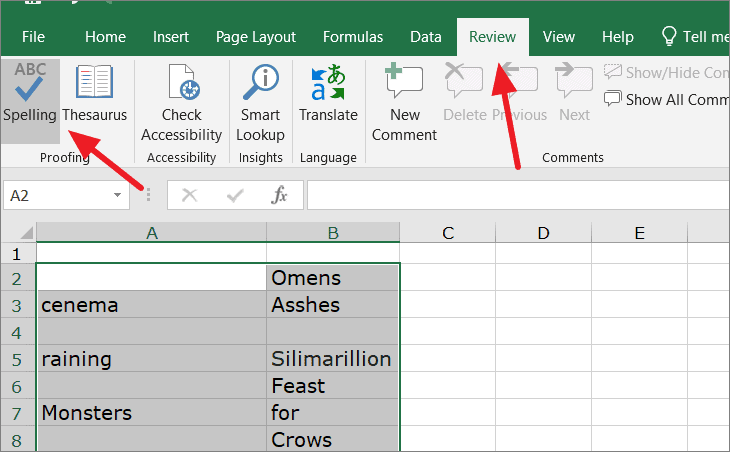
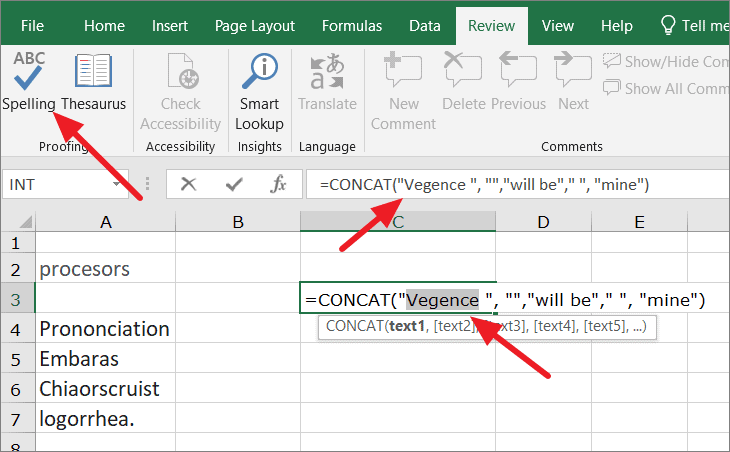
First, open a spreadsheet with some spelling errors and select any cell. Go to the ‘Review’ tab, click on the ‘Spelling’ button at the left in the Proofing group of Excel Ribbon.
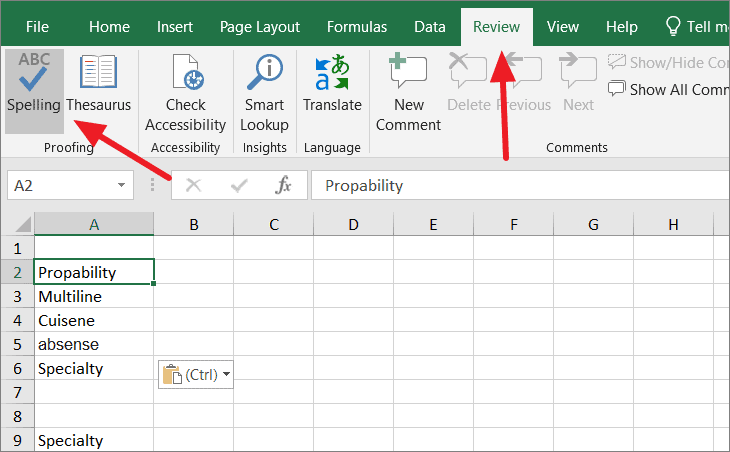
Alternatively, you can also press the keyboard shortcut F7 function key to open the Spelling dialogue box. If you select any single cell in the spreadsheet, Excel will automatically check for spelling errors in the entire current spreadsheet.
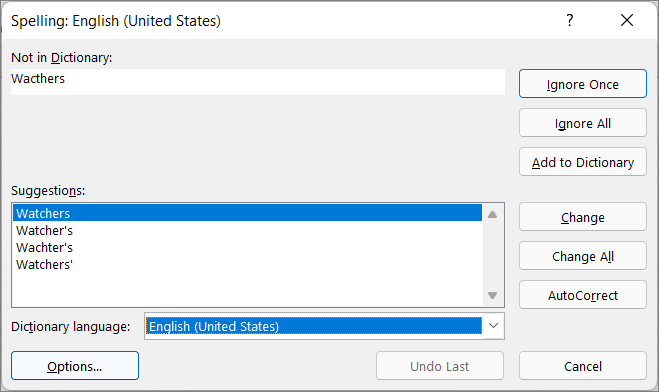
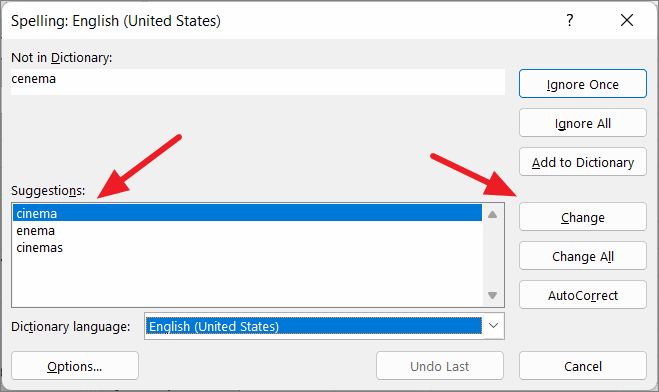
Either way, it will open up the Spelling dialog box. Excel will start checking spelling errors in your worksheet and it will provide suggestions for the correct spelling.
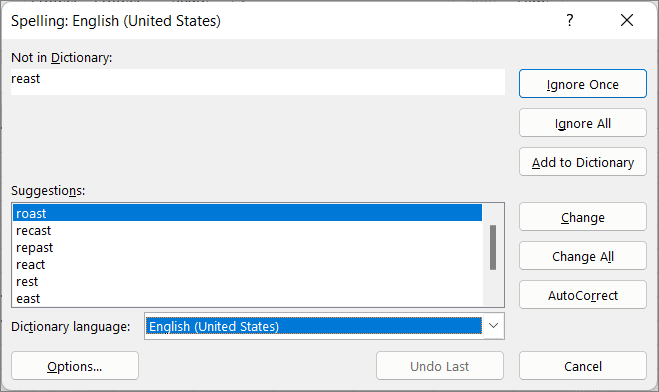
In the Spelling dialog, choose a suggestion from the ‘Suggestions:’ box and click the ‘Change’ button to correct the misspelling of the word. After that spelling has been corrected, it will move on to the next error. This box will only appear for the cells with misspelled words. Here, we will choose the first word ‘Probability’ from the suggestions list to replace the misspelled word ‘Propability’ and click on the ‘Change’ button.

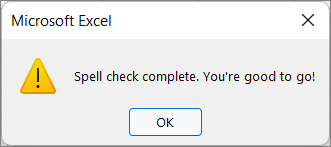
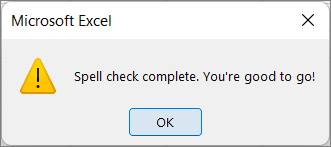
Once all the spelling has been corrected, Excel will show you the ‘Spell check complete. You’re good to go’ message. Click ‘OK’ in the prompt box to continue.
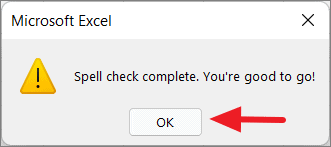
Excel will show you the Spelling dialog box only if there were any errors found in the sheet. If no error was found, Excel will show you the same above message.
If the spell check feature is not working (i.e the ‘Spelling’ button under the Review tab is greyed out.), it’s probably because your spreadsheet is protected. ‘Unprotect’ your worksheet before checking for spelling mistakes.
Different Options of Spelling Dialog Box
Before we learn how to perform spell check for cells, entire worksheets, multiple worksheets, or the entire workbook, we should understand the different options in the Spelling dialog box and how to customize them. You need to choose the appropriate options when correcting words.
The following are some of the functions you will see in the Spelling dialog box:
- Ignore Once – When spell check encounters a word that it identifies as an error, and the word is actually correct for your purposes, click on the ‘Ignore Once’ button to disregard the current spell check error suggestion. E.g. Names, Addresses, etc.
- Ignore All – Click this option, if you want to ignore all the instances of the current misspelled words and retain the original values. For example, if have the same name repeated multiple times, clicking this option will skip all those words without changing them and save you time.
- Add to Dictionary – If Excel regards the current word as an error, but it is a correct word and the one you use quite often, then you can add this misspelled word to the Microsoft Excel dictionary, as long as the word is used correctly. This will make the word as part of MS dictionary and will not be flagged as an error in the future in any workbook as well as in other Microsoft Products.
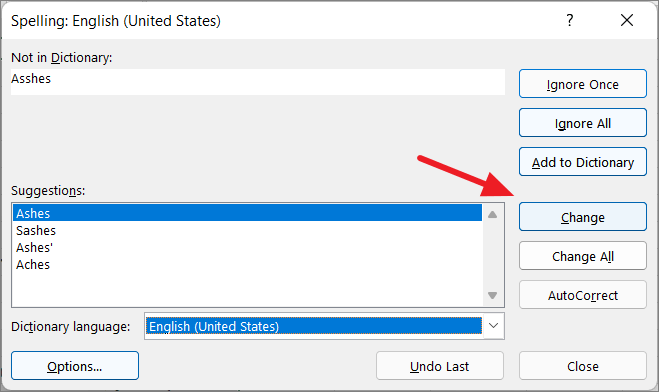
- Change – When a spell check error is detected, Excel will show you a list of suggestions. Select one of the suggested words and click this button to replace the currently selected misspelled word with the correct one.
- Change All – This option will replace all the occurrences of a misspelled word as well as the current one with the selected suggestion.
- AutoCorrect – Clicking this option will let Excel correct the misspelled word automatically with your selected suggestion. Also, it will add the word to the autocorrect list, which means if you type the same misspelled word in the future, Excel will automatically convert this to the selected suggestion.
- Dictionary language – You can change the Excel dictionary language using this drop-down.
- Options – This button will take you to ‘Excel Options’ where you can review or modify the default spell check settings accordingly.
- Undo Last – Click this button to reverse your last action.
Customizing the Settings of Excel Spell Check
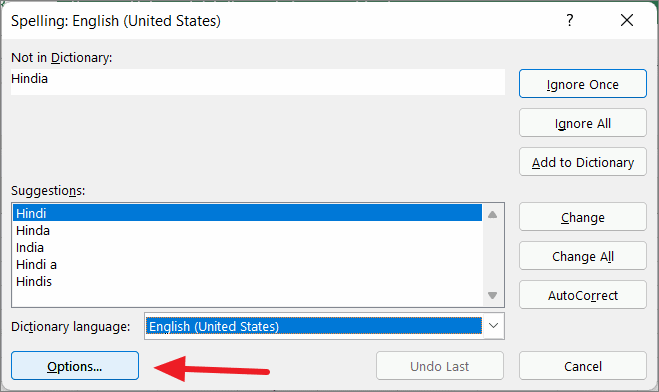
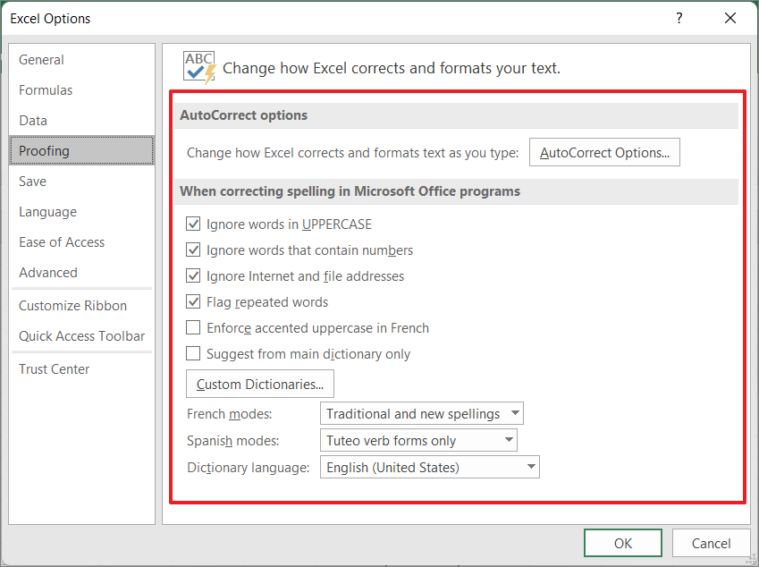
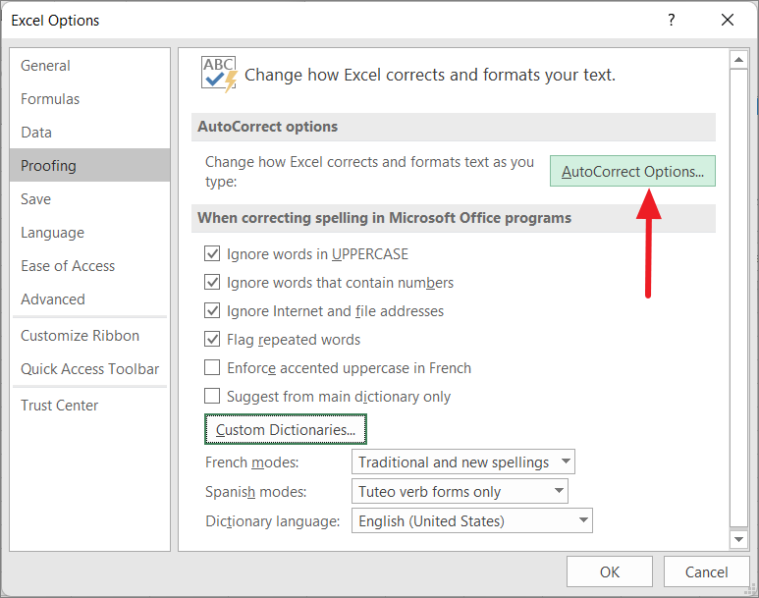
If you want to change the default settings of the Spell check in Excel, click ‘Options’ in the Spelling dialog box or go to the ‘File’ tab and click ‘Options.
In the Proofing tab of the Excel Options, you will find the default settings of the Spell check which you can customize as per your needs and requirements.
Excel ignores words that are in Upper Case (HEETHEN), text that contains numbers (Rage123), IP/file addresses, or internet codes and they will not be considered as a mistake. Also, it flags the repeated words as an error. E.g, if you type “Say hello to to my little friend”, it will flag, the additional ‘to’ as an error. You can enable or disable these options if you want.
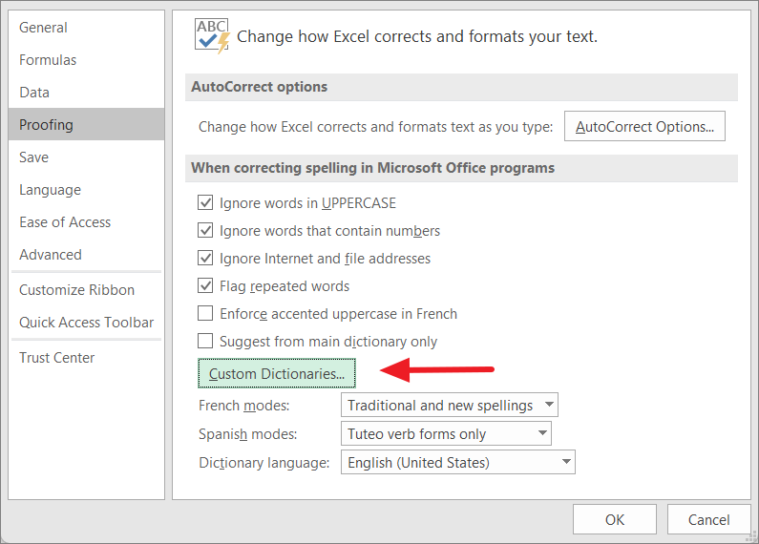
If you want to add or edit the Excel Dictionary, Click the ‘Custom Dictionaries’ option.
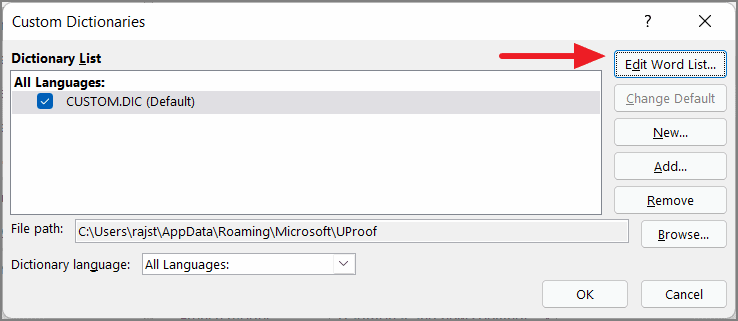
Then, to edit the list of words in the Custom Dictionaries, select the ‘CUSTOM.DIC’ under Dictionary List and click the ‘Edit Word List…’ button.
Enter the word you want to add to the dictionary in the ‘Word(s):’ field and click ‘Add’. If you want to remove an already added word from the list, select a word and click ‘Delete’ or ‘Delete all’ to remove all words. Then, click ‘OK’ twice to close both dialogs.
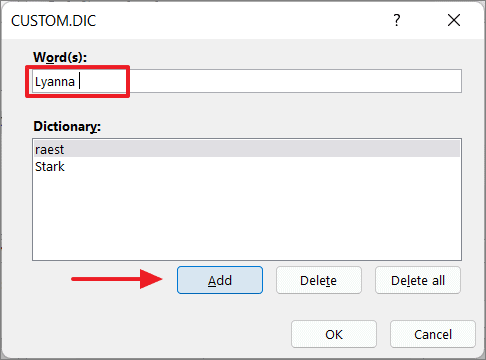
Also, any word added to the custom dictionaries will not be flagged as an error in any other Microsoft products. If you added a word to the custom dictionary in Excel, it will not be considered as an error in Word or Powerpoint and vice versa.
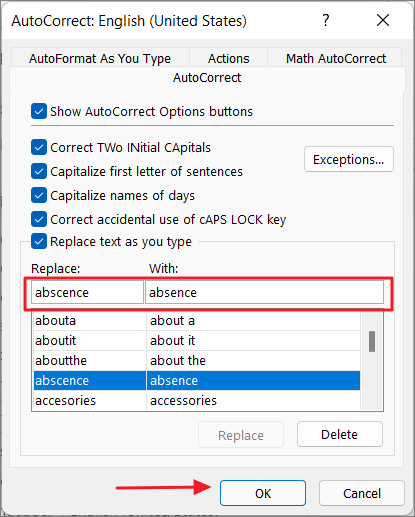
If you want to change the AutoCorrect settings, click the ‘AutoCorrect Options’ in Excel Options.
Here, you can customize the AutoCorrect settings.
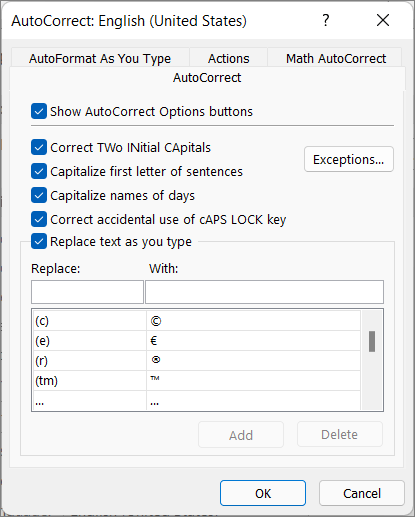
When typing, you may often misspell some words several times in your worksheet. You can fix these mistakes by adding those words to your AutoCorrect list. This way, Excel will autocorrect these words while you write.
To do this, enter the misspelled word in the ‘Replace’ section and select the correct word from the list below or enter it in the ‘With’ section. Then, click ‘OK’ to apply.
Spell Check a Single Cell/Text in Excel
Excel allows you to check a single cell value (Word) for spelling errors.
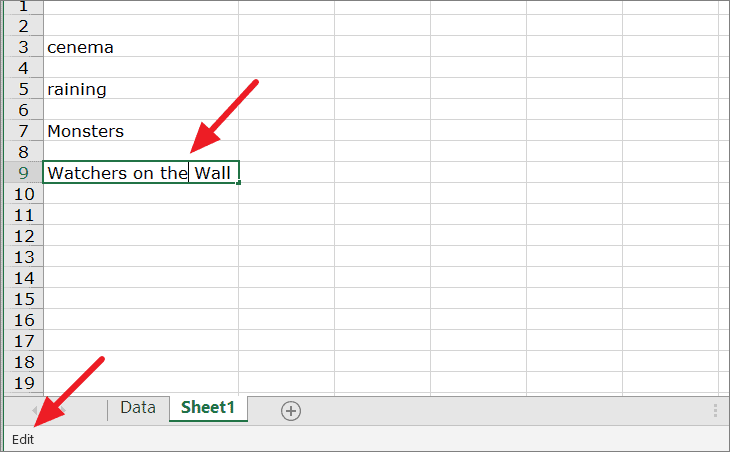
To check the spelling of any single cell in an Excel document, select the cell and double-click on it or press F2 to enter into edit mode. Make sure you are in the edit mode in the cell. If you’re in the edit mode, you will the text cursor in the cell and ‘Edit’ in the status bar at the bottom left corner of the Excel window (as shown below).
Then, click the ‘Spelling’ button in the Review tab or press F7.
If Excel finds any spelling errors it will display the suggestions box otherwise it will show a message with the message “The spelling check is complete”.
Select the correct word and click ‘Change’ to correct the spelling. Then, click ‘OK’ in the Spell check complete dialog box.
Spell Check Multiple Cells/Words in Single Worksheet
If you want to spell check multiple cells together, you can do that by selecting only those cells and using the Spelling dialog box. This method is useful when you want to skip the name or address column from checking errors because names and addresses are usually flagged as spelling errors.
First, select the cells or ranges or columns or rows you want to check for spelling. If you are selecting adjacent cells, then you simply use the mouse drag or Shift + arrow keys to make the selection.
If you want to select non-adjacent cells (cells that are not next to each other), you can press and hold the Ctrl key and click on the cells you want to get selected. If you have a large number of cells to select, press and release Shift + F8 and then click on as many cells as you want to select them. Then, press Shift + F8 again to turn off the selection mode.
Once you selected the cells, switch to the ‘Review’ tab and select ‘Spelling’ on the Ribbon or press F7.
The Spelling dialog box will appear with some suggestions to replace the first misspelled word (if Excel found any) in the selected cells or ranges.
Then, select the correct suggestion, click on the ‘Change’ option or use ‘AutoCorrect’ to automatically select the correct spelling and move to the next misspelled word.
Or, you can also click ‘Ignore Once’ to dismiss the suggestion and move on to the next misspelled word.
Once, the first misspelled word has been corrected, it will show you suggestions for the next misspelled word in the same dialog box. Choose the appropriate options to fix the error. Similarly, you can correct all the misspelled words, one by one.
After all the misspelled words have been corrected, you will see the ‘success’ prompt.
Spell Check the Entire Worksheet
To spell-check an entire worksheet in Excel, select any cell in the worksheet you want to get checked or click the tab of the worksheet on which you want to run the spell check, and click on the ‘Spelling’ option (or press F7) under the ‘Review’ tab.
Excel will start checking for errors and give suggestions to correct them.
When you run the spell check, it checks for spelling from the currently selected cell and onward till the end of the worksheet. If you select cell A1, Excel will start checking all the cells in the first row (from left to right), then moves to the second row and check all the cells in the second row (from left to right) and then goes to the third row and so on.
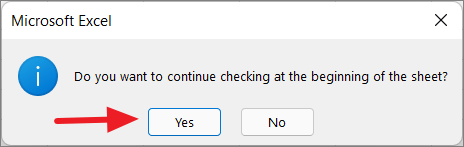
For example, if you select A4, it will simply go through all cells of Row 4 (horizontally) and then rows below it. After checking for all the cells after A4, Excel will show you a prompt box, “Do you want to continue checking at the beginning of the sheet?”. Click ‘Yes’ to continuing the spell check from the beginning as shown below.
Spell-Check Multiple Sheets at Once
In Excel, you can check spellings for multiple worksheets together. Here’s how:
To check the spelling for the multiple worksheets, press and hold the Ctrl key and select the multiple sheet tabs that you want to check. Initiate spelling check by clicking the ‘Spelling’ button under the ‘Review’ tab or pressing the F7.
This will start the spell-checking process, and one by one, all the errors will pop up in the dialog box.

Choose appropriate options to fix all the errors and a dialog box will prompt to notify you with a confirmation message.

Spell Check All the Worksheets in a Workbook at Once
If you have many worksheets in your workbook, you can easily spell-check them all in one go.
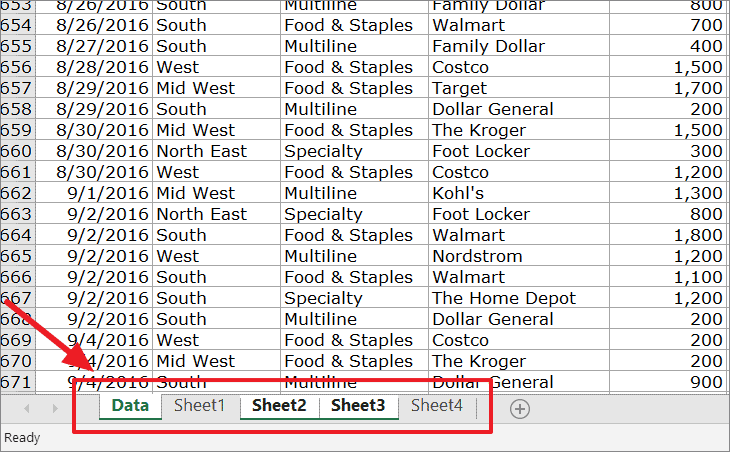
To spell-check all the worksheets in a workbook, right-click on any worksheet’s tab and select ‘Select All Sheets’ from the context menu.

This will select all the worksheets in your workbook. Then, press F7 or click the ‘Spelling’ button under the Review ribbon tab. When all worksheets are selected, all the tabs will be displayed with a white background, as shown below.
Now Excel will spell-check all the worksheets in the workbook.
Spell Check Words in a Formula
If you try to check a text that is part of the formula, it won’t work and the spell-check runs back to the beginning of the worksheet. You can only check a text that is inside the shell of the formula in the edit mode.
If you want to check the spelling of the words in a formula, double-click on the cell with the formula or select the words inside the formula in the formula bar. Then, press F7 or click the ‘Spelling’ button under the Review ribbon tab to run the spell-check.
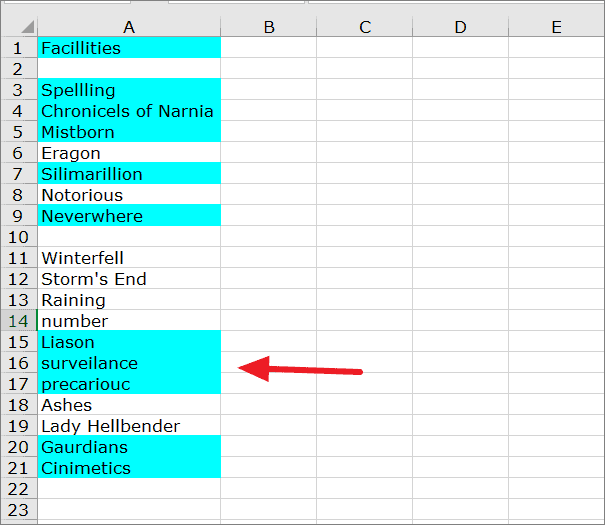
Highlight Spelling Mistakes using an Excel VBA Macro
You can even use the Excel Macro to find and highlight the misspelled words in the current worksheet. For this, you have to create a macro in the VBA editor. Here’s how you do this:
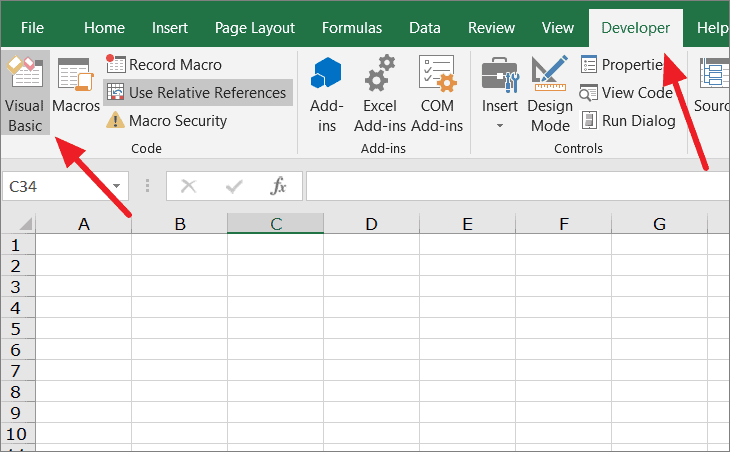
First, open the worksheet in which you want to highlight the misspelled words. Then, click the ‘Visual Basic’ button under the ‘Developer’ tab or press the shortcut key Alt + F11 to open the Excel VBA editor.
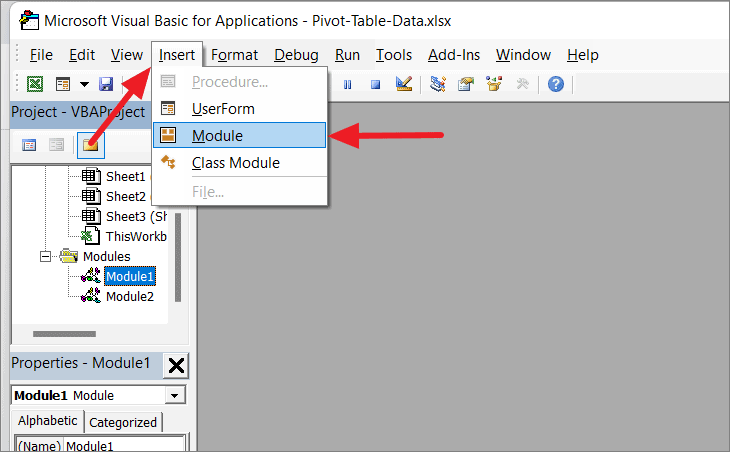
In the Microsoft VBA editor, click the ‘Insert’ menu and select the ‘Module’ option.
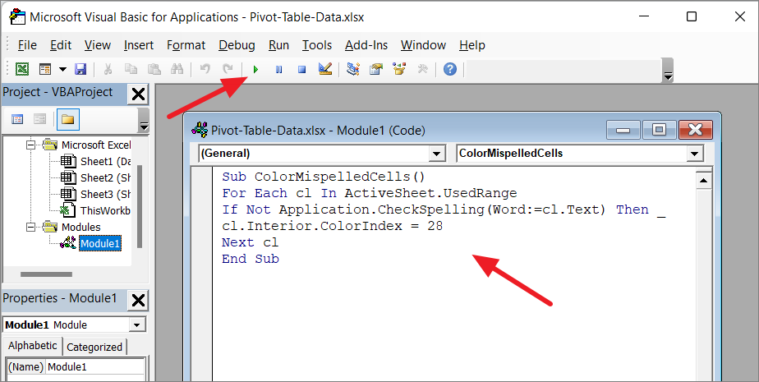
Then, copy and paste the following code in Module editor:
Sub ColorMispelledCells()
For Each cl In ActiveSheet.UsedRange
If Not Application.CheckSpelling(Word:=cl.Text) Then _
cl.Interior.ColorIndex = 8
Next cl
End Sub
After pasting the code click the ‘Run’ button in the toolbar or press the ‘F5’ key to run the macro.
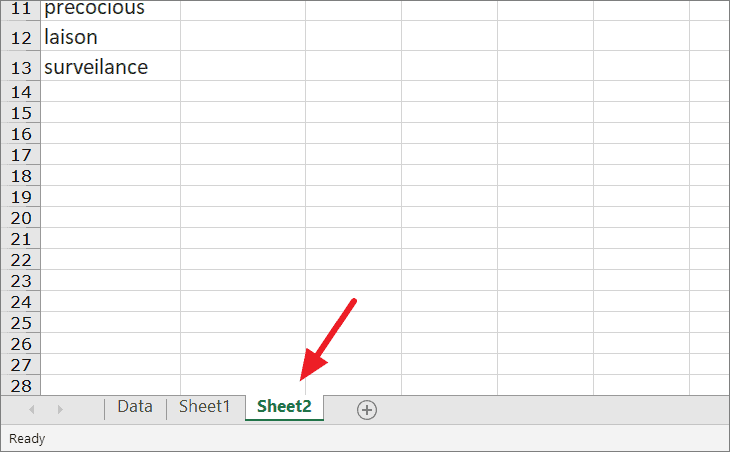
Once you run the macro, check your worksheet. And all the cells with misspelled words would have been highlighted as shown below.
That’s everything you need to know about spell-checking in Excel.


