
Capturing screenshots on Windows 11 can be incredibly useful for various tasks, whether you’re creating tutorials, troubleshooting issues, or simply wanting to save something from your screen. There are several methods available, each suited to different needs. This guide covers the most effective ways to take screenshots on Windows 11.
Use the Snipping Tool app to take screenshots in Windows 11
The Snipping Tool is a built-in application in Windows 11 that provides flexible options for capturing screenshots. It allows you to capture specific areas of your screen, individual windows, or the entire screen. Below are the different modes and how to use them.
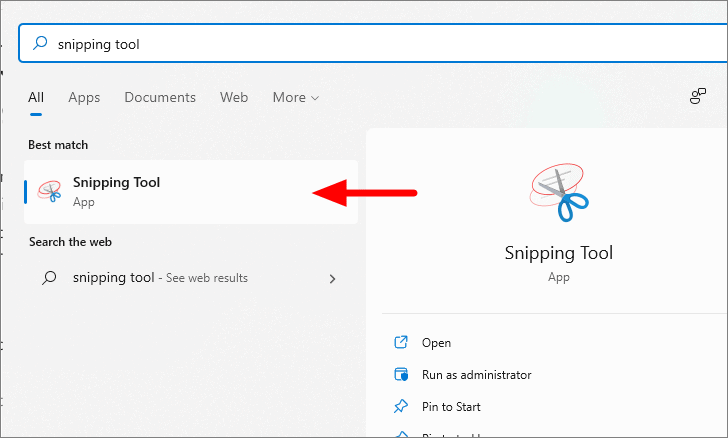
To launch the Snipping Tool, search for “Snipping Tool” in the Start Menu and select the app from the results.
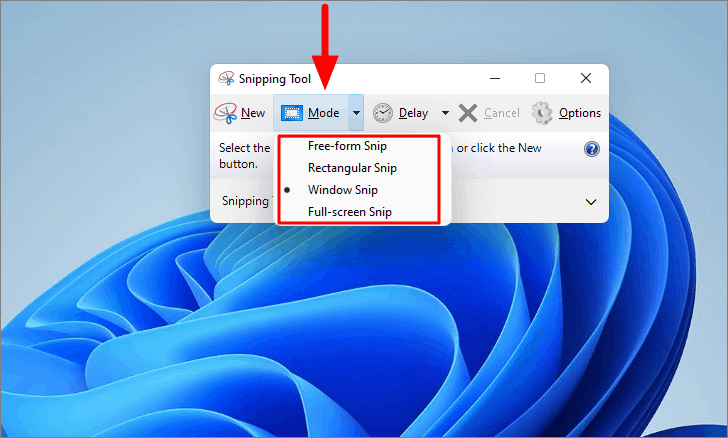
Once the app is open, you’ll see several options at the top. Click on the “Mode” dropdown menu to view the different capture modes:
- Free-form Snip: Draw a free-form shape around the area you want to capture.
- Rectangular Snip: Capture a rectangular portion by dragging the cursor over the desired area.
- Window Snip: Select an open window to capture.
- Full-screen Snip: Capture the entire screen.
You can also set a delay before the screenshot is taken, which is useful for capturing menus or tooltips that disappear quickly.
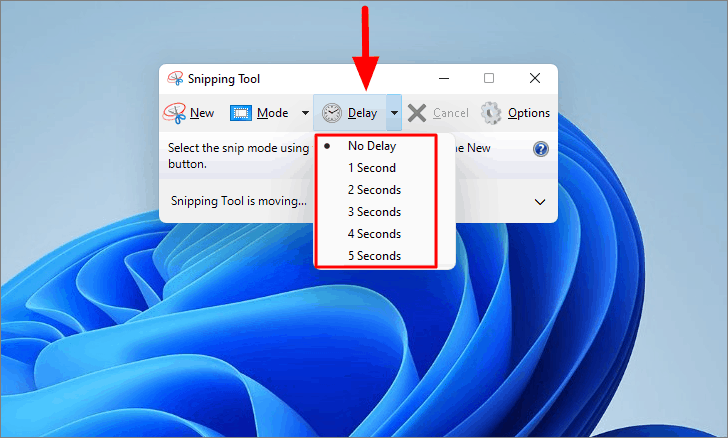
After setting the delay, choose your desired mode and initiate the screenshot. Make sure to prepare any menus or tooltips you want to capture before the timer runs out.
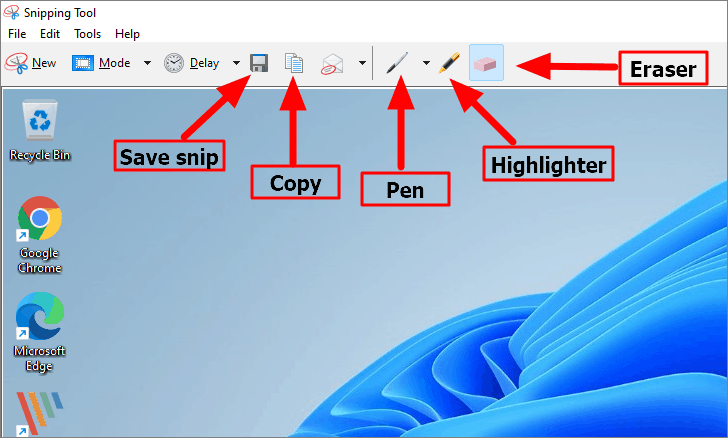
Once you’ve captured the screenshot, it will open in the Snipping Tool window, where you have several options:
- Save Snip: Save the screenshot to your computer.
- Copy: Copy the screenshot to the clipboard to paste it elsewhere.
- Pen: Annotate the screenshot with the pen tool. You can adjust the color, thickness, and tip style.
- Highlighter: Highlight parts of the screenshot.
- Eraser: Remove any annotations you’ve made.
Take screenshots with the Print Screen key on Windows 11
The Print Screen key is one of the quickest ways to take a screenshot. By combining it with other keys, you can capture the entire screen or specific parts and either save them to your computer or copy them to the clipboard.
The Print Screen key may be labeled as PrtScn or PrtSc on your keyboard. Here’s how to use it:
Capture and save the screenshots
To capture the entire screen and save it automatically:
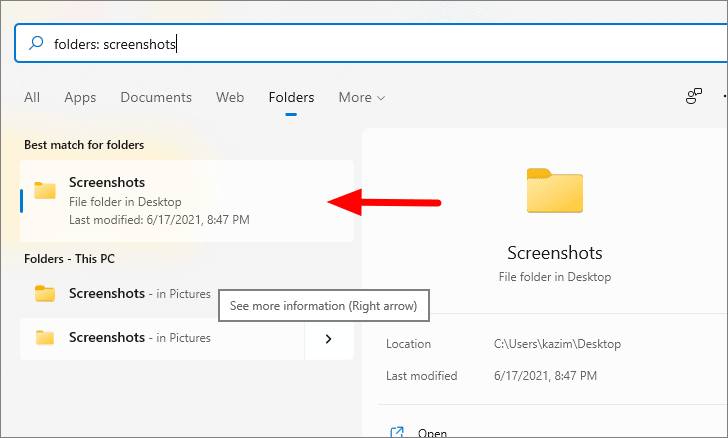
The screen may dim briefly to indicate a screenshot has been taken. The image is saved in the “Screenshots” folder inside your “Pictures” directory. You can access this folder by searching for “Screenshots” in the Start Menu.
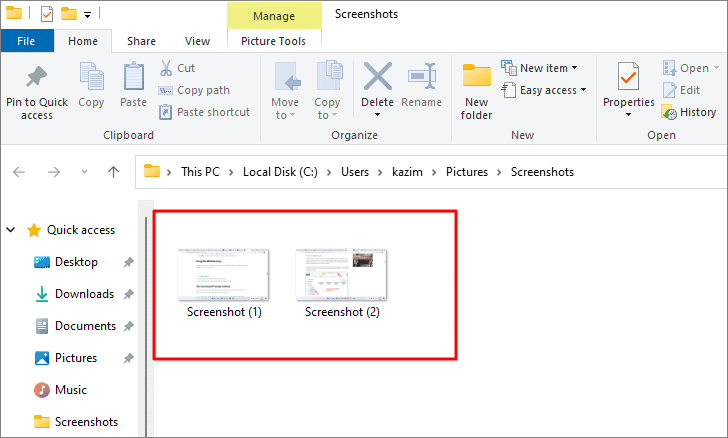
In the folder, you’ll find all your saved screenshots, labeled with numbers.
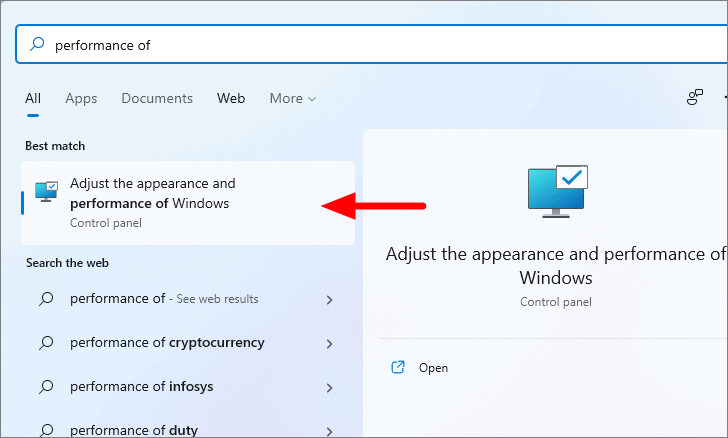
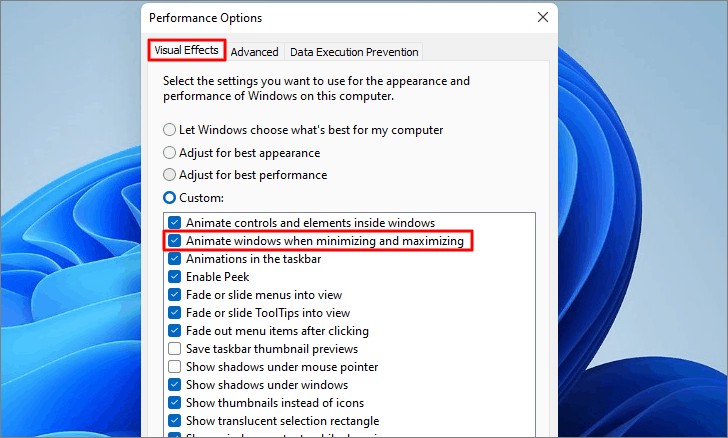
If your screen doesn’t dim when taking a screenshot, you might need to enable an animation setting:
Capture full-screen screenshot and copy to clipboard
If you prefer to copy the screenshot to the clipboard without saving it:
The screenshot is now copied to your clipboard. You can paste it into an image editor or document by pressing Ctrl + V.
Note: If you’ve set the Print Screen key to open the Snip & Sketch tool, this keyboard shortcut will not copy the screenshot to the clipboard in the usual way.
Capture screenshot of a single window and copy to clipboard
To capture only the active window:
The screenshot of the active window is copied to the clipboard, and you can paste it where needed.
Use Xbox Game Bar app to take screenshots in Windows 11
The Xbox Game Bar is another built-in tool that allows you to capture screenshots and record videos of your screen. It’s commonly used for gaming but can be used for any application.
To use the Xbox Game Bar:
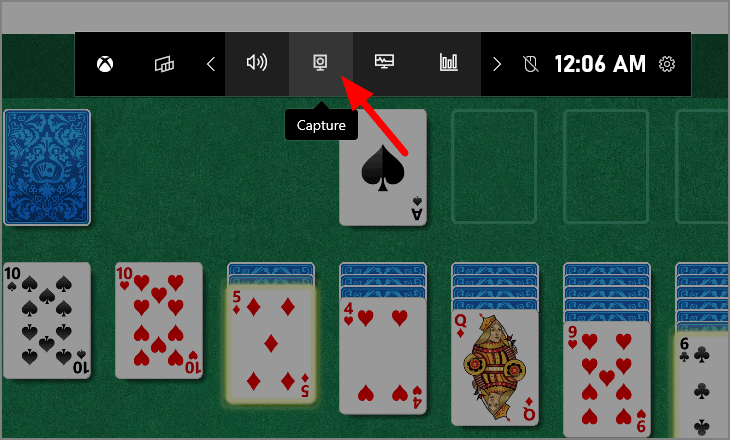
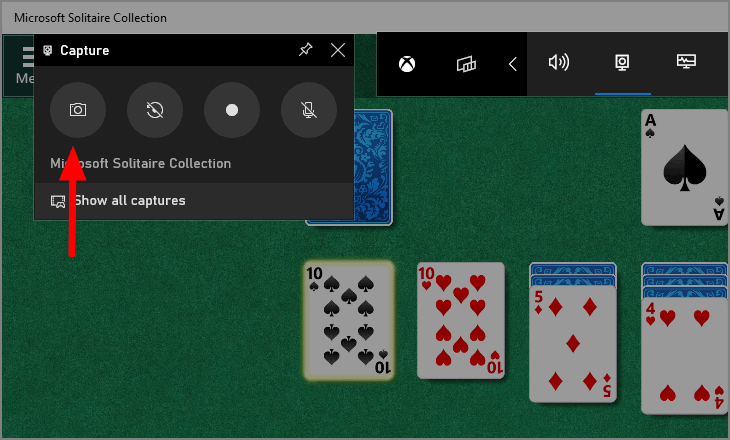
You can also use the keyboard shortcut Windows + Alt + PrtScn (or Windows + Alt + Fn + PrtScn) to capture a screenshot directly with the Game Bar.
The screenshots are saved in the “Captures” folder, which you can find at:
C:\Users\YourUserName\Videos\CapturesReplace “YourUserName” with your actual Windows username.
Third-party apps to capture screenshots in Windows 11
If you need more advanced features, there are several third-party applications available:
With these methods, taking screenshots on Windows 11 becomes a simple task, whether you need to capture the entire screen, a specific window, or a custom area.


