
Compressing files into zip format is a convenient way to reduce file sizes and bundle multiple files together. However, when you receive a zip file, you’ll need to extract its contents to access them. Windows 11 offers built-in tools for unzipping files, and there are also third-party applications like 7-Zip that provide additional features. This guide will show you how to unzip files in Windows 11 using both methods.
Unzip files using the built-in utility in Windows 11
To extract a zip file using Windows 11’s built-in utility, follow these steps:
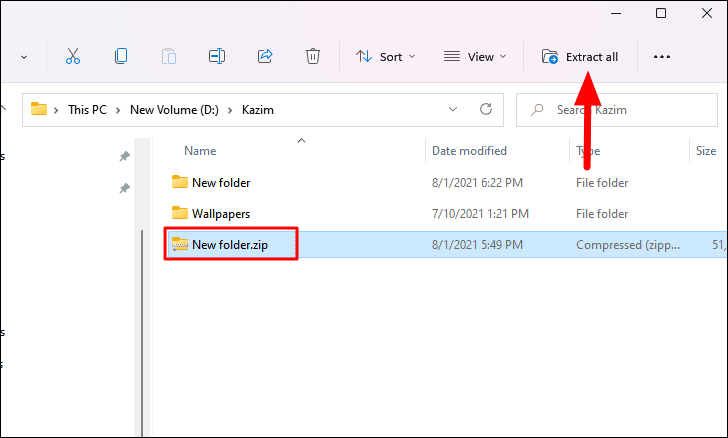
- Locate the zip file you want to extract.
- Right-click the zip file and select ‘Extract All’ from the context menu.

- Alternatively, select the zip file, and click ‘Extract All’ in the ‘Command Bar’ at the top of the File Explorer window. This option appears only when a compressed file is selected.
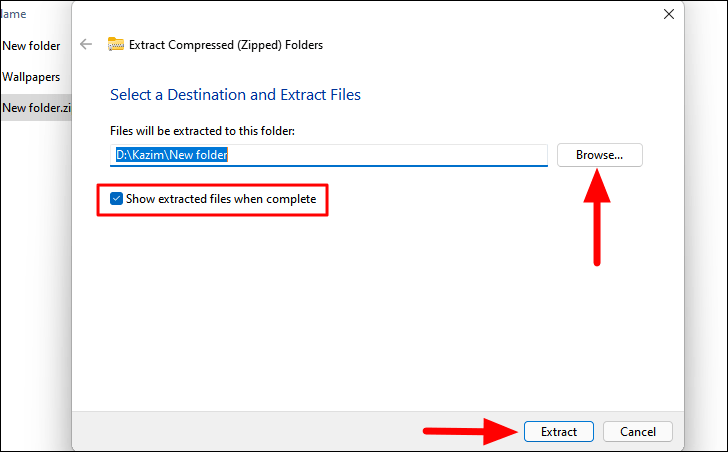
- In the ‘Extract Compressed (Zipped) Folders’ window, choose the destination folder by clicking ‘Browse…’, or paste the path directly if you have it copied.
- If you want the extracted folder to open automatically after extraction, check the box next to ‘Show extracted files when complete’.
- Click ‘Extract’ to begin the extraction process.
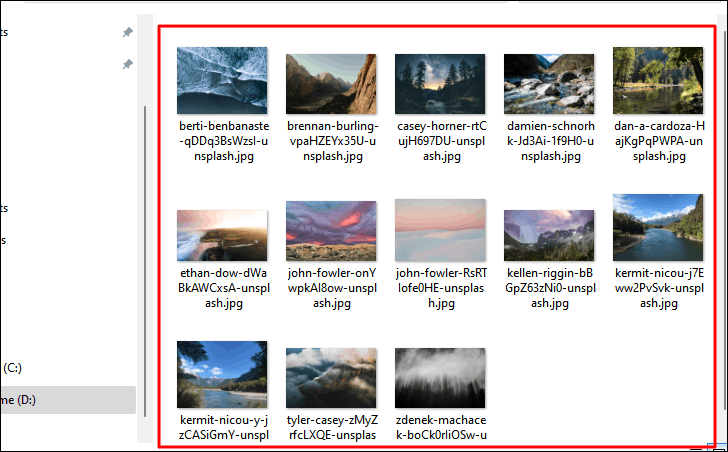
Windows will extract the files to your chosen location, and you can access them there.
Extract selected files from a zipped folder
If you need to extract specific files without decompressing the entire archive, follow these steps:
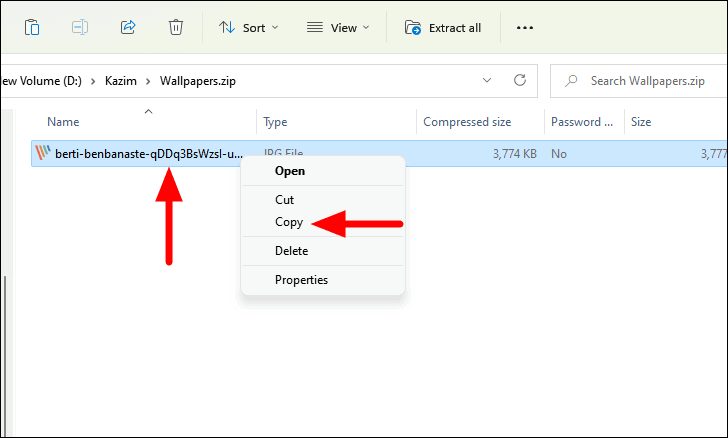
- Double-click the zip file to open it and view its contents.
- Select the file(s) you want to extract.
- Right-click the selected file(s) and choose ‘Copy’ from the context menu.
- Navigate to the destination folder where you want to paste the files.
- Paste the files by pressing
CTRL+Vor by right-clicking and selecting ‘Paste’. The files will be extracted to this location.
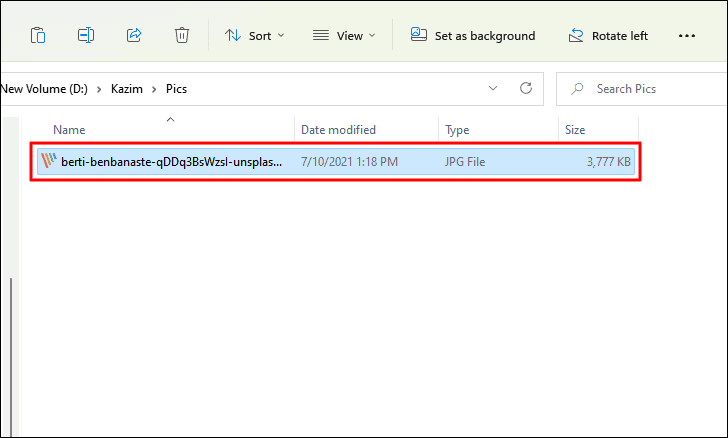
You can extract multiple files by selecting them all before copying and pasting them to your desired location.
Unzip files with the 7-Zip app
7-Zip is a powerful third-party application that can extract files and offers additional features beyond the built-in Windows utility. To use 7-Zip for unzipping files, follow these steps:
- Download 7-Zip from 7-zip.org/download by selecting the version compatible with your system.
- Open the installer and follow the on-screen prompts to install 7-Zip. Once installed, you’re ready to extract files using 7-Zip.
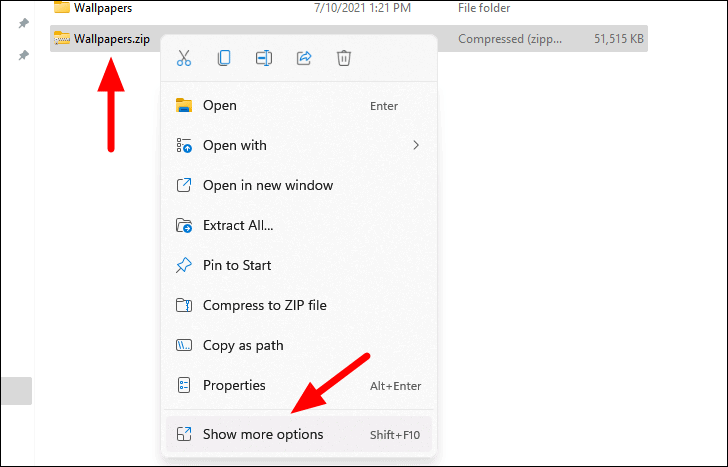
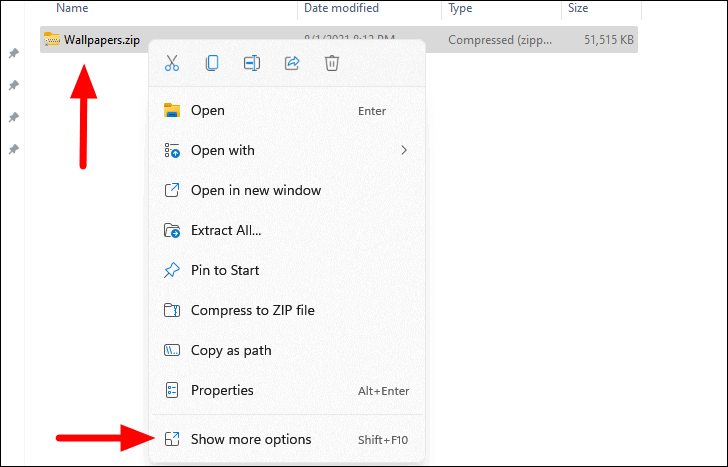
- Right-click the zip file you want to extract and select ‘Show more options’ from the context menu.
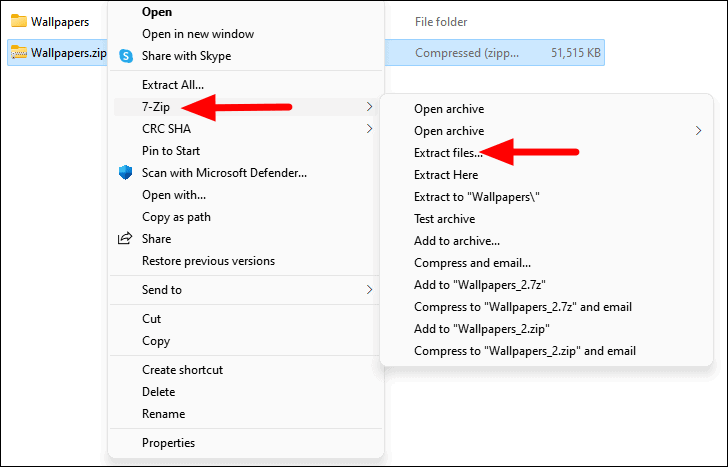
- Hover over ‘7-Zip’ to view additional options.
- Select ‘Extract files…’ to choose a destination folder, or select ‘Extract Here’ to extract files to the current folder.
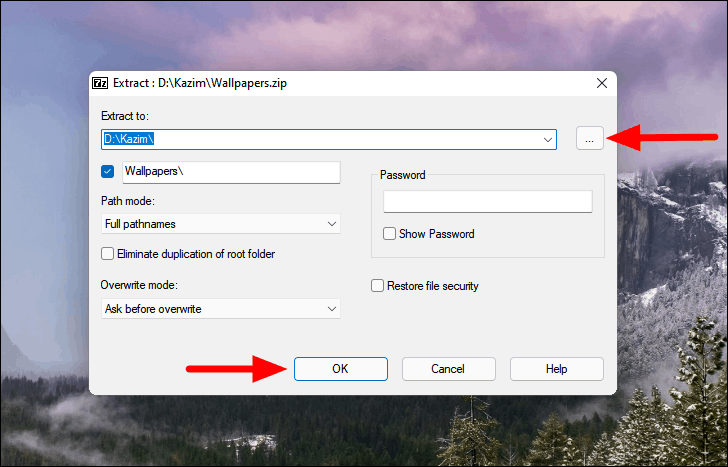
- If you chose ‘Extract files…’, click the ellipsis (…) button in the extraction dialog to browse and select the destination folder.
- Click ‘OK’ to start the extraction process.
7-Zip will extract all files to the designated folder you chose.
Extract selected files from a zip file using 7-Zip
To extract specific files using 7-Zip, follow these steps:
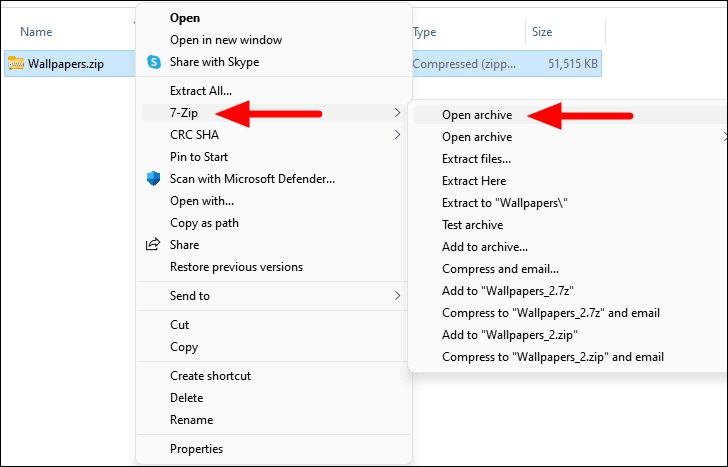
- Right-click the zip file and select ‘Show more options’ to access the extended context menu.
- Hover over ‘7-Zip’ and select ‘Open archive’ from the submenu.
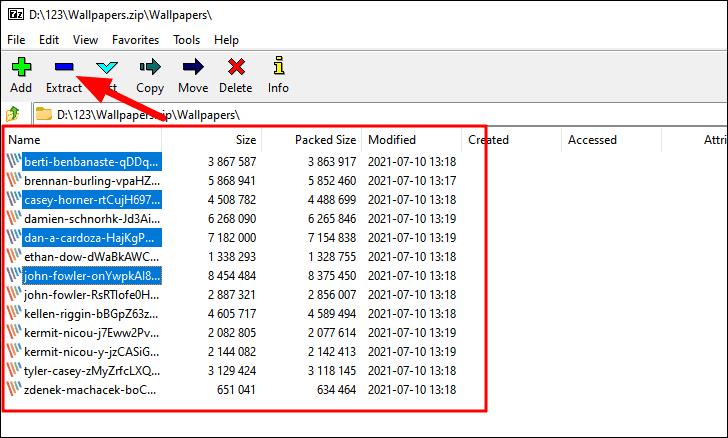
- In the 7-Zip window, select the file(s) you want to extract.
- Click the ‘Extract’ button at the top.
- In the extraction dialog, click the ellipsis (…) to change the extraction path if necessary.
- Click ‘OK’ to extract the selected files.

The selected files will be extracted and available in the folder you specified.
Whether you use Windows 11’s built-in utility or a third-party app like 7-Zip, extracting files from a zip archive is straightforward. Choose the method that best fits your needs and preferences.


