Canva’s latest updates include some of the most requested features of all time. The platform, though exceptional with the designing provisions for both free and paid versions, was lacking in a couple of tools. It took to the challenge and welcomed popular crowd demands recently.
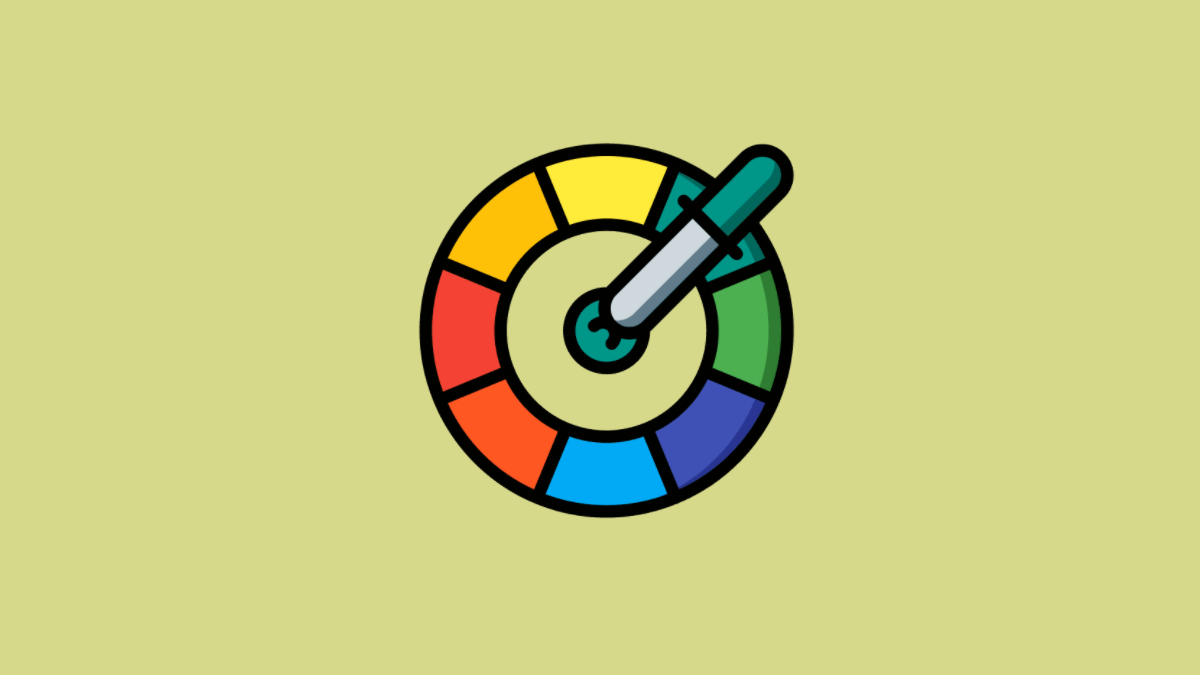
One such feature Canva introduces is, the color picker tool. This tool helps use colors that are pre-existing in a design/page without having to manually find them in the color scheme. Now, when you’re mixing and matching colors on your Canva design, you don’t need to spend hours trying to find the right color. The pen icon would do that for you!
Here’s how to use Canva’s latest addition – the color picker.
Opening the Color Picker
The color picker tool is found in the color palette. The path to opening the color options slightly varies depending on your designing purpose, like color-coded backgrounds, elements, smart mockups (backlink ‘What is Canva Smart Mockups and How to Use it’ guide), etc. We’ll cover popular purposes and how you can reach the tool in each.
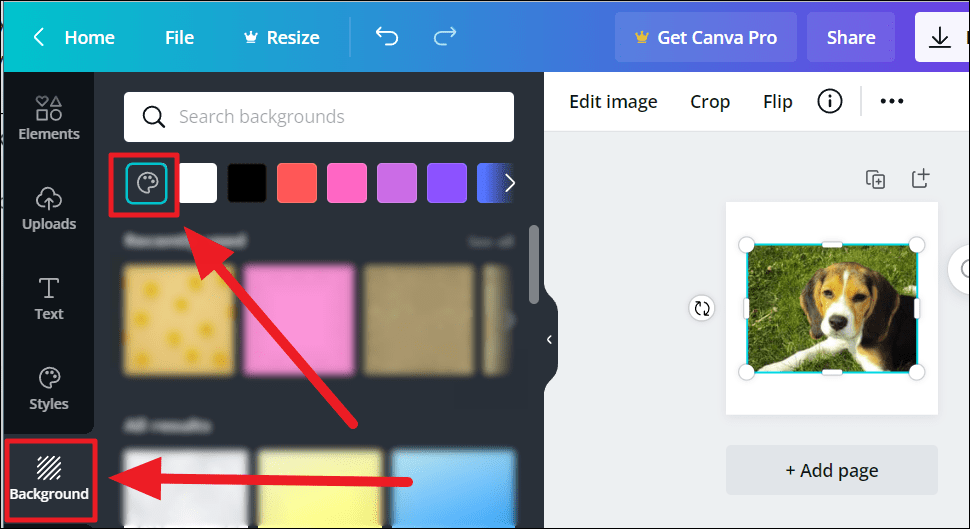
While matching the background. Open the image/design and click the ‘Background’ option in the list of the designing options on the left.
Then, click the ‘Palette’ icon at the top of the ‘Background’ menu. This icon would typically start the horizontal strip of colors at the top of the menu.
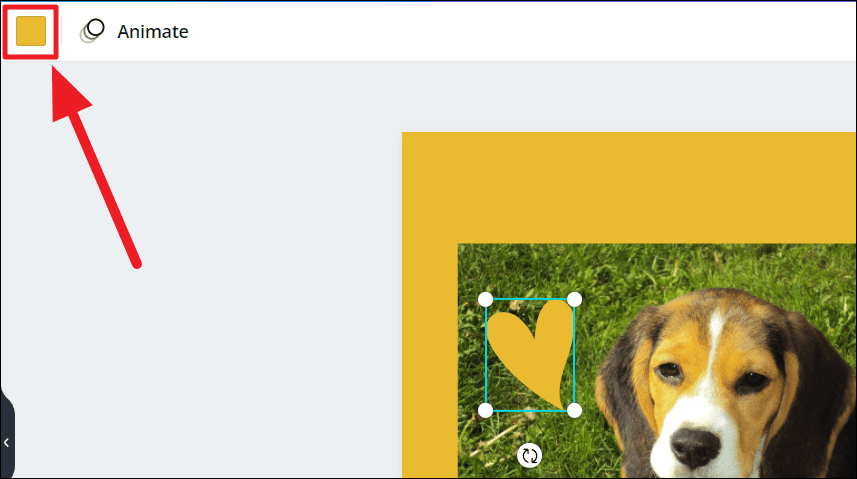
While changing element colors. Almost all elements including solid shapes, graphics, lines, etc., would generally have their own default colors which you can further customize. Choose your element, select it, and then click the color block at the top. This will open the color customizing options.
In the case of multiple colors, any color block would direct you to color customization, but, the personalization would reflect only on the chosen color.
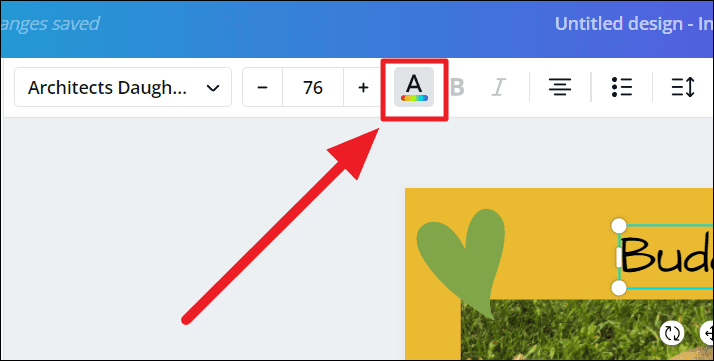
While changing text color. Type out your text in the design, select it. Then click the button with a capital ‘A’ and a rainbow underline. This is the ‘text color’ button.
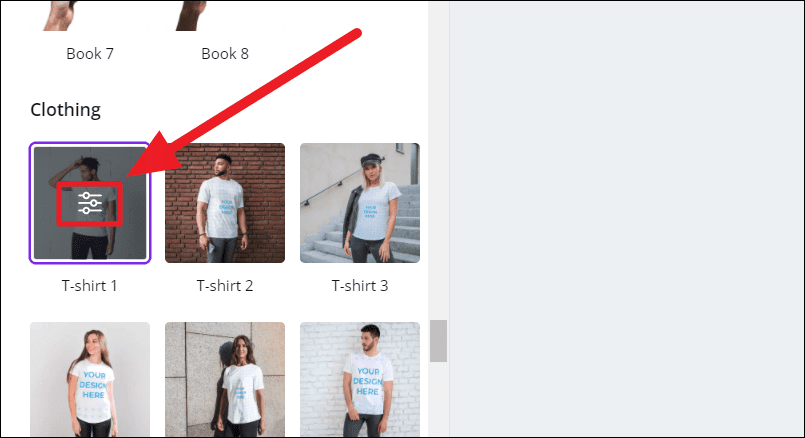
While using Smart Mockups. To match the mockup’s color to your design, click the customize icon (controls) at the center of the chosen mockup product.
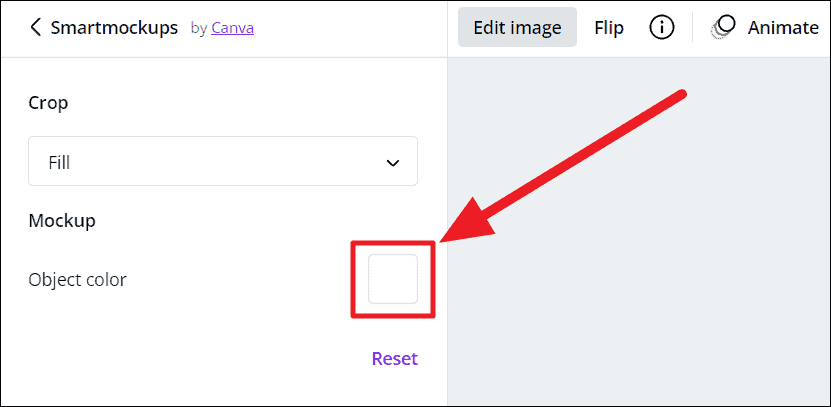
Now, click the white box (default object color if not previously changed) next to ‘Object’.
That’s about the popular requirements to change color on a design. Now, irrespective of the path you choose, you will encounter the following.
Using the Color Picker Tool
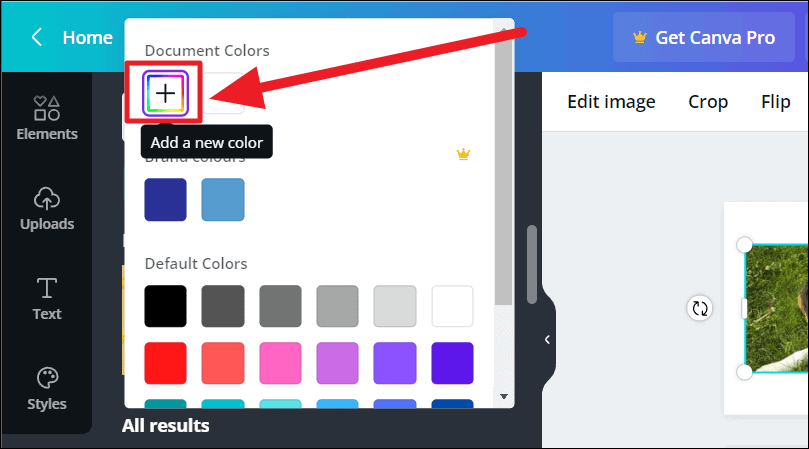
Click the ‘Add a new color’ ‘+’ button with a rainbow square outline at the top of the palette, under ‘Document Colours’. This is a given for all scenarios.
Now, click the ‘pen’ icon to the bottom right of the color scheme that opens next. This is the color picker tool.
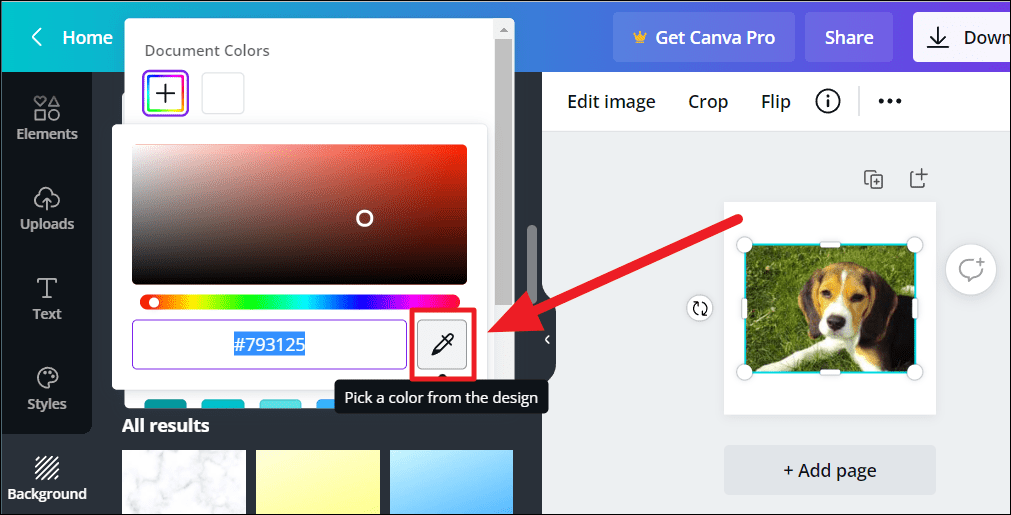
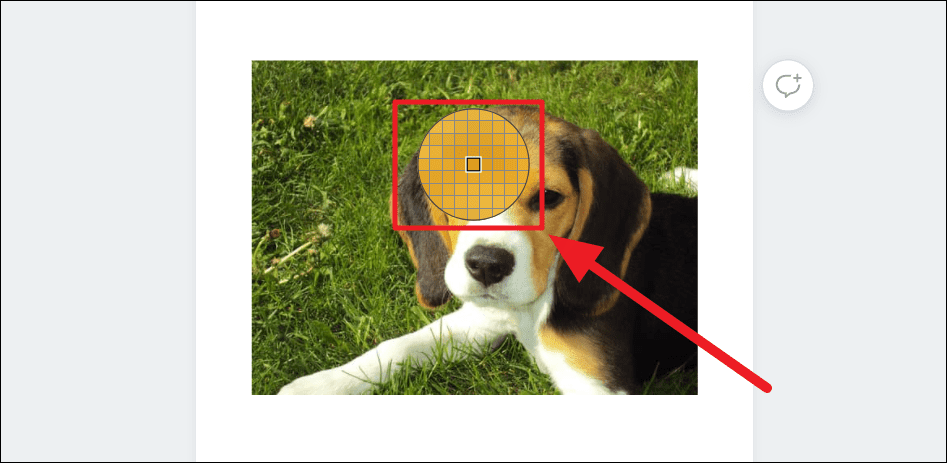
A pixelated circular color picker tool pops next. Apart from just choosing a color from the image/design, you could also choose just about any color on your current webpage.
Move the tool to ensure the outlined square at the center is at the exact spot containing the color you want. Once you capture the color, tap the tool. Even a feathery touch would choose the color and change color.
To remove the color picker tool without using it, hit the Esc key.
That’s how you use the color picker tool on Canva. It’s a super useful tool that’s super easy to use. Only remember the sensitivity of the tool and carefully place it on the spot that contains the color you want.
Hope you found the guide useful and the tool, even more!