To use Midjourney to create AI art, join the Midjourney server on Discord and navigate to the ‘Newcomer rooms’ section. Type “/imagine” in the message box, followed by a prompt describing the desired art. Midjourney will generate a grid of four images based on the prompt. You can upscale, create variations, or re-roll to get new images. Subscription plans offer more features, and paid subscribers can access the bot in Direct Messages. Use commands and parameters to customize image generation, such as changing the aspect ratio or model version.
A few years ago, we would have all chalked up the idea of a robot generating realistic art a thing of the not-so-near future. And yet, the future is already here. AI tools have become increasingly proficient and tools that can generate creative but realistic art are helming this ship. However, with the sheer number of AI tools that are popping up every day, some of which can generate utter nonsense, knowing which tool to spend your time on can be daunting. But Midjourney is one of the most popular AI art generator tools out there, and for good reason.
If you haven’t yet tried it, it’s high time to enter this world. And if intimidation was one of the factors holding you back, we’ve got your back. We’ll take you through the entire process of using Midjourney to create AI art step-by-step and you’ll be creating high-quality art in no time.
What is Midjourney
Midjourney is an AI art generator tool that is a lot similar to OpenAI’s DALL-E and Stable Diffusion. In fact, the underlying technology is based on Stable Diffusion, given the company funded it. The tool can create graphics using natural language inputs that a user provides. These inputs are known as prompts.
Based on the prompts you provide, the AI art generator Midjourney can produce a broad variety of artwork and images that look like they were created by an uber-talented creator. Your only limitation is the prompts you provide; your descriptions can inspire the creation of brand-new worlds, fantastical people, and original visuals, all within a few seconds.
Currently, Midjourney is only accessible through Discord but a web interface is also reportedly in the works. Midjourney offers a free trial to all users but when that expires, you’ll need to subscribe to a plan to continue creating art via the app.
The latest model for the tool, at the time of this writing, is the Midjourney V5 model, which is almost twice as fast as its predecessor. But the current model is the V4 model. Any time you use Midjourney, the default model will be the V4 model (at the time of this writing). To use the V5 model, you’ll need to use the --v 5 parameter with your prompt or select the MJ Version 5 model after using the /settings command. You can also use previous models using the --v parameter. We’ll see what parameters and commands are later in the guide.
Midjourney Subscription and Free Trial
Midjourney offers a limited free trial to every user, which includes 25 jobs only. Each action the Midjourney bot takes on your behalf is counted as a job. So, entering a prompt to generate a grid of images is one job. But upscaling an image, creating a variation, re-rolling the prompt, etc., each counts toward one job.
Other features are also limited in the free trial. For example, there is no stealth mode, and you cannot access the bot in a DM. You also get only 0.4 hr/lifetime of Fast GPU Time with the free trial.
As soon as you make your first request to the Midjourney bot, your free trial starts. Once you run out of free queries, you’ll need to subscribe to keep using Midjourney. Free trial users cannot use the artwork they generate for commercial purposes.
Now, the subscription comes in three different plans: Basic Plan ($10/month), Standard Plan ($30/month), and the Pro Plan ($60/month). You can also purchase an annual subscription at a 20% discount. Standard and Pro plans come with an unlimited number of image generation in Relax Mode, but Basic Plan has a limit of 200 images per month. Each of these plans also comes with a different number of Fast Mode hours. Fast Mode hours get you quick access to the GPU.
Joining Midjourney
To use Midjourney, you’ll need to join the Midjourney server on Discord. Anyone can join the server and no special invitation is required. However, users who might have previously left the server after joining it will require an invitation to rejoin the server. You can also use the Midjourney bot in the official channel or on any other server that has invited the bot. Currently, the Midjourney bot can only be added to other servers if they have fewer than 1000 members.
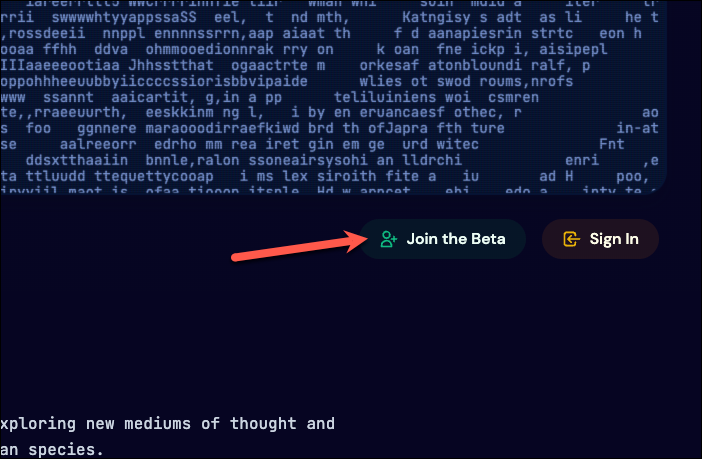
Now, to start using Midjourney, either go to midjourney.com and click the ‘Join the Beta’ button.
Or you can go directly to discord.com. You need to have a verified Discord account to join the Midjourney server. If you don’t have an account, create one and verify it using your phone number.
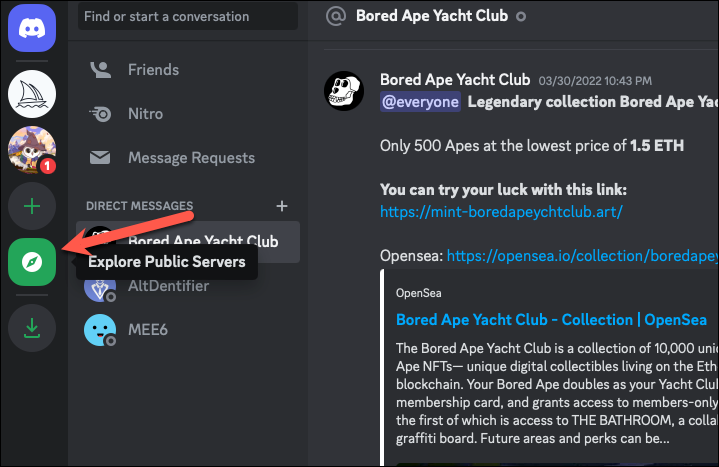
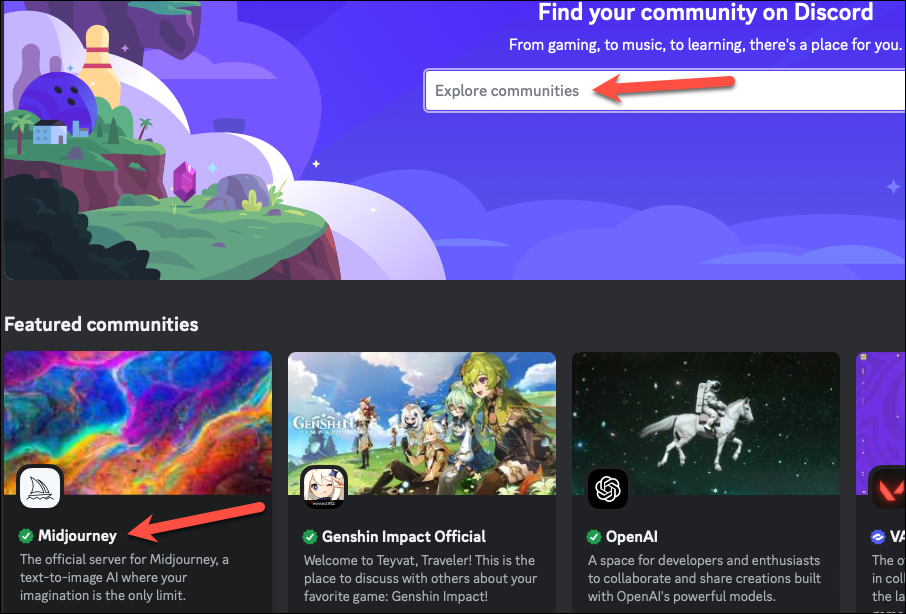
Then, log in to your account and click the ‘Explore Public Servers’ button from the navigation pane on the left.
Then, you should see the Midjourney server in the Featured communities list. However, if you don’t, use the search bar to search for it. Click the server to navigate there. You can also click this link to go directly to the Midjourney Discord server and then create an account/ sign in to an existing account.
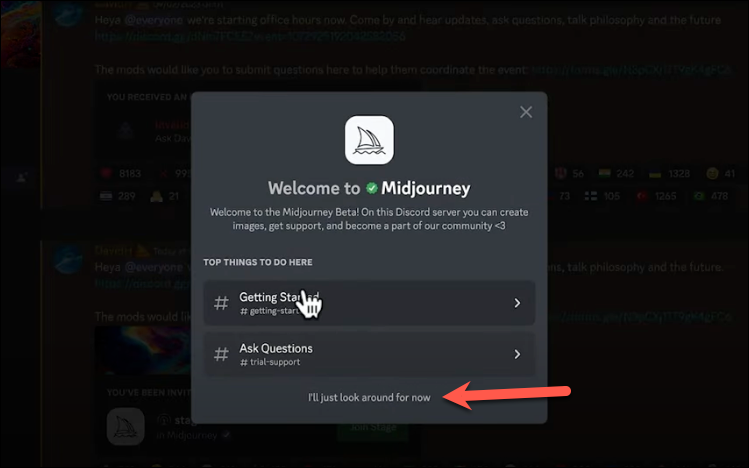
A pop-up will appear when you view the Midjourney server with options to see how to use Midjourney as well as contact Midjourney support; click the ‘I’ll look around for just now’ option to proceed.
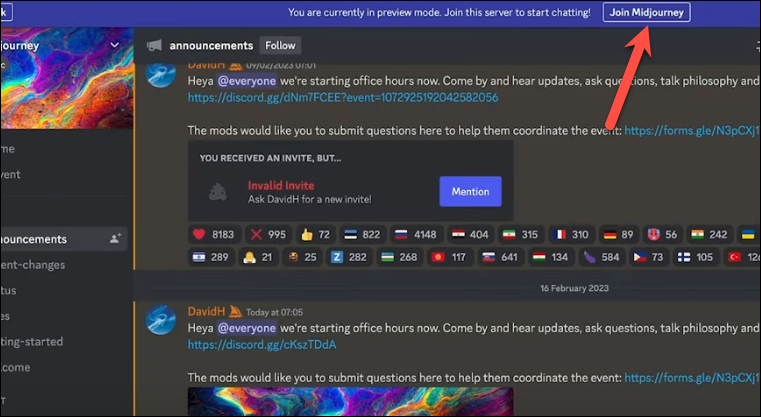
Then, click the ‘Join Midjourney’ option at the top.
A Captcha test will appear to verify that you’re a human that you’ll need to pass. A lot of users often get stuck on this step so pass the test carefully. If you still get stuck on this step, you can contact the Discord support team. Once it’s done, you will be a member of Midjourney.
Using Midjourney to Create AI Art
Once you are a part of the Midjourney official server on Discord, creating AI Art is extremely easy.
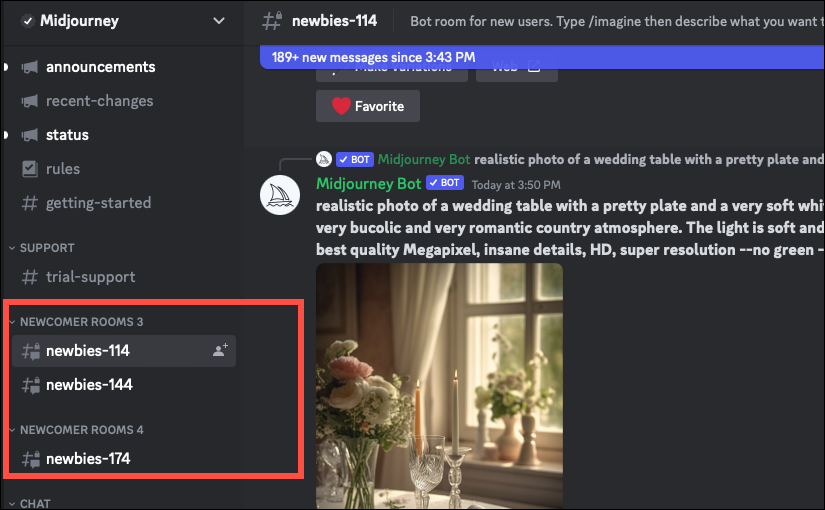
Navigate to the Midjourney server on Discord.
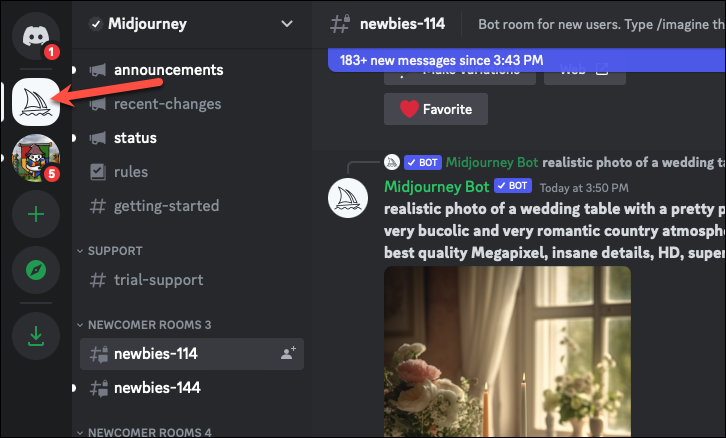
Then, find any of the newbie bot channels under the ‘Newcomer rooms’ section. It would be represented as newbies-# where the end number might vary for you.
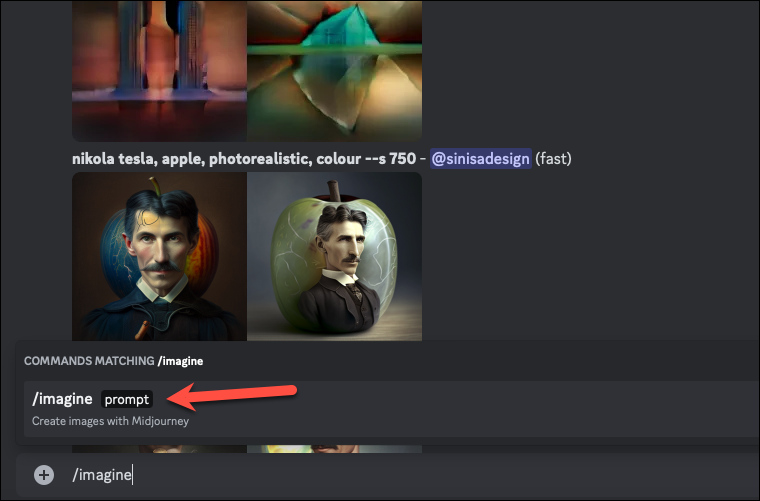
Next, go to the message box at the bottom of the right panel, type /imagine and select the /imagine prompt option from the commands pop-up.
Note: The same /imagine command will work in other servers where the bot has been invited to create art and will follow the same process as outlined here.
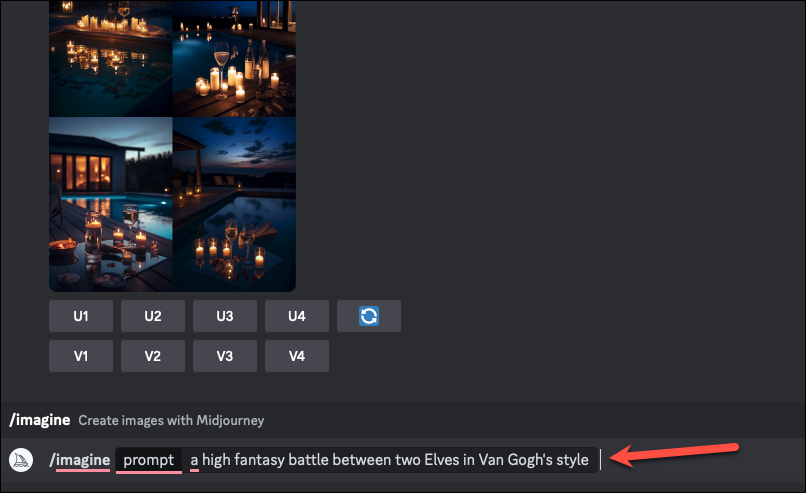
Now, enter the prompt you want the AI to follow to create the art. The prompt can have as few or as many details as you want. If you only have a vague idea of what you want, for example, say a robotic elephant but nothing else, you can only type that and leave the rest to AI’s imagination. But if you do know what you want, for example, hyper-realistic, in the style of a particular painter like Van Gogh, etc., you can provide those details and AI will follow them closely.
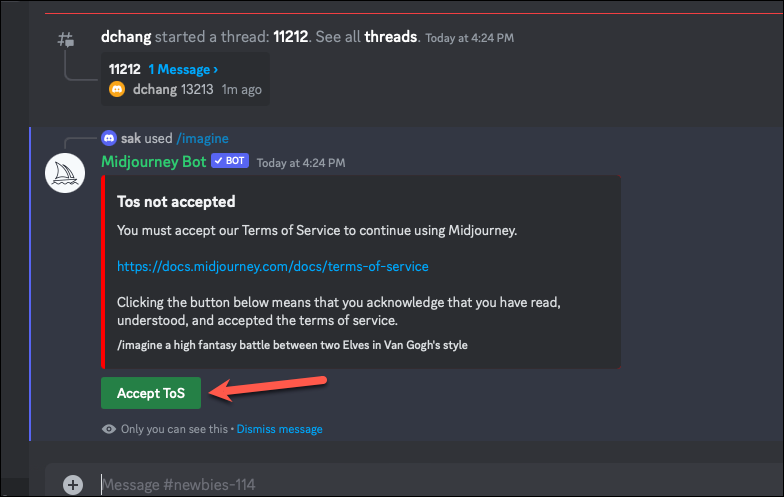
Send your message; you will have to accept the terms and conditions the first time. There is a possibility that you might not get a free trial right away due to high demand. In this case, you can either try again later or become a paid subscriber.
After that, Midjourney will start generating the art for you. It should take around 60 seconds for the bot to complete your request in Relax Mode; you can see the percentage of the request that the AI has completed next to it.
Note: As you use Midjourney more, the time it will take the bot to complete your request in Relax Mode might increase, depending on your usage and number of jobs already in the queue. To get the AI to priortise your query, you can generate art in the Fast Mode instead.
Midjourney will generate 4 images related to your prompt in a grid. You’ll also see a few options underneath them, namely U1, U2, U3, U4, and V1, V2, V3, V4, along with a re-roll button. The numbers 1, 2, 3, and 4 on the screenshot below are only there to inform you about the position of images on the grid. Generated images won’t have a number on them.
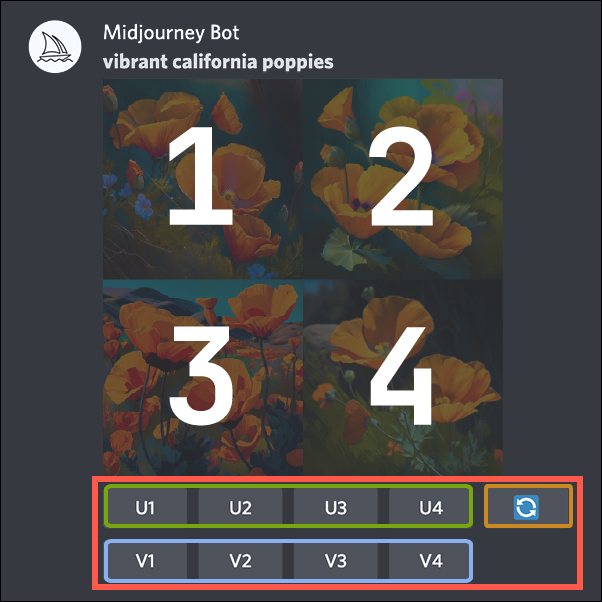
The re-roll button will rerun your prompt and generate an entirely new grid of images for the original prompt.
Now, what does U1, U2, V1, V2, etc. mean? U refers to upscaling an image whereas V refers to generating a variation for the image.
Upscaling increases the size of an image and adds more details and textures to it. Midjourney generates low-resolution images in the grid in the beginning. They also aren’t too rich in details. But, if you like any image from the 4 options available, you can generate a high-resolution, detailed image for it. Click the corresponding option, say U2, to upscale the 2nd image in the grid.
There are also multiple upscale models available, such as Regular (default) upscaler, light upscaler, detailed upscaler, beta upscaler, anime upscaler, etc., the details about which we’ll discuss later.
Variation, true to its name, creates variations for the selected image by generating 3 more images similar to the one you choose. These variations share the same overall style and composition as the same image with some variations here and there. Click V1, for example, to generate variations for the 1st image in the grid. You can even upscale one image from the grid and create variations for another.
When you upscale an image, a new set of options will appear. At the time of this writing, these include: ‘Make Variations’, ‘Light Upscale Redo’, ‘Beta Upscale Redo’, ‘Web’, and a few emoji icons to rate the upscaled image. ‘Make Variations’ will generate a new grid of variations for the upscaled image. Light Upscale Redo and Beta Upscale Redo will upscale the image using the Light Upscaler and Beta Upscaler models respectively. Clicking the ‘Web’ option opens the image in your gallery on midjourney.com.
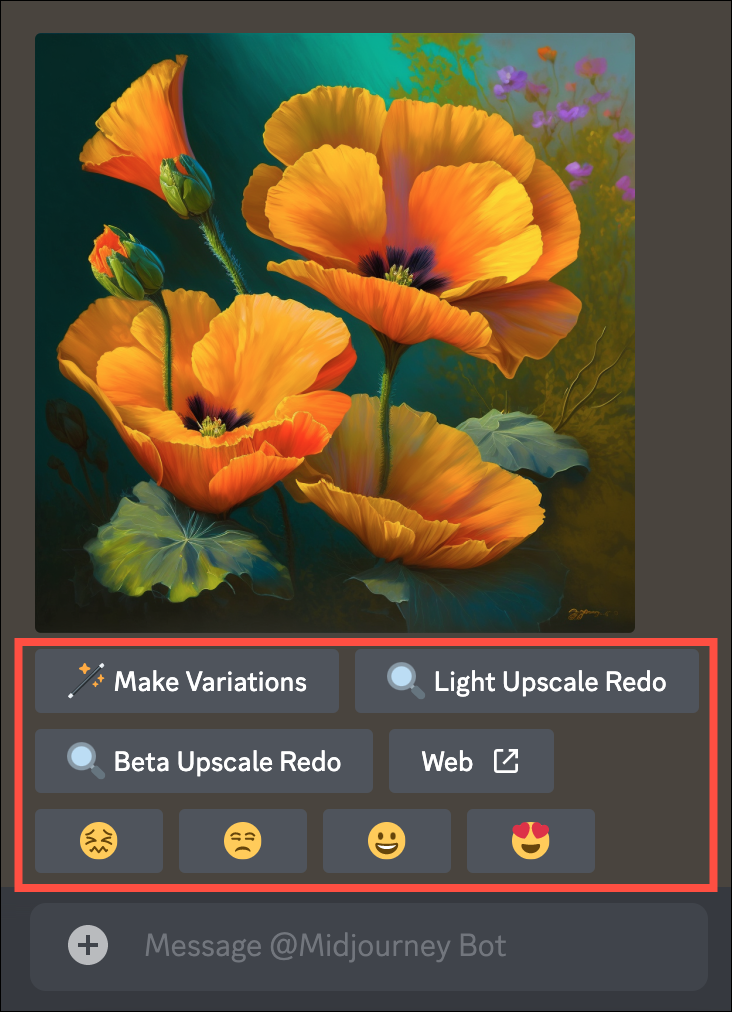
And clicking any of the emoji icons will rate the image; only users with a subscription can rate an image. Midjourney gives an hour of free Fast Mode time to the top 1000 image raters.
Using Midjourney in DMs
When you’re using the Midjourney bot in the newbie channels, your request is made with countless other users. And while your request is highlighted in the background with a subtle orange shade to differentiate, the newbie or general channels could be moving too fast for you. To use Midjourney without all the clutter and noise, you can work one-on-one with the bot in your direct messages.
Note: This feature is only available for paid subscribers.
Go to your ‘Direct Messages’ from the left.
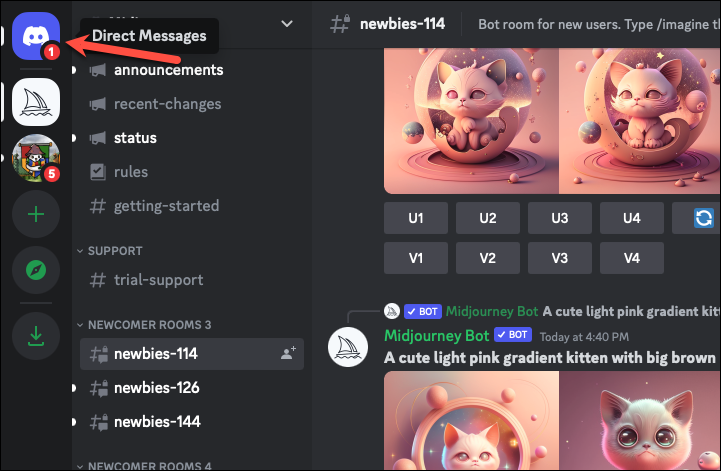
Then, find the Midjourney bot from the list of users and click it.
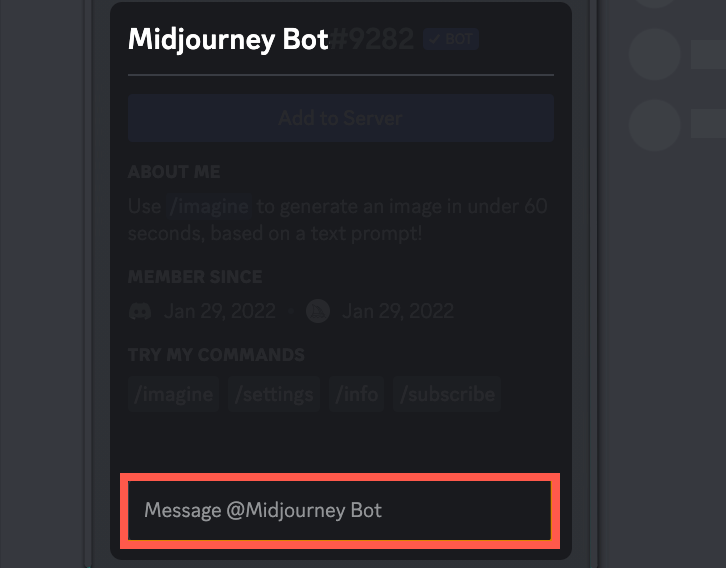
Send any message to begin the conversation, or directly send the prompt for the image with the /imagine command.
Note: It is important to remember that even the images that you generate in your DMs are not private. Anyone can see your artwork by going to your profile on midjourney.com. You can only generate private images in stealth mode, which is only available for Pro users.
Midjourney Commands
Apart from the /imagine command that you can use to provide the AI bot with the prompt, there are other commands also available to interact with the bot. Just like the imagine command, these commands can be used in bot channels, DMs, and servers where the bot has been added.
Some of the popular commands are:
/fast– switch to fast mode/relax– switch back to relax mode/info– View information about your account, like remaining Fast hours, remaining jobs, any queued or running jobs, etc./subscribe– generate a link to subscribe to Midjourney for your account/settings– View and adjust the bot’s settings/blend– using this command, you can upload 2-5 images and blend them together into an image that combines the concepts and aesthetics of the images provided. This command does not work with a text prompt./stealth– switch to the stealth mode; only available for Pro subscribers/public– switchback to public mode; for pro subscribers
You can find the complete, updated list of Midjourney commands here.
Midjourney Prompt Parameters
Parameters are additional options that you can add to a prompt to change how the bot will generate the image. For example, you can change the aspect ratio, Midjourney model version, define which upscaler model to use, etc. These parameters are added after your prompt.
Some examples of parameters include:
- Aspect Ratio – Add the parameters
--aspector--arafter the prompt along with the desired aspect ratio. For example, add--aspect 16:9after the prompt to change the aspect ratio of the generated images from the default 1:1 ratio to a 16:9 ratio. - No – To exclude something from an image, use the
--noparameter. For example, add--no plantsafter the prompt if you don’t want plants in an image. - Quality – To change the quality of the generated images, use the
--qualityor--qparameter. The default quality is 1. So, using--q 2would double the quality, or using--q .25would 1/4th the quality. But remember that using the quality parameter impacts your GPU minutes. So with the ‘2’ value, you would be using twice the amount of GPU minutes. Similarly, using the ‘.25’ value would use 1/4th of your GPU minutes. Quality 2 is only available with Version 1, 2, and 3 models currently and not 4 and 5 models. - Version – To change the model version, use the parameter
--vfollowed by the version number.
An example prompt using more than one parameter would look like this:
/imagine prompt a diner against a vibrant California sunset --ar 16:9 --v 5 --no grass
You can see the list of all the parameters here.
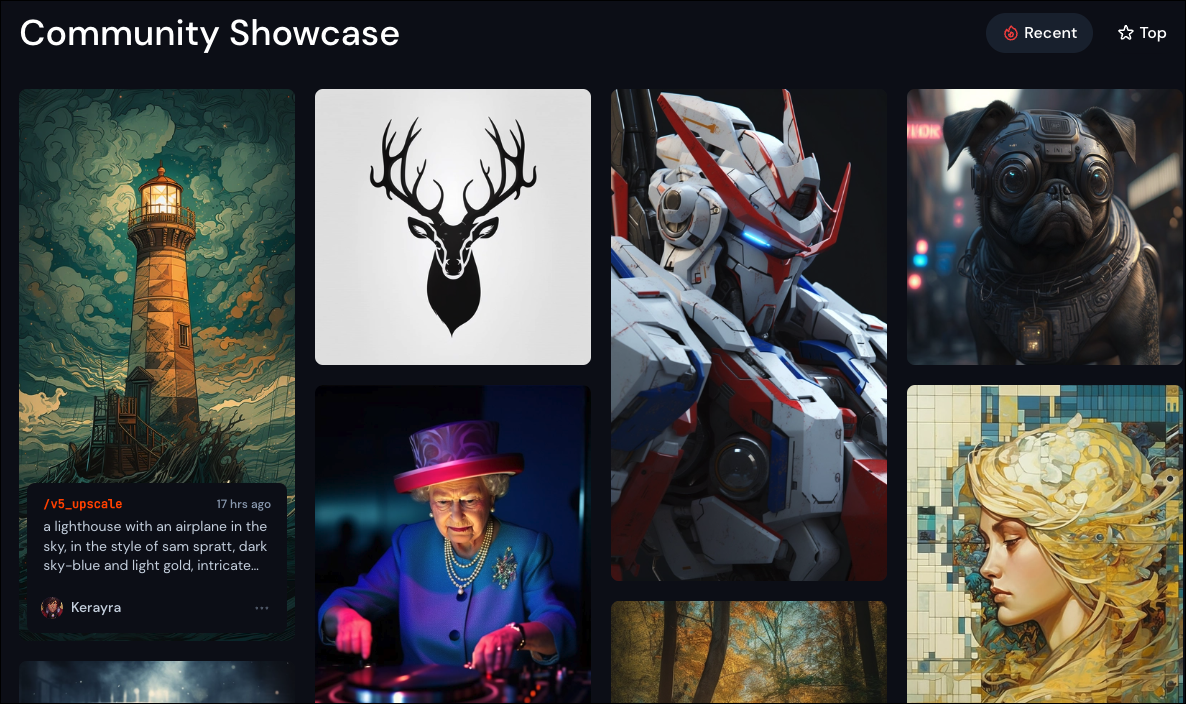
Midjourney is amazing at generating exactly what you ask it. You can also visit the community showcase on Midjourney’s website to get inspiration for your prompts. Hopefully, you’ll have a great time creating!