
The '<>' operator in Excel is essential for comparing values and performing logical tests in your spreadsheets. It determines whether one value is not equal to another, returning TRUE if they are different and FALSE if they are the same.
Utilizing the 'Not Equal To' operator enhances your ability to analyze data and create dynamic formulas. This operator is particularly powerful when combined with functions like IF, COUNTIF, and SUMIF. Explore how to effectively use the '<>' operator in various scenarios below.
Using the '<>' Comparison Operator in Excel
The basic syntax of the 'Not Equal To' operator is:
=value1<>value2value1– The first value for comparison.value2– The second value for comparison.
Here are examples demonstrating how this operator functions with numbers and text.
Example Formula:
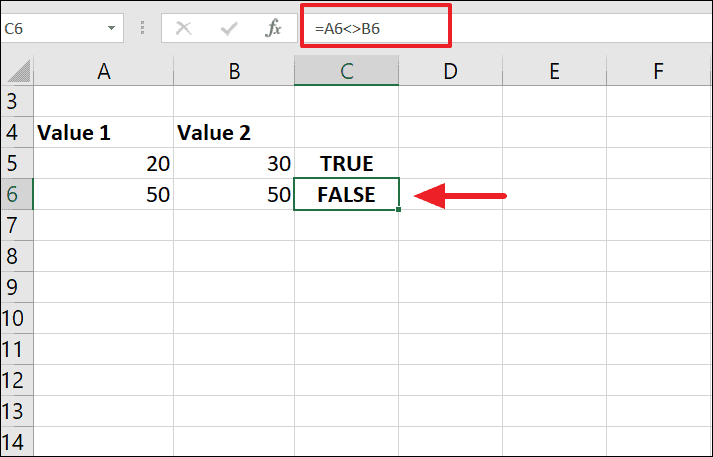
=A5<>B5In the example below, the formula in cell C5 checks if the value in A5 is not equal to the value in B5. Since they are different, the formula returns TRUE.

When the values in A6 and B6 are equal, the formula yields FALSE in cell C6.
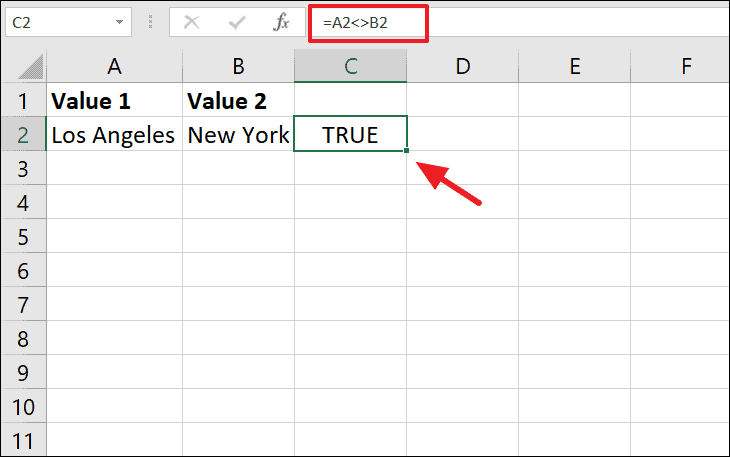
With text values, the '<>' operator works the same way. It returns TRUE when texts are not identical and FALSE when they match.
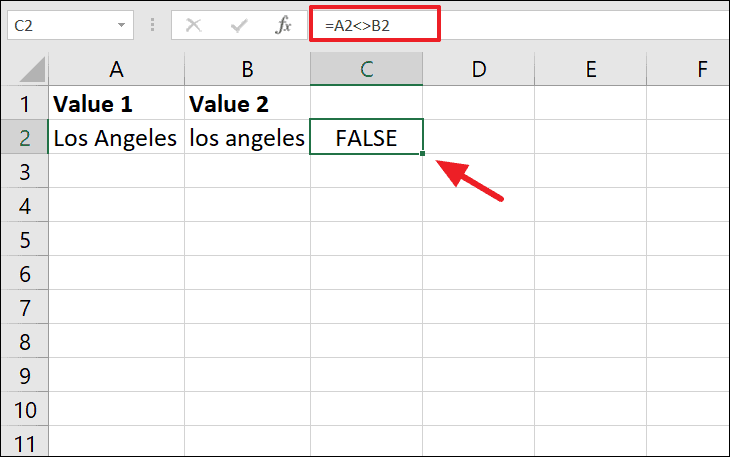
Note that the 'Not Equal To' operator is case-insensitive. This means it treats uppercase and lowercase letters as the same, so "Excel" and "excel" are considered equal.
Combining '<>' Operator with Functions
Integrating the 'Not Equal To' operator with Excel functions allows for more dynamic and complex data analysis. Below are some practical examples of how to use this operator with common functions.
Using 'Not Equal To' with the IF Function
The IF function performs a logical test and returns one value if the condition is TRUE and another if it is FALSE. By incorporating the '<>' operator, you can test for inequality conditions.
The syntax of the IF function is:
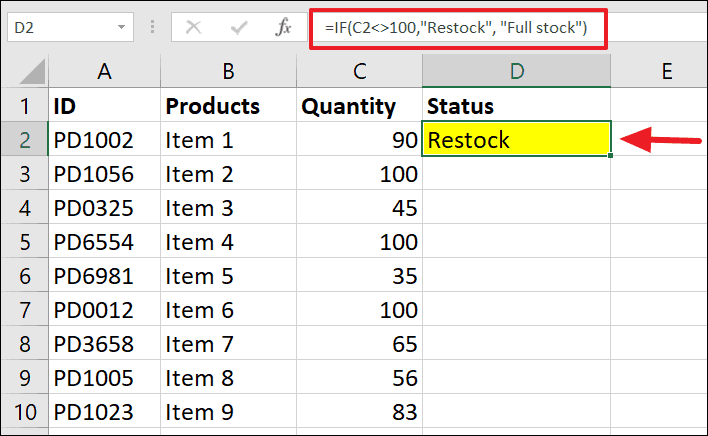
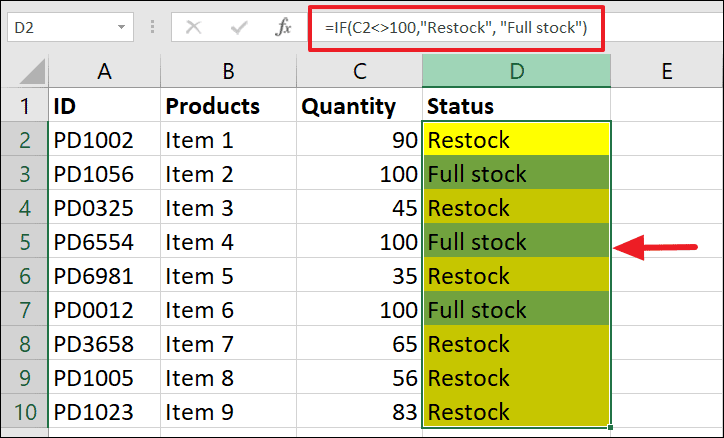
=IF(logical_test, [value_if_true], [value_if_false])Imagine you have an inventory of products with their quantities, and you need to identify items that require restocking if their quantity is not equal to 100.
In cell D2, enter the following formula:
=IF(C2<>100, "Restock", "Full stock")This formula checks whether the quantity in C2 is not equal to 100. If it isn't, "Restock" is displayed; otherwise, "Full stock" appears.
Drag the fill handle down to apply the formula to the remaining cells in column D.
Using 'Not Equal To' with the COUNTIF Function
The COUNTIF function counts the number of cells within a range that meet a specified condition. To count cells that do not contain a certain value, the '<>' operator is used in the criteria.
The syntax of the COUNTIF function is:
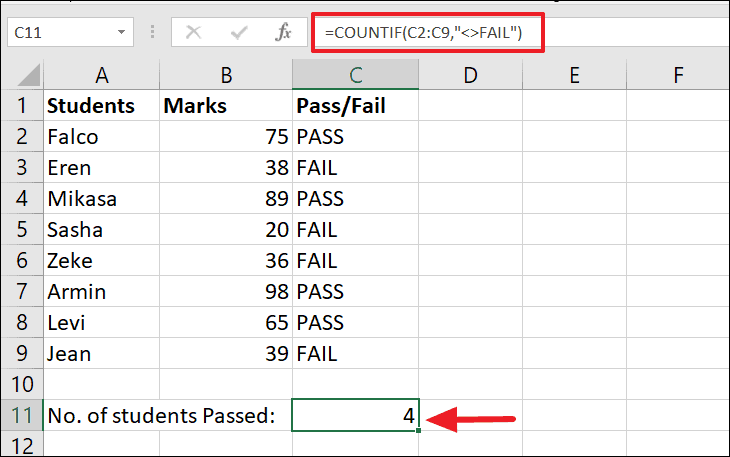
=COUNTIF(range, criteria)Consider a scenario where you have a list of student results, and you want to count how many students passed the test (i.e., whose result is not "FAIL").
In cell C11, input the following formula:
=COUNTIF(C2:C9, "<>FAIL")This formula counts all cells in the range C2:C9 that do not contain "FAIL".
Using 'Not Equal To' with the SUMIF Function
The SUMIF function adds all numbers in a range that meet a specific condition. Using the '<>' operator allows you to sum values that do not match a certain criterion.
The syntax of the SUMIF function is:
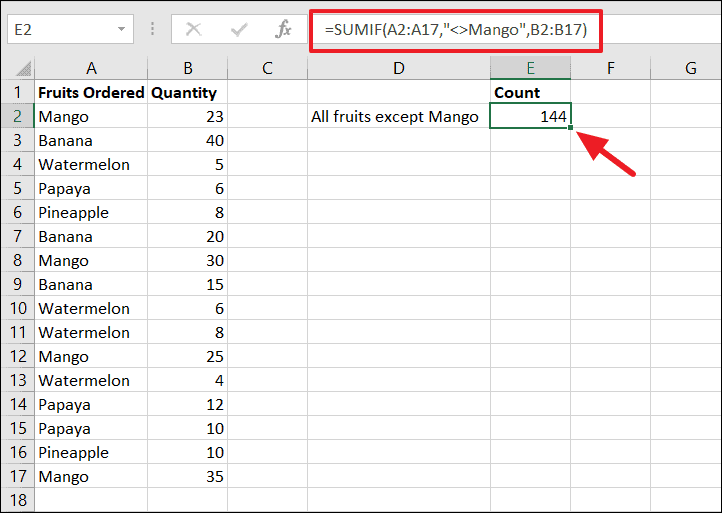
=SUMIF(range, criteria, [sum_range])For instance, if you have a sales list of various fruits and want to calculate the total quantity sold excluding "Mango", you can use the following formula in cell E2:
=SUMIF(A2:A17, "<>Mango", B2:B17)This formula sums the quantities in B2:B17 for all fruits that are not "Mango" as listed in A2:A17.
Mastering the 'Not Equal To' operator allows you to perform more flexible and powerful data analysis in Excel.