
Zoom has become an essential tool for connecting people through video conferencing, whether for business meetings, online classes, or virtual gatherings. If you’re using a Windows 11 computer, you might be wondering how to get started with Zoom. This guide will walk you through everything you need to know to use Zoom on Windows 11, from installation to hosting and joining meetings, and more.
What is Zoom and why should you use it?
Zoom is a cloud-based video communication platform available on both computers and mobile devices. Launched on December 10, 2012, it has significantly grown in popularity, especially during the pandemic when remote work and online learning became the norm.
So why choose Zoom? Here are some compelling reasons:
- It’s free to use with various premium subscription options that offer additional features tailored to specific needs, so you can find a plan that suits you best.
- It’s available across multiple platforms, including Windows, macOS, and Android, ensuring compatibility with your devices.
- Zoom allows you to use a virtual waiting room to manage participants before they join the meeting.
- You can display up to 49 participants on a single screen during a meeting.
- Zoom enables you to record your meetings and save them to cloud storage for future reference.
- You can livestream your Zoom meetings on social media platforms like Facebook.
- It offers built-in collaboration and engagement tools that enhance the meeting experience and help manage the conference effectively.
Zoom plans and pricing
Zoom offers a free version as well as several paid subscription options for users who need more advanced features. These plans cater to different needs, including general use, education, healthcare, and development. You can explore all the available plans on the Zoom pricing page.
Here’s a quick overview of the general-use plans, their prices, and features:
- Basic: This free plan allows you to host unlimited group meetings with a maximum duration of 40 minutes and up to 100 participants. You also have access to private and group chat.
- Pro: Priced at USD 14.99 per month per license (or Rupees 1300), this plan includes all the Basic features plus the ability to stream to social media, 1 GB of cloud recording storage, and more.
- Business and Enterprise: Both plans cost USD 18.99 per month per license (or Rupees 1800) and offer additional features suited for larger organizations, such as increasing the participant limit to 300 for Business and 500 for Enterprise.
What are the requirements for running Zoom?
Zoom is designed to run on a wide range of devices, but to ensure smooth performance on your Windows 11 computer, certain system requirements are recommended:
- Processor: Dual-core Intel or AMD processor or higher.
- RAM: At least 4 GB.
- Audio Output: Built-in, USB, or wireless speakers or headset.
- Audio Input: Built-in, USB, or wireless microphone.
- Video: Built-in, USB, or wireless webcam.
In addition to hardware requirements, you’ll need an active internet connection. The required bandwidth depends on your activities:
- For a simple audio call, a 1 Mbps connection is sufficient.
- For HD (720p) video calls with screen sharing, you’ll need a 2.5 to 3 Mbps connection.
- For Full HD (1080p) video calls with screen sharing, a 4 to 5 Mbps connection is recommended.
Download and install Zoom on your Windows 11 PC
To install Zoom on your Windows 11 PC, you can either download it from the official website or install it via the Microsoft Store. Below are the steps for both methods.
Installing Zoom from the Microsoft Store
- Open the Microsoft Store by typing
Storeinto the Start Menu search and selecting it from the results.

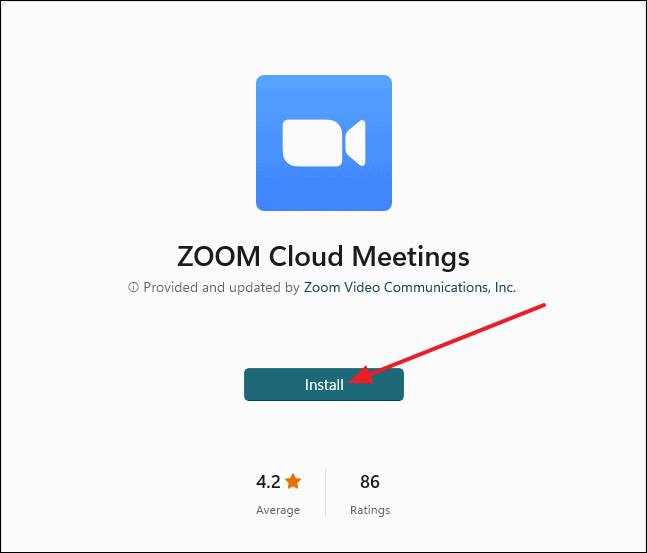
- In the Microsoft Store, type
Zoominto the search bar at the top, then select Zoom Cloud Meetings from the search results.

- Click on the Install button to begin downloading and installing Zoom.
- Wait for the installation to complete; this should take a few minutes.

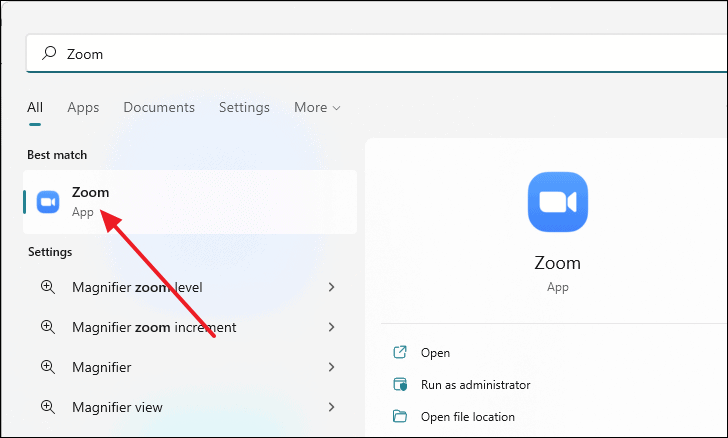
- Once installed, search for
Zoomin the Start Menu and click on it to launch the application.
Installing Zoom from the official website
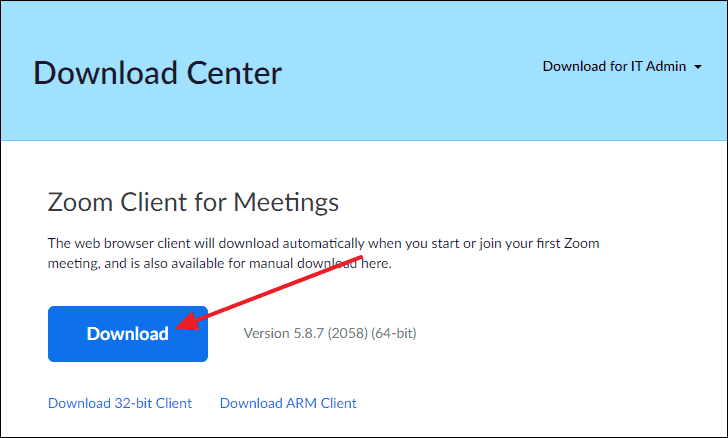
- Open your preferred web browser and navigate to zoom.us/download.
- Under Zoom Client for Meetings, click the Download button.
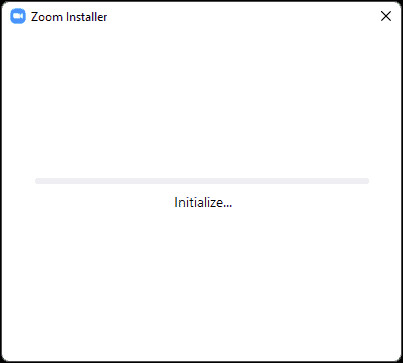
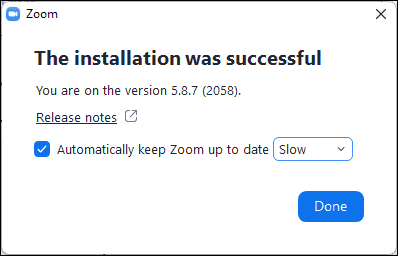
- Once the download is complete, open the installer by double-clicking on it to begin the installation process.
- After the installation completes, you will see a confirmation window. To enable automatic updates, check the box next to Automatically keep Zoom up to date and choose Slow or Fast updates. Click on Done to finish.
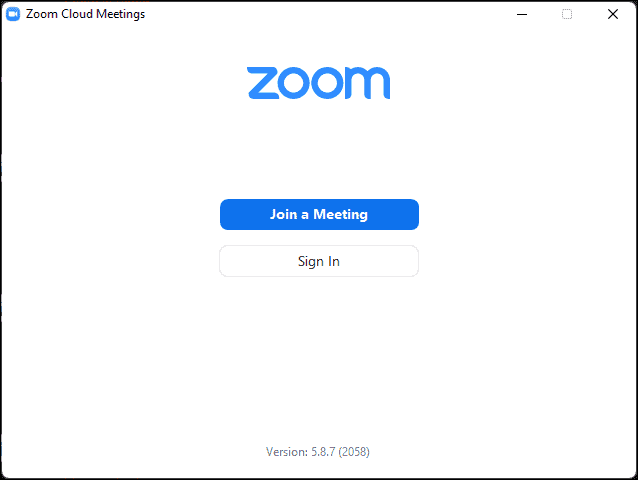
- Now, you can either sign in to your Zoom account or join a meeting directly using a meeting ID or link.
The basic operations of Zoom
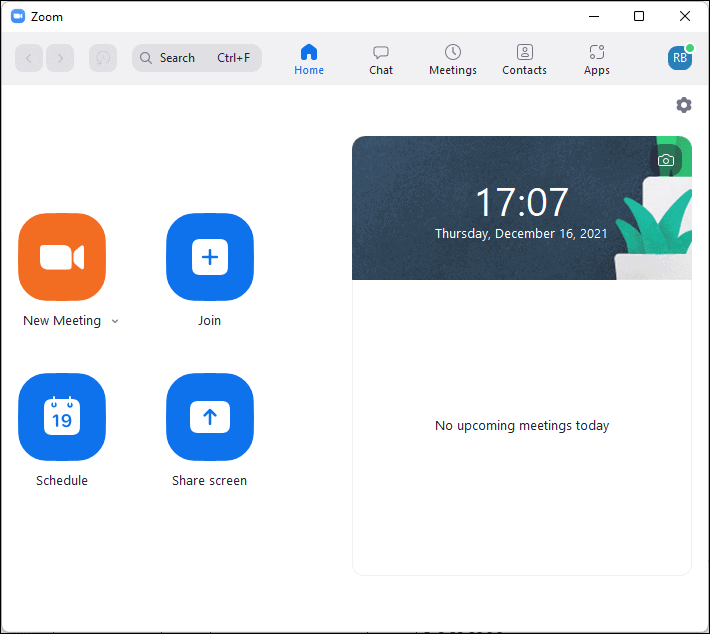
Once you sign in to the Zoom client, you’ll see the home screen. From here, you can:
- Start a new meeting.
- Join an existing meeting using a meeting ID or link.
- Schedule a future meeting.
Let’s explore how to use these basic features.
Adding people to your Zoom contacts
You can add other Zoom users to your contacts list to make it easier to invite them to meetings or chat. Follow these steps to add someone to your Zoom contacts:
- Click on the Contacts tab in the Zoom client.

- Click on the small + icon and select Invite a Zoom Contact.

- In the Invite to Zoom window, enter the email address of the person you want to add and click Invite.

- The invitee will appear under the External contacts with a Pending status until they accept your invitation.

- After they accept your invitation, you will receive a notification, and they will be added to your contacts list.

Hosting a meeting on Zoom
To host a new meeting in Zoom:
- On the Zoom home screen, click the New Meeting icon to start a new meeting.

- If you prefer to start the meeting without video or use your Personal Meeting ID (PMI), click the small arrow next to New Meeting and adjust your preferences.
- When the meeting starts, a Join Audio window will appear. Click on Test Speaker and Microphone to ensure your audio devices are working properly.
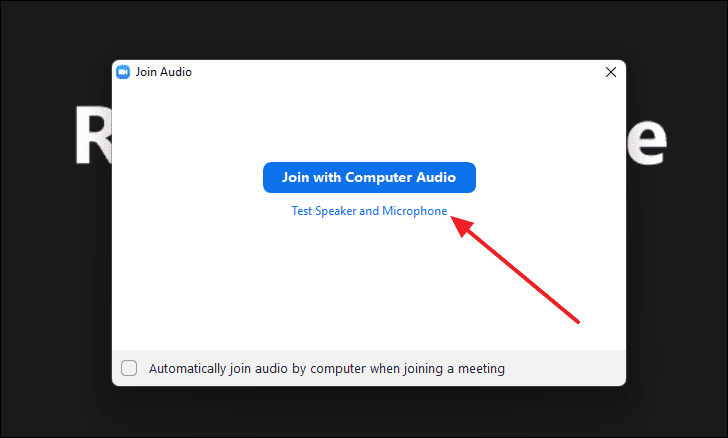
- Follow the prompts to test your speakers by listening for the test tone, and click Yes if you hear it.
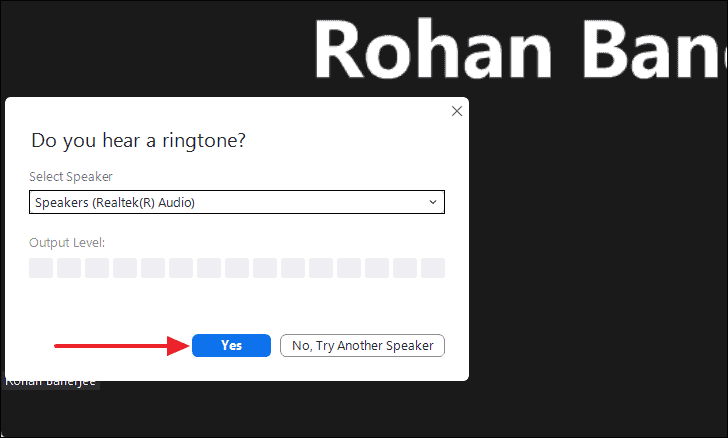
- Test your microphone by speaking, and ensure the input level meter moves. Click Yes if the test is successful.
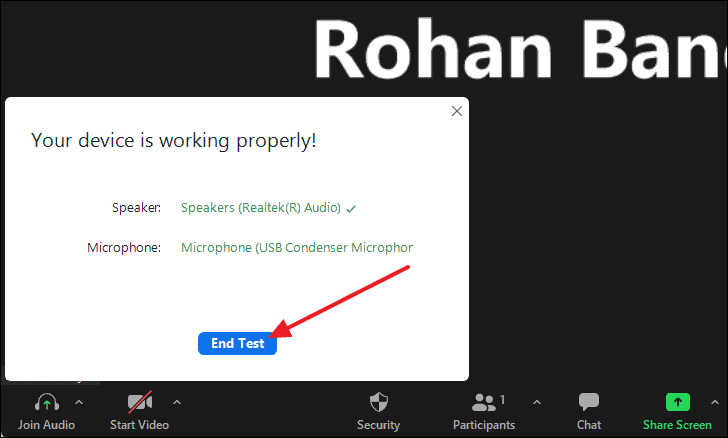
- Click Join with Computer Audio to enter the meeting.
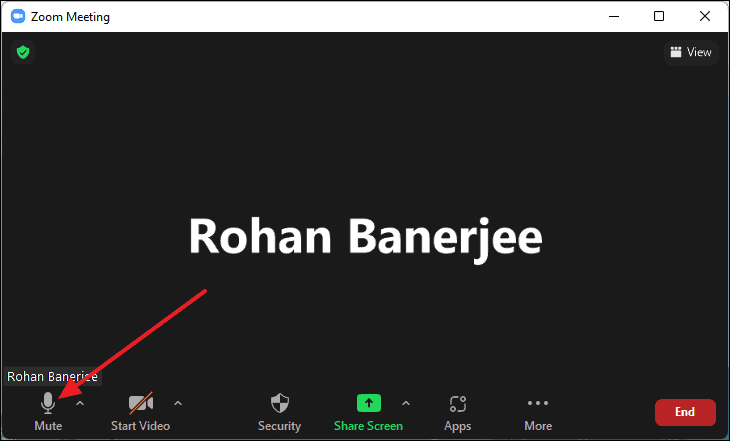
Muting and unmuting your microphone
To mute or unmute your microphone during a meeting:
- Click the Microphone icon at the bottom-left corner of the Zoom meeting window to mute or unmute yourself.
- To switch audio devices or access audio settings, click the arrow next to the Microphone icon and select your preferred device or click on Audio Settings.
Sharing your Zoom meeting link
To share your meeting link with participants:
- In the Zoom meeting window, press
ALT+ion your keyboard or click on the Participants icon, then click on Invite.
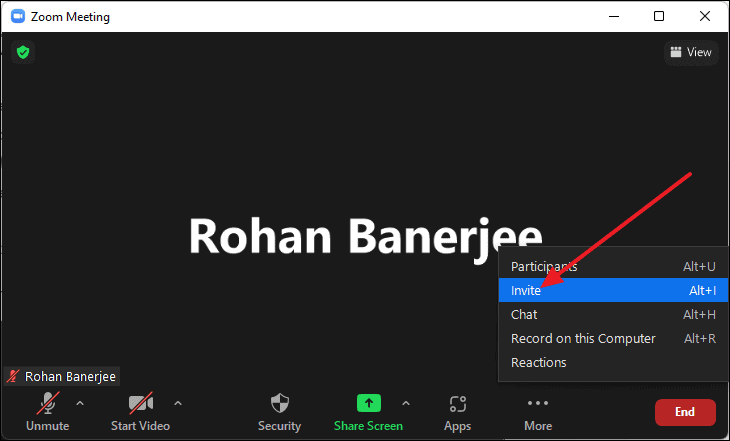
- In the invitation window, click on Copy Invite Link.
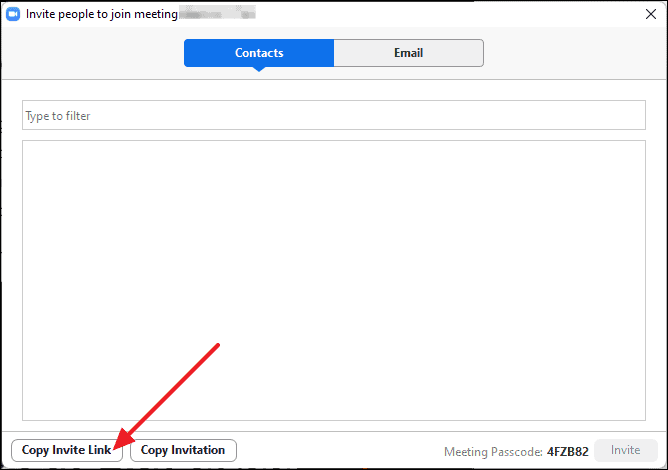
- Share the copied link with participants via email, chat, or any preferred method.
Scheduling a meeting on Zoom
To schedule a future meeting:
- Open the Zoom client and click on the Schedule button.

- In the Schedule Meeting window, enter the details of your meeting such as the topic, date, time, and duration.

- Configure additional settings such as:
- Select Recurring meeting if you want the meeting to repeat.
- Set a meeting password under Security.
- Enable or disable the waiting room feature.
- Choose whether to start the meeting with video on for the host and participants.
- Select your preferred calendar service to schedule the meeting.
- Click on Advanced Options to access more settings, such as enabling participants to join before the host, muting participants upon entry, and automatically recording the meeting. Once you’ve configured all settings, click Save.

- Choose how you want to invite participants, either by copying the invitation link or adding it to your calendar.
Joining a Zoom meeting
You can join a Zoom meeting using a meeting link or by entering the meeting ID and passcode.
Using a meeting link
- Click on the meeting link provided to you.
- Your web browser will open and prompt you to open the Zoom application.

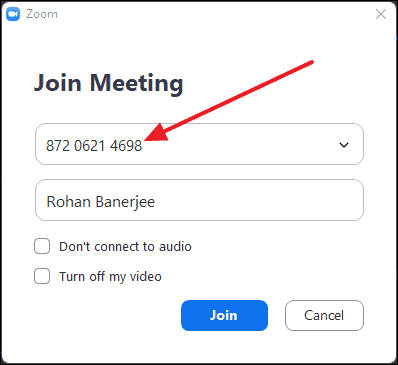
Using meeting ID and passcode
- Open the Zoom application and click on the Join button.

- Enter the Meeting ID and your name. Optionally, check the boxes for Do not connect to audio and Turn off my video if desired.
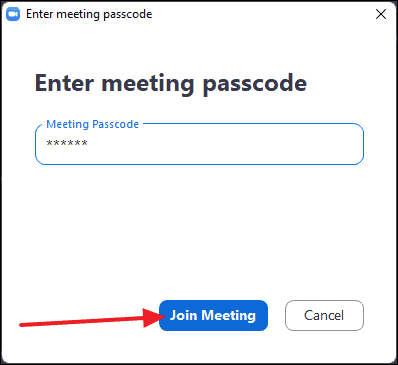
- Enter the meeting passcode when prompted and click Join Meeting.
- In the Video Preview window, choose whether to join with video on or off.
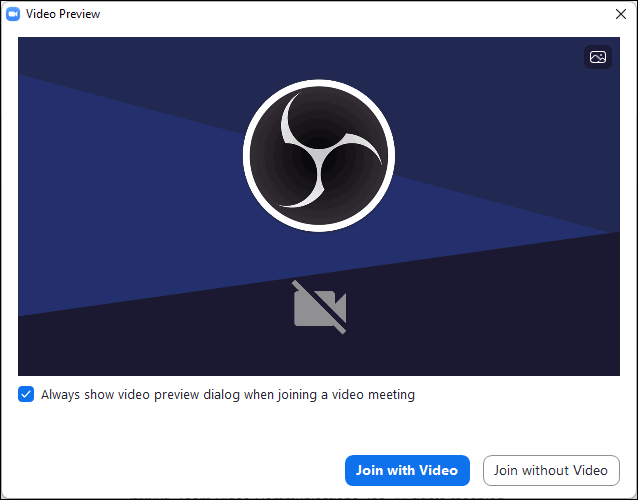
- Click on Join with Computer Audio to enter the meeting.
Sharing your screen on Zoom
To share your screen during a Zoom meeting:
- While in a meeting, click on the Share Screen button located at the bottom of the meeting window.
- Select the screen or application you want to share from the Basic tab and click Share.
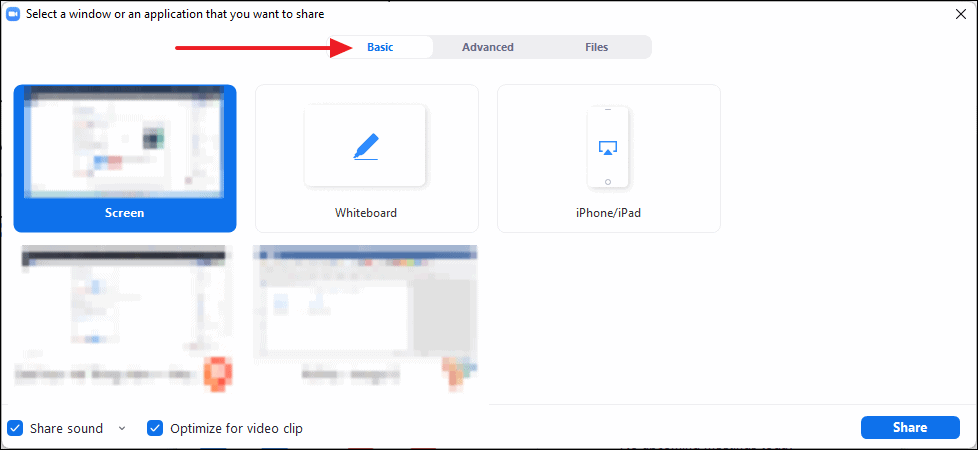
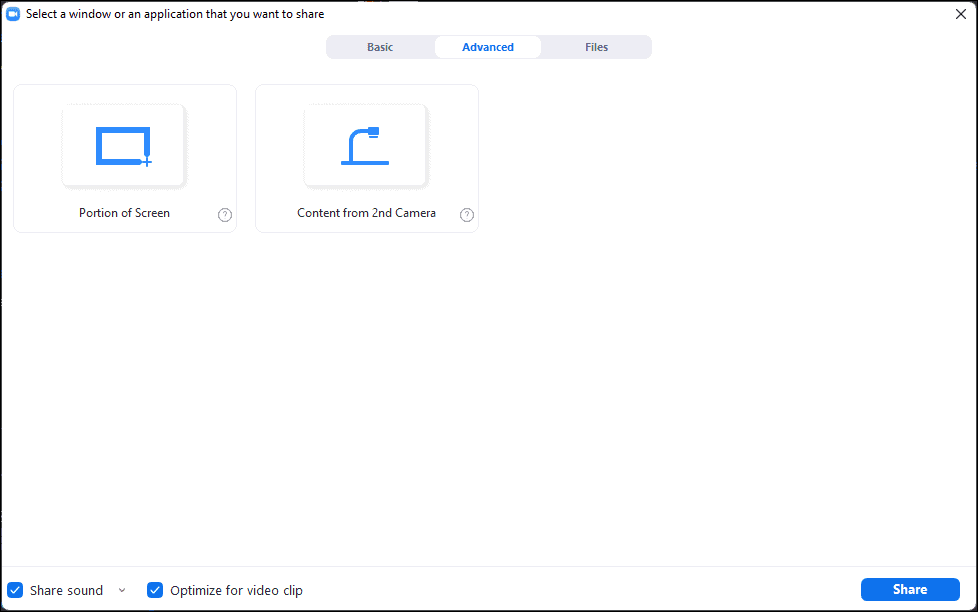
- Optionally, switch to the Advanced tab to share a portion of your screen or content from a secondary camera.
- You can also select files to share from cloud services under the Files tab.
Installing apps on Zoom
To enhance your Zoom experience by adding apps:
- In the Zoom client, click on the Apps tab.
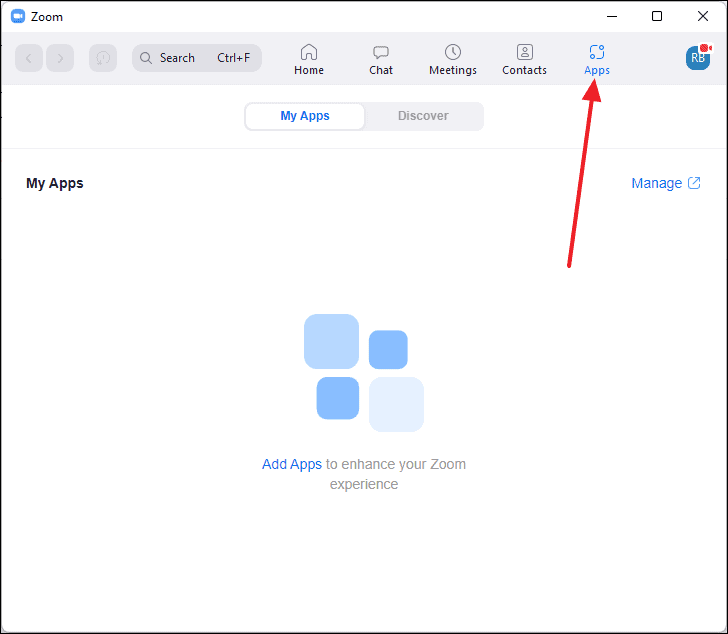
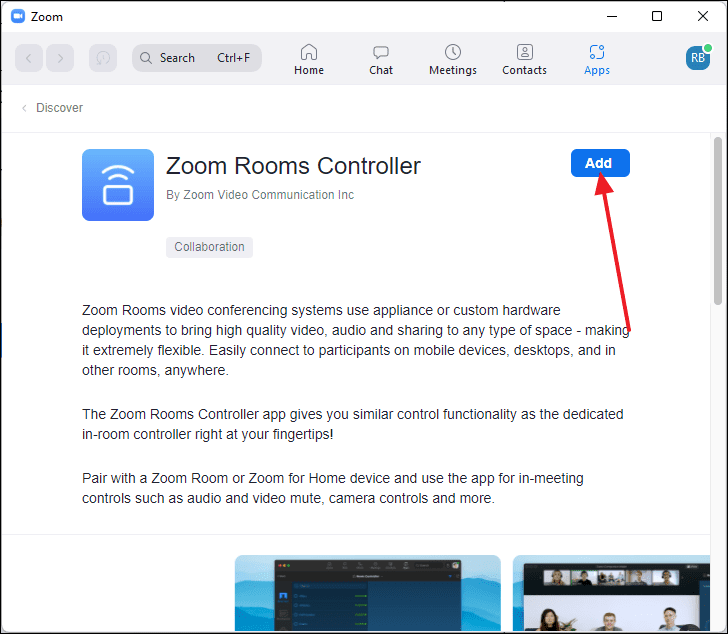
- Click on Discover to browse available apps.
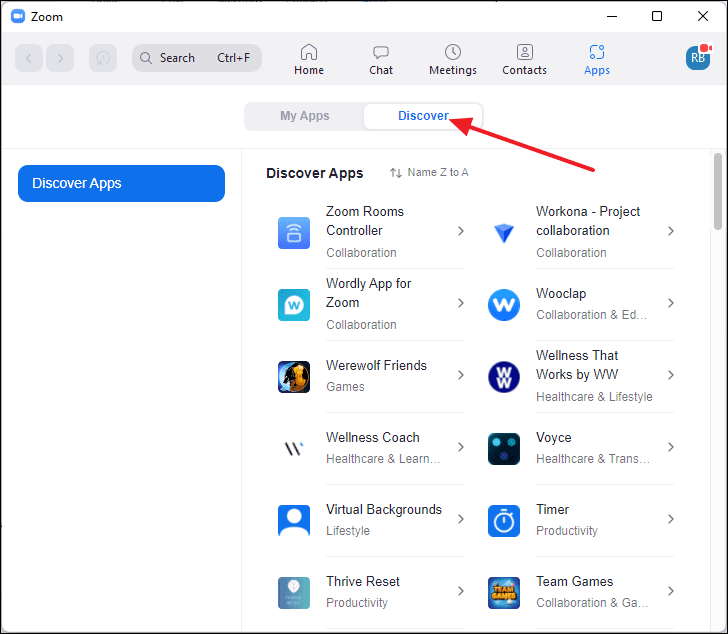
- Find an app you want to install and click on the Add button.
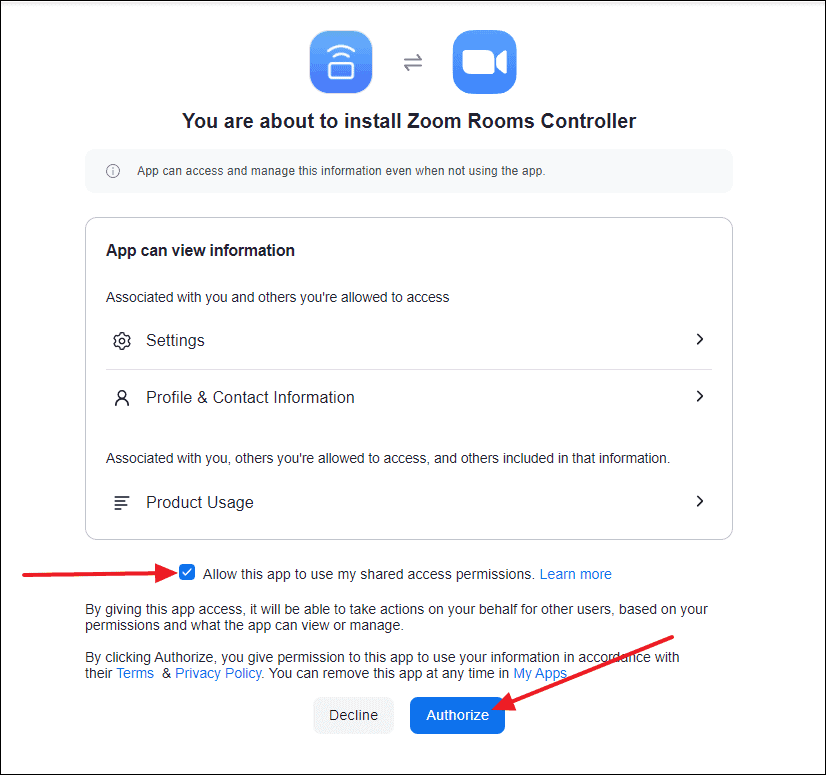
- In your web browser, review the permissions required by the app, check the box to allow access, and click Authorize.
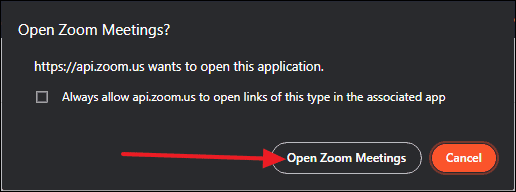
- When prompted, click Open Zoom Meetings to return to the Zoom client.
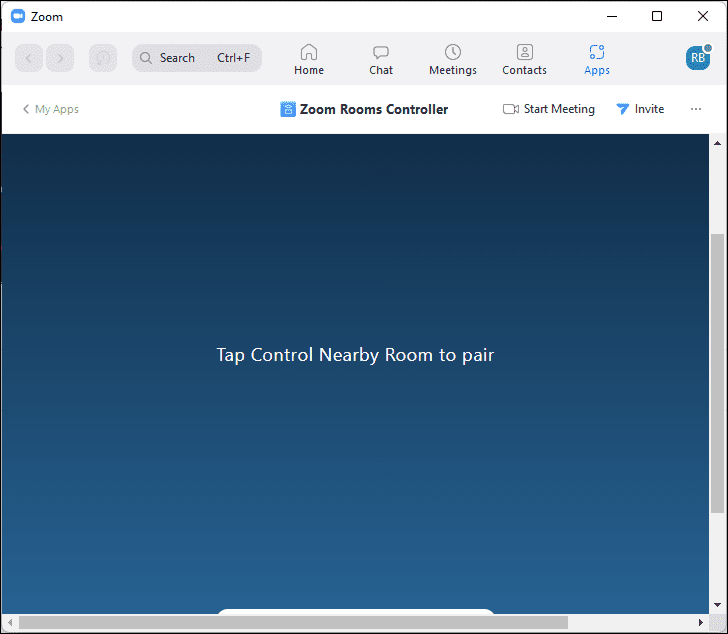
- After installing, the app will appear in your My Apps section.
- To close an app, go to the My Apps tab and click Close All under the Opened section.
Here are some recommended apps to enhance your Zoom experience:
- Google Workspace: Schedule, join, and manage Zoom meetings directly from Gmail and Google Calendar.
- Google Drive for Zoom: Easily save and transfer your meeting recordings to Google Drive.
- Slack: Create a Zoom meeting or call from any Slack channel or group with a simple slash command,
/zoom. - Coursera: Integrate the Coursera learning experience within Zoom meetings for enhanced teaching and learning.
- Evernote: Access and edit your Evernote content directly from Zoom.
- Zapier: Automate tasks in Zoom, such as scheduling meetings or sending meeting invites.
- DocuSign: Connect your DocuSign account to Zoom and use bots to digitally sign documents.
Some useful Zoom shortcuts
Knowing keyboard shortcuts can help you navigate Zoom more efficiently. Here are some handy shortcuts:
| Shortcut | Action |
|---|---|
ALT+a |
Mute/Unmute your microphone |
Spacebar |
Push-to-talk |
ALT+F1 |
Switch to Active Speaker view |
ALT+F2 |
Switch to Gallery view |
ALT+m |
Mute/Unmute audio for everyone except host |
ALT+i |
Open the Invite window |
ALT+Shift+s |
Start/Stop screen sharing |
ALT+t |
Pause/Resume screen sharing |
ALT+F4 |
Close the current window |
ALT+y |
Raise/Lower your hand |
F6 |
Navigate between Zoom pop-up windows |
Using Zoom on Windows 11 is straightforward once you know the basics. With this guide, you’re now equipped to install Zoom, host and join meetings, add contacts, and make the most of its features to stay connected.


