
With the amount of spam messages we get during the day, staying on top of them is already difficult. But when you add another SIM to the mix, it’s downright chaos. But the Messages app on iPhone has a little hidden feature that can make it easy to manage messages for multiple SIMs efficiently.
Starting with iOS 16, the Messages app has had a nifty little option that allows you to view or sort your messages by SIM. Here’s everything you need to know about it.
Enable SMS Filtering to Sort Messages by SIM
To be able to sort messages by SIM in the Messages app, you need to have SMS filtering enabled.
- Open the Settings app on your iPhone.
- Scroll down and tap the ‘Messages’ tile.

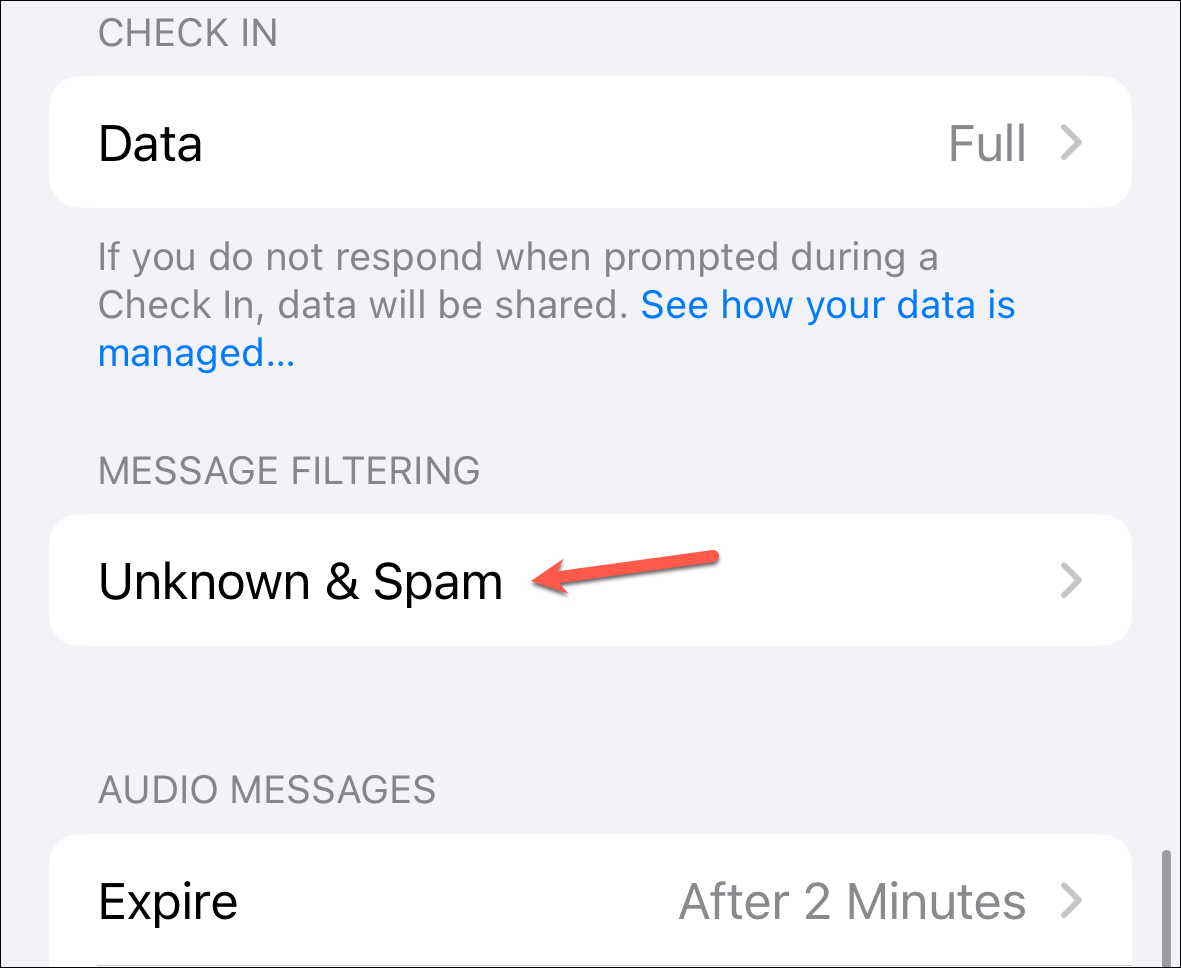
- In the Message settings, scroll down again and navigate to ‘Unknown & Spam’.
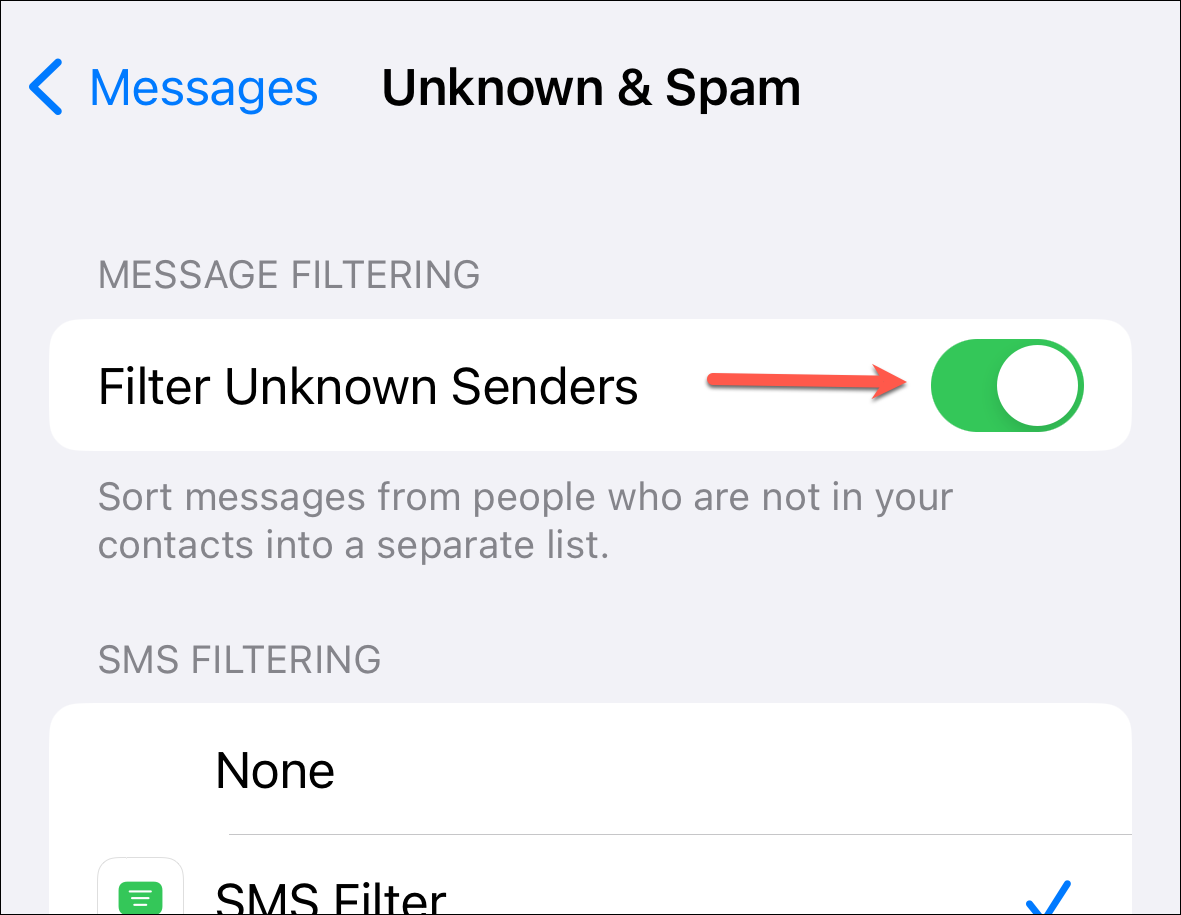
- Then, turn on the toggle for ‘Filter Unknown Senders’ to enable the setting.
Sort Messages by SIM in the Messages App
Once you have SMS filtering enabled, you’ll get the option to sort messages by SIM in the Messages app.
- Open the Messages app on your iPhone.
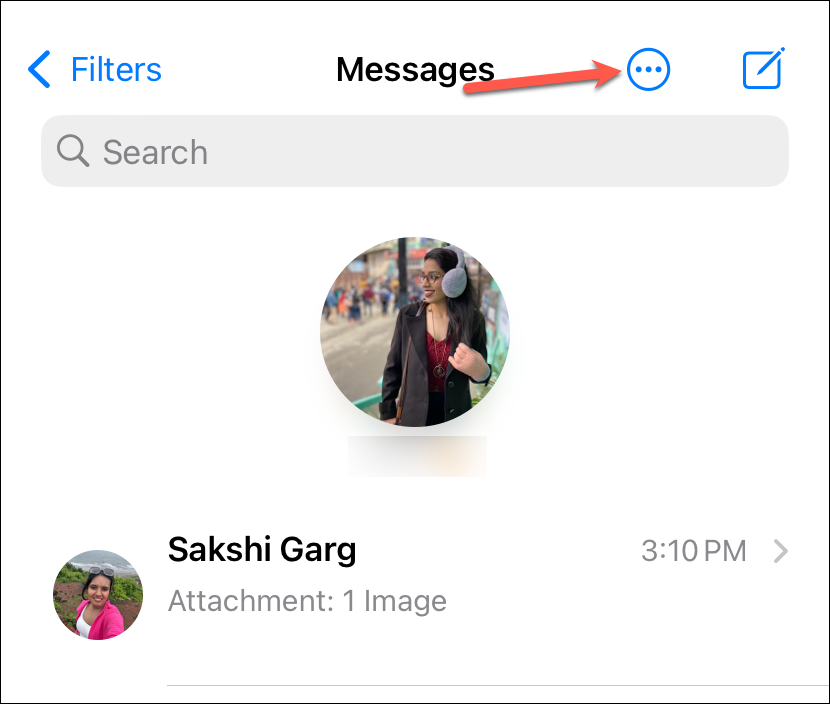
- Tap the ‘Ellipsis’ in the top-right corner of the screen.
- You’ll see three options: ‘All Lines’ and two individual SIMs. Select the SIM for which you want to view the messages.
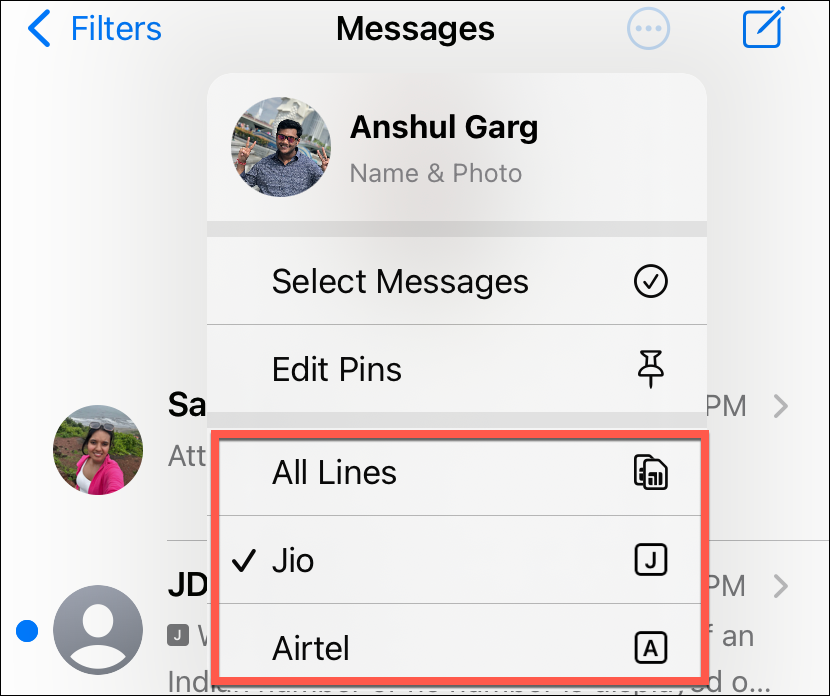
- The Messages app will now only show messages you’ve received for that line until you switch it again. Note that it doesn’t matter which SIM you’re viewing the messages for; your pinned chats will appear regardless.
Managing two SIMs can be a hassle, especially when you’re using two different SIMs for personal and work use. But with per-SIM message sorting in iPhone, you can get by better.


