
In Excel, when you input a long text string into a cell, it may extend beyond the cell’s boundaries and overflow into adjacent cells. This can obscure the content of neighboring cells, making it challenging to read the data unless you select each cell individually. To resolve this, Excel offers the ‘Wrap Text’ feature, which allows text to display on multiple lines within a single cell, ensuring all content remains visible without affecting other cells.
Wrapping Text Automatically in Excel
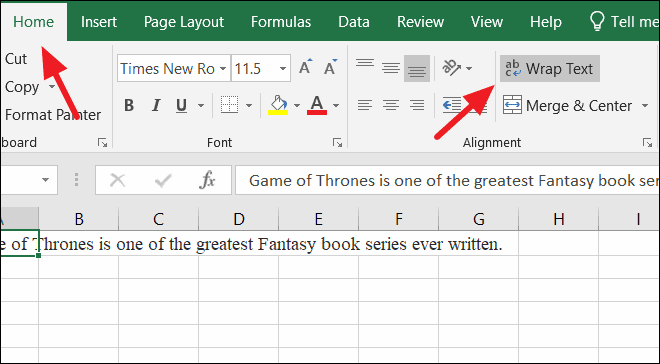
To seamlessly fit lengthy text within a cell, you can utilize the ‘Wrap Text’ feature. This function adjusts the text to display on multiple lines, matching the cell’s width.
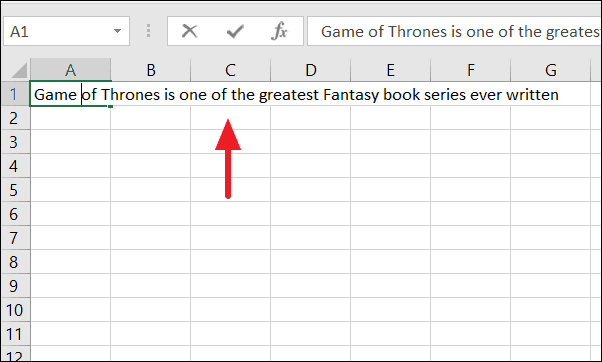
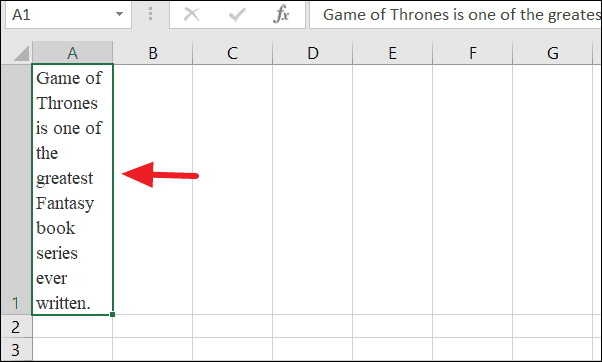
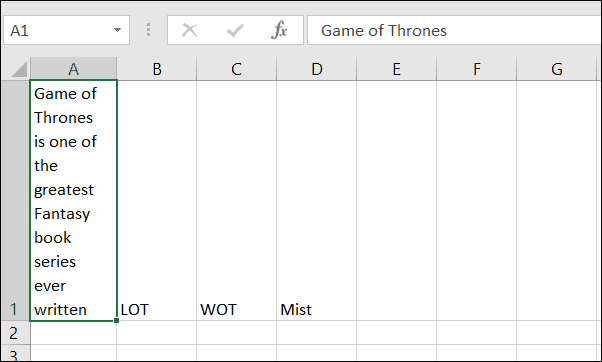
For example, if you enter a long text string into cell A1, it might appear like this:
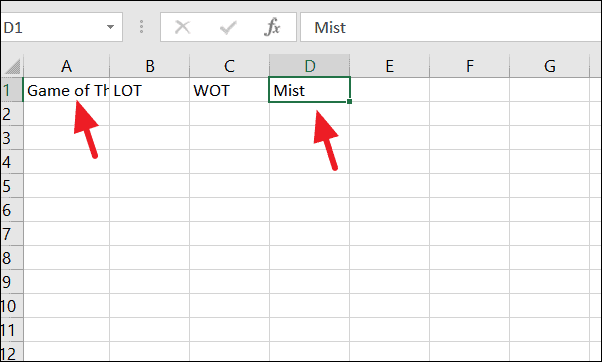
If there is data in the adjacent cells, the overflowing text may cover them, as shown below:
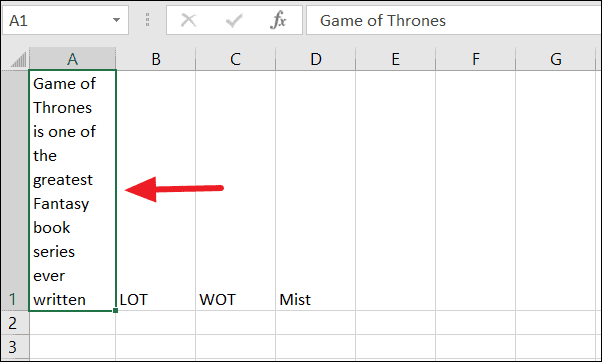
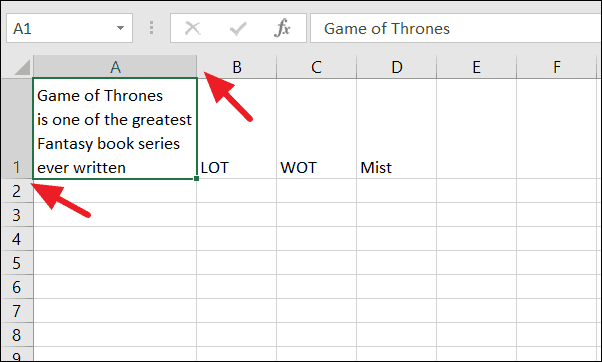
The text will now adjust to fit within the cell’s width, displaying on multiple lines as needed.
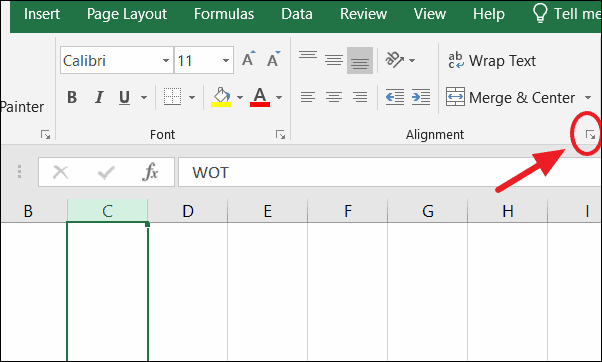
Using the Format Cells Dialog to Wrap Text
Another method to wrap text automatically is through the ‘Format Cells’ dialog box.
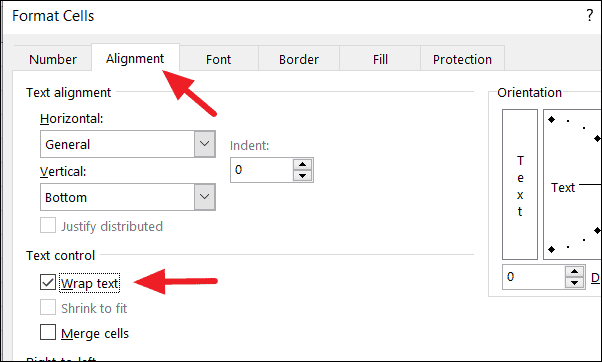
The content in the cell will now wrap automatically to fit within the cell’s width.
Wrapping Text with Manual Line Breaks in Excel
Sometimes, you may want to control exactly where the text breaks onto a new line within a cell rather than relying on automatic wrapping. To insert manual line breaks:
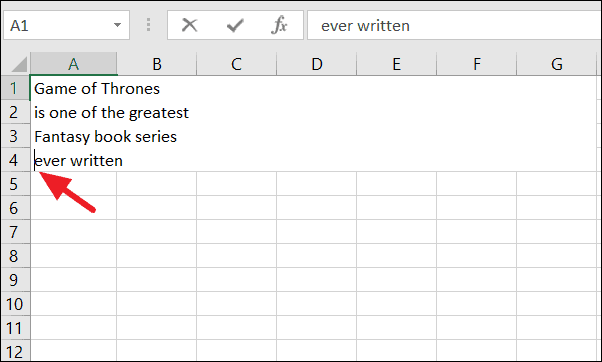
Even after inserting manual line breaks, Excel may still wrap text based on the cell’s width. However, the line breaks you added will remain fixed, ensuring your text is formatted exactly as you intend.
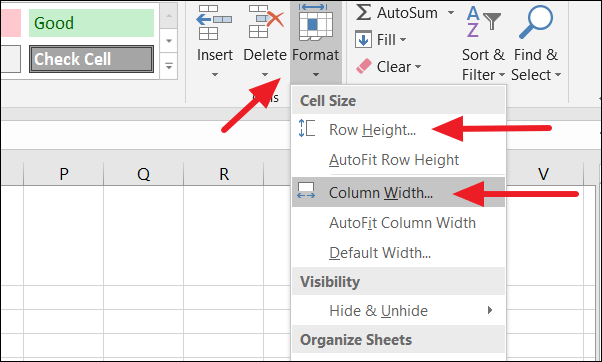
If the text doesn’t display as expected, you can adjust the row height or column width to accommodate the content.
Alternatively, use the ‘Format’ option to specify exact dimensions:
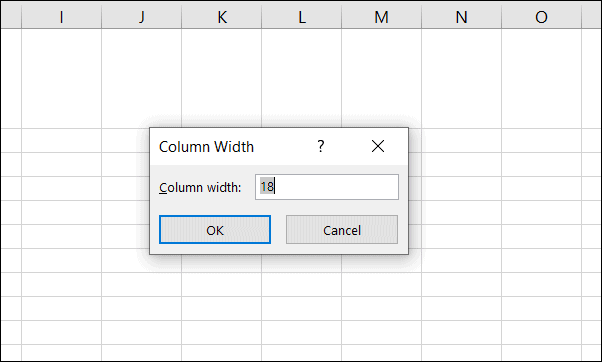
By adjusting the cell size, you can ensure that your manually inserted line breaks and wrapped text display correctly.
By leveraging Excel’s ‘Wrap Text’ feature and manual line breaks, you can effectively manage long text entries, enhancing the readability and presentation of your spreadsheets.


