
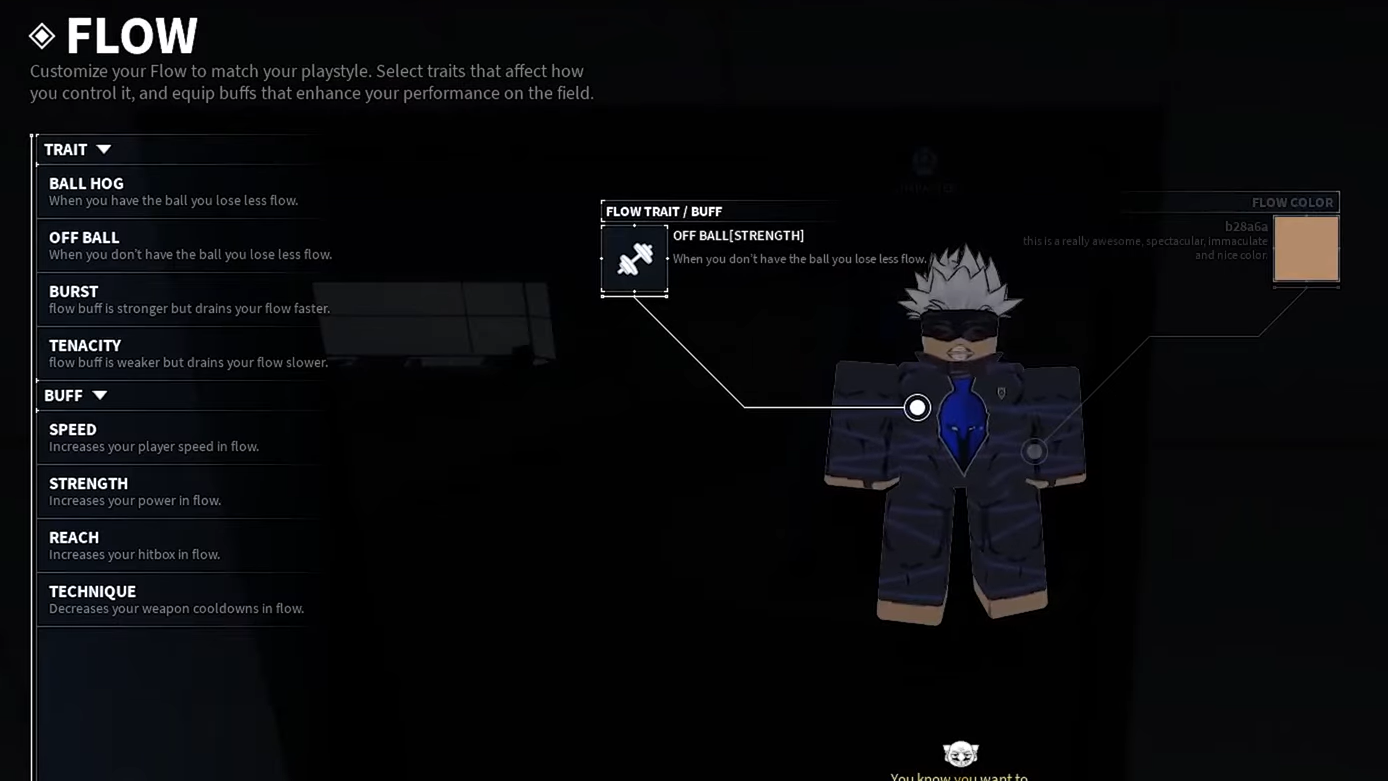
Flow in Locked 2 is a rolled pairing of one Trait and one Buff that stays active during your match-state windows on the pitch. Each spin costs 1,000 Yen at the Flow menu inside the Character room, and the result is fully random across 16 possible combinations. Picking the right pairing matters more than weapon choice for some roles, because Traits decide how long your Flow lasts and Buffs decide what it actually boosts.

How Flow rolls work
Every Flow is built from two halves. The Trait controls drain rate and overall potency, while the Buff defines what stat your Flow amplifies. You cannot choose either side directly. You spin at the Flow column inside the Character room (the last room down the main corridor in the lobby), pay 1,000 Yen, and accept whatever the system gives you. Rerolling fully replaces your current Flow, so a strong roll is worth keeping unless you have currency to burn.
Flow color is a separate cosmetic spin at 200 Yen and does not affect stats.
| Trait | Effect |
|---|---|
| Burst | Stronger Flow buff, drains faster |
| Tenacity | Weaker Flow buff, drains much slower |
| Ball Hog | Loses less Flow while you have the ball |
| Off Ball | Loses less Flow while you don’t have the ball |
| Buff | Effect |
|---|---|
| Speed | Increases movement speed during Flow |
| Technique | Reduces ability cooldowns during Flow |
| Strength | Increases shot and physical power during Flow |
| Reach | Increases your hitbox size during Flow |

Full Flow tier list (all 16 combos)
Combos are ranked by raw impact across both Autos and Scrims. S-tier rolls are worth keeping no matter your position. D-tier rolls are safe to reroll if you have the Yen.
| Tier | Combo | Best for |
|---|---|---|
| S | Burst + Speed | Any role, top-tier pressure |
| S | Burst + Technique | Skilled players spamming weapon abilities |
| S | Ball Hog + Technique | Forwards and wingers with possession |
| S | Off Ball + Speed | Defenders and interceptors |
| A | Ball Hog + Speed | Solo dribblers and finishers |
| A | Off Ball + Technique | Support and midfield |
| A | Burst + Strength | Power strikers, short windows |
| A | Tenacity + Speed | Long-uptime mobility build |
| B | Ball Hog + Strength | Physical strikers |
| B | Off Ball + Reach | Marking and interceptions |
| B | Tenacity + Technique | Passive cooldown play |
| B | Burst + Reach | Short defensive bursts |
| C | Tenacity + Strength | Sustained power, low ceiling |
| C | Ball Hog + Reach | Niche possession defense |
| C | Off Ball + Strength | Off-ball physical pressure |
| D | Tenacity + Reach | Low-impact filler |
S-tier combos in detail
Burst + Speed is the best Flow in the game. The amplified speed boost from Burst makes you nearly impossible to mark in a 1v1, and the short uptime is plenty for a single attacking run or counter-press. The only real cost is that you need to be in the right position when Flow procs, otherwise the window burns without payoff.
Burst + Technique turns weapon abilities into spam. Cooldowns drop hard, so weapons like Riptide Curve or Black Hole Trap come back fast enough to stack pressure. You will need to manage the drain carefully, because Burst eats through Flow quickly.
Ball Hog + Technique is the cleanest forward roll. As long as you keep the ball, the drain is minimal, and the cooldown reduction means you can chain dribble and shot abilities through a full attacking phase. It falls off the moment you lose possession.
Off Ball + Speed is the defensive mirror. Drain stays low while you chase, intercept, and cover space, and the speed boost makes recoveries and counter-runs trivial. It contributes nothing directly to scoring, so it is best slotted on dedicated defenders or midfielders who feed strikers.
Pairing Flow to your role
Buff value shifts depending on whether you are creating chances or stopping them. Speed and Technique are the most universally strong because they help in attack and defense. Strength is narrow, and Reach mostly helps defenders and goalkeepers.
| Role | Best Trait | Best Buff |
|---|---|---|
| Striker | Ball Hog or Burst | Technique or Strength |
| Winger | Burst | Speed |
| Midfielder | Tenacity | Speed or Technique |
| Defender | Off Ball | Speed or Reach |
| Goalkeeper | Off Ball or Tenacity | Reach |
How to roll and reroll Flow
When to keep versus reroll
Keep your Flow if it sits in S- or A-tier, even if the Buff does not perfectly match your role. A misaligned A-tier roll outperforms most C- and D-tier rolls, and chasing perfection through repeated spins usually costs more Yen than the upgrade is worth.
Reroll only when your current Flow is C-tier or lower and you have at least 5,000 to 10,000 Yen banked. Tenacity + Reach is the clearest reroll target, since it offers no offensive pressure and very limited defensive value. Anything in B-tier is borderline, and worth keeping if it matches your role.
Burst combos win short, decisive attacking sequences. Tenacity combos win attrition. Ball Hog rewards possession-heavy strikers, and Off Ball rewards anyone who plays without the ball most of the match. Match the Trait to your time-on-ball pattern first, then let the Buff fine-tune the playstyle.