The Withered Knight in Mistfall Hunter punishes button mashing and rewards timing. Its whole kit runs on the Wither system, so instead of swinging blindly you apply Wither, chain into heavy attacks, and cash out with executions. Two weapon paths change how you play it: the Greatsword for solo damage, and the Polearm and Shield for holding the line in trios.
Quick answer: For solo, run the Greatsword with Parry, Radiant Retribution, and Breakthrough Charge, backed by the Crime, Bad Karma, Endless Flow, and Righteous Creed talents. For trios, switch to Polearm and Shield with Javelin Thrust, Spear Barrage, and Intervene, keeping Endless Flow and Righteous Creed while swapping in Momentum Shift. Slot Burst, Aegis, Tenacious, and Valor affixes for either build.
How Wither drives the Withered Knight
On paper the Withered Knight looks like the Mercenary, but they play nothing alike. The Mercenary is a straightforward block-and-bash frontliner. The Withered Knight is an aggressive execute fighter that builds pressure through the Wither mechanic and then detonates it.
You apply Wither with attacks and certain skills, then trigger it through heavy hits to deal damage, restore energy, and shave cooldowns. That loop of marking, striking, and following up is the entire class. Skip the timing and it feels average. Sequence it cleanly and it melts both players and mobs.
Before you commit, weigh what the class does well against where it falls apart.
| Strengths | Weaknesses |
|---|---|
| Deadly combos when moves are chained correctly | A dropped combo can get you killed |
| Parry counters PvP-meta picks like Shadowstrix | Long learning curve to master |
| Strong dive and engage tools | Mistimed attacks are often fatal |
| One of the best solo melee choices | Slow mobility hurts against Sorcerer and Blackarrow |
| Two distinct routes with Greatsword or Polearm and Shield | Repetitive, since you reuse the same combos each round |
Once the combos click, the Withered Knight can carry a lobby or act as the defensive anchor for a squad. It just asks for practice first.
Best solo Withered Knight build (Greatsword)
Playing alone, your job is to kill fast. Defense is secondary because dead enemies can’t hit back. The Greatsword raises your damage ceiling more than any other option, so it’s the solo pick.
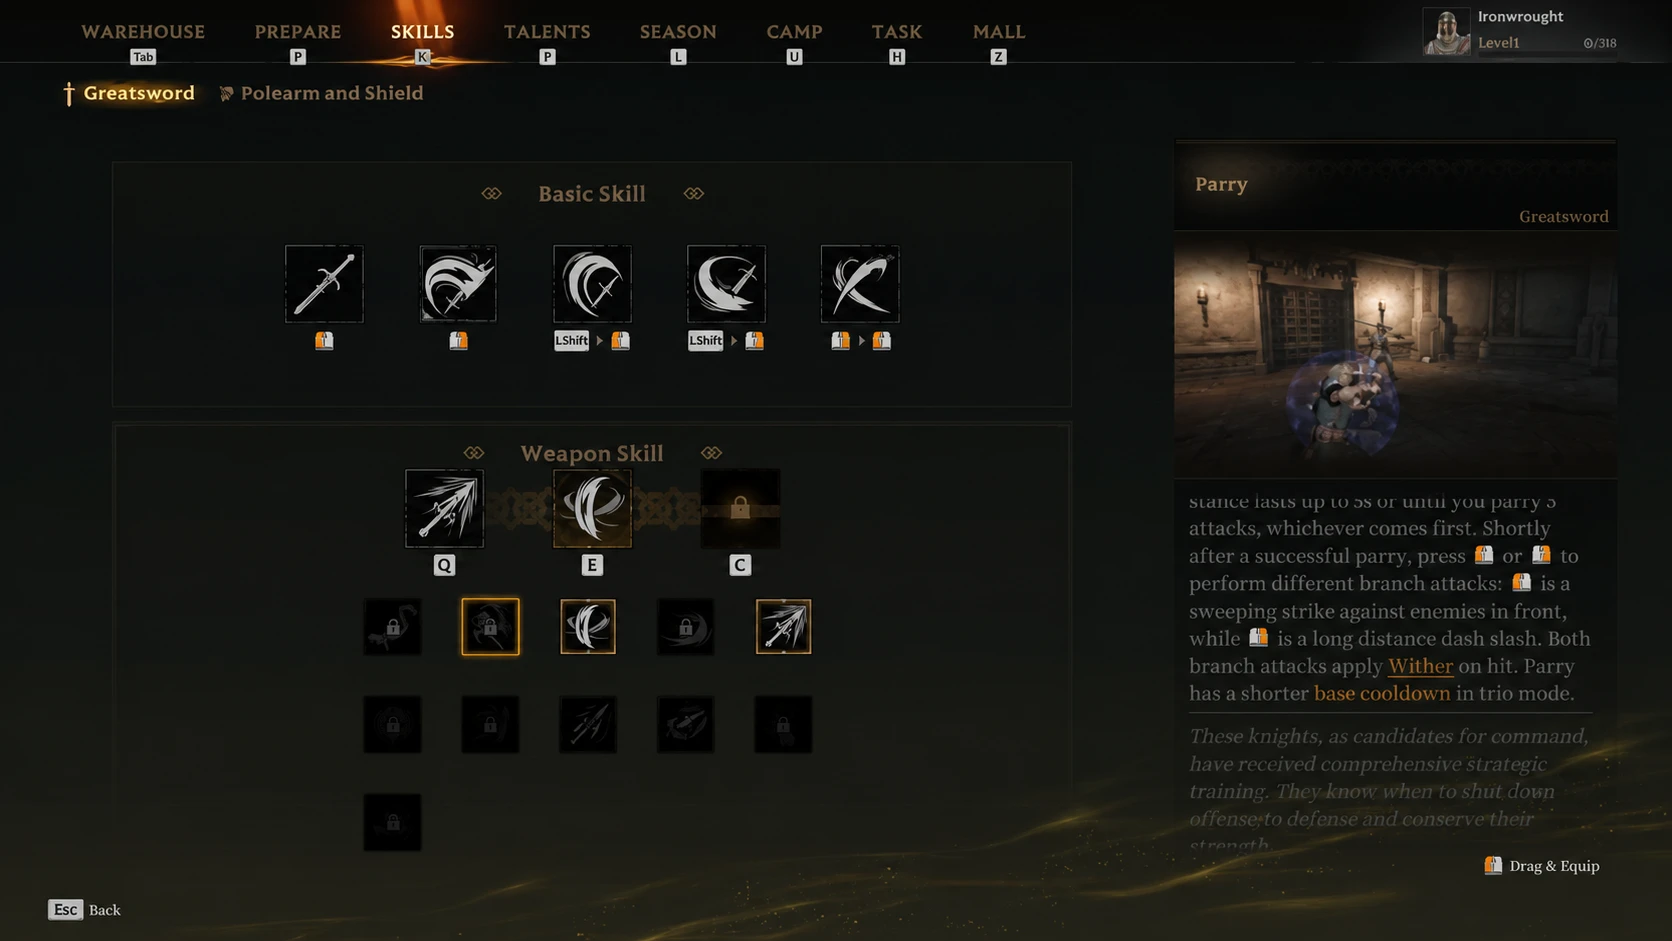
Fill your three skill slots with the following.
- Parry: Without a shield, this is your main defensive tool. A stun lasts up to 5 seconds, or until you parry 5 attacks. A successful parry opens branch attacks tied to your mouse buttons, which sets up your combos.
- Radiant Retribution: Three wide slashes in quick succession. Each hit counts as a light strike and charges your weapon. Once fully charged, landing three strikes applies Judgment and grants brief super armor. After Judgment lands, the target gains Wither from every following hit.
- Breakthrough Charge: Thrust forward, then press left or right mouse during recovery to dash that direction while sweeping enemies in range. This patches the class’s mobility problem and makes your movement hard to predict.
Solo Greatsword talents
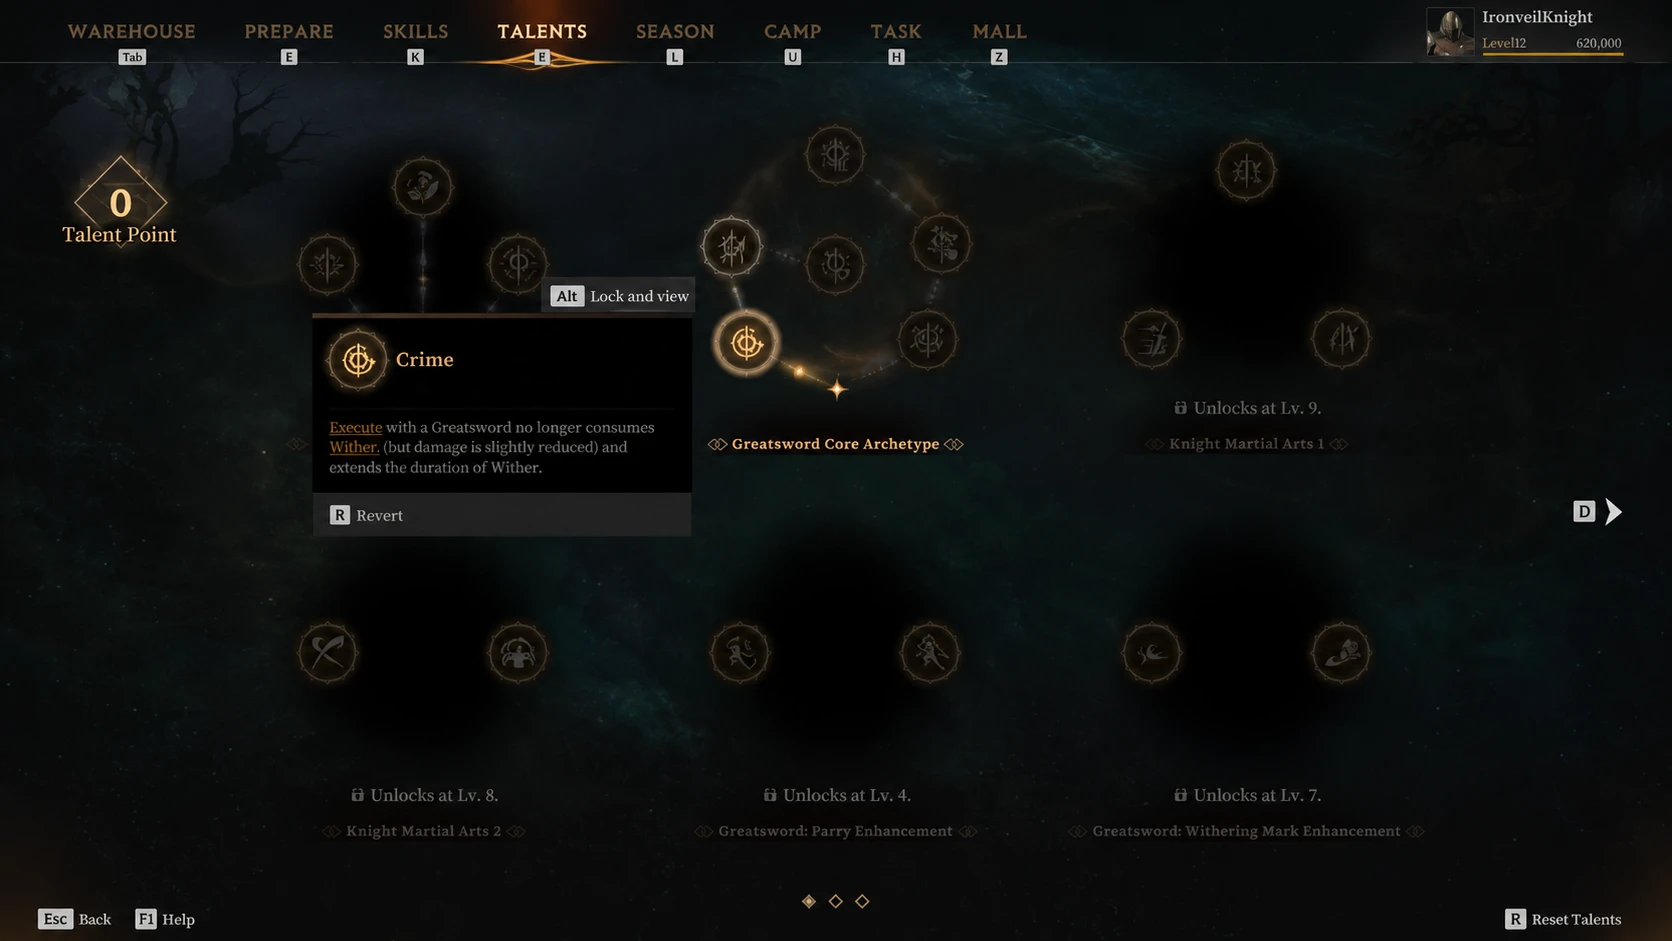
The talents keep your Wither alive and let you chain heavy attacks back to back.
| Talent | What it does |
|---|---|
| Crime | Executing an enemy with the Greatsword no longer consumes your Wither, and Wither lasts longer. A must-have on any Withered Knight build. |
| Bad Karma | Applies more linked debuffs when you execute with the Greatsword. Pairs directly with Crime. |
| Endless Flow | Reduces the cooldown on all your skills. |
| Righteous Creed | Briefly raises your Physical Damage after a successful execution. |
Crime and Bad Karma are the core pairing here. Together they let you fire off consecutive heavy attacks and keep pressure on enemies who expected your burst to end.
Best trio Withered Knight build (Polearm and Shield)
In trios, become the defensive anchor. Few classes can hold that role, which makes you valuable. Trade the Greatsword for the Polearm and Shield here. You give up some raw damage, but you gain far better survivability and peel for your team.
- Javelin Thrust: Throw your javelin to apply Wither on impact. On a clean hit you leap to the target, pull the spear free, and land a heavy sweeping strike.
- Spear Barrage: Thrust forward to bring the enemy down. A successful connect inflicts Judgment.
- Intervene: Rush forward and release an energy pulse that shields your parries and knocks enemies back. You also gain brief super armor.
Trio Polearm and Shield talents
Keep Endless Flow and Righteous Creed from the solo setup, since both still work with the Polearm and Shield. Make these two changes.
| Talent | Why it fits |
|---|---|
| Endless Flow | Spends more energy but lets you keep thrusting the spear forward. Essential alongside Spear Barrage. |
| Momentum Shift | Adds extra dodges during your shield charge dash. Dodges are critical in the current meta, so the extra mobility helps constantly. |
Best affixes for both builds
The weapon and gear affixes stay the same no matter which weapon set you run. A couple shift depending on whether you lean offensive or tanky, but the core four apply to both routes.
| Affix | Effect |
|---|---|
| Burst | Raises Execution damage. Works with every Withered Knight build. |
| Aegis | Raises defense and physical resistance. Essential for tank setups. |
| Tenacious | Increases maximum health and improves healing. |
| Valor | Raises attack and adds defense penetration at higher levels. |
Burst is the payoff affix because your damage flows through executions. If you skew toward the trio anchor role, lean harder on Aegis and Tenacious. For solo play, prioritize Burst and Valor to push your kill speed.
Mistakes that waste the build
The build only performs if you respect the class’s timing. A few habits sink it faster than any gear choice.
- Letting Wither drop. Once it falls off, your pressure and your Execute damage go with it. Keep reapplying it.
- Mashing into enemy attacks. Parry first, then take your turn. Swinging blindly into a Shadowstrix or a swinging opponent gets you interrupted.
- Chasing kiting classes on open ground. Sorcerer and Blackarrow outrun your slow mobility. Fight on choke points and disengage rather than sprinting into the open.
Get those three right and the rest of the kit falls into place. The Greatsword build turns solo fights into fast executions, while the Polearm and Shield build keeps your trio standing through the messy extraction moments where most squads fall apart.