
Hard Mode Zenara & Astralym is built to punish weak damage. The boss, listed in the raid as Blightstar Calamity, carries 5,030,099 HP and cycles through barrier phases that end the run if you can’t burn them fast enough. Most players answer that with a swarm of summoned Pals. You don’t need one. A pair of heavily bred Chikipis can carry the whole fight if you pair them with the right support and buffs.
Quick answer: Run two Level 80 Chikipis bred with God of Destruction, Immortality, Serenity, and Legend, then fill the last three party slots with Silvegis, Celesdir Noct, and Orserk. Eat Mammorest Curry for +25% Attack, then cycle Circle Vine, Apocalypse, and Sand Twister to break each barrier phase before the boss finishes charging.

Why a five-Chikipi party fails
A full team of five Chikipis simply cannot output enough damage to break the final barrier before Astralym unleashes its finishing attack. The boss enters protective phases where it draws in energy, and each phase demands a hard burst window. Spreading your damage across five identical birds dilutes the burst instead of concentrating it.
The fix is to treat only two Chikipis as your damage core and give up the other three slots to Pals that buff attack and defense. Fewer attackers, but each hit lands much harder because of the stacked passive buffs and the partner-skill support behind them.
The five-Pal party composition
Two Chikipis do the killing. The other three exist purely to raise your damage ceiling and keep the birds alive through the boss’s area attacks.
| Pal | Role |
|---|---|
| Chikipi ×2 (Lv. 80) | Primary damage; spam elemental active skills |
| Silvegis (Lv. 71) | Shield regeneration and damage reduction via Aegis Shield |
| Celesdir Noct (Lv. 80) | Support buffs for the party |
| Orserk (Lv. 80) | Attack support and staple combat buffs |
Silvegis is the anchor here. Its Aegis Shield partner skill regenerates your shield and cuts incoming damage, which keeps the Chikipis on the field long enough to reach the burst window. Orserk and Celesdir Noct round out the support core as reliable buff providers for this endgame fight.

How to breed the Chikipi damage core
The two Chikipis are the entire strategy, so their passives and active skills matter more than anything else you bring. Breed them to inherit up to four passive skills that boost raw combat performance, since Astralym has no elemental weakness to exploit.
| Attribute | Target |
|---|---|
| Level | 80 |
| Passive skills | God of Destruction, Immortality, Serenity, Legend |
| Active skills | Circle Vine (Grass), Apocalypse (Dark), Sand Twister (Ground) |
Immortality and Serenity keep the birds standing through the boss’s constant area damage, while God of Destruction and Legend push attack output. Spreading the three active skills across different elements matters less for damage type and more for having multiple hard-hitting abilities to rotate through the barrier windows.
Strengthen both Chikipis further with Pal Souls at a Statue of Power and improve their base stats and partner skill level at the Pal Essence Condenser. Those permanent upgrades add real survivability and damage for a fight this long.

Player gear and pre-fight buffs
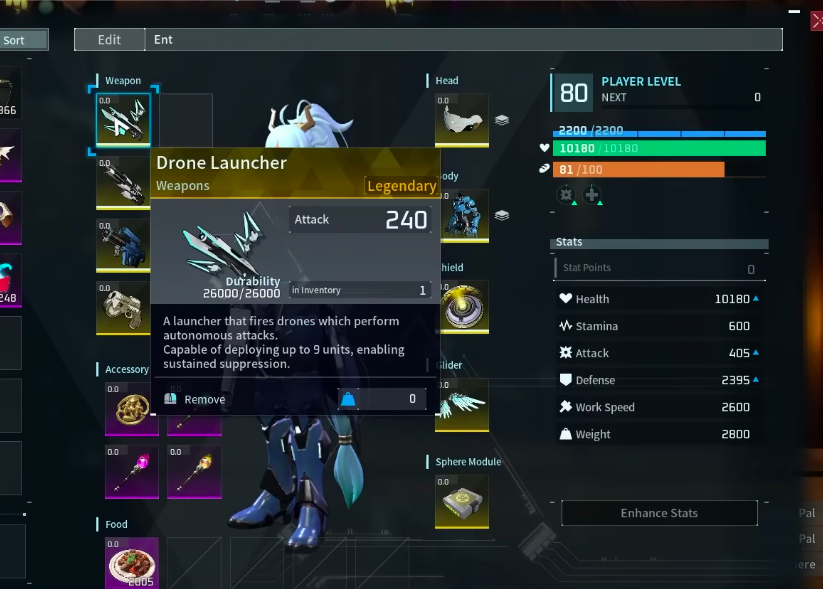
Your own loadout supplements the Chikipis and keeps pressure on the boss’s wings during barrier phases. Two legendary weapons handle that job, and one food buff pushes everyone’s damage up before the timer even starts.
| Slot | Item |
|---|---|
| Weapon | Legendary Drone Launcher |
| Weapon | Legendary Plasma Rifle |
| Food buff | Mammorest Curry (+25% Attack) |
Eat the Mammorest Curry right before you challenge the boss so the attack bonus is active for the opening damage window. Deploy your drones and top off with healing potions during the preparation timer. The Drone Launcher is especially useful because its tracking hits keep chipping the boss even when Astralym repositions.
Working through the barrier phases


How to know it worked
Break the final barrier in time and a victory cutscene plays showing the boss collapse, followed by the “Thank you for playing!” screen. That cutscene is your confirmation the run cleared.
The most common failure is not breaking the last barrier fast enough, which lets Astralym release its finishing attack and wipe the fight. That almost always traces back to two things: Chikipis that aren’t bred with the full passive set, or losing a bird earlier and not reviving it, which leaves you short on burst when the window opens.
Silvegis, Orserk, and Celesdir Noct stay in the party for a reason. They are the staple support core that keeps two Chikipis viable against a 5-million-HP boss, and dropping any of them for a fourth attacker is exactly the trap that makes the fight unwinnable without a raid army.