
Mac Ventura systems may be unable to access symlinked folders when connecting to network file shares hosted by Windows Server 2016. This problem disrupts workflows that rely on symbolic links for organizing shared resources, resulting in missing directories or access errors in Finder and other applications. Addressing this issue requires adjustments on both the Windows Server and Mac client sides to ensure proper handling of symlinks over SMB (Server Message Block) protocol.
Enable Symlink Support on Windows Server 2016 SMB Shares
Step 1: Open the Group Policy Editor on the Windows Server 2016 host by pressing Windows + R, typing gpedit.msc, and pressing Enter. This tool allows you to configure advanced security and sharing options.

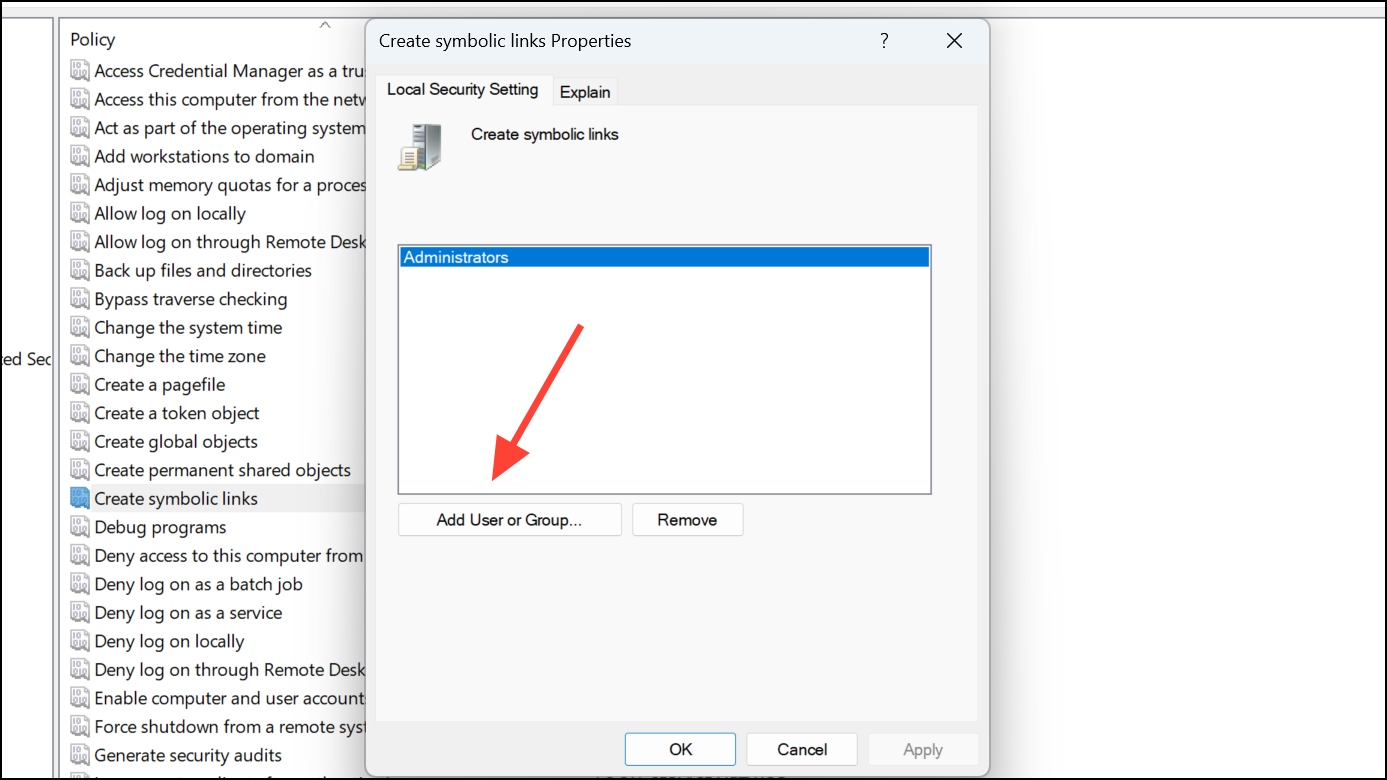
Step 2: Navigate to Computer Configuration > Windows Settings > Security Settings > Local Policies > User Rights Assignment. Locate the policy named Create symbolic links.
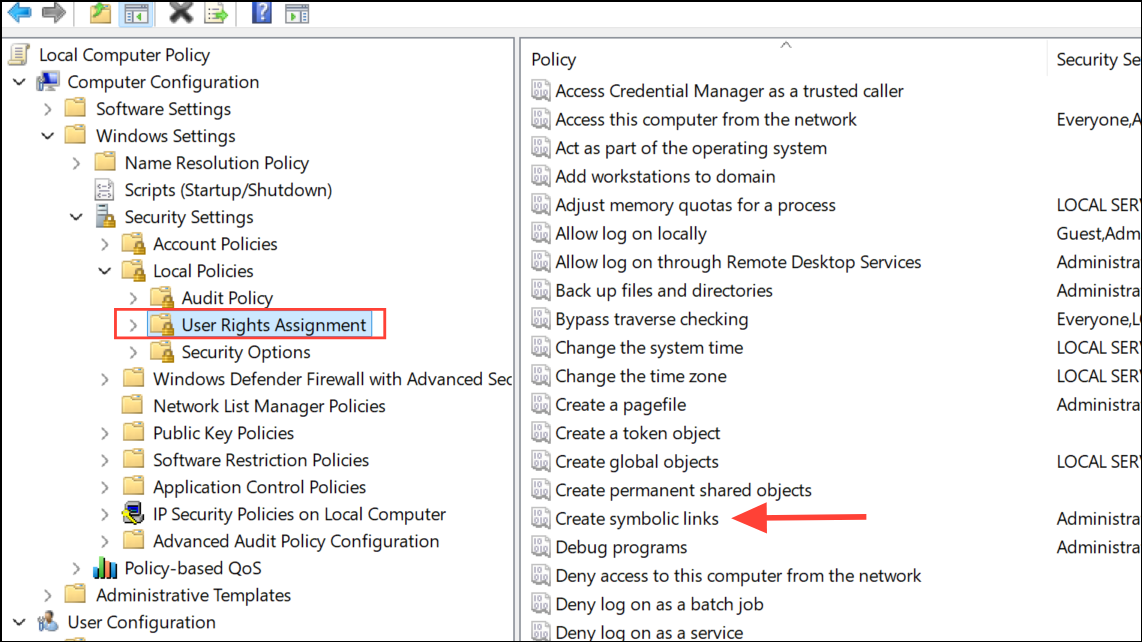
Step 3: Add the user accounts or groups that are used for accessing the SMB share from your Mac to this policy. By default, only administrators have this right, but users accessing via SMB may need explicit permission to follow symlinks.
Step 4: Apply the changes and restart the Windows Server or run gpupdate /force in a Command Prompt to apply the new group policy settings immediately.
Adjust SMB Settings on Windows Server 2016
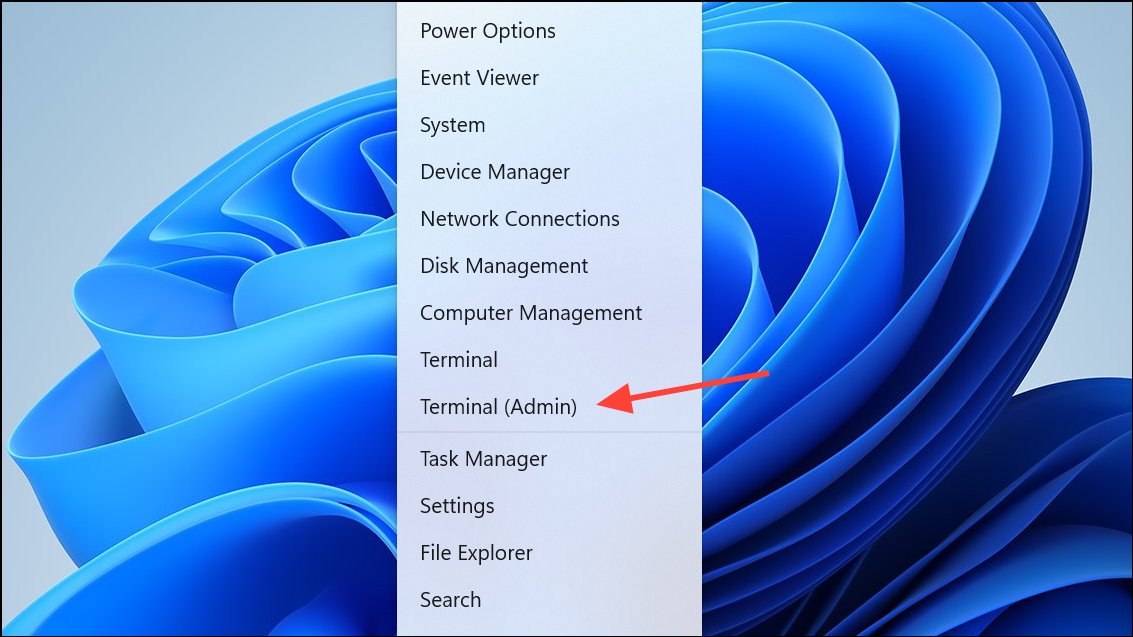
Step 1: Open a Command Prompt with administrative privileges. You can do this by right-clicking the Start Menu and selecting Command Prompt (Admin) or Terminal (Admin).
Step 2: Check the current SMB server configuration by running:
Get-SmbServerConfiguration | Select EnableSMB2Protocol, EnableSMB1Protocol, RejectUnencryptedAccess, EnableSMBDirsymlink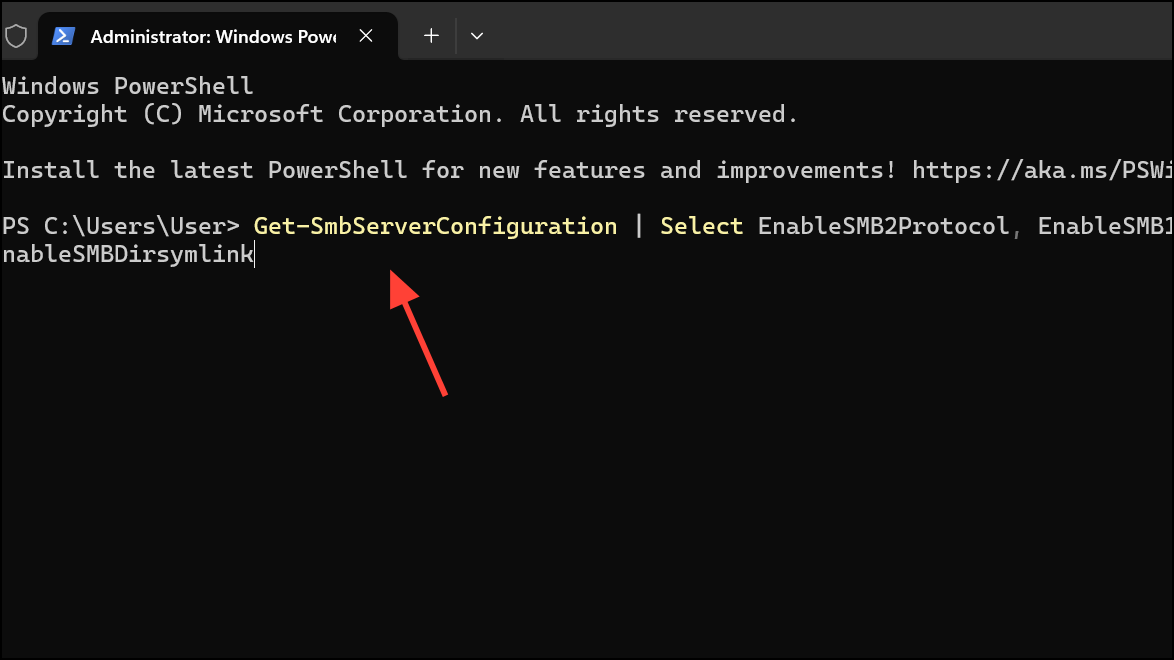
Step 3: If EnableSMBDirsymlink is set to False, enable it by running:
Set-SmbServerConfiguration -EnableSMBDirsymlink $true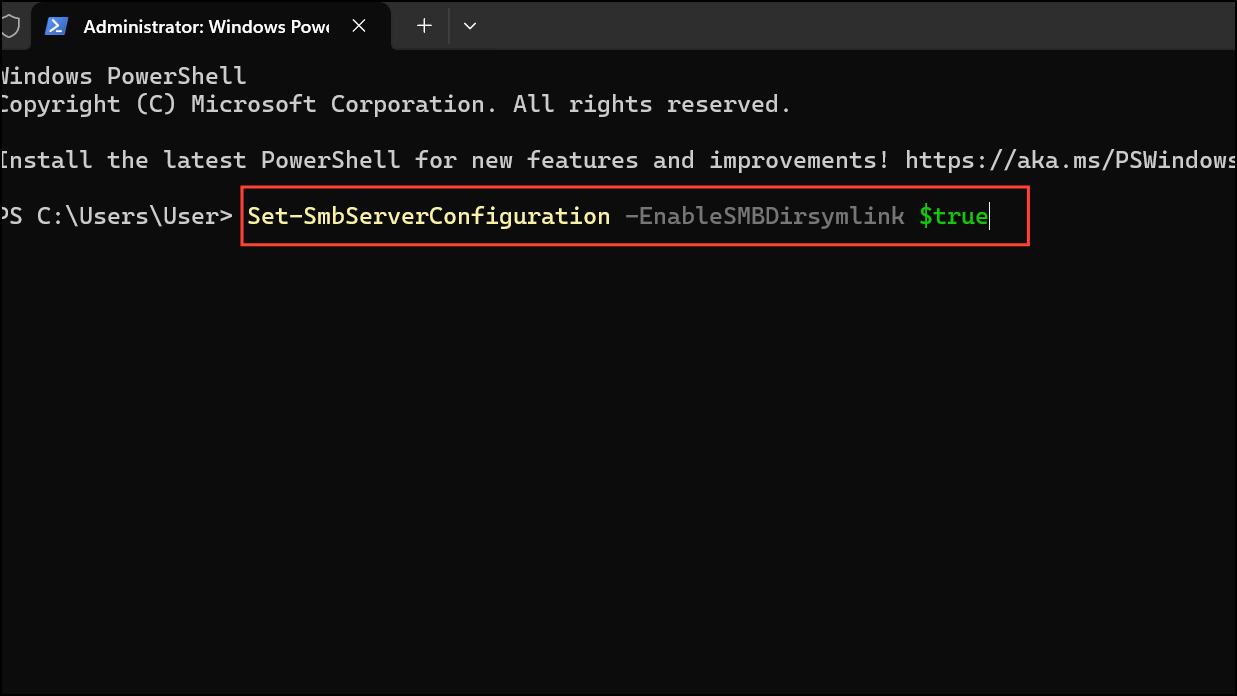
This setting allows the SMB server to support directory symlinks, making them visible and accessible to clients like Mac Ventura.
Step 4: Restart the server or the SMB service for the change to take effect. You can restart the SMB service with:
Restart-Service -Name 'LanmanServer'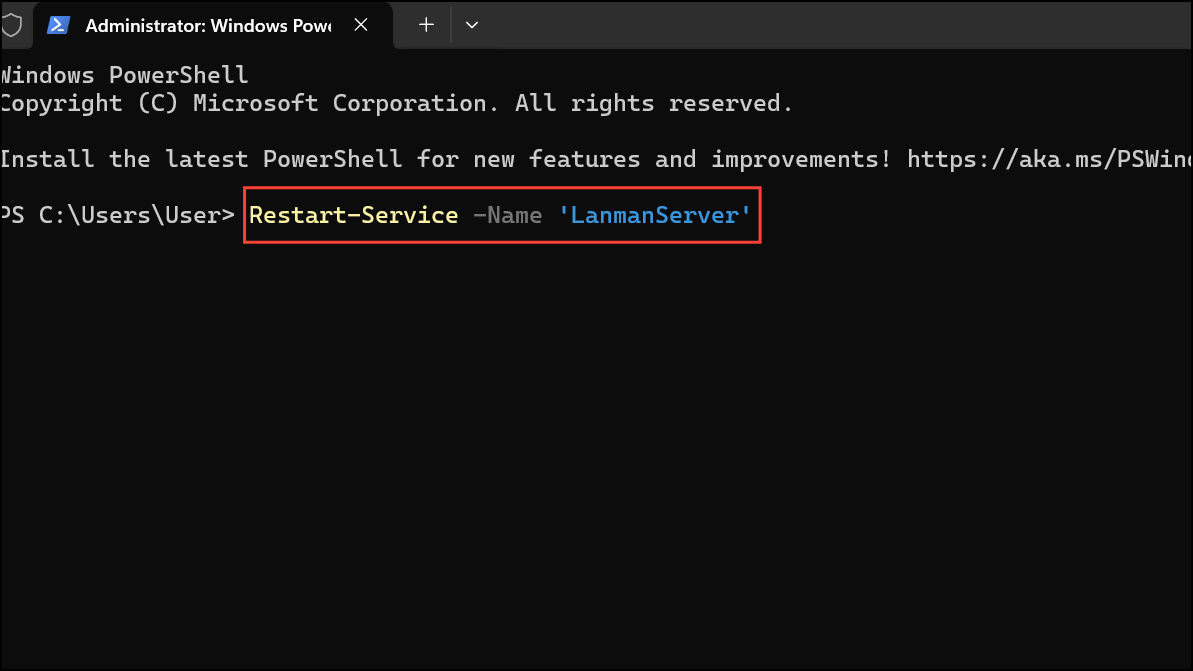
Connect to the SMB Share Using the Correct Protocol on Mac Ventura
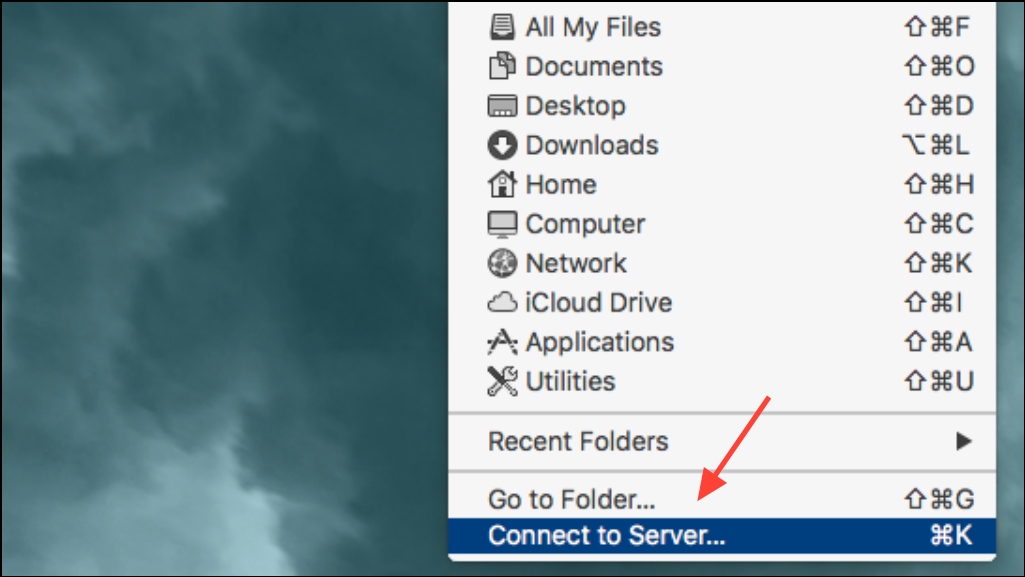
Step 1: Open Finder on your Mac, then click Go in the menu bar and select Connect to Server... or press Command + K.
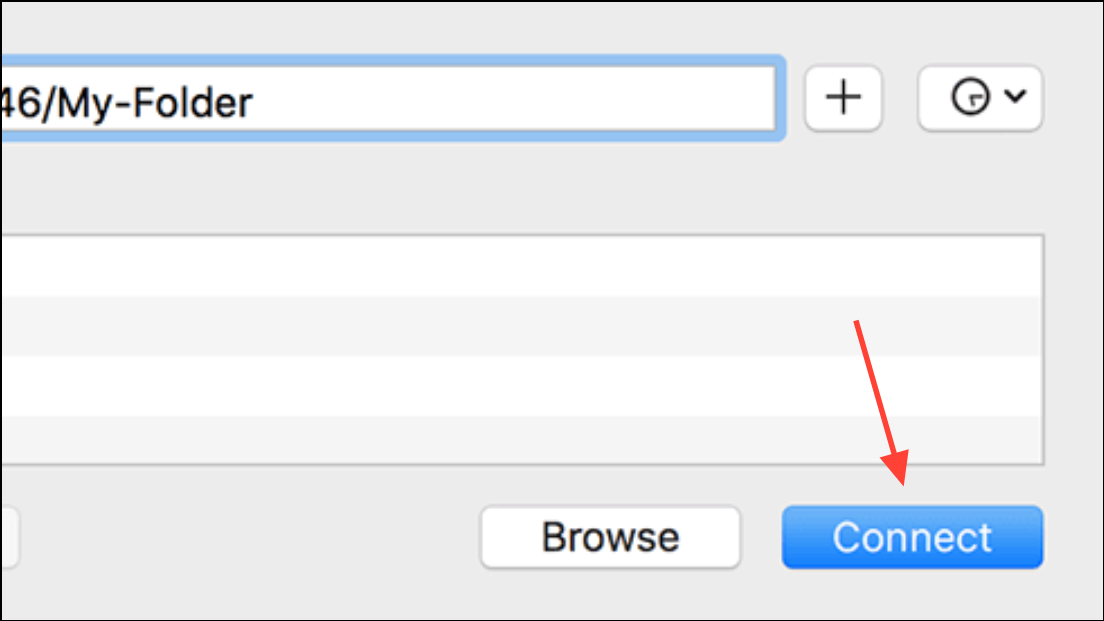
Step 2: In the server address field, enter the SMB path to your Windows Server share, ensuring you use the smb:// prefix (for example, smb://servername/sharename).

Step 3: Click Connect and enter your credentials if prompted. The share should now mount, and symlinked folders should appear if server-side changes were applied correctly.
Step 4: If symlinked folders still do not appear, try disconnecting and reconnecting, or restart your Mac to clear any cached SMB session data.
Alternative Workaround: Replace Symlinks with NTFS Directory Junctions
Mac Ventura may not support certain Windows symlink types over SMB due to protocol differences. Using NTFS directory junctions instead of symbolic links can provide better compatibility.
Step 1: On the Windows Server, open Command Prompt as an administrator.
Step 2: Use the mklink command to create a directory junction instead of a symlink. For example:
mklink /J "C:\Shared\JunctionFolder" "C:\Target\ActualFolder"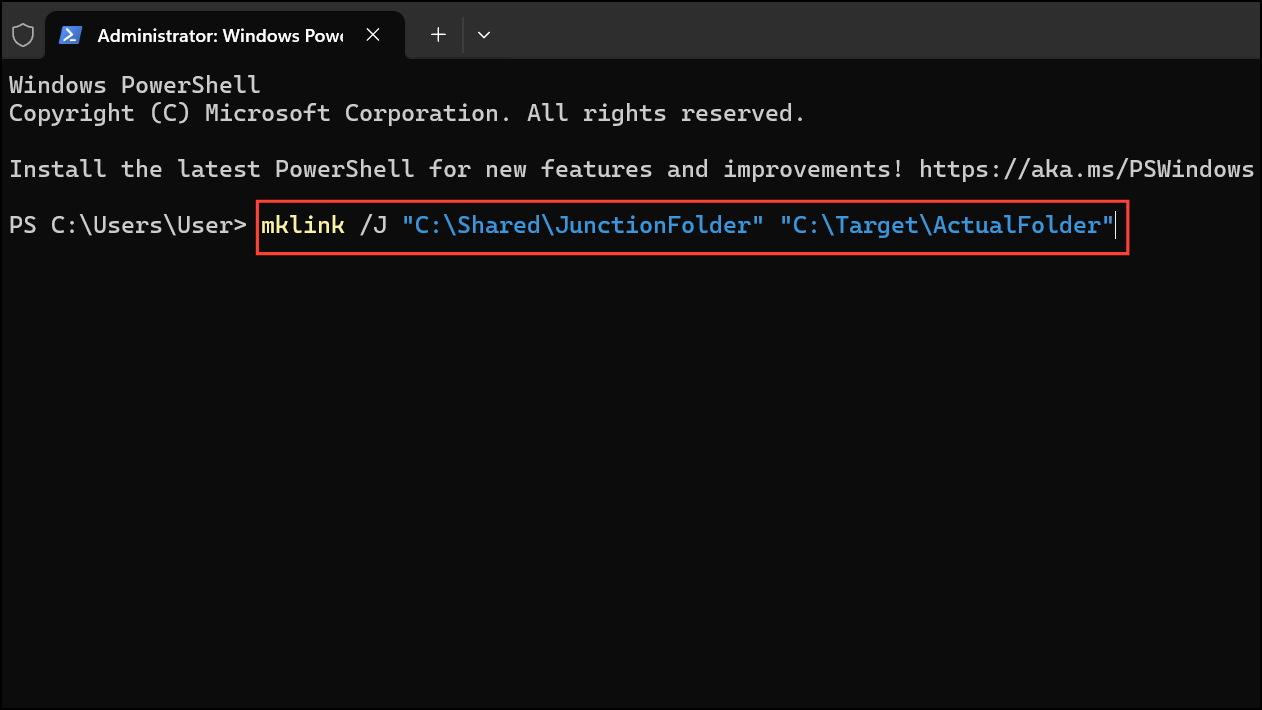
Step 3: Share the parent directory as usual. Directory junctions are more consistently recognized by SMB clients, including macOS, and should appear as normal folders in Finder.
Resolving Mac Ventura's inability to access symlinked folders on Windows Server 2016 SMB shares involves configuring server-side permissions and settings, as well as considering alternative link types for maximum compatibility. If issues persist, verifying SMB protocol versions and testing with directory junctions can help streamline access for Mac users.